
How to Build a Wildlife Water Guzzler for Your Garden Pond (7 Simple Steps)
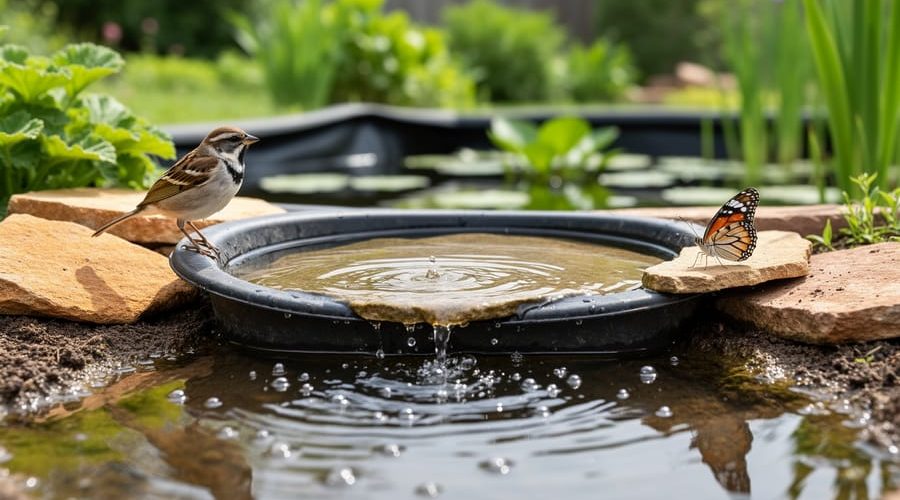
A wildlife water guzzler is a simple, gravity-fed watering station that you can build in a weekend to attract birds, butterflies, small mammals, and amphibians to your water garden. The basic construction involves creating a shallow drinking platform connected to a reservoir that gradually refills the basin, ensuring fresh water is available even during hot, dry stretches. This supplement to your existing pond or water feature extends the watering oasis into areas where wildlife might hesitate to approach deeper water.
Why add a guzzler when you already have a pond? Many species prefer shallow, gradual-access drinking spots over open water. Songbirds feel vulnerable at pond edges. Pollinators need landing zones. Ground-dwelling creatures want discrete hydration points tucked into garden beds. A well-placed guzzler solves these problems while reducing pressure on your main pond during peak summer months when evaporation runs high.
The design is forgiving. You don’t need specialized tools or plumbing experience. Most builds use recycled containers, basic hardware store supplies, and natural materials you probably have on hand. Position your guzzler strategically near cover plants or shrubs, and you’ll create a wildlife magnet that operates silently in the background, refilling itself and drawing visitors from dawn until dusk. The following guide walks you through every step, from selecting the right location to maintaining your guzzler through the seasons.
What is a Wildlife Water Guzzler?
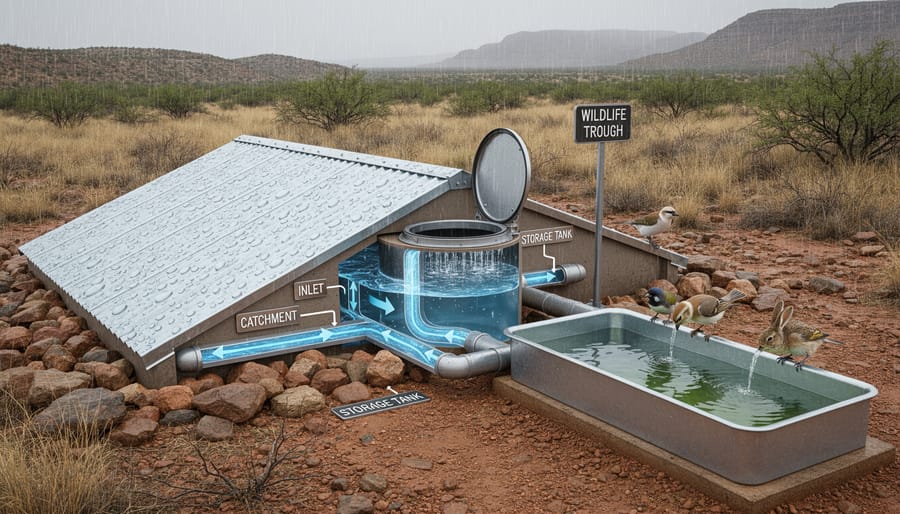
A wildlife water guzzler is a specialized rainwater collection and storage system designed to provide consistent, reliable drinking water for birds, small mammals, and other wildlife throughout the year. Originally developed by wildlife managers in arid regions of the southwestern United States during the 1940s, these ingenious structures solved a critical problem: how to support wildlife populations in areas where natural water sources were scarce or seasonal.
The basic principle is beautifully simple. A sloped catchment surface collects rainwater and funnels it into an underground or partially buried reservoir. This stored water then becomes accessible through shallow drinking ramps or small openings that allow animals to drink safely without the risk of drowning. The underground storage keeps water cooler in summer, reduces evaporation dramatically, and prevents it from freezing solid in winter, providing a water source when ponds might ice over.
What sets a guzzler apart from a simple birdbath is this storage capacity and controlled access system. While a birdbath holds just a few inches of water that evaporates quickly and requires frequent refilling, a properly built guzzler can store 30 to 100 gallons or more, lasting weeks or even months between rainfalls. The design also prevents contamination from debris and reduces mosquito breeding, unlike open water containers.
In water garden settings, guzzlers serve as valuable supplemental drinking stations that complement your pond. They give wildlife drinking options away from the pond itself, which helps protect delicate pond ecosystems from excessive disturbance. Smaller birds and mammals often prefer the shallow, controlled access of a guzzler over navigating pond edges, especially when water levels fluctuate. This combination creates a more complete habitat that attracts greater wildlife diversity to your property.
Planning Your Water Guzzler
Choosing the Best Location
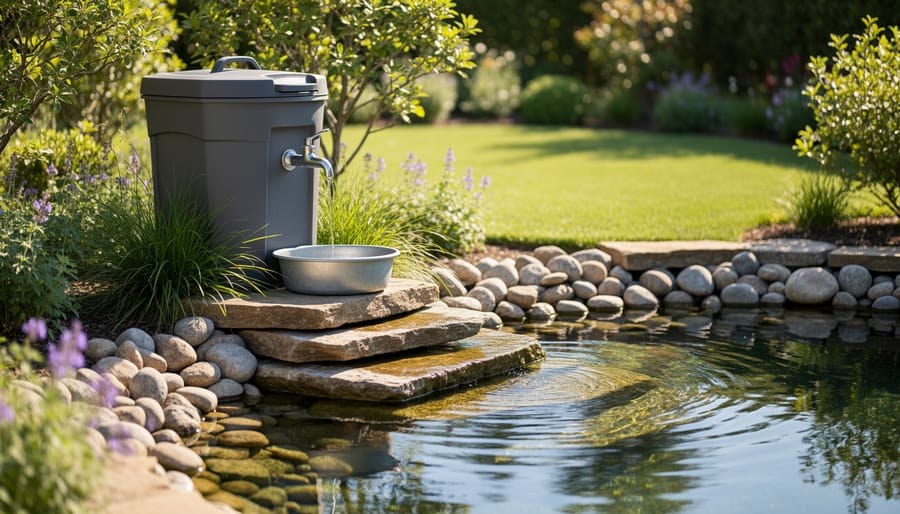
The spot you choose for your water guzzler can make the difference between a wildlife magnet and an unused feature gathering leaves. Start by thinking about how animals approach your pond, they prefer routes with some cover and multiple escape paths rather than crossing wide-open lawn.
Your ideal location checks several boxes:
- 10-20 feet from your pond’s edge, close enough to create a wildlife zone but far enough to avoid competition
- Partial shade during the hottest part of the day to slow evaporation and keep water cooler
- Clear sight lines from one or two directions so animals can spot predators
- Nearby shrubs or brush piles within 5-10 feet for quick cover
- Relatively level ground to simplify construction and prevent runoff issues
Consider your own viewing pleasure too. Position the guzzler where you’ll see it from a favorite window or patio, but not so close to high-traffic areas that you’ll constantly disturb visitors. Morning sun works well since many birds and mammals drink after dawn, and you’ll catch better light for observation or photography.
Avoid low spots where your pond might overflow into the guzzler during heavy rain, you want these water sources to stay distinct. Similarly, don’t place it directly under trees that drop messy fruits or excessive leaves, though dappled shade from nearby branches is perfect. The goal is creating a natural corridor between your pond and surrounding habitat where wildlife feels safe moving between water sources.
Sizing for Your Space
The right size for your water guzzler depends on three factors: available space, the wildlife you want to attract, and your existing pond setup.
For small urban gardens with limited space, a compact 5-10 gallon reservoir works perfectly. It’ll serve songbirds, squirrels, and other small visitors without overwhelming your landscape. Medium-sized properties can accommodate 15-25 gallon systems that attract a wider variety of species, including larger birds and rabbits.
If you’re working with a half-acre or more, consider a 30-50 gallon guzzler. These larger installations can support deer, foxes, and other mammals while still serving smaller creatures.
Think about your expected visitors too. A garden frequented by songbirds needs less capacity than one visited by deer. Watch your property for a week to see who shows up at dusk and dawn.
Integration matters as well. If your pond already provides abundant water, a smaller guzzler placed 20-30 feet away creates a secondary water source that reduces crowding. For properties where the pond sits far from wooded edges, position a mid-sized guzzler as a wildlife corridor between cover and your main water feature.
Start smaller than you think you need. You can always expand later.
Tools and Materials You’ll Need
Building a wildlife water guzzler is refreshingly straightforward, and you probably already own many of the tools needed. Most materials are available at hardware stores or can be repurposed from previous pond projects, keeping costs down while creating something truly functional for your garden wildlife.
Materials You’ll Need:
- Collection materials: plastic or vinyl guttering (4-6 feet), downspout connector, waterproof sealant
- Reservoir materials: food-grade plastic container or livestock tank (15-30 gallon capacity), pond liner scraps or heavy-duty plastic sheeting
- Access materials: flat rocks or flagstones, pea gravel, small branches or driftwood pieces, landscape fabric
- Basic tools: power drill with bits, hand saw or reciprocating saw, carpenter’s level, measuring tape, marking pencil
- Fasteners and support: exterior screws, wire mesh or hardware cloth, landscape stakes, concrete blocks or bricks for leveling
If you’ve built a pond before, you likely have leftover liner material that works perfectly for waterproofing. Garden stones from other landscaping projects make excellent perching surfaces around the drinking area. For the catchment surface, even an old piece of corrugated roofing or a repurposed plastic tray can work, just ensure any recycled materials are clean and free from chemicals or paints that could contaminate the water.
A 20-gallon food-grade bucket costs under $15 and makes an ideal reservoir for most backyard applications. Skip fancy materials initially; simple, functional components prove more effective than elaborate designs, and you can always upgrade later once you see how local wildlife uses your guzzler.
Safety Considerations
Building a wildlife water guzzler requires attention to both your safety during construction and the wellbeing of animals who’ll use it. Wear gloves when handling sharp materials, use proper lifting techniques for heavy containers, and be cautious when digging, call your local utility company to mark underground lines before breaking ground.
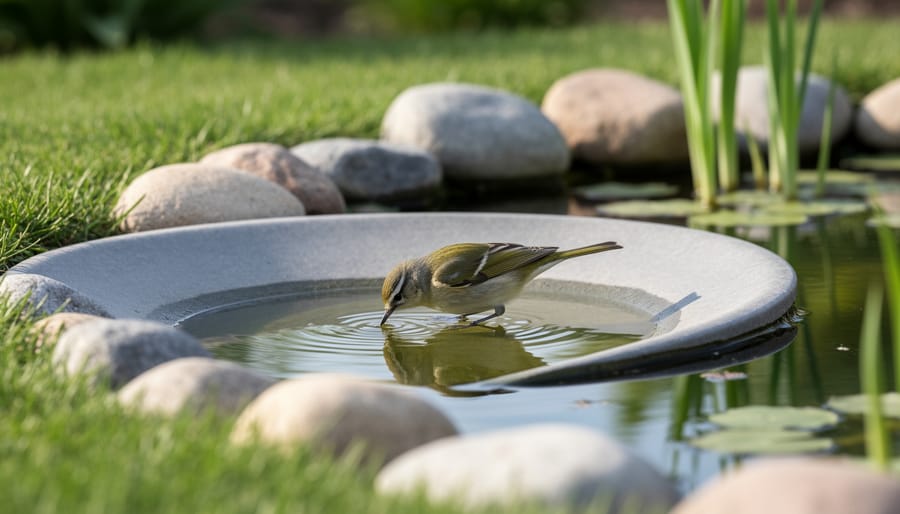
The biggest wildlife safety concern is preventing drownings. Small animals like chipmunks, frogs, and young birds can become trapped in steep-sided containers. Add stones, branches, or textured ramps at all access points, creating gradual slopes rather than sudden drops. Keep water depth at the drinking edge to no more than one to two inches.
Avoid treated lumber, galvanized metal that hasn’t been weathered, and any plastics not rated for potable water, these can leach harmful chemicals. Choose stone, untreated wood, food-grade plastic, or ceramic materials instead. Make sure your structure sits level and stable; an unstable guzzler can tip over, creating both a mess and a potential hazard. Anchor larger components firmly and test stability before considering the project complete.
Step-by-Step Building Process
Building the Catchment System
The catchment surface is your guzzler’s engine, it determines how much water you’ll collect with each rainfall. Start with a clean, food-grade plastic sheet (about 4×4 feet works well for most gardens) or repurpose a large plastic storage container lid. Metal sheeting also works but avoid galvanized materials that might leach zinc.
Position your catchment at a slight angle, roughly 10 to 15 degrees is ideal. This slope ensures water flows steadily toward your collection point without pooling. You can achieve this by propping one edge on bricks or treated timber, creating a gentle downward pitch. The high end should face your prevailing wind direction to maximize rain capture.
Cut a small hole (about 2 inches diameter) at the lowest corner of your catchment surface. This becomes your drain point. Smooth any rough edges with sandpaper to prevent debris buildup. If you’re drawing inspiration from broader rainwater design principles, you’ll know that simple systems work best, complicated setups just create maintenance headaches.
Connect a short length of PVC pipe or flexible tubing (1.5 to 2 inches wide) to your drain hole, sealing it with waterproof silicone. This tube will direct water into your buried reservoir. Keep the connection slightly elevated above the reservoir entrance to create natural flow pressure. Test your angle by pouring a bucket of water across the surface, it should sheet cleanly toward the drain without creating rivulets or dead spots.
Creating the Reservoir
The reservoir is your guzzler’s water bank, and getting it right means wildlife always have something to drink. You’ll want a container that holds at least 5-10 gallons, plastic storage tubs, old coolers with drainage holes added, or even repurposed food-grade buckets work perfectly.
Dig a hole slightly larger than your container, going deep enough that the rim sits 2-3 inches below ground level. This keeps water cooler in summer and provides some insulation in winter. Before setting the container, add 2 inches of gravel at the bottom for drainage and stability. The container itself needs several small holes near the top for overflow, drill three or four quarter-inch holes about an inch below the rim.
Here’s the part most people miss: evaporation control. In hot weather, you can lose half your water to evaporation in a week. Float a few pieces of untreated wood or cork on the surface to break up the water and slow evaporation by up to 40%. You can also partially cover the reservoir opening with flat stones, leaving gaps for your access ramps.
Pack soil firmly around the buried container, sloping it away from the edges so surface water drains outward, not in. This prevents your reservoir from becoming a mud pit after every rain. Position your overflow holes to face your pond or a planted area where the extra water benefits your garden.
Making Wildlife-Friendly Access Points
The most critical part of your water guzzler is creating access points that actually work for wildlife. You’re not just drilling a hole, you’re building multiple entry and exit routes that accommodate everything from tiny wrens to thirsty possums.
Start by cutting or shaping at least three separate access ramps into your reservoir at different angles. Use flat stones stacked in gradual steps, creating slopes no steeper than 30 degrees. Place these stones so they extend from the water line right up to ground level, giving animals solid footing both entering and leaving. Small birds need shallow perching spots just an inch or two deep, while larger visitors need deeper access further in.
Add branches or thick twigs positioned diagonally across the water surface, these act as emergency escape routes if an animal slips in. Anchor them securely so they won’t shift when weight is applied. Think of these different depths and textures as microhabitat zones that serve various species simultaneously.
Consider adding a textured lip around the main opening using rough-cut timber or grooved stone, this gives claws and talons something to grip. For smaller species like lizards and insects, place a few cork pieces or small floating platforms that sit partially submerged, creating stable drinking platforms that won’t capsize.
Test each access point yourself by checking whether a tennis ball could roll out easily, if it gets trapped, so will a struggling animal.
Connecting Overflow to Your Pond System
If your guzzler collects more water than wildlife can drink, you can route the overflow into your existing pond or surrounding garden beds. This integration turns your water feature into a connected ecosystem rather than isolated elements. Dig a shallow trench from your guzzler’s overflow point toward your pond, sloping it gently (about 1 inch per 10 feet) so water flows naturally. Line this channel with small river rocks or pea gravel to prevent erosion and add visual appeal. The overflow becomes a natural filter as it travels through planted beds or rock layers before reaching your pond, reducing sediment and debris. Alternatively, direct overflow into rain garden plantings surrounding your water features. These moisture-loving plants absorb excess water while creating additional wildlife habitat. This simple connection reduces water waste and creates the cascading, interconnected water movement that both wildlife and water garden enthusiasts appreciate.
Testing and Verification
Once your wildlife water guzzler is complete, you’ll want to verify it works properly before wildlife starts depending on it. Start by simulating rainfall with a garden hose, pour water slowly over the catchment surface and watch how it flows into the reservoir. You should see steady drainage without pooling or splashing outside the system.
During this initial test, check these critical points:
- Water flows smoothly from catchment to reservoir without blockages
- All connections remain leak-free under moderate water pressure
- Overflow directs excess water away from the structure properly
- Access points allow easy drinking without steep drops
- Water remains clear in the reservoir after settling
- Within 2-3 days, you notice animal tracks, droppings, or direct sightings
After the first real rainfall, inspect the guzzler again. Look for erosion around the base, which means you need better drainage. If water isn’t reaching the reservoir efficiently, adjust the catchment angle or clear any debris blocking the flow path. The water level should stabilize a few inches below the rim, if it’s too high, your overflow isn’t working correctly.
Wildlife acceptance takes patience. Birds typically discover new water sources within days, while cautious mammals like foxes or raccoons might take a week or two. Fresh paw prints in nearby soil and disturbed stones at the drinking edge are your best confirmation the guzzler is serving its purpose.
Maintenance and Seasonal Care
Keep your water guzzler functioning at its best with a simple maintenance routine that takes just minutes each month. Regular care ensures fresh water, prevents algae buildup, and keeps wildlife coming back.
Check your guzzler weekly during active use seasons, spring through fall, looking for debris accumulation, water level, and signs of algae or contamination. Remove fallen leaves, twigs, and any drowned insects from both the catchment surface and reservoir. A quick visual inspection helps you catch small issues before they become problems.
Clean the reservoir thoroughly every 4-6 weeks during warm weather. Empty the water completely, scrub surfaces with a stiff brush and plain water (avoid soaps or chemicals), and rinse well before refilling. If algae becomes stubborn, a diluted vinegar solution works safely, just rinse extensively afterward.
In freezing climates, prepare for winter by mid-autumn. Empty and clean the system one final time, then either dismantle components that might crack or ensure your reservoir can safely expand with ice. Some wildlife will still visit during thaws, so consider leaving access stones in place if your design allows partial winter function. In spring, give everything a thorough cleaning before the first rainfall refills your system. Replace any perching stones or branches that shifted over winter, and check that drainage paths remain clear. Your refreshed guzzler will be ready when migrating birds arrive and local wildlife emerge from dormancy.
Common Questions About Wildlife Water Guzzlers
Building a water guzzler often raises practical questions, especially when you’re integrating it into an existing pond ecosystem. Understanding these common concerns helps you create a feature that will make everyone happy from the visiting wildlife to your fish population.
Will this attract mosquitoes to my water garden?
Properly designed guzzlers with good water flow and movement discourage mosquito breeding, especially when connected to your pond ecosystem. The shallow access areas dry between rainfalls, preventing larvae development, while overflow into your pond introduces fish that eat any mosquito eggs.
How often should I clean my wildlife water guzzler?
A quick inspection every two weeks during active seasons is sufficient, with thorough cleaning every month or two. Remove debris, scrub away algae buildup, and check that water flows freely through all access points.
What wildlife will actually use my guzzler?
Expect visits from songbirds, native mammals like possums and small marsupials, lizards, and beneficial insects. The variety depends on your local ecosystem, but most water gardens see increased activity within days of installation.
Can I keep it running through winter?
In mild climates, yes, with minimal adjustment. In freezing areas, either winterize by draining the reservoir or add a small heating element to maintain a drinking source for cold-weather wildlife.
Will it disturb my pond fish or upset the balance?
No, a well-placed guzzler complements your pond rather than competing with it. The separate drinking station actually reduces wildlife traffic directly at your pond edge, giving fish a quieter environment while still supporting the broader ecosystem.
Most builders complete a basic guzzler for under fifty dollars using recycled materials and items left over from pond projects. The real investment is the couple of hours spent on construction, which pays off immediately when you spot your first visitor taking advantage of this thoughtful addition to your water garden habitat.
Adding a wildlife water guzzler to your water garden creates ripples of benefit that extend far beyond a simple drinking spot. You’ve built a bridge between your pond ecosystem and the surrounding landscape, inviting birds, mammals, and beneficial insects to become regular visitors. This steady stream of activity enriches your garden’s biodiversity while giving you front-row seats to nature’s daily routines.
The beauty of this project is its simplicity paired with lasting impact. Most water guzzlers can be built in a single weekend with basic materials, yet they’ll serve wildlife through every season. During hot summers when natural water sources dry up, your guzzler becomes a lifeline. In spring and fall, it’s a gathering place where you can observe migration patterns and breeding behaviors you might otherwise miss.
Start with a basic design and refine it as you watch how different species interact with your creation. Keep a journal of visitors or set up a simple camera nearby. You’ll be amazed at the diversity that discovers your offering, especially during early morning and dusk hours. The combination of your pond and guzzler transforms your property into a genuine wildlife haven, proving that thoughtful water management creates thriving spaces where nature and gardens flourish together.