
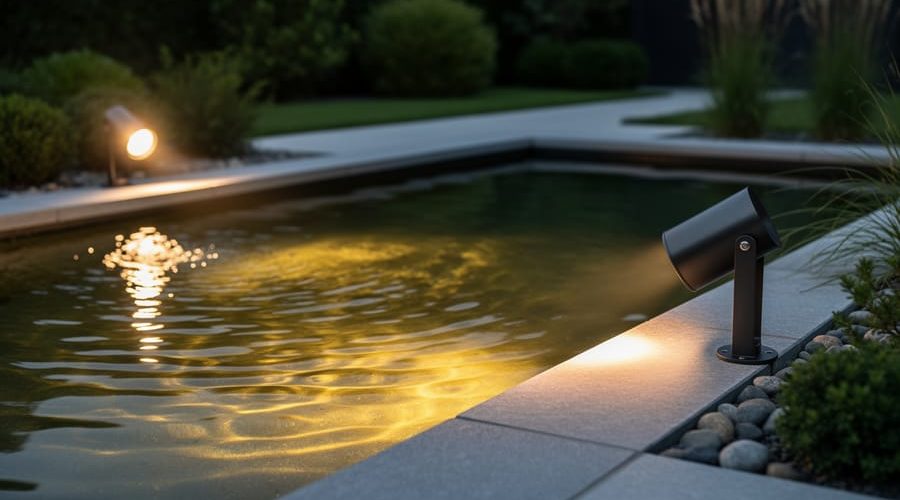
What Is Glare Control (and Why Does It Matter for Your Pond)?
Glare control is the practice of positioning and shielding pond lights to eliminate harsh, direct beams that cause eye discomfort and wash out the beauty of your water feature. When you walk outside in the evening and find yourself squinting at a bright spot instead of admiring the gentle glow on the water’s surface, you’re dealing with a glare problem.
Most pond owners discover this issue the hard way. You install lights with great expectations, flip the switch, and instead of the peaceful ambiance you imagined, you get blinding pinpoints that make it hard to enjoy your own backyard. The fish disappear into shadow, the plants lose their texture, and anyone sitting nearby spends the evening shading their eyes.
The fix isn’t complicated, but it requires understanding where glare comes from and how light behaves around water. Glare happens when a light source sits in your direct line of sight or reflects off the water at the wrong angle. Ponds magnify the problem because the water acts as a mirror, bouncing light in unexpected directions.
This article breaks down the mechanics of glare in pond lighting, walks you through the main types you’ll encounter, and gives you straightforward strategies to prevent or eliminate it. Whether you’re troubleshooting an existing setup or planning your first installation, you’ll learn how to position fixtures, choose the right beam angles, and use shielding techniques that let the water glow without the squint.
What Glare Control Means for Pond Lighting
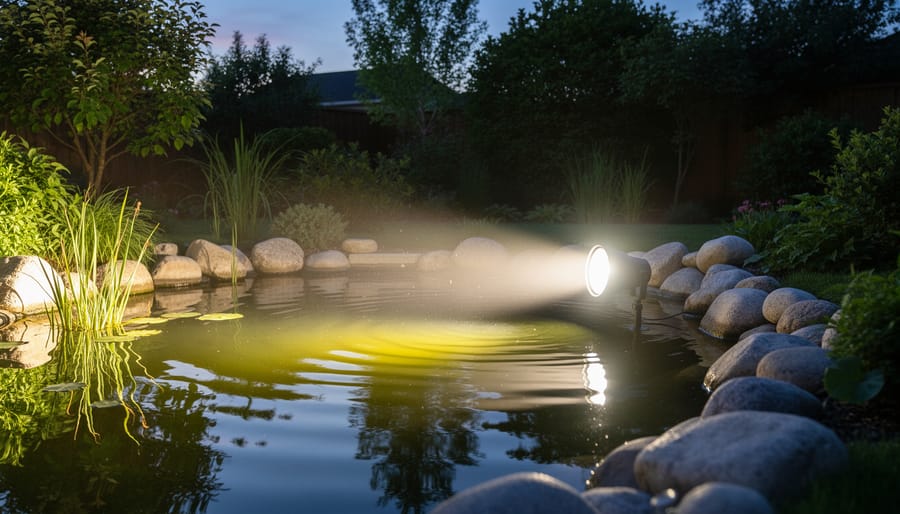
Glare control is the practice of managing light so your pond glows beautifully without blinding you or your guests. It means positioning fixtures thoughtfully, adding shields or hoods to block direct views of bulbs, and choosing the right brightness levels for each area. Think of it like the difference between driving toward oncoming high beams and reading by a soft bedside lamp, both provide light, but only one feels comfortable.
When glare control works well, you see illuminated water lilies, shimmering reflections, and the gentle outline of your waterfall. When it fails, you squint, your eyes water, and the pond itself disappears behind harsh, washed-out brightness. Disability glare harms comfort and reduces your ability to see detail, which defeats the whole purpose of lighting your pond in the first place.
Understanding a few key concepts helps you spot and fix glare issues:
- Glare
- Uncomfortable brightness caused by light shining directly into your eyes or reflecting off surfaces, making it hard to see clearly.
- Direct Glare
- Light that travels straight from the bulb to your eyes, like staring into an unshielded spotlight across the pond.
- Reflected Glare
- Light that bounces off the water surface and into your viewing position, often doubling the discomfort of poorly aimed fixtures.
- Visual Comfort
- The pleasant, strain-free experience of seeing your pond features clearly without squinting or shielding your eyes.
- Shielding Angle
- The degree to which a fixture’s hood or baffle blocks the bulb from view, typically measured from the vertical axis of the light.
Well-designed pond lighting directs illumination where you want it, on plants, rocks, moving water, while keeping the light source itself hidden or softened. It’s purposeful, not just powerful, and it transforms your water garden from a bright eyesore into a welcoming nighttime retreat.
How Glare Control Works in Your Water Garden
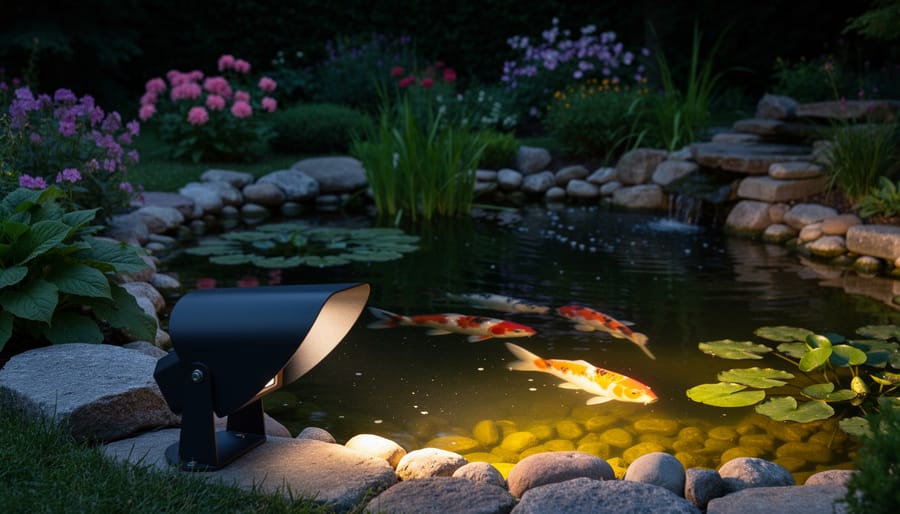
Glare control in pond lighting comes down to managing three interrelated factors: where you place your fixtures, how you shield the light source, and how much brightness you actually need. Each element plays a role in creating comfortable illumination that highlights your water garden‘s beauty without causing eye strain.
Fixture placement is your first line of defense. Instead of aiming lights toward seating areas or viewing spots, position them to illuminate specific features while keeping the beam path away from direct sightlines. A spotlight highlighting a fountain should sit low and angle upward at the water, not shine across the pond into your patio. Pathway lights work best when they cast light downward onto the walking surface rather than spreading brightness horizontally at eye level. The goal is simple: if you can see the bulb directly, the fixture needs to move or rotate.
Shielding and baffles address what happens when placement alone isn’t enough. A hooded fixture includes a built-in cowl that blocks light from traveling in unwanted directions, creating a focused beam that hits your target without spilling sideways. Baffles work similarly, acting as physical barriers between the light source and your eyes. You can add aftermarket shields to many existing fixtures or use landscaping elements like rocks and plants as natural baffles that soften harsh edges.
Light intensity selection matters more than many pond owners realize. A 50-watt bulb might seem necessary for drama, but it often creates uncomfortable brightness that washes out details and strains eyes. Lower-wattage LEDs with tighter beam angles frequently deliver better results because they concentrate light where you want it rather than flooding the entire area. Dimming capabilities let you fine-tune brightness for different occasions and seasons.
Water surfaces add a layer of complexity that land-based lighting never faces. Your pond acts as a mirror, reflecting every light source and potentially doubling your glare problem. Still water creates sharp, predictable reflections, while moving water from fountains or waterfalls scatters light in changing patterns. Thoughtful glare control addresses both the direct light from your fixtures and the reflected light bouncing off the water’s surface.
The core principles work together:
- Position fixtures below or to the side of viewing angles, not in direct sightlines
- Use only as much brightness as needed to illuminate the target feature
- Shield the light source with hoods, baffles, or strategic landscaping
- Account for reflections by adjusting fixture angles to redirect bounced light
- Test from every spot where people gather around your pond
When you consider all three approaches together, you create layers of glare protection. A well-placed, properly shielded fixture using appropriate intensity eliminates most discomfort before you ever notice a problem. The reflection challenge requires extra attention, especially with underwater lights that shine upward through the water column. Angling these lights slightly away from primary viewing areas or using narrower beam spreads helps manage the mirror effect without sacrificing the magical underwater glow that makes pond lighting so appealing.
Different Types of Glare in Pond Settings

Direct Glare from Exposed Fixtures
Direct glare happens when you look straight at an unshielded light bulb or LED. Your eyes aren’t designed to stare into concentrated light sources, so the result is immediate discomfort, squinting, eye strain, and temporary spots in your vision that ruin your ability to see the pond itself.
Around water gardens, this problem crops up most often with pathway lights that sit at eye level when you’re seated on a bench, spotlights aimed horizontally across the water instead of downward, and accent lights tucked into plantings without proper shields. You installed the fixture to illuminate a waterfall or stepping stones, but if the bulb faces your usual viewing spot, you’ve created a miniature interrogation lamp instead of ambient lighting.
The fix is straightforward: reposition the fixture so the light points away from where you stand or sit, add a simple hood or baffle to block direct sightlines to the bulb, or swap to a shielded fixture designed to direct light downward while hiding the source.
Reflected Glare Off Water Surfaces
Still water acts like a polished mirror, reflecting every light source back toward you and effectively doubling your glare problem. If you’ve positioned a fixture poorly on one side of the pond, you’re not just dealing with that direct light, you’re also catching its twin bouncing off the water’s surface straight into your eyes.
Surface movement changes everything. A gentle breeze ripples the water and scatters those reflections across a wider area, softening the glare but creating dancing light patterns that can be distracting. Waterfalls and fountains break up the mirror effect entirely, which is why moving water features often look better lit than still ponds, the turbulence disrupts those harsh reflected beams.
The calmer your pond, the more critical your fixture placement becomes. Aiming lights at shallow angles across the water amplifies reflection problems, while steeper downward angles or submerged lighting reduce what bounces back at viewing height.
Uplight Glare and Sky Glow
Uplight glare happens when fixtures aim too much light toward the sky instead of where you actually want it, on your pond or garden features. When you position a spotlight at the base of a waterfall or statue and it sends a beam straight up, anyone standing nearby gets hit with uncomfortable brightness. Worse, that wasted light bounces off particles in the air and creates sky glow, the orange haze over neighborhoods that washes out stars and disrupts nocturnal wildlife.
Uplighting has its place. A well-aimed fixture can beautifully highlight the canopy of a weeping willow or illuminate foliage behind your pond. The key is control: use a narrow beam angle, shield the sides so light doesn’t spill sideways into eyes, and aim precisely at the feature rather than letting the beam wander into open sky. If you can see the bulb from your patio or if the light creates a bright cone above your yard, it’s time to reposition or add a baffle.
Where and How to Use Glare Control Techniques
Let’s translate glare control theory into real-world pond setups you’ll actually use.
Underwater Lighting
Position underwater pond lights near the pond floor, angled toward plants, rocks, or the sides, never aimed upward toward the surface where they’ll create blinding reflections. Mount them at least 30cm below the waterline so the water itself acts as a diffuser. If you’re lighting a vertical feature like a rock wall, place the fixture at the base aiming up the wall rather than out into open water. Frosted lenses work beautifully underwater because they spread light evenly without harsh hotspots.
Pathways and Perimeter
Keep pathway lights low, between 20 and 40cm tall, with downward-facing shields or hoods. The fixture should illuminate the ground, not your face. Aim for a soft pool of light every 2 to 3 meters rather than bright spotlights. Position them slightly back from the pond edge, angled away from viewing areas. If you’re walking toward the pond, you shouldn’t see the bulb itself, only the path it’s lighting.
Accent Lighting for Plants and Features
Use narrow-beam spotlights (15 to 30 degrees) positioned below and in front of the feature you’re highlighting. For a Japanese maple or ornamental grass, place the fixture at ground level 60 to 90cm away, aiming up through the foliage so leaves glow from within. The key is hiding the fixture behind a rock, planter, or low plant so viewers only see the illuminated subject, never the light source. Adjustable shields let you fine-tune the beam to stay on target.
Waterfalls and Fountains
Light waterfalls from below or behind the cascading water, not from the front where spray creates dazzling glare. Position fixtures in the catch basin or tucked into rockwork, angled so the water itself becomes the feature. For fountains, submerge lights beneath the spray pattern or use low fixtures around the perimeter that uplight the water column. Check out our fountain light tips for placement strategies that minimize glare while maximizing drama. Moving water diffuses light naturally, but poor placement can still create eye strain, test from multiple viewing angles before finalizing your setup.
Choosing Fixtures and Features That Minimize Glare
When shopping for new pond lights or evaluating your current fixtures, certain design features make glare control much easier. Hooded or shrouded fixtures come with built-in shields that block your direct line of sight to the bulb while still allowing light to reach the water or landscape feature you’re highlighting. These hoods work like the brim of a baseball cap, cutting off stray light that would otherwise shine into your eyes from across the yard.
Adjustable shields give you even more control. Look for fixtures with movable louvers, rotating baffles, or snap-on cowls that let you fine-tune the light’s direction and cutoff angle as your viewing habits or pond layout change. Frosted or diffused lenses soften the light output and spread it more evenly, reducing harsh bright spots and making the overall effect gentler on the eyes. Low-profile designs that sit flush with the ground or mount discreetly at the waterline are less likely to create glare because they keep the light source below typical sightlines.
When you’re comparing product specifications, pay attention to beam angle, the narrower the beam (around 15 to 25 degrees), the more precise your lighting and the less spill light you’ll deal with. Cutoff rating tells you how well a fixture prevents upward light scatter; full-cutoff fixtures direct all their light downward or horizontally, eliminating sky glow and reducing glare for anyone standing nearby.
Here’s a quick checklist of glare-friendly features to look for:
- Adjustable hoods or cowls that let you aim and shield the beam
- Narrow beam angles (15-30 degrees) for focused, controlled light
- Matte or textured finishes that reduce surface reflections
- Submersible fixtures designed to aim upward only from underwater
- Built-in louvers or baffles that block side glare
- Warm color temperature (2700-3000K) for softer, less harsh light
You don’t need to replace every fixture overnight. Simple DIY modifications can make a big difference with what you already own. Try repositioning lights a few feet to change the angle, add homemade baffles using dark, weatherproof material cut to size, or swap in lower-wattage bulbs to reduce intensity. Even rotating a fixture 15 degrees or raising it slightly on a riser can shift glare out of your main viewing corridor and make your evening pond visits much more comfortable.
Tips for Testing and Adjusting Your Pond Lighting
The best way to know if your lighting works is to experience it the way you actually use your pond. Wait until full darkness, then walk through your yard as you would on a typical evening. Stand where you normally sit with a drink, where guests gather, where you pause on the path to admire the water. At each spot, notice your physical reaction. Are you squinting? Does one eye water slightly? Do you instinctively look away from certain fixtures? Those responses signal glare problems worth fixing.
Check the water surface itself from different angles. Crouch down, stand at the edge, move to the far side. If you see harsh white patches or a blinding reflection that obscures plants and fish, that’s reflected glare. Washed-out areas where detail disappears suggest a light is too bright or aimed poorly. Sometimes why lights look murky connects to glare as well, overlapping beams or scattered reflections can muddy clarity instead of enhancing it.
Once you’ve identified trouble spots, make one change at a time. Rotate a spotlight ten degrees away from your seating area. Slide an underwater fixture deeper or angle it toward a rock instead of the surface. Add a simple baffle cut from black plastic sheeting, or swap a clear bulb for a frosted one. Test again the next night before moving to the next fix.
Expect to revisit this process seasonally. As lilies spread and grasses grow taller, they’ll block some light or create new reflections. What worked in spring may need tweaking by midsummer. That’s normal. Treat your lighting as a living element of the garden, not a one-time installation, and you’ll keep glare under control year-round.
Common Questions About Glare Control in Pond Lighting
Can I eliminate glare completely?
Total elimination is tough, especially with water surfaces that reflect light unpredictably. You can reduce glare dramatically by shielding fixtures, choosing lower-intensity bulbs, and aiming lights carefully, making your pond far more comfortable to enjoy even if a little brightness remains.
Does glare control mean my pond will be too dim?
Not at all. Glare control focuses on directing light where you want it, illuminating plants, rocks, and water features, rather than blasting light in every direction. You’ll often find that controlled lighting looks brighter and more dramatic because your eyes aren’t fighting discomfort.
How does glare affect fish and plants?
Harsh, unshielded lights can stress fish by disrupting their day-night cycles and making them vulnerable to predators. Excessive brightness also affects pond lighting and zooplankton shifting feeding patterns and ecosystem balance. Gentle, well-placed lighting minimizes these issues while still showcasing your pond.
What’s the difference between glare control and light pollution?
Glare control addresses immediate visual discomfort for you and your neighbors, while light pollution refers to wasted light spilling into the sky and disrupting nocturnal wildlife over a wider area. Good glare control often reduces light pollution as a bonus, since you’re keeping light focused and low.
You might wonder whether local regulations apply to backyard pond lighting. Most residential areas don’t have strict codes for decorative water features, but some neighborhoods or environmental zones restrict brightness levels, upward-facing lights, or fixtures visible from neighboring properties. Check with your homeowners association or local council if you’re installing multiple high-wattage lights or live near protected habitats. Even without formal rules, being considerate about glare helps maintain good relationships with neighbors and keeps your outdoor space inviting rather than intrusive.
Glare control isn’t about dimming your pond into darkness or settling for boring lighting. It’s about creating a setup that’s comfortable to look at, highlights what you want to see, and respects both your eyes and the ecosystem. When you eliminate harsh brightness and annoying reflections, your water features actually look better, more dramatic, more inviting, more like the peaceful retreat you imagined.
Tonight, grab a flashlight and walk around your pond from every angle you typically enjoy it. Notice where you squint, where reflections wash out details, where a fixture blinds you instead of illuminating something beautiful. Pick one or two small changes, reposition a spotlight, add a simple hood, swap in a lower-wattage bulb, and see what happens. You’ll be surprised how much difference a fifteen-minute tweak can make.
Pond lighting is never truly finished. Plants grow, water levels shift, seasons change the way you use your outdoor space. That’s the fun part. Keep experimenting, keep adjusting, and don’t be afraid to move things around until it feels right. Your pond deserves lighting that makes you want to linger outside, and with a little attention to glare control, that’s exactly what you’ll create.