
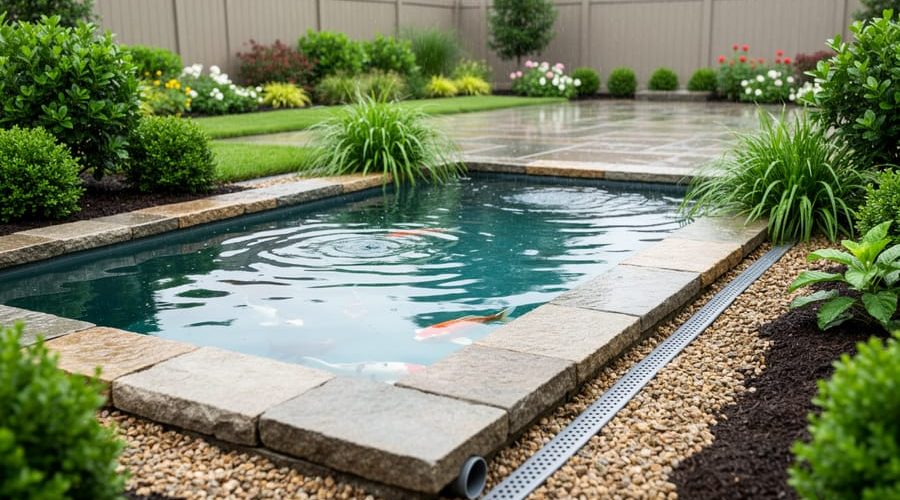
How to Manage Stormwater in Your Residential Water Garden (6 Practical Steps)
Your backyard pond doesn’t have to become a muddy mess every time it rains. Residential stormwater management protects your water garden from rain overflow and runoff damage by directing excess water away from the pond and filtering debris before it enters your carefully balanced ecosystem. With a few weekend hours and basic materials like gravel, perforated pipe, and strategic landscaping, you can build a simple drainage system that keeps your pond clear and prevents erosion around its edges.
I learned this lesson the hard way after watching my koi pond turn into a murky disaster following a heavy spring storm in 2024. Rainwater cascading off my roof carried dirt, leaves, and lawn chemicals straight into the pond, and the overflow nearly washed away the stone edging I’d spent weeks installing. That’s when I realized stormwater management isn’t just for city planners. It’s essential for anyone who wants their water garden to thrive year-round.
The good news? You don’t need professional help or expensive equipment to protect your pond. Most residential stormwater solutions rely on gravity and smart placement rather than complex engineering. By understanding where water flows on your property during storms and creating simple barriers or channels, you can redirect runoff, capture sediment, and even turn problem areas into attractive rain gardens that complement your existing landscape.
This guide walks you through everything you need to assess your property’s drainage patterns, choose the right materials, and install effective stormwater controls that work with your pond rather than against it. You’ll also learn maintenance steps to keep your system functioning through every season.
Why Stormwater Management Matters for Your Water Garden
Your water garden wasn’t designed to become a detention basin during heavy rain, and when stormwater overwhelms the delicate balance you’ve worked so hard to create, the damage happens fast. I learned this the hard way after a spring downpour turned my peaceful pond into a muddy torrent, leaving me frantically netting out debris while my fish huddled in the deepest corner they could find.
Overflow damage is the most visible problem. When rainwater rushes into your pond faster than it can safely exit, water levels spike, breaching your liner edges, washing away decorative stones, and carving erosion channels through carefully placed plantings. That overflow carries sediment, lawn chemicals, and organic debris straight into your ecosystem, clouding the water and clogging filters within hours.
Your fish and plants suffer immediately from these sudden changes. Fish experience stress from rapid temperature drops, oxygen depletion, and pH swings as diluted pond water loses its stability. Submerged plants can’t photosynthesize effectively in murky conditions, while marginal plants get drowned when water levels stay elevated for days. The same stormwater management principles that protect fish habitat during heat stress apply to managing sudden dilution events.
Beyond protecting your investment, proper residential stormwater management helps your neighborhood too. Every pond that safely absorbs or redirects runoff reduces the burden on storm drains and prevents pooling in low-lying areas. Your water garden can be part of the solution rather than another point where excess water becomes a problem during the next big storm.
What You’ll Need to Manage Stormwater Effectively
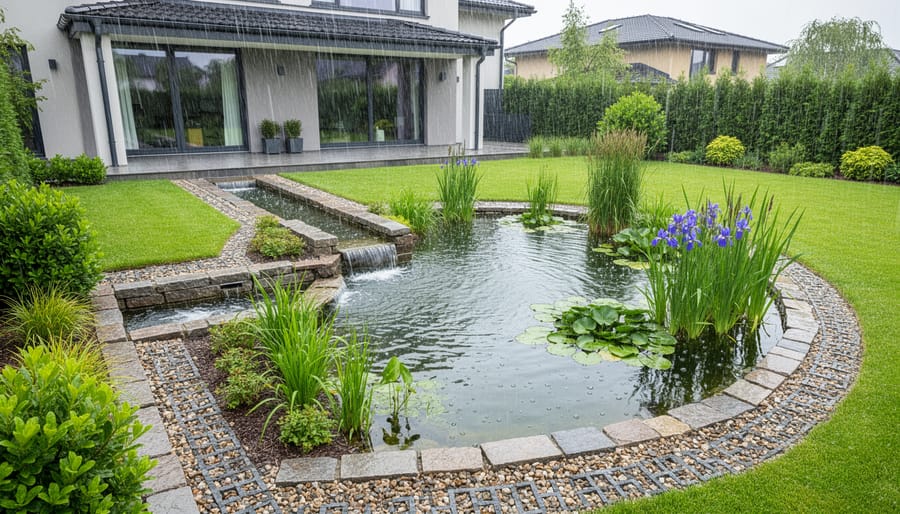
Before you start digging or building anything around your water garden, let’s gather what you’ll need. I’ve learned the hard way that having everything on hand before you begin saves countless trips to the hardware store, and keeps your momentum going when inspiration strikes.
Assessment Tools help you understand your current situation. You’ll need a 25-foot measuring tape to map distances and elevations, a simple carpenter’s level (a 2-foot torpedo level works great) to check slopes, and a basic rainfall gauge to track how much water your garden actually receives. A notebook and camera for documenting drainage patterns during storms prove invaluable when you’re planning your system.
Construction Materials form the backbone of your stormwater management setup:
- Gravel (3/4-inch river rock or pea gravel) for infiltration trenches and drainage paths
- PVC pipe (4 to 6 inches diameter) for overflow outlets and underground drainage
- Filter fabric or landscape fabric to prevent soil from clogging your gravel zones
- Sand and topsoil mix for building berms and shaping drainage swales
- Flexible corrugated drainage pipe for longer runs where rigid PVC isn’t practical
- Concrete blocks or natural stone for stabilizing overflow outlets
Planting Materials complete your system with living filters. Native rain garden plants like sedges, iris, cardinal flower, and Joe-Pye weed absorb excess water while looking beautiful. Choose varieties suited to your climate zone, your local nursery can point you toward wetland-tolerant natives that thrive in temporarily soggy conditions.
Optional Advanced Items include a sump pump for emergency drainage, French drain components if you’re working with heavy clay soil, and water quality test kits to monitor how stormwater affects your pond chemistry. A small trenching shovel makes digging infiltration zones much easier than wrestling with a full-size spade in tight spaces around established plants.
Start with the basics, then add specialized items as your system evolves. You don’t need everything at once to make real improvements.
Important Safety and Planning Considerations
Before you grab a shovel and start reshaping your landscape, let’s talk about the safety and planning essentials that’ll keep you out of trouble. I learned some of these lessons the hard way, and I’d love to save you from the same mistakes.
Start by checking whether your stormwater management plans require permits. Many municipalities have specific regulations about altering drainage patterns, especially if your property’s runoff flows into storm sewers or neighboring properties. Some areas also require stormwater permits for pond modifications or new water features. A quick call to your local planning department can save you from expensive violations down the road.
Assess your soil conditions before you commit to infiltration zones or rain gardens. Clay-heavy soil drains poorly and might need amendments, while sandy soil may require extra erosion control. If you’re unsure, dig a test hole about 12 inches deep, fill it with water, and see how long it takes to drain, anything slower than an inch per hour suggests you’ll need to adjust your approach.
Know when to call a professional. If your project involves digging deeper than 18 inches near your pond’s liner, working around gas or electrical lines, or managing runoff from large roof areas, get expert help. Similarly, if you notice foundation cracks, persistent standing water, or if your property sits on a steep slope, a landscape engineer can design solutions that won’t create new problems. There’s no shame in getting professional guidance, it’s just smart planning.
Step-by-Step: Setting Up Stormwater Management for Your Water Garden
Step 1: Assess Your Water Garden’s Drainage Patterns
The best time to assess your drainage is during an actual rainstorm, so grab an umbrella and head outside next time it pours. Watch where water flows toward your pond and note any streams, rivulets, or sheet flow patterns. I’ve learned more in fifteen minutes of real rain observation than hours of dry guesswork.
Start by walking your pond’s perimeter and marking spots where water pools or creates muddy channels. Use flags, stakes, or even smartphone photos to document these problem areas. Pay special attention to low spots where water collects rather than draining away.
For slope measurement, you don’t need fancy equipment. A long board, carpenter’s level, and measuring tape work perfectly. Place the board from your pond edge toward suspected drainage sources, level it, then measure the gap underneath. A one-inch drop over ten feet indicates a 1% slope, enough to direct water flow.
Create a simple sketch of your yard showing your pond, house, hardscaping, and the flow patterns you observed. Mark high and low points with elevation measurements. This drainage map becomes your blueprint for designing solutions. I keep mine in a waterproof sleeve and update it seasonally as I notice changes.
Step 2: Calculate Your Pond’s Overflow Capacity
You don’t need a degree in hydrology to figure out how much rain your pond can handle. I learned this the hard way after a summer thunderstorm turned my peaceful koi pond into a frothy mess that stressed my fish for days.
Start with your pond’s total volume in gallons. If you don’t know it already, multiply length times width times average depth (all in feet), then multiply by 7.5 to get gallons. A 10×8 foot pond that’s 2 feet deep holds about 1,200 gallons.
Now here’s the key: your pond can safely absorb about 10-15% of its volume during a single storm without major problems. For that 1,200-gallon pond, that’s roughly 120-180 gallons of rainwater. Measure your pond’s surface area in square feet, then know that one inch of rain adds about 0.6 gallons per square foot. So an 80 square-foot pond surface collects about 48 gallons per inch of rain.
If your area regularly gets 2-inch downpours, that’s 96 gallons just from direct rainfall, not counting runoff from surrounding areas. Add any slope draining toward your pond, and you’ll quickly exceed that safe absorption limit. That’s when you need the overflow system we’ll install in the next step.
Step 3: Install an Overflow System
I learned this lesson the hard way during a particularly wet spring when my pond turned into a miniature lake. An overflow system is your safety valve, it lets excess water escape in a controlled way instead of flooding over the edges and washing away your carefully arranged rocks or stressing your fish.
The key is positioning your overflow at the pond’s highest safe water level, usually an inch or two below the rim. I use a simple PVC pipe overflow that I installed in about an hour. Measure your pond’s volume to size the pipe correctly: for most backyard ponds (500-2000 gallons), a 1.5-inch to 2-inch diameter pipe works well. Larger ponds may need 3-inch pipe or multiple outlets.
Cut a hole through your pond liner at the chosen spot using a bulkhead fitting to prevent leaks. The pipe should slope gently downward (about 1/4 inch per foot) away from the pond, directing water to an infiltration area or storm drain, never toward your house foundation or neighbor’s property.
For a more natural look, create a stone spillway instead. Stack flat rocks to form a low spot in your pond’s edge where water can cascade out during heavy rain. Line the spillway channel with landscape fabric and river rocks to prevent erosion.
Test your overflow immediately by filling the pond to trigger level with a hose. Water should flow smoothly without backing up or creating turbulence that disturbs sediment.
Step 4: Create Infiltration Zones Around Your Pond
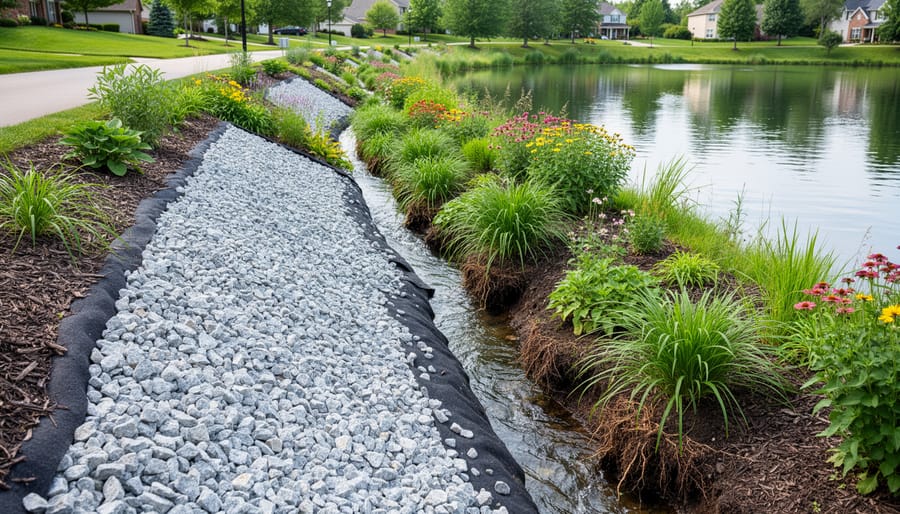
I learned this lesson the hard way during my second spring with a pond: stormwater doesn’t just disappear. If your soil can’t absorb it fast enough, all that runoff heads straight into your water feature. The solution? Give the water somewhere else to go before it becomes your problem.
Start by digging a shallow gravel trench about 12 to 18 inches wide and 8 to 12 inches deep, positioned 3 to 5 feet from your pond’s edge where you’ve noticed water flowing during rains. Line the trench with filter fabric, fill it with coarse gravel or river rock, and top it with a lighter decorative stone. Water seeps down through the gravel and slowly infiltrates the soil below instead of rushing into your pond.
For larger areas, a rain garden works beautifully. Choose a low spot 10 to 15 feet from your pond where water naturally collects. Dig a depression 6 to 8 inches deep and 8 to 10 feet across, then plant it with moisture-loving natives like cardinal flower, swamp milkweed, or blue flag iris. These rain gardens soak up runoff that would otherwise overwhelm your pond while adding gorgeous seasonal color.
If you have a sloped yard, consider a simple bioswale, which is just a gentle, planted channel that slows and filters water as it moves downhill. Dig a shallow 4 to 6 inch depression following the natural contour, plant it with grasses and sedges, and let it do the work. I added one last fall, and it’s already reduced the sediment washing toward my pond by half.
Step 5: Direct Roof and Hardscape Runoff Strategically
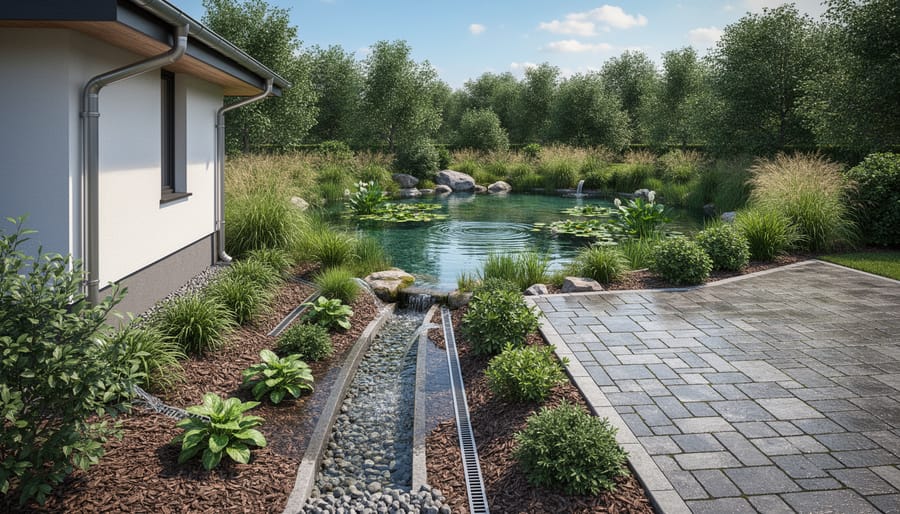
Your roof and driveway are probably the biggest contributors of stormwater rushing toward your pond. A single rainstorm can dump hundreds of gallons from your roof alone, and if that water flows straight to your water garden, you’re fighting an uphill battle.
Start by extending your downspouts at least 10 feet away from your pond using flexible corrugated pipe or rigid PVC. I buried mine underground and directed them into the rain garden I built in Step 4. It looks clean, and during heavy storms, I watch that rain garden fill up instead of my pond overflowing.
For driveways and patios that slope toward your pond, cut a shallow swale (basically a gentle ditch) across the flow path to intercept runoff. Line it with river rock for a finished look. The swale redirects water around your pond or funnels it into your infiltration zones.
Work with what you have. If you’ve got a low spot in your yard, use it. Natural depressions make excellent temporary holding areas for stormwater. The goal is simple: keep concentrated flows away from your pond while letting the ground do its job absorbing rainfall gradually.
Step 6: Add Protective Berms or Edging
Creating a protective berm around your pond is like giving it a gentle hug that keeps unwanted sheet flow at bay. I learned this the hard way after watching muddy water cascade across my lawn straight into my carefully balanced pond during a spring downpour.
Start by building a low earthen ridge about 4-6 inches high along the uphill side of your pond, where water naturally flows toward it. Use the soil you excavated during pond construction, or bring in clean topsoil mixed with clay for stability. Compact it firmly with your feet or a tamper as you build, loose soil will wash away in the first heavy rain.
Shape the berm with a gradual slope on both sides rather than a steep wall. This looks more natural and prevents erosion. I planted mine with creeping thyme and sedum, which root deeply and hold everything together while adding color.
For a more finished look, edge your berm with flat stones partially buried into the slope. They act as mini-dams and create visual interest. The key is making your berm blend into the landscape, it should look like a natural rise rather than an obvious barrier.
How to Test and Verify Your Stormwater System Works

Once you’ve installed your stormwater management system, you need to know if it actually works before the next big downpour arrives. I learned this the hard way after setting up my first overflow system and discovering during a storm that I’d angled the outlet pipe slightly uphill (rookie mistake). Testing and verifying your setup gives you peace of mind and time to fix problems before they matter.
Here’s how to systematically verify your system:
- Start with a hose test by running water at full pressure for 15 minutes near your pond’s high-risk areas. Watch where the water flows and whether your overflow outlets activate as designed.
- Check all infiltration zones during the test. Water should disappear into gravel trenches and rain gardens within a few minutes, not pool on the surface.
- Observe your first real rainstorm from a safe, dry spot. Note whether runoff follows your planned channels or finds unexpected paths around your barriers.
- Inspect within 24 hours after heavy rain for erosion, exposed soil, or standing water that shouldn’t be there. Walk the entire perimeter of your pond and overflow route.
- Monitor your fish for 48 hours post-storm. Gasping at the surface, hiding, or refusing food signals water quality problems from excessive runoff.
- Test water clarity and parameters if anything seems off. A sudden spike in ammonia or dramatic pH swing indicates your system let in too much unfiltered runoff.
Success looks like calm, clear water in your pond while excess flows safely away through your designated channels. Your fish should behave normally, plants remain upright, and you shouldn’t see muddy water or debris accumulation. If water backs up, pools in unexpected spots, or your overflow doesn’t activate until the pond is already overfull, you’ve found issues worth addressing. Most problems come down to inadequate slope, undersized outlets, or clogged infiltration zones. A quick adjustment now prevents a pond disaster later.
Ongoing Maintenance and Seasonal Adjustments
Your stormwater system isn’t a one-and-done project. It needs regular attention to keep working effectively, especially as seasons change and weather patterns shift. I check mine quarterly, and those 15-minute inspections have saved me from several potential disasters over the years.
Here’s what to focus on each season:
- Spring: Clear debris from overflow outlets, check for erosion after snowmelt, divide overgrown rain garden plants
- Summer: Monitor water levels during dry spells, refresh mulch in infiltration zones, remove invasive weeds from bioswales
- Fall: Clean leaves from gravel trenches before winter, cut back dead plant material, inspect berms for settling
- Winter: Check ice formation around overflow pipes, plan adjustments for next year, order replacement plants
Beyond those quarterly checks, I refresh the gravel in my infiltration zones every two to three years. It compacts and clogs with sediment, losing effectiveness. You’ll notice water pooling on top instead of soaking in, that’s your cue. Before winter hits, follow proper steps to winterize stormwater systems and ensure seasonal plant protection in rain gardens to prevent freeze damage.
Climate shifts matter too. If your area experiences heavier rains than usual, consider expanding your infiltration zones or adding a second overflow outlet. Your stormwater system should evolve with your local conditions, not fight against them.
Common Questions About Residential Stormwater Management
Can my pond handle stormwater directly?
Most residential ponds can absorb some stormwater, but directing large volumes straight into your pond risks overwhelming the ecosystem and diluting beneficial bacteria. It’s safer to route heavy flows through an overflow system or infiltration area first, letting only filtered, controlled amounts reach your pond.
How much rain is too much for my water garden?
A general guideline: if rainfall would add more than 20-30% to your pond’s volume in a single storm, you need overflow protection. Calculate by measuring your pond’s surface area and multiplying by expected rainfall depth, if a 2-inch storm on a 100 square foot pond would add 200 gallons to a 700-gallon pond, that’s nearly 30% and worth managing.
What if I live in a dry climate?
Even arid regions experience occasional heavy downpours, and these sudden deluges can be especially damaging when your pond ecosystem isn’t adapted to rapid changes. Setting up basic overflow protection and infiltration areas helps during rare storms and creates habitat during normal conditions.
Do I need permits for stormwater management?
Most small residential pond modifications don’t require permits, but regulations vary significantly by location. Check with your municipality or homeowners association before major earthwork, especially if you’re altering drainage patterns that affect neighboring properties, local compliance requirements can save you headaches later.
How does my pond help neighborhood stormwater issues?
Your water garden acts as a mini-retention basin, slowing and filtering runoff before it reaches storm drains. When combined with rain gardens and infiltration zones, your system reduces peak flow during storms, lessens strain on municipal infrastructure, and helps recharge groundwater, benefits that multiply when neighbors adopt similar practices.
What’s the difference between managing overflow and preventing flooding?
Overflow management protects your pond’s ecosystem from sudden dilution and stress, while flood prevention protects your property from water damage. They work together: controlling where excess water goes keeps both your fish healthy and your yard dry.
These questions come up constantly in water gardening forums, and they all share a common thread: concern about doing something wrong. The truth is, stormwater management doesn’t have to be perfect from day one. Start by observing how water moves around your pond during rain, then make incremental improvements. You’ll learn what works for your specific site, and you can always adjust as you go. The biggest mistake is doing nothing and hoping heavy rains won’t cause problems, because eventually, they will.
Taking control of stormwater around your water garden isn’t just about avoiding overflow disasters, though preventing those frantic cleanup sessions after a downpour is definitely a win. You’re protecting everything you’ve invested in your pond: your fish, your plants, your carefully balanced ecosystem, and all those hours you’ve spent creating something beautiful.
The best part? You don’t need to tackle everything at once. Start with one step, maybe adding that overflow pipe you’ve been thinking about, or directing a downspout away from the pond. Each small improvement builds on the last, and you’ll notice the difference immediately when the next storm rolls through. Your fish won’t be stressed, your water stays clearer, and you’re not scrambling to fix erosion or scoop out debris.
Beyond your own backyard, you’re contributing to how your neighborhood handles stormwater. Every infiltration zone, every redirected downspout, every rain garden helps reduce the burden on local systems.
There’s real satisfaction in watching your water garden handle a heavy rain exactly as you planned, overflow flowing where you want it, plants thriving, fish calm, water clear. That’s a system working right, and you built it yourself.