
Why Your Koi Keep Dying (And How the Right Filtration Saves Them)
**Design your koi pond filtration system with three times the volume capacity of your actual pond**—koi produce significantly more waste than goldfish or other pond inhabitants, and undersized filtration is the primary reason most koi ponds fail within their first year.
Your filtration system serves as the life-support mechanism for your koi, removing toxic ammonia and nitrites while maintaining crystal-clear water. Unlike decorative water features where simple pumps suffice, koi ponds demand robust biological and mechanical filtration that operates 24/7. The stakes are high: inadequate filtration leads to poor water quality, stressed fish, disease outbreaks, and ultimately, the heartbreaking loss of expensive koi.
**Combine mechanical pre-filtration with biological filtration in separate chambers**—this two-stage approach removes solid waste before beneficial bacteria can process dissolved toxins. Position your mechanical filter first to capture debris, followed by biological media where nitrifying bacteria colonies establish themselves. Many beginners make the costly mistake of relying on all-in-one units that quickly become overwhelmed in koi environments.
**Calculate your required flow rate at 1,000-2,000 gallons per hour for every 1,000 gallons of pond volume**—proper turnover ensures waste reaches your filtration system before decomposing in the pond. This aggressive circulation rate differs dramatically from the gentle flow suitable for planted backyard pond ideas, reflecting the higher bioload koi create.
Understanding these fundamentals before purchasing equipment prevents expensive mistakes and sets your koi up for long, healthy lives in pristine water conditions.
What Makes Koi Ponds Different from Regular Garden Ponds
If you’ve been struggling to keep your pond water crystal clear despite having a filtration system, I have good news: you’re not doing anything wrong! The truth is, koi ponds play by completely different rules than regular garden ponds, and understanding this difference is the first step toward success.
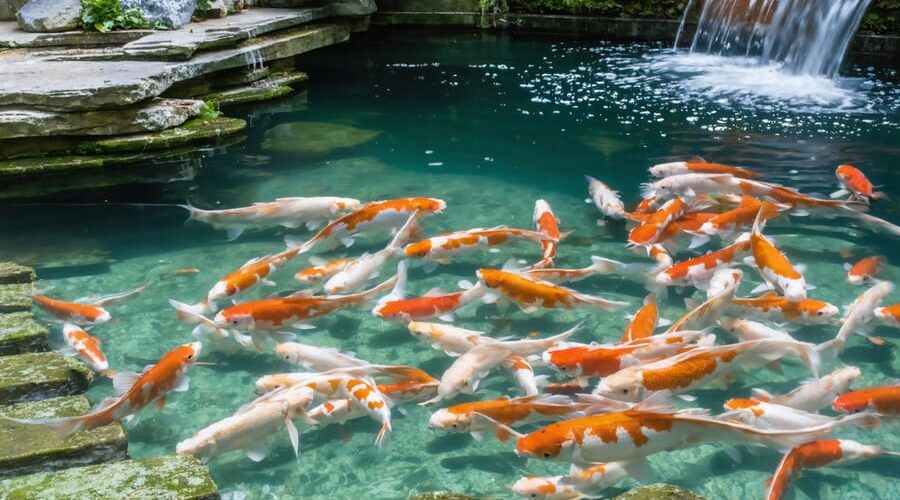
Think of it this way—a garden pond with a few goldfish and some water lilies is like having a couple of houseguests for the weekend. A koi pond? That’s more like running a busy restaurant! Koi are remarkable fish, but they’re also impressive eaters and, well, equally impressive waste producers. A single mature koi can produce waste equivalent to several goldfish, and most koi enthusiasts don’t stop at just one fish.
Here’s what makes koi ponds uniquely challenging: the sheer bioload. When koi eat (and they love to eat!), they create ammonia-rich waste that quickly accumulates. Regular feeding schedules mean constant waste production throughout the day. Unlike the modest waste output you’d find in filters for smaller ponds with fewer fish, koi ponds need industrial-strength filtration to handle this biological workload.
Standard garden pond filters simply aren’t built for this level of demand. They might work beautifully for a water feature with a handful of goldfish, but they’ll struggle and fail under the constant pressure of a thriving koi population. It’s not a matter of quality—it’s about capacity and design purpose.
Additionally, koi are bottom feeders who love to root around in substrate, stirring up debris and creating turbidity. They’re also valuable fish that deserve the best water quality for their health and vibrant colors. This combination means you need filtration that can handle heavy biological waste, physical debris, and maintain consistently excellent water parameters. Understanding this isn’t admitting defeat—it’s recognizing that your beautiful koi deserve equipment designed specifically for their needs.
The Three Jobs Your Filtration System Must Do
Mechanical Filtration: Catching the Visible Stuff
Think of mechanical filtration as your pond’s front-line defense – it’s the bouncer that catches all the stuff you can actually see floating around. Leaves, uneaten food, fish waste, that green gunk – mechanical filtration grabs it before it breaks down and turns your beautiful pond into murky soup.
Here’s how it works: water flows through progressively finer filter materials that physically trap particles. It’s pretty straightforward, but choosing the right media makes all the difference.
**Brush mats** are often your first line of defense. These look like oversized bottle brushes stacked together, and they’re fantastic at catching larger debris while providing tons of surface area for beneficial bacteria (bonus!). Water flows between the bristles, which snag particles like a gentle net.
**Filter foam** comes next, usually in different densities. Coarse foam catches medium-sized particles, while fine foam polishes the water. I’ve learned the hard way that stacking them properly – coarse before fine – prevents clogging and makes cleaning so much easier.
**Filter pads** work similarly to foam but are typically denser and thinner. They’re great for final polishing but need frequent rinsing.
The key is creating a multi-stage approach. Start coarse, end fine. This way, each layer does its job without getting overwhelmed, and you’re not replacing expensive fine media every week because it got clogged with leaves on day one!
Biological Filtration: Your Pond’s Life Support System
Think of your koi pond as a living, breathing ecosystem where invisible helpers work around the clock to keep your fish healthy. These helpers are beneficial bacteria, and they’re the unsung heroes of every successful koi pond.
Here’s what happens: your koi produce waste (just like any living creature), and that waste breaks down into ammonia—a toxic compound that’s deadly to fish even in small amounts. Left unchecked, ammonia would quickly poison your pond. But nature has an elegant solution.
Beneficial bacteria colonize the surfaces in your filter media—think of them as tiny cleaning crews setting up shop. The first team of bacteria converts that harmful ammonia into nitrite. Now, nitrite is still toxic, so we’re not done yet. That’s where the second bacterial team steps in, transforming nitrite into nitrate, which is far less harmful and can be managed through regular water changes and plants.
This process is called the nitrogen cycle, and it’s the foundation of what makes biofiltration systems so crucial. Without it, you’d be fighting a constant battle against toxic buildup.
I learned this the hard way with my first pond—I didn’t understand why my beautiful koi were gasping at the surface despite crystal-clear water. Turns out, clear doesn’t mean safe! The biological filter needs time to establish these bacterial colonies, typically four to six weeks in a new pond. During this “cycling” period, you’ll need to monitor water parameters closely and possibly add beneficial bacteria supplements to speed things along.
Chemical Filtration: The Extra Protection Layer
Chemical filtration acts as your pond’s specialty cleanup crew, tackling problems that biological and mechanical filters can’t handle alone. Think of it as the optional-but-wonderful extra layer that really polishes your water.
**Activated carbon** is your go-to for removing medications after treating sick fish, eliminating discoloration, and absorbing dissolved organics that make water look dingy. I run carbon for a few weeks after any medication treatment, then remove it—it loses effectiveness over time and isn’t needed year-round.
**Zeolite** is brilliant for emergency ammonia removal. If your biological filter crashes during spring startup or after cleaning, zeolite buys you precious time while beneficial bacteria rebuild. It can be recharged with salt water, making it reusable!
**When you need chemical filtration**: After medication treatments, when dealing with stubborn green or brown water, during filter cycling emergencies, or if you have persistent odor issues.
**When it’s optional**: In established, well-balanced ponds with healthy biofilters. Many successful koi keepers never use chemical media—their mechanical and biological systems handle everything beautifully.
The key? Chemical filtration supplements, not replaces, your primary filtration. Use it strategically when specific problems arise.
Sizing Your Filtration System (The Formula That Actually Works)
Here’s the truth that seasoned koi keepers know: undersizing your filtration is the most expensive mistake you’ll make. I learned this the hard way when my first pond’s “adequate” filter left me battling green water every summer. Let me save you that headache with a formula that actually works in the real world.
**The Basic Calculation That Won’t Let You Down**
Start with your pond volume in gallons. Don’t know it? Multiply length × width × average depth × 7.5 for rectangular ponds. For irregular shapes, it’s better to overestimate than underestimate.
Here’s your golden rule: **Your filtration system should turn over your entire pond volume at least once every two hours.** If you have a 2,000-gallon pond, you need a pump moving at least 1,000 gallons per hour through your filter.
But wait—that’s just the starting point for koi.
**The Koi Factor Changes Everything**
Unlike goldfish ponds, koi are messy eaters and produce substantial waste. For every adult koi (12 inches or larger), add 250 gallons to your effective pond volume when calculating filtration needs. So if you have eight adult koi in that 2,000-gallon pond, you’re actually designing for 4,000 gallons.
**The Feeding Adjustment**
Do you feed heavily during summer months? Add another 20% to your filtration capacity. Koi enthusiasts who want maximum growth typically need more robust filtration than those who feed lightly.
**My Simple Sizing Formula**
(Pond gallons + [number of adult koi × 250]) × 1.25 = minimum gallons per hour needed
That 1.25 multiplier gives you breathing room for those summer feeding frenzies and accounts for filter efficiency loss over time.
**Real-World Application**
For a 3,000-gallon pond with ten adult koi where you feed generously:
(3,000 + [10 × 250]) × 1.25 = 6,875 GPH minimum
Round up to 7,000 GPH and you’ll thank yourself later. Your filter manufacturer will specify maximum flow rates—stay within them, because faster isn’t always better for biological filtration efficiency.
Remember, it’s far easier to dial back a properly sized system than to retrofit an undersized one while fighting water quality issues.
Choosing Your Filter Design: Four Systems That Work for Koi
Pressurized Filters: The Compact Solution
Pressurized filters are fantastic space-savers that pack biological and mechanical filtration into one compact unit. Think of them as the apartment-friendly option in the filtration world—perfect when you’re working with limited real estate around your pond!
These systems shine brightest with smaller ponds (under 1,000 gallons) and moderate fish populations. I’ve seen countless homeowners successfully use pressurized filters for beautiful display ponds with a few colorful koi swimming peacefully. The built-in UV clarifier that many models include is a real bonus for keeping algae at bay.
However—and this is important—pressurized filters hit their limits quickly with heavy koi loads. If you’re planning to keep more than a handful of koi or breed them, you’ll likely find yourself battling water quality issues. The compact design that makes them appealing also means less media volume for beneficial bacteria, and the smaller mechanical filtration compartment clogs faster with koi waste.
Consider pressurized filters as your entry-level solution or for ponds where koi are accent features rather than the main attraction. They’re wonderfully convenient for maintenance (just turn a valve to backwash!), but serious koi keepers typically outgrow them as their collection expands.
Gravity-Fed Multi-Chamber Systems: The Gold Standard
If you’re serious about keeping koi healthy and happy, a gravity-fed multi-chamber system is hands down your best choice. I learned this the hard way after my first single-chamber setup couldn’t keep up with my growing koi family!
Here’s why these systems are so effective: they use gravity to pull water through multiple chambers, each designed to tackle a specific filtration task. No pumps fighting against flow restrictions—just natural, steady movement that works 24/7 without struggle.
The magic happens in the progressive filtration concept. Think of it like a factory assembly line, where each station has its own job. Water flows from one chamber to the next, getting cleaner at each stage. This sequential approach is far more efficient than trying to cram everything into one space.
A typical setup includes three to four chambers. The first chamber catches the heavy debris—those pesky leaves and fish waste settle right to the bottom. The second chamber usually houses your mechanical filtration media, trapping finer particles. Chamber three is where beneficial bacteria colonize biological media, converting harmful ammonia into safer compounds. Some systems add a fourth polishing chamber with fine filter pads or UV clarifiers for crystal-clear water.
The beauty is that maintenance becomes manageable. You can clean one chamber without disrupting the others, keeping those precious beneficial bacteria colonies intact. It’s like rotating tires—systematic and effective!
Moving Bed Filters: The Low-Maintenance Option
Moving bed bio-reactors are game-changers for busy pond keepers who want excellent biological filtration without constant maintenance. These clever systems use small plastic media—think of tiny pasta wheels or cylindrical beads—that float and tumble in your filter chamber, creating a massive surface area for beneficial bacteria to colonize.
Here’s what makes them special: as water flows through, the media constantly moves and bumps against each other, naturally scrubbing off excess bacterial growth and preventing clogging. This self-cleaning action means you’ll spend less time scrubbing filter pads and more time enjoying your koi!
The bacteria living on these moving pieces work tirelessly to convert harmful ammonia and nitrites into safer nitrates. Because the media is always in motion, oxygen reaches every surface, keeping your beneficial bacteria healthy and efficient.
To integrate a moving bed reactor into your system, you’ll need moderate water flow to keep the media circulating—not so fast that it flies everywhere, but enough to create a gentle rolling action. Many pond owners add them as a secondary filter stage after mechanical filtration removes larger debris. The beauty is their simplicity: once established, they practically run themselves, giving you professional-grade biological filtration with minimal fuss.
DIY Filter Systems: Building Your Own
Building your own filtration system can be incredibly rewarding—and often much kinder to your wallet! Many pond keepers have created fantastic DIY filters using 55-gallon plastic barrels, stock tanks, or even concrete chambers. These homemade systems work on the same principles as commercial units, just with a bit of creative problem-solving involved.
The barrel approach is probably the most popular DIY route. You’ll drill holes, add bulkhead fittings, and layer different filter media inside—typically starting with coarse mechanical filtration at the bottom and working up to finer biological media. Stock tanks work similarly but offer more working space, making maintenance easier on your back! Some ambitious builders even construct multi-chamber concrete systems that can rival professional setups.
So when does DIY make sense? If you’re handy with basic tools, enjoy projects, and have a smaller to medium-sized pond (under 2,000 gallons), DIY can save you 40-60% compared to commercial options. You’ll also get the satisfaction of customizing everything to your exact needs.
However, commercial systems shine when you need reliability without the learning curve, have a large koi collection worth protecting, or simply don’t have time for trial-and-error. There’s no shame in going commercial—many successful koi keepers do! The key is honestly assessing your skills, time availability, and comfort level with potential troubleshooting. Either path can lead to crystal-clear water and happy koi.
Designing the Flow Path: Getting Water Where It Needs to Go
Getting water to flow efficiently through your filtration system is like creating a river through your pond—you need the right current, the right path, and no bottlenecks along the way. Let me walk you through the essentials without getting lost in plumbing jargon.
**Choosing Your Pump Size**
Your pump is the heart of your system, and sizing it correctly makes everything else work smoothly. Here’s a simple rule: aim to turn over your pond’s entire water volume at least once per hour. For a 2,000-gallon pond, that means a pump rated for 2,000 gallons per hour (GPH) minimum. I actually prefer going slightly higher—around 1.5 times the volume—because it gives you wiggle room and accounts for the inevitable efficiency loss as your pump pushes water uphill and through filters.
When I upgraded my first pond’s pump, I learned this lesson the hard way: always check the pump curve chart. A pump might promise 3,000 GPH, but if it’s pushing water up three feet and through tight pipes, you might only get 2,000 GPH. Factor in head height (vertical distance) and friction loss from pipes and fittings.
**Pipe Diameter Matters**
Think of pipes like highways—bigger diameter means less traffic congestion. For most backyard koi ponds, 2-inch diameter pipes work well for flows up to 3,000 GPH. Beyond that, consider 3-inch or even 4-inch pipes. Undersized pipes create resistance, forcing your pump to work harder and wasting electricity.
**Bottom Drains and Skimmers: The Dynamic Duo**
Bottom drains are your secret weapon for removing the heavy stuff—fish waste and settled debris—before it breaks down and creates ammonia. Install them at the pond’s lowest point, and if possible, slope your pond floor slightly toward them.
Skimmers handle floating debris like leaves and pollen before they sink. Together with bottom drains, they capture waste at both ends of the water column. Many successful koi pond design plans incorporate both systems because they complement each other beautifully.
**Creating Circulation Patterns**
Position your return lines opposite your intake points to create a gentle circular flow. This prevents dead zones where debris accumulates. I angle my returns slightly downward to push surface water across the pond, which helps with gas exchange and temperature consistency. Avoid creating raging currents—koi appreciate gentle movement, not white-water rafting conditions!
The Bottom Drain Decision (And Why It Matters So Much)
Let me be straight with you: if I could go back and redesign my first koi pond, the bottom drain would be the *first* thing I’d change. It’s that important.
Here’s why bottom drains are absolute game-changers. Koi are messy eaters and produce a surprising amount of waste that sinks to the pond floor. Without a bottom drain, this waste just sits there, breaking down and creating ammonia—exactly what we’re trying to avoid. You end up constantly battling water quality issues, no matter how amazing your filter is.
Bottom drains work beautifully with gravity-fed filtration systems. Think of it this way: waste settles to the lowest point (the drain), gets pulled by gravity through pipes to your filter, and clean water returns via pump. It’s elegant, efficient, and runs 24/7 without you lifting a finger. The solids never get a chance to decompose in your pond.
**So can you skip the bottom drain?**
Honestly? If you’re building a new pond, absolutely not. The difference in water quality and maintenance is night-and-day. I’ve watched friends spend hours with pond vacuums every week because they skipped this step to save a few hundred dollars upfront. It’s a false economy.
Already have a pond without one? You have options. Retrofit kits exist, though they require significant work—basically cutting into your liner and installing the drain system. Some folks successfully use powerful submersible pumps positioned near the pond floor as a compromise, though it’s not quite the same.
The bottom line: bottom drains aren’t just nice-to-have accessories. For serious koi keeping, they’re foundational infrastructure that makes everything else work better.

Setting Up for Easy Maintenance (Your Future Self Will Thank You)
Let me tell you about my biggest pond-keeping revelation: the difference between a filtration system that gets maintained regularly and one that gets ignored isn’t usually the workload—it’s the accessibility. I learned this the hard way after building my first setup where reaching the mechanical filter required draining half the pond and crawling under a waterfall!
Start by installing **shut-off valves** on both sides of each filter unit. These simple additions let you isolate equipment for cleaning without shutting down your entire system. Your koi can keep enjoying filtered water while you service one section at a time. Position ball valves where you can actually reach them—trust me, valves hidden behind rocks lose their usefulness quickly.
**Strategic drain placement** transforms maintenance from a dreaded chore into a manageable task. Install bottom drains on your filter chambers that connect to a dedicated cleaning station—basically a nearby drain point or gravel area. When it’s time to backwash or clean, you’ll open a valve instead of lugging buckets of mucky water across your yard. I added drain points near my biofilter, and what used to take 45 minutes now takes 15.
Think about **access pathways** during the design phase. Leave at least three feet of clearance around filter units. Create stable, level surfaces where you’ll stand during cleaning—wet grass and filter maintenance don’t mix well! Consider adding outdoor lighting too; maintenance doesn’t always happen during convenient daylight hours.
Build or designate a **cleaning station** nearby with a hose connection, storage for spare filter media, and space to lay out components. Having dedicated spots for dirty versus clean media prevents cross-contamination and makes the process flow smoothly.
The golden rule? If your maintenance routine feels difficult, you’ll skip it. Design for fifteen-minute sessions rather than weekend projects, and you’ll actually stick with the schedule your koi need to thrive.
Common Filtration Mistakes (And How to Avoid Them)
I’ve made plenty of mistakes with pond filtration over the years, and trust me, learning from them saved me countless headaches (and quite a bit of money!). Let me share the most common pitfalls so you can skip right past them.
**Undersizing your filter** is the number one mistake I see. Many beginners calculate based on pond volume alone, but koi produce significantly more waste than goldfish or other pond fish. A filter rated for 1,000 gallons might handle a lightly stocked goldfish pond beautifully but struggle with just a few koi. Always oversize your filtration system—aim for a filter rated at least 1.5 to 2 times your actual pond volume when keeping koi. Your fish (and your water quality) will thank you.
**Poor flow design** creates dead zones where waste accumulates. I once installed bottom drains that weren’t positioned correctly, and certain areas of my pond became waste magnets. Water should flow in a complete circuit—typically entering through returns and exiting through bottom drains or surface skimmers. Avoid placing your pump inlet too close to the outlet, which creates a “short circuit” where water takes the easiest path rather than circulating through the entire pond.
**Neglecting mechanical pre-filtration** is like asking your biological filter to do double duty. Without proper mechanical filtration first, solid waste clogs your biological media, reducing its effectiveness and requiring constant cleaning. Always include a settlement chamber or dedicated mechanical stage before your biological filter—it’s not optional for koi ponds.
Finally, **using inadequate biological media** or insufficient quantities means your beneficial bacteria lack proper housing. Cheap sponges or minimal media volumes can’t handle koi bioload. Invest in quality biological media with high surface area, and fill your biological chamber generously. Skimping here compromises your entire system’s effectiveness.
Designing a proper filtration system for your koi pond might seem overwhelming at first, but here’s the truth: it’s one of the most worthwhile investments you’ll make as a pond owner. I remember staring at my murky pond years ago, worried about my koi, and feeling completely lost. Once I got the filtration right, everything changed. The water cleared up, my fish became more active and colorful, and honestly, I stopped waking up anxious about water quality.
The beauty of modern filtration is that you don’t need to be an engineer to get it right. Yes, there are technical aspects to consider—flow rates, beneficial bacteria, mechanical versus biological filtration—but take it step by step. Start with understanding your pond volume and stocking levels, then build your system around those numbers. Don’t cut corners on filtration capacity, but also don’t let perfect be the enemy of good. You can always expand and refine as you learn.
The reward for getting this right is absolutely worth it. There’s something magical about looking into crystal-clear water and watching your koi glide gracefully, their colors brilliant and health obvious. That peace of mind, knowing your filtration system is working quietly in the background to protect your fish? Priceless. Plan carefully, ask questions, and trust yourself. You’ve got this, and your koi will thank you with years of beauty and companionship.