
Hide Your Pond Pumps and Filters Without Ruining the View
Disguise your pump by nestling it behind strategically placed flat rocks that lean naturally against the pond’s edge, creating a cave-like shelter that looks intentional while maintaining easy access for maintenance. Position taller marginal plants like cattails or iris in groups of three directly in front of filter boxes, ensuring the foliage cascade reaches at least 6 inches beyond the equipment’s edges for year-round coverage.
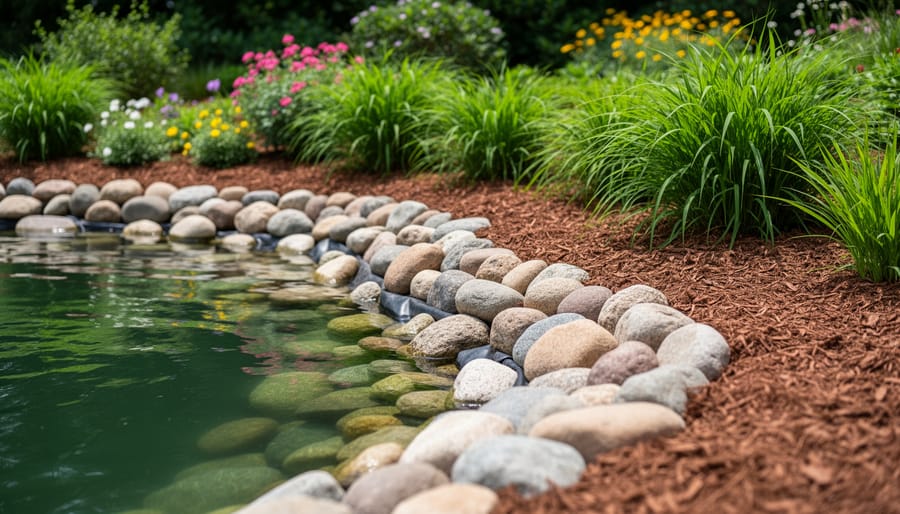
Build a simple hollow rock cover using hypertufa—a lightweight concrete mixture you can mold at home—that lifts off in seconds when you need to check your system but blends seamlessly with natural stone when in place. Create shallow ledges around your pond’s perimeter using stacked flagstone, then tuck tubing runs beneath these overhangs where shadows naturally hide the black lines from view.
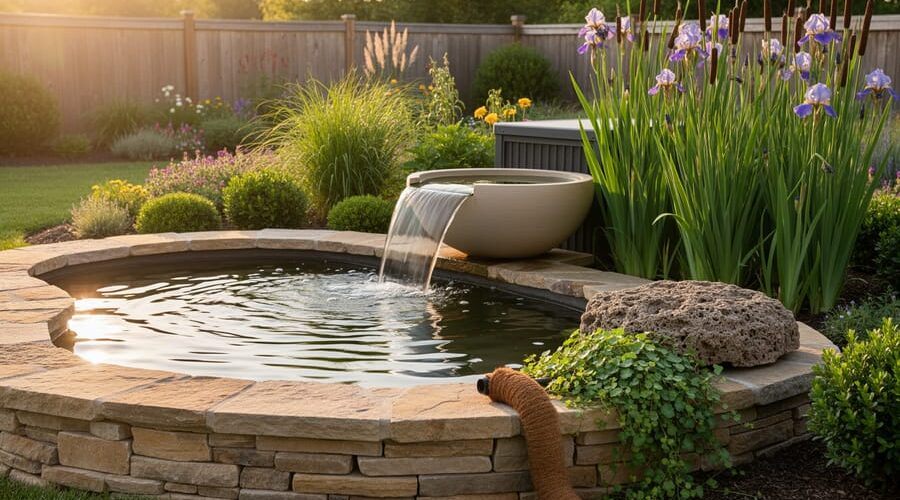
Camouflage exposed hoses by wrapping them in coconut coir rope or burlap strips that you can pin trailing plants like creeping jenny directly onto, transforming necessary plumbing into living garden features. Install a decorative spillway bowl or urn that doubles as your waterfall source, completely concealing the pump connection point inside an attractive focal piece that looks purposefully placed rather than functionally necessary.
The truth is, visible pumps, filters, and tangled tubing can instantly shatter the peaceful, natural escape you’ve worked so hard to create. Every glance at that black plastic box or exposed cord reminds you this is a constructed feature rather than a slice of wild nature in your backyard. But concealing your equipment doesn’t mean complicated renovations or sacrificing the accessibility you need for regular cleaning and adjustments.
Why Pond Infrastructure Ruins Your Peaceful Oasis
The Equipment You Can’t Avoid (But Can Hide)
Let’s be honest—creating a beautiful pond means dealing with some decidedly unbeautiful equipment. Every functioning water garden needs practical infrastructure to keep the water clear and healthy, but that doesn’t mean your visitors need to see it all!
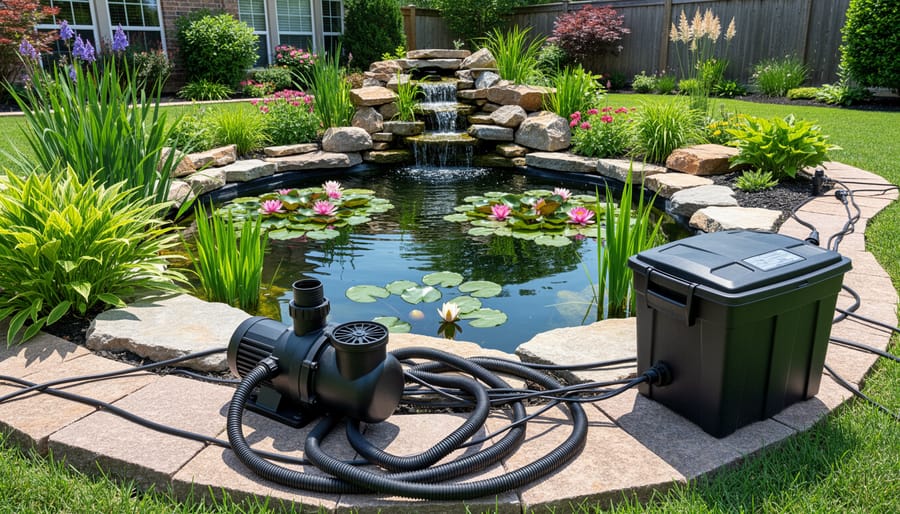
Your essential equipment list typically includes pumps (the heart of your circulation system), filters (mechanical and biological varieties), skimmers that remove surface debris, UV clarifiers for controlling algae, tubing that connects everything together, electrical boxes and outlets for powering your system, and aerators or air stones that oxygenate the water. When choosing the right filters and other components, remember you’ll need to hide them later, so size matters!
I learned this the hard way with my first pond. I focused entirely on getting the equipment running and ended up with a beautiful water feature surrounded by exposed black tubes and a filter box sitting right at the edge like an uninvited guest. Not exactly the tranquil oasis I’d imagined!
The good news? All this equipment can be concealed without compromising functionality. The key is planning for concealment from the beginning rather than treating it as an afterthought.
How Visible Equipment Changes Your Pond’s Feel
When you’re sitting by your pond trying to relax, that bright green pump housing or silver filter box jutting out can really break the spell. It’s like having a beautiful painting with someone’s grocery list taped to the corner. Your brain registers these mechanical elements as interruptions to the natural scene you’re trying to enjoy.
Here’s what happens psychologically: our minds crave the calming effect of nature, but visible equipment constantly reminds us we’re looking at something artificial and constructed. Instead of feeling like you’re beside a woodland stream, you’re suddenly aware you’re maintaining a backyard water feature. That distinction matters more than you might think.
I learned this firsthand when a friend visited my pond and immediately spotted my filter box before noticing the beautiful water lilies I’d spent weeks perfecting. That stung a bit, but it taught me something valuable. Even small mechanical intrusions draw the eye away from your carefully planned plantings and water features.
The goal isn’t perfection or pretending your pond is entirely natural. It’s simply minimizing these visual disruptions so you and your visitors can focus on what truly matters: the peaceful, beautiful water garden you’ve created.
Planning Your Concealment Strategy
Access vs. Aesthetics: Finding the Balance
Here’s the honest truth I learned the hard way: those beautifully concealed pumps and filters? They’re only beautiful until you need to clean them at 9 PM because your fish are gasping at the surface. Complete concealment sounds perfect in theory, but practical pond keeping requires regular access.
Think about your maintenance routine before you hide everything. Filters need weekly cleaning during peak season. Pumps occasionally need adjusting. Skimmers collect debris that you’ll want to remove daily. If reaching your equipment means moving 50 pounds of decorative rocks every single time, you’ll quickly regret that design choice.
The sweet spot is strategic concealment. Position equipment where it’s hidden from your primary viewing angles but accessible from pathways or less-visible sides of the pond. I keep my filter vault tucked behind a cluster of tall grasses. From my patio, it’s completely invisible. From the side garden path where I do maintenance? It’s right there, easy to reach.
Consider using removable concealment elements. Lightweight faux rock covers lift off in seconds. Hinged plant boxes swing open. Decorative screens on tracks slide aside when needed. These solutions give you the best of both worlds.
Plan access points into your hardscape design from the start. A strategically placed stepping stone that happens to sit right next to your skimmer isn’t coincidence—it’s smart planning. Leave yourself maintenance corridors. Your future self will thank you when you’re not balancing precariously over water trying to reach a clogged intake.
Mapping Your Equipment Placement
Before you start building or upgrading your pond, grab a notepad and spend some time planning where everything will go. Trust me, I learned this the hard way when I had to relocate my filter system three times because I hadn’t thought through the layout properly!
Start by walking around your pond site at different times of day. Notice where you naturally stand to admire the water and where guests will likely gather. These are your primary viewing angles, and you’ll want equipment positioned away from these sightlines. Take photos from these spots so you can reference them during planning.
Next, sketch a simple overhead map of your pond area. Mark the pond itself, then add circles representing your pump, filter, skimmer, and any other equipment. Consider these key positioning principles:
Place your pump at the pond’s deepest point for optimal performance. If possible, tuck it behind a future rockwork feature or under an overhanging ledge you’ll create during construction.
Position filters at least several feet back from the pond edge. This gives you room to build natural-looking barriers like planted berms or rock clusters. Avoid placing them directly in your main viewing path, even if it means running slightly longer plumbing lines.
Think about electricity and water flow when planning your backyard pond design. Your equipment needs power, so position items where you can run cables discreetly along fence lines or underground conduit. Consider water flow patterns too – placing your return line opposite the skimmer creates healthy circulation while giving you flexibility in concealment options.
Finally, always leave adequate access space. You’ll need to reach equipment for maintenance, so allow at least two feet of working room around each component, even if it’s hidden behind decorative elements.
Natural Rock and Stone Concealment
Creating Convincing Rock Caves and Grottos
Creating a natural-looking rock cave is one of my favorite ways to hide pond equipment while adding beautiful dimension to the water garden. I still remember the first grotto I built – it looked a bit like a precarious Jenga tower at first, but with patience and the right technique, it transformed into a stunning focal point that completely concealed my filter box.
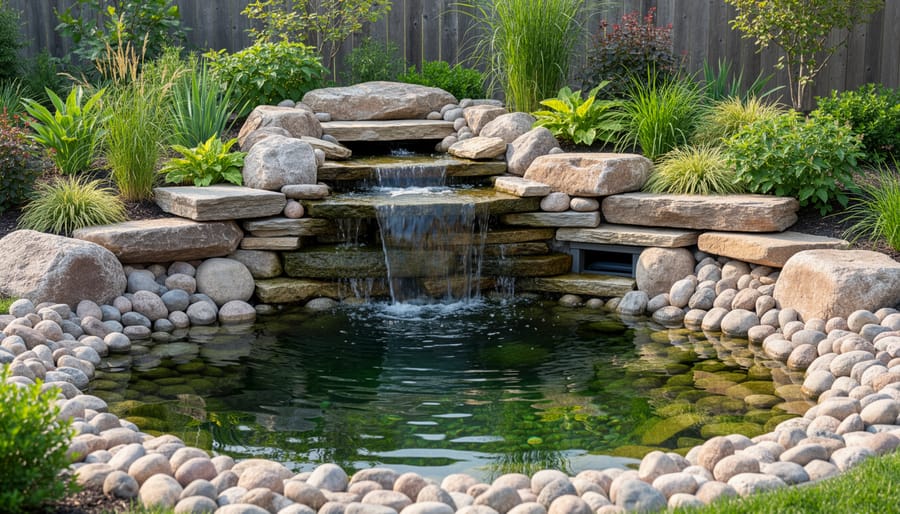
Start by selecting flat-bottomed rocks as your foundation stones. These provide stability and prevent shifting over time. Place your largest rocks first, positioning them in a horseshoe or C-shape around the equipment you’re hiding. Leave enough space for easy access during maintenance – trust me, you’ll thank yourself later when it’s time to clean that filter.
As you stack upward, angle each layer slightly inward to create an overhang effect. This mimics how natural caves form and provides better coverage. Use a mix of rock sizes to fill gaps, but avoid making it look too uniform. Nature isn’t perfect, and neither should your grotto be. I like to place medium-sized rocks irregularly, leaving some deliberate gaps between layers.
Here’s the crucial part many beginners miss: ventilation. Your pump and filter need airflow to prevent overheating and make maintenance easier. Leave a gap at the back or incorporate spaces between rocks where air can circulate freely. You can disguise these openings with trailing plants or strategically placed smaller stones that don’t block airflow.
Test stability by gently pushing on your structure from different angles. If anything wobbles, rebuild that section. For extra security on taller structures, consider using pond-safe foam sealant between key support rocks. This keeps everything solid while remaining removable if needed.
Fake Rocks That Actually Look Real
Here’s the honest truth about fake rocks: some look ridiculously fake, while others will fool even your most observant neighbors. The difference comes down to texture, color variation, and strategic placement.
Hollow artificial rock covers are lifesavers for hiding pumps, filters, and electrical boxes. They work best when you’re covering a single piece of equipment in a garden bed or along your pond’s edge. Where they struggle is covering large groupings or equipment that needs frequent access.
When shopping for realistic options, look for multi-toned surfaces rather than uniform color. Real rocks have shadows, lichens, and mineral variations. The best faux rocks have slightly irregular shapes and rough textures that catch light naturally. I learned this the hard way after buying a smooth, gray boulder that screamed “plastic” from across the yard.
Size matters too. Choose covers that are proportional to your landscape. A single massive boulder in a small pond area looks suspicious, but several medium-sized rocks grouped naturally blends beautifully.
The secret to making artificial rocks convincing is nestling them partially into mulch or gravel, just like nature would. Add some low-growing plants around the base, and suddenly that hollow cover becomes part of your pond’s story rather than an obvious disguise.
Plant-Based Concealment Techniques
Selecting the Right Screening Plants
The key to hiding pond equipment naturally is choosing plants that grow quickly and don’t mind getting their feet wet. I learned this the hard way when my first pond plantings took three years to fill in, and my filter sat there like an eyesore the whole time!
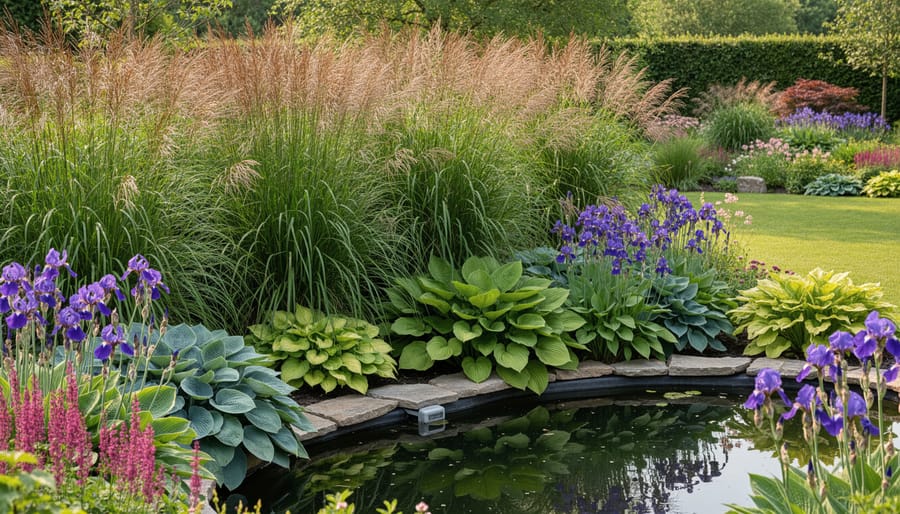
For quick results, ornamental grasses are absolute champions. Varieties like dwarf papyrus and Japanese sweet flag grow rapidly and create beautiful screens within a single season. They handle waterlogged soil beautifully and add wonderful movement when the breeze picks up. Place them about 12 inches apart for faster coverage.
Ferns are my secret weapon for shady pond areas where equipment often hides. Royal ferns and ostrich ferns tolerate moisture exceptionally well and create lush, layered coverage. They’re incredibly forgiving and practically thrive on neglect once established.
Hostas deserve special mention for their reliability. These workhorses come in countless sizes and colors, making them perfect for customizing your concealment strategy. Plant larger varieties like ‘Sum and Substance’ behind equipment for substantial screening, while smaller types work wonderfully as transition plants.
Strategic shrubs provide year-round structure. Compact varieties like dwarf willows or buttonbush stay manageable while offering excellent coverage. Position them slightly away from the immediate water’s edge to avoid root complications with your pond liner.
Remember that successful pond plant integration means selecting species that serve double duty, beautifying your space while naturally concealing necessary equipment without constant maintenance battles.
Creating Living Equipment Screens
Plants are nature’s perfect camouflage, and with smart positioning, you can completely hide your pond equipment while keeping everything healthy and accessible. I learned this the hard way after planting a gorgeous host behind my filter box, only to trample it every time I needed to clean the filter!
Start by choosing plants that naturally grow tall enough to screen your equipment. Ornamental grasses like maiden grass or fountain grass work beautifully because they grow quickly and create dense visual barriers without completely blocking airflow around pumps and filters. For shorter equipment, try bushy perennials like Russian sage or coneflowers.
The secret is creating strategic access paths. Leave a narrow corridor behind your plant screen, about 18 inches wide, so you can reach equipment without disturbing your plants. Lay down stepping stones or mulch to mark this hidden pathway. Your guests won’t notice it, but you’ll appreciate it during maintenance time.
Position taller plants slightly offset from equipment rather than directly in front. This angled approach blocks sightlines from viewing areas while keeping a clear workspace. I place mine about two feet to the side, which perfectly conceals my filter from the patio while giving me elbow room to work. Remember to consider the plant’s mature size, not just its current height, so your screen remains effective as seasons change.
Container Gardens for Flexible Concealment
Container gardens are absolute game-changers for hiding pond equipment while keeping your maintenance life simple. I learned this the hard way after planting a permanent hedge around my filter box, then needing to access it weekly during algae season. Large containers on wheels or positioned strategically can provide excellent screening without the commitment.
Choose containers at least 18-24 inches in diameter for stability and root space. Bamboo varieties in pots create quick vertical screens, though you’ll want clumping types to avoid spreading. Ornamental grasses like maiden grass or fountain grass work beautifully and look natural near water. For year-round coverage, try evergreen shrubs like boxwood or dwarf conifers.
Position your containers to block sightlines from your main viewing areas, but leave enough space behind them to easily slide them aside when you need equipment access. I keep three large containers on casters near my filter, and moving them takes about two minutes. In winter, you can even rotate them to protected areas if needed, keeping your screening flexible with the seasons.
Architectural and Built Solutions
Building a Disguised Equipment Shed
Creating your own disguised equipment shed is easier than you might think, and it’s incredibly satisfying to see those bulky components disappear into your garden design. I built my first one using leftover deck boards, and it looked so natural that visitors would often lean against it without realizing it housed my pond pump!
Start by measuring your equipment to determine the shed’s interior dimensions. Add at least 6 inches on all sides for ventilation space and easy access. A typical pump and filter setup needs about 24 by 24 inches, but always measure twice and build once.
For materials, weather-resistant options work best. Cedar or pressure-treated lumber gives you durability without breaking the bank. You can also repurpose old fence panels or pallet wood for a rustic look. The key is ensuring your structure can handle moisture exposure since it’ll be near water.
Here’s your basic construction approach. Build a simple frame using 2x4s, creating a box shape with an open bottom for drainage and ventilation. Attach your chosen exterior material, leaving a 1-inch gap between boards or panels for airflow. This spacing is crucial because equipment generates heat and moisture buildup causes problems fast.
Install a hinged or removable panel for easy access during maintenance. I learned this the hard way after building my first shed with everything screwed tight. Trust me, you’ll want quick access when you need to adjust flow rates or clean filters.
Ventilation makes or breaks your shed’s success. Drill several 2-inch holes near the top and bottom on opposite sides to create cross-ventilation. Cover these holes with rust-proof mesh to keep critters out while letting air circulate freely. Your equipment will thank you with longer life and better performance.
Decorative Cover Options
Sometimes the best way to hide pond equipment is to turn it into garden art! Decorative covers blend seamlessly into your landscape while keeping everything accessible for maintenance.
Ornamental bridges are my favorite dual-purpose solution. A simple arched footbridge positioned over a filter box or skimmer creates a charming focal point while providing easy access underneath. You can build one from weather-resistant cedar or purchase prefab garden bridges that work beautifully.
Hollow decorative benches offer another clever option. Position a waterproof storage bench near the pond edge to conceal pump control boxes or filtration systems. I’ve seen gardeners customize basic outdoor benches with lift-up seats, creating perfect hidden compartments. Plus, you get bonus seating for pond-side relaxation!
Faux stumps and hollow rock formations provide natural-looking covers for smaller equipment. Lightweight fiberglass versions are surprisingly affordable and convincingly realistic. I once used a hollow stump cover to hide my UV clarifier, and visitors constantly asked about my “ancient tree remnant.”
For artistic souls, consider commissioning or creating decorative screen panels. Metal cutouts featuring dragonflies, herons, or water lilies can frame equipment areas while maintaining airflow. Even a strategically placed garden obelisk or trellis with climbing vines works wonders. The key is choosing covers that complement your existing garden style while keeping functionality front and center.
Hiding Pipes, Tubing, and Electrical Lines
Burying Lines Properly
When burying lines around your pond, think of it as creating an invisible highway system for your equipment. I learned this lesson the hard way when I accidentally nicked my pump line while planting irises – what a mess!
For pipes carrying water, dig trenches at least 12 inches deep. This protects them from garden tools and weather extremes. Electrical conduit needs to go even deeper, typically 18 inches minimum, though local codes may require more. Always check with your local building department before digging, and call 811 to mark underground utilities – trust me, hitting an existing line is no fun.
Lay your pipes and conduit on a bed of sand for cushioning, then backfill carefully. Avoid sharp rocks that could damage the lines over time. I like to take photos of my trench routes before covering them, marking distances from permanent landmarks like fence posts or large rocks. This simple step has saved me countless headaches during future projects.
Use PVC pipe or proper electrical conduit rated for underground burial. Never use indoor-rated materials outside – they’ll degrade quickly. Consider running extra conduit as “spares” for future additions. Your future self will thank you when adding that fountain you’ve been dreaming about!
Above-Ground Line Concealment
Nothing disrupts a beautiful pond faster than exposed tubing snaking across rocks or electrical cords meandering through your landscape. The good news? Concealing these necessary evils is easier than you might think, and you probably already have most of what you need in your garden shed.
Start by routing lines along natural pathways where they’re easiest to hide. Tuck tubing behind larger rocks, positioning them strategically to create visual barriers while maintaining easy access for maintenance. I learned this the hard way after burying a line too deeply and spending an afternoon excavating to fix a simple connection issue.
Plants are your best friends here. Low-growing perennials like creeping Jenny or hostas quickly spread to cover exposed areas. Position plants on both sides of lines to create a natural canopy. For wires connecting pond lighting options, trailing plants work beautifully to soften their appearance.
Mulch provides quick coverage for areas where plants haven’t filled in yet. Apply a generous 2-3 inch layer around lines, keeping it slightly mounded for better concealment. Dark mulch blends beautifully with black tubing, making it nearly invisible.
Consider using flat stones as bridges over tubing in high-traffic areas, protecting lines while maintaining accessibility for routine checks.
Submersible Equipment: Out of Sight Solutions
When Submersible Pumps Make Sense
From a purely aesthetic standpoint, submersible pumps are your best friend when creating that natural, magazine-worthy pond look. These workhorses sit completely underwater, making them invisible from the surface. If you’ve ever stood at your pond’s edge and felt frustrated by clunky equipment breaking the illusion of a natural water feature, you’ll appreciate what submersibles offer.
I learned this lesson the hard way with my first pond. I chose an external pump because it seemed easier to access, but it dominated my small patio space with its bulky housing and conspicuous plumbing connections. The constant visual reminder that I was looking at a manufactured system, not a slice of nature, really bothered me.
Submersible pumps shine in smaller to medium-sized ponds where you want that seamless appearance. They’re particularly perfect if your pond design emphasizes naturalistic edges with rocks and plantings, since there’s simply nothing above water to hide. The tradeoff? They’re slightly trickier to access for maintenance since you’ll need to reach into the water. However, for most backyard ponds, this minor inconvenience is absolutely worth the aesthetic payoff of a completely unobstructed view.
Underwater Equipment Positioning
The secret to hiding pumps, filters, and UV clarifiers starts with strategic placement during installation. Position your pump on the pond bottom near the back or sides, tucked behind rock shelves or within built-in crevices. I learned this the hard way when my first pump sat dead-center, looking like a giant paperweight underwater!
Create natural-looking hiding spots using flat stones stacked to form small caves, ensuring adequate water flow around the equipment. Place your filter behind marginal plants or alongside your waterfall, where splashing water naturally disguises its presence. For UV clarifiers, find spots where plumbing naturally runs, keeping them close to the filter to minimize visible tubing.
Always maintain easy access for cleaning and maintenance. Use removable stone caps or plant containers on rollers so you’re not rebuilding your hiding spot every time you need to reach your equipment. Test water circulation before finalizing placements to ensure nothing blocks flow or creates dead zones. Remember, if you can’t easily see your equipment from your favorite viewing angle, you’ve succeeded!
Common Concealment Mistakes to Avoid
Ventilation Failures
I learned this lesson the hard way when my pump housing became a sauna and burned out my equipment! Proper airflow inside concealment structures isn’t just nice to have—it’s essential. When you box in pumps, filters, or electrical components without ventilation, heat builds up quickly. This trapped heat shortens equipment lifespan, causes motors to overheat, and can even create fire hazards with electrical connections.
Think of it like leaving your laptop running inside a closed drawer. Pumps and filters generate significant heat during operation, and they need somewhere for that warmth to escape. Without adequate ventilation holes or gaps, you’re essentially cooking your expensive equipment. Plus, poor airflow creates condensation issues that lead to rust, mold growth, and water damage to wooden structures.
The fix is straightforward: include ventilation slots, mesh panels, or strategic gaps in your concealment designs. Position openings near the top where hot air naturally rises, and consider adding intake vents near the bottom for cross-ventilation. Your equipment will thank you with years of reliable service.
Creating Maintenance Nightmares
I learned this lesson the hard way when I built an elaborate rock formation around my pump—it looked stunning but turned a simple filter cleaning into an hour-long ordeal! The biggest culprits for maintenance headaches are permanently sealed compartments that require dismantling just to check equipment. I’ve seen folks cement rocks directly over valves, build complex mortared structures without removable panels, and create nested hiding solutions where you need to disassemble three layers to reach anything.
Another common mistake is making access points too small. Sure, that tiny gap between decorative stones might hide your equipment, but can you actually fit your hand through to adjust the pump? I once designed a beautiful stacked slate cover that required removing seventeen individual pieces to access my skimmer—not sustainable!
The key to avoiding these nightmares is planning for routine maintenance access before you build anything decorative. Use hinged lids instead of stacked rocks, leave adequate clearance around equipment, and always test accessing components before permanently installing concealment features. Think about winter shutdowns too—you’ll thank yourself when autumn arrives and everything comes apart easily!
Here’s the truth I’ve learned after years of tinkering with my own pond: creating a beautiful water feature doesn’t mean choosing between gorgeous aesthetics and reliable equipment. You absolutely can have both, and honestly, you deserve both.
I remember standing by my pond five years ago, staring at that ugly black pump box sitting there like an eyesore, wondering if I’d have to just accept it. But I didn’t, and neither should you. The techniques we’ve covered aren’t complicated or expensive. They’re just thoughtful adjustments that transform your pond from a collection of equipment into an actual retreat.
Start small if you need to. Maybe this weekend you’ll just move that filter behind some taller plants, or tuck the tubing under a few strategically placed stones. Next month, you might build that simple rock wall or try the planted screen approach. There’s no rush. The beauty of pond keeping is that it’s always evolving, always giving you new opportunities to improve.
The real shift happens when you stop thinking about maintaining your pond and start genuinely enjoying it. I finally hit that point when I could sit on my deck with morning coffee and see only water, plants, and fish, not the machinery making it all possible. That’s when the effort became worth it.
Your pond should invite you outside, not remind you of chores. Make it a space you actually want to be in.