
How to Choose and Use Safety Equipment for Swimming in Your Pond or Water Feature
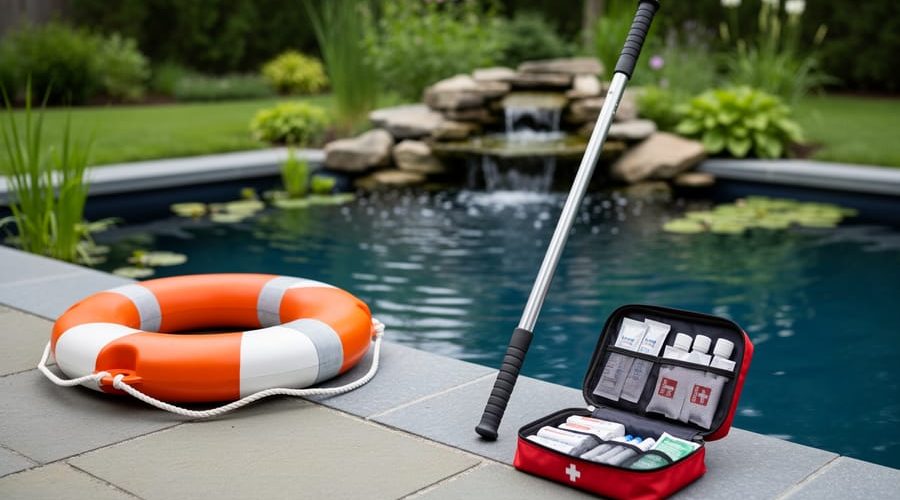
Swimming in your backyard water feature requires three core pieces of safety equipment: a properly sized life ring or rescue buoy, a reaching pole, and a well-stocked first aid kit positioned within easy access of the water. These basics form your first line of defense when someone struggles in the water, giving you tools to respond immediately without entering the water yourself.
Most water garden owners don’t think about safety equipment until they decide to allow swimming, but once you open your pond or converted pool to swimmers, you’re taking on real responsibility. The transition from decorative feature to swimming spot changes everything about how you need to prepare your space.
The good news? You don’t need to install complex systems or spend thousands on commercial-grade equipment. The right safety setup for a residential water feature focuses on immediate response tools and clear safety protocols that match your specific situation. A small natural pond needs different equipment than a large swimming pond, and your safety plan should reflect the size, depth, and typical use of your feature.
This guide walks you through selecting appropriate safety equipment based on your water feature’s characteristics, positioning it effectively around your space, and teaching everyone who uses the water how to respond in an emergency. You’ll learn what to buy, where to place it, and how to maintain it so it’s ready when needed.
Understanding the Risks: Why Swimming Safety Equipment Matters for Water Features
I learned about the hidden risks of backyard water features the hard way when my neighbour’s daughter slipped on algae-covered rocks at the shallow end of their pond and panicked in water that was only waist-deep. That moment taught me that natural swimming environments present challenges you’d never encounter in a traditional pool, and proper safety equipment isn’t optional, it’s essential.
Unlike pools with their uniform depths and clear sight lines, ponds and water features often have irregular bottoms where a child can step from knee-deep water into a hole over their head in seconds. Aquatic plants can tangle around swimmers’ legs, and murky water from natural tannins or algae means you can’t see someone struggling beneath the surface. Temperature variations matter too, ponds develop cold spots where spring water enters or in shaded areas, and the shock of hitting cold water can trigger panic or cramps even in strong swimmers.
The lack of defined edges compounds these risks. There’s no obvious “deep end” marked with painted numbers, no ladder showing where to exit safely, and no pool deck providing stable footing. Moss-covered stones, muddy banks, and submerged logs create slip and entrapment hazards that change with seasons and water levels. This unpredictability is exactly why you need reliable safety equipment positioned and ready, it’s your safety net when natural conditions create emergencies that don’t happen in controlled pool environments.
Essential Safety Equipment You’ll Need
Rescue and Reach Equipment
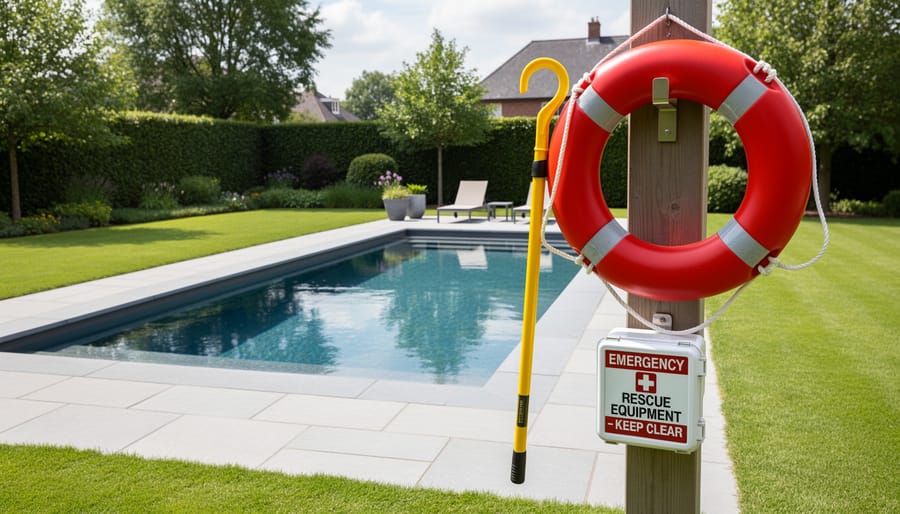
Rescue equipment creates a safety buffer between you and someone struggling in the water. A shepherd’s hook or rescue pole lets you extend your reach without entering the pond yourself, the pole should be long enough to span from the edge to your deepest swimming area, plus a comfortable margin. Fiberglass or aluminum poles work well because they’re lightweight and won’t conduct electricity if power lines are nearby. Position the pole where you can grab it instantly, mounted on a fence post or laid across brackets within arm’s reach of the water.
Throw ropes and ring buoys handle situations beyond pole reach. Look for floating rope that stays visible on the surface and won’t sink if your aim is off. A properly weighted ring buoy carries the rope farther and gives a struggling swimmer something stable to grab. Choose rope length based on your pond’s dimensions, you want enough to cross the widest section with slack remaining. Store these tools at multiple access points if your water feature has several entry areas.
The key is visibility and accessibility. Brightly colored equipment stands out during an emergency, and mounting locations should be obvious to anyone nearby, not tucked away in a shed. Test your reach periodically to confirm you can actually deploy everything quickly.
Personal Flotation Devices
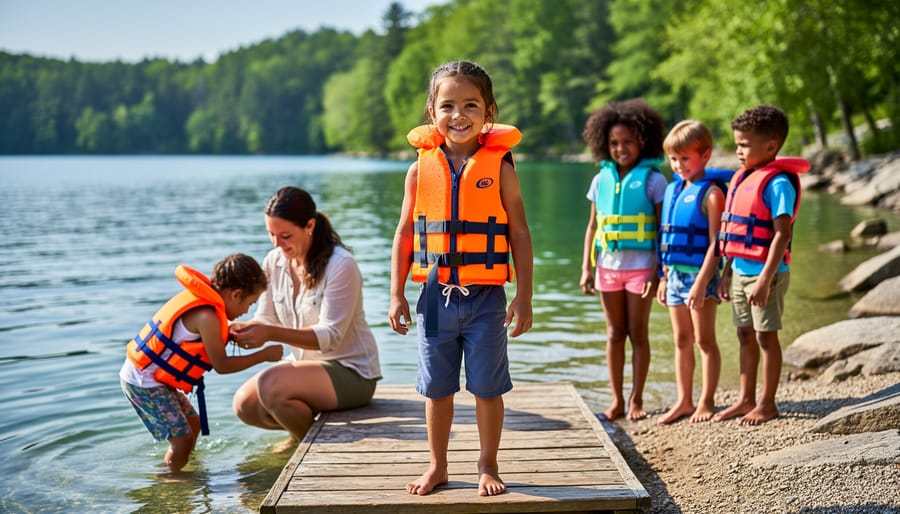
Personal flotation devices are your backup when things go wrong. Life jackets, swim vests, and flotation belts can keep someone’s head above water until help arrives.
The most important detail is the US Coast Guard approval label. Look for a tag or stamp indicating the device meets federal standards and lists the appropriate weight range. Don’t rely on pool toys or inflatable armbands, they aren’t designed for emergencies and can deflate or slip off.
Fit matters as much as approval. A jacket that’s too loose will ride up over a swimmer’s head; one that’s too tight restricts movement and breathing. Check the label for fit guidelines based on chest size and weight, then test it in shallow water before relying on it.
I keep Type II and Type III jackets on hand. Type II turns an unconscious person face-up, which is crucial for backyard ponds where you might be the only rescuer. Type III is more comfortable for active swimming but doesn’t guarantee face-up flotation.
Weak swimmers should wear flotation devices whenever they’re near your water feature, not just when they’re swimming. Children especially need constant protection, their judgment about when they need help isn’t reliable yet.
Barriers and Warning Systems
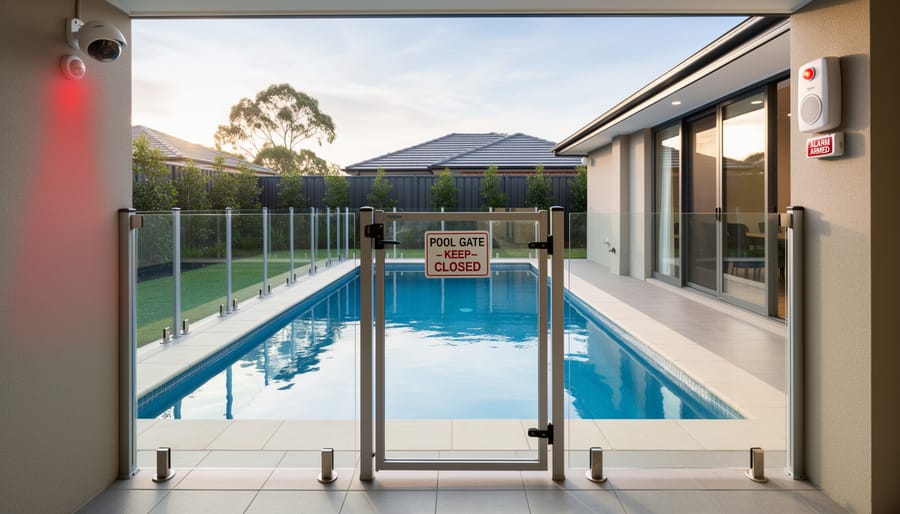
Barriers create a crucial line of defense by controlling who can access your water feature and when. A fence around the swimming area, ideally with vertical bars spaced closely enough that children can’t squeeze through, keeps unsupervised wanderers out. The gate should be self-closing and self-latching, positioned high enough that toddlers can’t reach it. I learned this lesson when a neighborhood child slipped into our yard during a barbecue; a proper gate would have prevented that heart-stopping moment.
Pool alarms offer another layer of protection. Some mount on gates and sound when the gate opens, while others float on the water surface and alert you to disturbances. Choose a model loud enough to hear from inside your home. Pairing an alarm with clear signage, depth markers, “No Diving” warnings, emergency contact numbers, ensures everyone understands the rules and knows what to do.
Local codes often dictate fence height, gate mechanisms, and alarm requirements, so check with your municipal building department before installing anything. What’s adequate in one area may not meet standards elsewhere, and compliance protects both your family and your legal standing.
Safety Warnings and Precautions Before You Begin
Before anyone takes a dip in your water feature, you need to understand the conditions that make swimming outright dangerous. Having the right equipment matters, but knowing when not to swim matters more.
Never allow swimming during or immediately after thunderstorms. Lightning strikes water and spreads outward, creating a lethal zone far beyond the impact point. If you hear thunder or see lightning, everyone stays out until at least thirty minutes after the last rumble. Similarly, if you have electrical pumps, lights, or aerators running in or near your water feature, ensure they’re on properly grounded GFCI-protected circuits. Any sign of electrical malfunction means the water is off-limits until a qualified electrician inspects and repairs the system.
Poor visibility is another absolute deal-breaker. If you can’t clearly see the bottom or identify submerged obstacles, no one should be swimming. Murky water hides hazards, makes rescue efforts exponentially harder, and increases panic when a swimmer can’t orient themselves. Maintaining crystal-clear water through proper three-stage filtration isn’t just aesthetic, it’s a safety requirement.
Temperature extremes demand caution too. Very cold water causes muscles to seize and breathing to become difficult within minutes. Very warm, stagnant water can harbor harmful bacteria. Use common sense: if the water feels uncomfortable when you test it, keep everyone out.
Supervision requirements are non-negotiable. Children and weak swimmers need constant, eyes-on attention from a competent adult within immediate reach. “Watching” doesn’t mean glancing up occasionally, it means focused attention, ready to act. Even strong swimmers benefit from the buddy system, because accidents, cramps, and medical emergencies can incapacitate anyone without warning.
Step-by-Step: Setting Up Your Water Feature Safety System
Step 1: Assess Your Water Feature and Identify Hazards
Start by walking the entire perimeter of your water feature on a calm, clear day. Bring a notebook or your phone to document what you find. Wade in carefully to check depth changes, noting where the bottom drops off suddenly or slopes gradually. Mark all entry and exit points, identifying which have firm footing and which are muddy or unstable. Look for slippery rocks, algae-covered surfaces, and underwater obstacles like submerged logs or equipment. Pay attention to areas where you can’t see the bottom clearly, and consider whether flow meter monitoring might help you track circulation patterns that affect visibility. Sketch a simple overhead diagram of your water feature, labeling problem areas you’ve identified. This visual reference becomes your baseline for positioning safety equipment effectively.
Step 2: Position Rescue Equipment Strategically
Mount your rescue pole where it doesn’t require unlocking a gate or navigating obstacles to reach it. A poolside hook or simple wall bracket works, positioned so you can grab the pole while keeping eyes on the water. Throw ropes and ring buoys belong at opposite ends of your swimming area, giving you options no matter where someone struggles. Choose mounting spots protected from direct weather when possible, but prioritize accessibility over shelter. Walk through a mock emergency: can you reach each piece of equipment within seconds without searching? If you’re hesitating or fumbling, reposition it. Bright colors help you spot equipment quickly, and family members should know exactly where everything lives before anyone enters the water.
Step 3: Install Barriers and Access Controls
Start by installing fencing that creates a true boundary between your water feature and the rest of your yard. Choose a fence height and style that matches local codes, many areas have specific requirements for water barriers, so check with your local building department. The critical features are a self-closing, self-latching gate that springs shut and latches automatically every time. Test it repeatedly: it should close fully even when you give it just a gentle push.
Position door or gate alarms at every entry point to the water area. These battery-powered devices emit a loud sound when the gate opens, alerting you immediately if someone heads toward the water. Check batteries monthly and test the alarm by opening the gate.
Place clear, durable signage at eye level near entrances and around the water. Include depth information at the deepest point, swimming rules (like “No Swimming Alone” or “Life Jackets Required for Children”), and emergency contact numbers. Laminate signs or use weatherproof materials that won’t fade.
Finally, walk the perimeter from a child’s perspective. Can a determined kid climb the fence, squeeze through gaps, or unlock the gate? Look for nearby furniture, stacked planters, or tree branches that could serve as stepping stools. Move or secure anything that compromises the barrier’s effectiveness. Your goal is eliminating every workaround a curious child might discover.
Step 4: Stock Personal Flotation Devices
Start by getting properly fitted life jackets for everyone who’ll be around your water feature regularly. Visit a local marine supply store where staff can help you find the right sizes, children’s jackets are sized by weight, adults’ by chest measurement. Look for US Coast Guard approval labels, and have each person try theirs on to ensure a snug fit that won’t slip off in the water.
Set up a designated storage spot within easy reach of your water feature. A weatherproof deck box or wall-mounted hooks work well, keeping the jackets visible and grab-ready. Store them where you’ll see them every time someone heads toward the water, out of sight means out of mind.
Establish clear household rules about when flotation devices must be worn. Many families require them for all children and any weak swimmers whenever they’re near the water. Post these rules visibly and enforce them consistently. The best safety equipment in the world helps no one if it’s sitting unused in storage when someone enters the water.
Step 5: Establish Communication and Emergency Protocols
Keep a waterproof emergency card posted near the water that lists 911 and local emergency services. Store your phone in a designated spot that every household member knows about, ideally in a waterproof case within sight of the water. Create a simple rescue plan that everyone understands: who calls for help, who enters the water with flotation equipment, and where to meet emergency responders. Walk through the plan with your family and update it as children grow more capable. When guests visit, give them a quick safety orientation covering where rescue equipment is stored, water depth, and who to alert if someone enters the water. Having these protocols established means everyone knows their role instead of panicking during an actual emergency.
Verification and Ongoing Safety Practices
Installing safety equipment is just the beginning. The real test comes when you verify everything works and maintain it consistently.
Start with quarterly practice drills. Grab your reaching pole and simulate pulling someone from the water’s edge. Time how quickly you can access your throw rope and toss it accurately. These rehearsals reveal whether your equipment is truly accessible or if you’ve let garden tools block the storage box. I learned this the hard way when I couldn’t find my rescue hook during an actual scare because it had gotten buried behind pool toys.
Inspect your equipment monthly during swimming season. Check fence gates for secure latching, examine throw ropes for fraying or mildew, verify alarm batteries, and confirm signage remains legible. Life jackets need special attention as children outgrow them quickly, what fit properly in spring might be dangerously loose by summer’s end.
Before each swimming season, walk through your entire safety protocol. As your kids grow older and become stronger swimmers, adjust which flotation devices they need. Update your emergency contact list if phone numbers changed. Refresh everyone’s memory about rescue procedures.
Don’t forget winter pond safety considerations. Store equipment properly during off-season to prevent deterioration. When you pull everything out in spring, inspect it thoroughly before assuming it’s ready.
Success means confidence. You should feel certain you can reach anyone in trouble within seconds and that your barriers prevent unsupervised access. If doubt creeps in anywhere, address it immediately.
Frequently Asked Questions
Do I need all this equipment for a small pond?
Even small ponds present drowning risks, so you’ll need basic safety equipment scaled to your feature’s size. At minimum, have a reaching tool, personal flotation devices for weak swimmers, and clear depth markers or warning signs.
How often should I replace safety equipment?
Inspect flotation devices and rescue equipment at the start of each swimming season for wear, fading, or damage. Replace life jackets if straps fray or buckles crack, and swap out any rescue rope that shows sun damage or stiffness.
What if my water feature has variable depth?
Mark depth changes clearly with signs or floating markers, and position rescue equipment at the deepest areas where swimmers are most likely to struggle. Consider restricting access to deep zones for children and inexperienced swimmers.
Can I use pool safety equipment for my pond?
Pool equipment often works well for water features, though you may need longer reaching poles or throw ropes if your pond is larger or irregularly shaped. The key is matching the tool’s reach to your specific layout.
What about winter storage for safety equipment?
Store flotation devices and rescue ropes indoors during freezing months to prevent UV damage and material degradation. Clean and dry everything before storage, and inspect it thoroughly before the next swimming season begins.
These questions come up frequently because every water feature is unique, and there’s no one-size-fits-all safety approach. The unifying principle is simple: choose equipment that matches your feature’s specific hazards and keep it accessible and well-maintained. If you’re uncertain whether your setup provides adequate protection, err on the side of more equipment rather than less. Safety gear that sits unused is infinitely better than not having it when you need it.
Taking the time to set up proper safety equipment around your water feature is one of the best investments you can make. The steps we’ve covered are straightforward, and once everything is in place, you’ll have genuine peace of mind knowing you’re prepared for any situation. Remember that equipment is only part of the equation, it works best when paired with active supervision, clear household rules, and common sense judgment about when conditions are safe for swimming. Your pond or water feature can be a source of joy and relaxation for years to come when you approach it with both enthusiasm and respect for the water. Now you’re ready to enjoy your backyard oasis safely and confidently.