
Why Your Pond Fish Are Gasping (And How Diffusers Fix It)
Your pond’s murky water, gasping fish, and stubborn algae blooms often point to one invisible culprit: low dissolved oxygen. Without adequate oxygen circulation, beneficial bacteria can’t break down organic waste, fish struggle to breathe, and your once-clear water turns into a cloudy, smelly problem that worsens with each passing week.
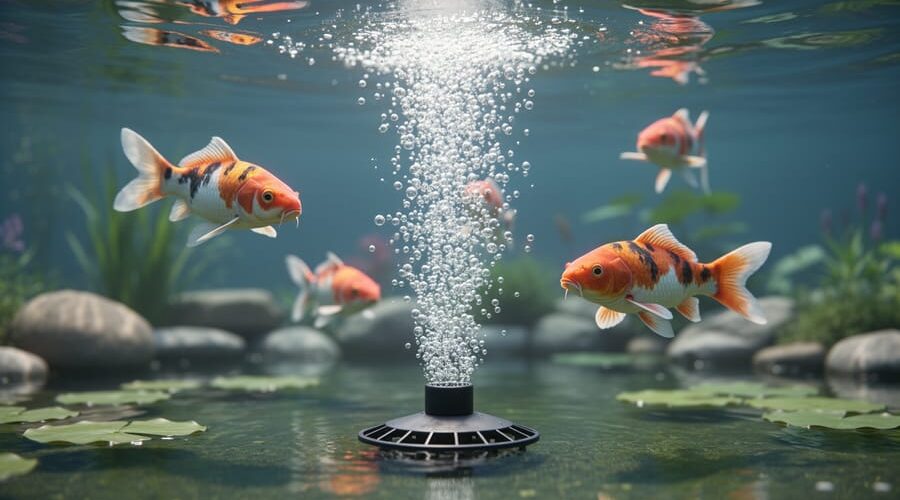
Pond aeration diffusers solve this by releasing tiny bubbles from the pond bottom, creating a continuous circulation pattern that oxygenates water throughout the entire water column. Unlike surface fountains that only aerate the top few inches, diffusers work from the bottom up, pushing oxygen-rich bubbles upward while simultaneously pulling nutrient-rich bottom water to the surface where it can release harmful gases and absorb fresh oxygen.
The difference becomes visible within days. Fish become more active as oxygen levels stabilize. Algae growth slows as beneficial bacteria multiply and consume excess nutrients. Water clarity improves as circulation prevents stagnant zones where debris accumulates. During summer heat waves and winter ice cover, when natural oxygen levels plummet, diffusers become essential life support for your pond ecosystem.
Whether you manage a small backyard water garden or a larger recreational pond, understanding how diffusers work and selecting the right system transforms pond maintenance from constant crisis management into simple routine care. The investment pays dividends through healthier fish, clearer water, and significantly less time spent battling water quality problems that oxygen circulation prevents naturally.
What Pond Aeration Diffusers Actually Do
The Bubble Science Made Simple
Think of it this way: if you wanted to cool down on a hot day, would you rather have one giant ice cube or a bucket of crushed ice? The crushed ice works faster because there’s more surface touching the air, right? That’s exactly how bubble size affects oxygen transfer in your pond.
When diffusers create thousands of tiny bubbles instead of a few big ones, they’re dramatically increasing the surface area where water meets air. Each bubble is like a little oxygen delivery vehicle, and smaller bubbles take longer to rise to the surface, giving them more time to share their oxygen with the water. Big bubbles? They shoot straight up like rockets and pop before they’ve done much good.
Here’s the real magic: those fine bubbles create a gentle rolling motion throughout your pond, mixing oxygen-rich water with the deeper, oxygen-poor layers. It’s like stirring a pot of soup to distribute the heat evenly. This circulation means your fish get oxygen no matter where they swim, and beneficial bacteria throughout the pond get the oxygen boost they need to keep your water crystal clear.
How Diffusers Create Healthy Water Movement
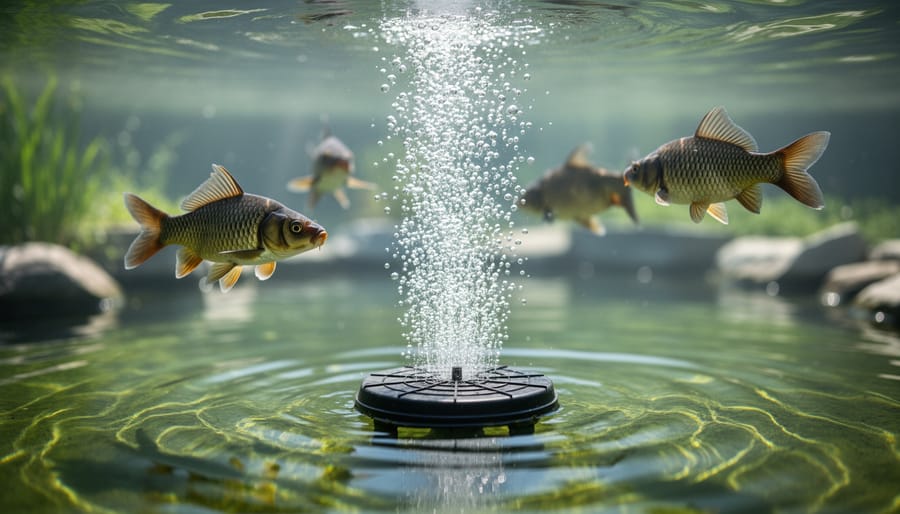
Think of a pond diffuser as a gentle underwater fountain that works its magic from the bottom up. When air bubbles rise from the diffuser, they create something truly beautiful—a continuous circulation pattern that keeps your entire pond healthy and vibrant.
Here’s how it works in simple terms: as those tiny bubbles float upward, they act like little elevators, carrying bottom water (usually cold and oxygen-poor) up to the surface. This movement forces the warmer surface water to flow downward and outward, creating a rolling motion throughout your pond. It’s similar to how a pot of soup circulates when it’s gently simmering on the stove.
This constant movement solves two major pond problems. First, it eliminates stagnant zones—those dead spots where nothing seems to thrive and debris accumulates. Every corner of your pond gets fresh, oxygenated water instead of becoming a neglected area. Second, it prevents temperature stratification, which is just a fancy way of saying your pond won’t have distinct layers of hot and cold water anymore. When left unchecked, these temperature layers can trap harmful gases at the bottom and stress your fish.
I’ve watched this transformation in my own pond, and it’s remarkable. Areas that once had murky, lifeless water became clear and inviting within weeks. The beauty of natural pond aeration through diffusers is that it works quietly around the clock, mimicking nature’s own circulation patterns to keep everything balanced and thriving.
Types of Diffusers and What They’re Best For
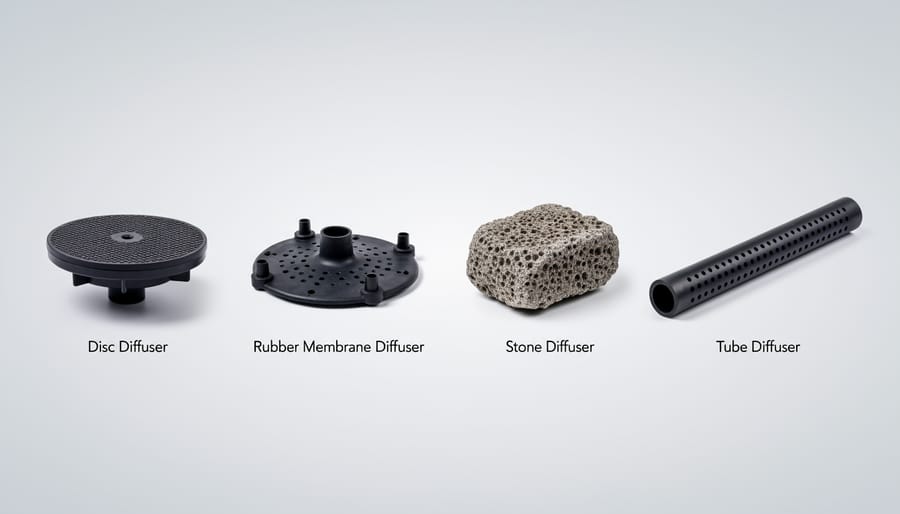
Disc and Plate Diffusers
If you’re just getting started with pond aeration, disc and plate diffusers are your best friends. They’re the go-to choice for most backyard ponds, and for good reason. These circular units sit at the bottom of your pond and release thousands of tiny bubbles that lift oxygen-poor water to the surface where it can absorb fresh oxygen from the air.
What makes them so popular? They’re affordable, easy to install, and incredibly effective. I remember setting up my first disc diffuser in about 20 minutes, which felt like a victory compared to other pond projects! They work beautifully in ponds ranging from 500 to 5,000 gallons, though you can use multiple diffusers for larger water features.
The secret to success is placement. Position your diffusers in the deepest part of your pond, spacing them evenly if you’re using more than one. Keep them at least 12 inches from the bottom to prevent stirring up sediment and debris. For best results in irregularly shaped ponds, place diffusers in different zones to ensure complete circulation.
Disc diffusers typically measure 7 to 10 inches in diameter and connect to your air pump with standard airline tubing. They’re particularly great for fish ponds since the gentle bubble action doesn’t stress your aquatic friends.
Rubber Membrane Diffusers
Rubber membrane diffusers are the premium choice in pond aeration, and once you understand how they work, you’ll see why many pond owners consider them worth every penny. These diffusers feature a flexible rubber surface (usually EPDM rubber) with tiny slits or perforations that open when air flows through and close when the aerator shuts off. This self-sealing action is brilliant because it prevents water from backing up into your airline when the system isn’t running, which can cause all sorts of headaches with other diffuser types.
What really sets rubber membrane diffusers apart is their incredible durability. I’ve seen these workhorses last 5 to 10 years or more with minimal maintenance, compared to 2 to 3 years for basic airstones. They resist clogging much better because those slits don’t accumulate mineral deposits as quickly, and the flexible rubber naturally resists the wear and tear that comes from constant water pressure and movement.
Are they worth the extra investment? If you have a larger pond (over 1,000 gallons), keep valuable koi, or simply want a set-it-and-forget-it system, absolutely. The upfront cost pays for itself through longevity and reliability, giving you consistent oxygen levels without constant replacement hassles.
Stone and Ceramic Diffusers
Stone and ceramic diffusers are the tried-and-true workhorses of pond aeration, and they’ve been around for good reason! These traditional options create fine, champagne-like bubbles that rise slowly through your water column, maximizing oxygen transfer along the way. The porous materials naturally produce smaller bubbles compared to rubber alternatives, which means more surface area contact with water and better oxygenation overall.
Here’s what makes them appealing: they’re incredibly durable and won’t degrade from UV exposure or constant submersion. I’ve seen ceramic diffusers still going strong after five years of continuous use! They work beautifully in medium to large ponds, especially if you have koi or goldfish that appreciate consistent, gentle water movement.
The trade-off? These diffusers need more attention than their rubber cousins. The tiny pores can clog with minerals, algae, and sediment over time, reducing bubble output. Plan on cleaning them every few months by soaking in vinegar or a specialized cleaning solution. You’ll also want to check them regularly during peak algae season.
Best for ponds between 1,000 and 5,000 gallons where you want reliable, fine-bubble aeration and don’t mind occasional maintenance sessions. They’re perfect if you’re committed to keeping your system running at peak performance!
Tube and Stick Diffusers
If you’ve got a long, narrow pond or an irregularly shaped water feature, tube and stick diffusers might be your best friends! These clever systems use flexible weighted tubing with tiny perforations that release a continuous curtain of bubbles along their entire length. Think of them as creating an underwater wall of oxygen rather than a concentrated bubble column.
I love recommending these for kidney-shaped ornamental ponds or elongated koi ponds where you need even oxygen distribution across the entire area. The tubing typically comes in lengths from 10 to 100 feet, allowing you to custom-fit your aeration pattern to match your pond’s unique footprint. You can snake them along the bottom in straight lines, curves, or even create a grid pattern for maximum coverage.
Installation is wonderfully straightforward. The weighted tubing naturally sinks to the pond bottom, so you simply unroll it in your desired pattern and connect it to your air pump. Some folks stake them down with landscape pins for extra security, especially in ponds with active fish that might disturb them.
One practical tip: these diffusers work best in ponds at least 3 feet deep. In shallower water, the bubbles reach the surface too quickly to provide optimal oxygen transfer. They’re perfect for those tricky corners that single disc diffusers might miss!
Where to Place Your Diffusers for Maximum Impact
The Deepest Spot Rule
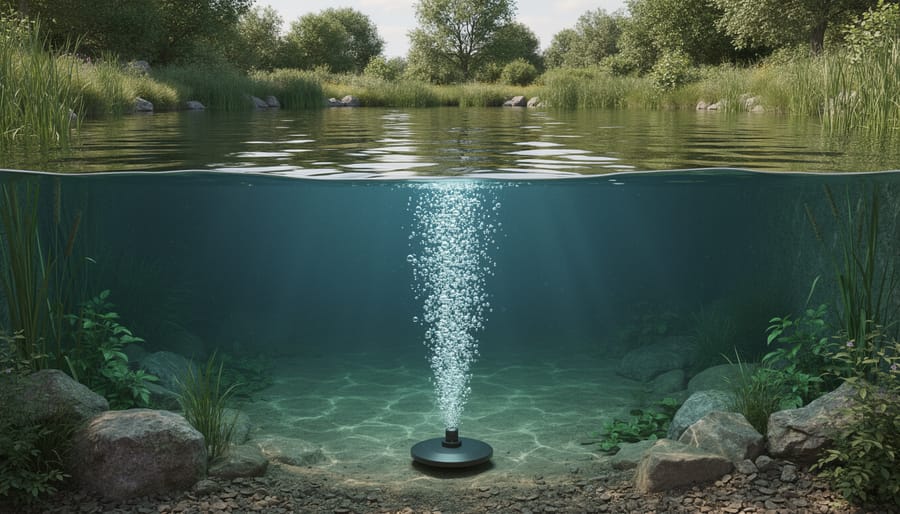
Here’s the truth about diffuser placement: if you’re not putting them at the deepest point of your pond, you’re missing out on the full benefits of aeration. Think of it this way – cold, oxygen-poor water naturally settles at the bottom, creating a stagnant layer where problems brew. When you position your diffuser at the pond’s lowest point, those rising bubbles create a gentle lifting action, bringing that heavy bottom water to the surface where it can grab oxygen from the air.
I learned this the hard way when I first set up my koi pond. I placed the diffuser about halfway down, thinking it would be fine. My fish still hung near the surface, and I couldn’t figure out why until a fellow pond keeper pointed out my mistake. Once I moved it to the very bottom, the difference was remarkable within days.
The positioning is simple: lower the diffuser until it touches bottom, ideally at the pond’s center if you have a bowl-shaped pond, or at the deepest point if your pond has an irregular shape. This creates the longest possible column for bubbles to rise through, maximizing oxygen transfer and water circulation throughout your entire pond depth.
Multiple Diffuser Layouts
When your pond exceeds 1,000 square feet or has an irregular shape, you’ll likely need multiple diffusers to keep every corner healthy and oxygenated. Think of it like trying to heat a large house with one space heater—it just won’t reach everywhere!
The key to success is strategic placement. I learned this lesson the hard way when I installed two diffusers right next to each other in my kidney-shaped pond. The center bubbled beautifully, but the far ends stayed stagnant and murky. What a rookie mistake!
For regular-shaped ponds, the grid pattern works wonderfully. Space your diffusers evenly across the pond floor, maintaining roughly equal distances between each unit. This creates overlapping circulation zones that cover the entire area without leaving dead spots.
If you’ve got an L-shaped or irregular pond like mine, place one diffuser in each distinct section. Pay special attention to corners, coves, and narrow channels where water naturally stagnates. These trouble spots need their own dedicated airflow.
A helpful rule of thumb: position diffusers so their circulation patterns overlap by about 20 percent. You can test this by watching surface movement patterns on calm days. If you see still areas between bubble zones, adjust your placement.
For deeper ponds over six feet, consider varying the depth of your diffusers slightly. This creates different circulation layers that mix more effectively. And don’t forget—you can always start with fewer diffusers and add more if you notice problem areas developing. Your fish and plants will thank you!
Matching Your Diffuser System to Your Pond Size
Small Ponds (Under 1,000 Gallons)
For cozy backyard ponds under 1,000 gallons, you’ll want a compact but effective setup. A small air pump (typically rated between 1-3 watts) paired with a single disc or cylindrical diffuser works beautifully. I started with a 500-gallon pond myself, and a simple 2-watt pump with a 4-inch disc diffuser made an incredible difference within just a few days.
Look for diffusers specifically designed for shallow water applications, usually with weighted bases to keep them anchored. Position your diffuser near the deepest point of your pond, even if that’s only 2-3 feet deep. The gentle bubbling action will circulate the entire volume efficiently without creating too much turbulence that might stress smaller fish or disrupt plants.
Most small-pond systems come as complete kits, making installation straightforward for beginners. You’ll simply connect airline tubing from your pump to the diffuser, plug it in, and you’re aerating! These systems are wonderfully affordable and energy-efficient, often costing just pennies per day to operate while keeping your water crystal clear and your fish happy.
Medium Ponds (1,000-5,000 Gallons)
When you’ve got a pond holding between 1,000 and 5,000 gallons, you’re stepping into territory where aeration becomes really important for keeping your water healthy and your fish happy. I remember upgrading my own 2,500-gallon koi pond and noticing the difference immediately!
For ponds this size, you’ll want a more robust diffuser system than what smaller setups need. Look for linear or multiple disc diffusers that can cover more surface area. A good rule of thumb is about 2-3 CFM (cubic feet per minute) of airflow from your pump. Position your diffusers strategically across the pond bottom rather than clustering them in one spot. This creates better circulation patterns and helps eliminate those pesky dead zones where debris settles and oxygen gets depleted.
Many medium pond owners find that running their system 24/7 works best, especially during hot summer months when oxygen levels naturally drop. The investment pays off with clearer water, less algae, and more active fish. Plus, your beneficial bacteria will thrive, making your filtration system work more efficiently overall.
Large Ponds (Over 5,000 Gallons)
When you’re managing a larger pond over 5,000 gallons, a single diffuser just won’t cut it anymore. Think of it like trying to heat a large house with one small space heater – you need more power and better coverage! For these bigger water features, you’ll want to set up multiple diffusers strategically placed around your pond to ensure every corner gets proper oxygen circulation.
Commercial-grade air compressors become essential at this size. Look for units that can handle multiple diffuser connections without losing pressure. A good rule of thumb is to space diffusers about 15-20 feet apart for even coverage. I learned this the hard way when my neighbor tried using just two diffusers in his 8,000-gallon koi pond – the far end stayed stagnant until he added a third unit.
Consider systems with higher CFM ratings (cubic feet per minute) to push enough air through all those diffusers effectively. Many pond owners find weighted rubber membrane diffusers work wonderfully for larger setups because they create those beautiful, fine bubble columns that maximize oxygen transfer. Don’t forget you’ll need quality airline tubing rated for continuous outdoor use and possibly a manifold to split your air supply evenly between multiple diffusers.
Installing Your Diffuser System Without the Headaches
What You’ll Need Before You Start
Before diving into your pond aeration project, gather everything you’ll need for a smooth installation. First on your list is the diffuser unit itself, matched to your pond’s size. You’ll also need an air compressor or pump designed for outdoor pond use, along with weighted airline tubing to connect them. Don’t forget airline check valves to prevent water backflow, which I learned the hard way after my first setup attempt! Grab some basic tools like scissors or a utility knife for cutting tubing, and measuring tape to ensure proper placement. If your pond has a rocky bottom, consider getting a mounting base or weighted plate to keep your diffuser stable. Prepare a clean, dry outdoor location for your air pump, ideally protected from rain and direct sun. Finally, have your pond dimensions handy, including depth and approximate gallonage, since these measurements will guide your equipment choices. Taking ten minutes to organize everything beforehand will save you multiple trips back to the garage mid-project.
Connecting Everything Properly
Now comes the fun part – putting it all together! Don’t worry, connecting your aeration system is easier than assembling most backyard furniture, and I promise it makes a lot more sense.
Start by placing your air pump in a dry location near your pond, ideally elevated above water level. This prevents water from backing up into the pump if there’s a power outage. I learned this the hard way during my first installation – let’s just say my garage floor wasn’t happy with me!
Next, attach your airline tubing to the pump’s outlet. Make sure it fits snugly with no gaps. Run the tubing toward your pond, keeping it away from sharp edges or high-traffic areas where it might get damaged. If you’re burying it, use PVC pipe as a protective sleeve.
Here’s a crucial step many beginners miss: install a check valve in the airline about halfway between the pump and pond. This one-way valve stops water from flowing backward toward your pump. The arrow on the valve should point away from the pump toward the diffuser.
Finally, connect the other end of the tubing to your diffuser and submerge it in your desired location. Turn on the pump and watch for bubbles. If you don’t see any after a minute, check all connections for air leaks and ensure the tubing isn’t kinked.
Troubleshooting tip: hearing a humming pump but seeing weak bubbles? Your diffuser might be too deep for your pump’s capacity, or you may have a small leak somewhere in the line.
Common Mistakes to Avoid
Let me share some lessons I learned the hard way so you can skip the headaches! One of the biggest mistakes is kinked tubing. When running airline from your compressor to the diffuser, those tight bends can seriously restrict airflow. I once wondered why my diffuser barely bubbled until I noticed my tubing had a nasty kink behind a rock. Keep your lines as straight as possible and use gentle curves when routing around obstacles.
Another common error is skimping on weights. Your diffuser needs enough ballast to stay put on the pond bottom. I’ve seen diffusers float to the surface mid-summer because folks didn’t secure them properly. Use stainless steel weights or attach them to a heavy base plate. Trust me, you don’t want to be fishing out a floating diffuser!
Depth placement matters too. Installing diffusers too shallow means smaller bubbles that don’t circulate water effectively. Too deep in small ponds wastes energy. Aim for the deepest point, but remember that diffusers work best when bubbles have enough distance to rise and mix water thoroughly. For most backyard ponds, placing them at the deepest spot works perfectly.
Keeping Your Diffusers Working Year-Round
Regular Cleaning and When to Do It
Your diffusers work hard keeping your pond healthy, but they need a little TLC too. Here’s how to keep them running smoothly.
Watch for these telltale signs that cleaning time has arrived: reduced bubbles at the water’s surface, uneven bubble distribution, or your fish hanging near the surface gasping for air. If you notice algae building up faster than usual, that’s another hint your diffusers might be clogged.
Cleaning is wonderfully straightforward. Simply remove the diffuser from the pond and rinse it with a garden hose to blast away debris and algae buildup. For stubborn grime, soak it in a solution of white vinegar and water (about one part vinegar to three parts water) for 30 minutes, then scrub gently with a soft brush. Avoid harsh chemicals that could harm your pond’s ecosystem when you reinstall the diffuser.
How often should you clean? Plan on a quick inspection every month during peak season, with a thorough cleaning every three to six months. If your pond has heavy fish populations or lots of plants, you might need more frequent attention. I’ve found that marking cleaning days on my calendar keeps me consistent, and my pond rewards me with crystal-clear water and happy, active fish.
Winter Aeration Considerations
Running your diffuser through winter is actually one of the smartest moves you can make! Here’s why: even when temperatures drop, your fish still need oxygen, sometimes even more so because cold water holds gases differently. Keeping your diffuser going gently circulates warmer water from the pond bottom, preventing ice from completely sealing the surface and creating dangerous gas buildup underneath.
That said, there’s a technique to it. Position your diffuser a bit deeper than usual, around 18-24 inches below the surface, so it doesn’t create too much turbulence that would actually cool the pond further. You want gentle circulation, not a winter whirlpool! This helps maintain a small opening in the ice for gas exchange while protecting your fish in the warmer layers below.
Proper winter pond care means understanding that aeration works differently than a de-icer. While de-icers just melt holes, diffusers actively support your pond’s ecosystem all season long, keeping beneficial bacteria working and preventing toxic gas accumulation that can harm fish under ice.
The Real Benefits You’ll Notice
Happier, Healthier Fish
You’ll notice the difference in your fish almost immediately once your aeration diffuser starts working its magic. When oxygen levels are just right, fish become more active and energetic, swimming around with purpose rather than hanging listlessly near the surface gulping for air. Their colors often appear more vibrant too, which is a wonderful sign of good health.
I remember watching my friend’s goldfish transform within days of installing her diffuser system. Those fish went from sluggish and stressed to playful and curious, exploring every corner of the pond like they’d rediscovered their home. Healthy, well-oxygenated fish also have stronger immune systems, making them less susceptible to diseases and parasites that thrive in poorly oxygenated water.
You’ll also see better feeding behavior. Fish with adequate oxygen are eager eaters with healthy appetites, whereas oxygen-stressed fish often ignore food altogether. This improved vitality ties directly into maintaining healthy pond chemistry, creating a balanced environment where your fish can truly thrive rather than just survive.
Clearer Water and Less Algae
Here’s the thing about algae – it absolutely thrives in still, stagnant water with poor oxygen levels. When you introduce a pond aeration diffuser, you’re changing the game completely. The bubbles rising from your diffuser create constant water movement, breaking up those warm surface layers where algae loves to party. This circulation also delivers oxygen throughout your pond, which encourages beneficial bacteria to flourish. These helpful microorganisms are nature’s cleanup crew, competing with algae for nutrients and winning the battle. I’ve seen ponds transform from murky green soup to crystal-clear water within weeks of installing a diffuser system. The continuous movement prevents debris from settling and decomposing on the bottom, which otherwise releases nutrients that fuel algae growth. By reducing algae blooms, you’ll enjoy watching your fish glide through sparkling water instead of disappearing into green haze. It’s honestly one of the most satisfying improvements you can make to your pond.
Fewer Foul Odors
Stagnant water produces that unpleasant rotten egg smell because without oxygen, beneficial bacteria can’t break down organic matter properly. Instead, anaerobic bacteria take over, creating hydrogen sulfide and other smelly gases as they decompose leaves, fish waste, and plant debris. When you add a diffuser to your pond, it circulates oxygen throughout the water column, allowing the good bacteria to thrive and naturally eliminate waste without producing foul odors. You’ll notice the difference within days as fresh, oxygen-rich water replaces stagnant zones where smell-causing bacteria once flourished.
Adding a pond aeration diffuser system to your pond is honestly one of the smartest investments you can make for long-term water quality and the health of everything living in it. I know the idea of installing equipment might feel a bit intimidating at first, but trust me, once you work through it step-by-step, you’ll realize it’s totally manageable, even if you’ve never tackled a project like this before.
The payoff is absolutely worth it. Within just a few weeks, you’ll notice clearer water, healthier fish with more energy, and that persistent algae problem finally under control. Your pond will look better, smell fresher, and require less constant maintenance from you. That’s a win all around.
Remember, every pond has its own personality and needs. Take some time to really assess your specific situation—your pond size, depth, what you’re dealing with in terms of challenges, and what you hope to achieve. Start there, choose the right diffuser setup for your circumstances, and you’ll be enjoying a healthier, more beautiful pond before you know it. Your fish will thank you, and you’ll actually get to relax and enjoy your water feature instead of constantly worrying about it.