
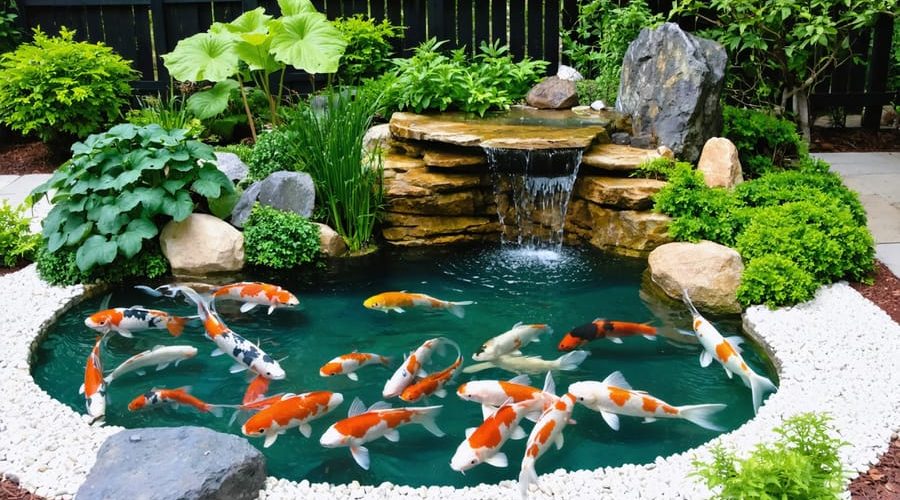
Transform Your Backyard Into a Peaceful Koi Paradise (Without Breaking the Bank)
A DIY koi pond turns a bare corner of the yard into a quiet focal point, and the fish themselves, Japanese carp with serious personality, do a lot of the heavy lifting. Building your own koi fish pond can also cut the labor portion of professional installation, which is often the biggest line item on a quote.
This guide walks through the whole project, from picking a spot to choosing filtration, so the pond you dig in 2026 is one your fish can actually thrive in. You’ll find design ideas, the equipment that matters, and the construction methods that hold up season after season.
We’ll also flag the mistakes beginners make most often, and show how natural stone waterfalls, aquatic plants and careful lighting can give the pond real character. Plan it properly and you’ll end up with a koi habitat that’s manageable to maintain and calm to sit beside.
First up are the foundations: site selection and design planning. Get those right and everything after becomes easier.
Planning Your DIY Koi Pond Project
Location and Size Requirements
When planning your koi fish pond, location and size are crucial factors that will determine your project’s success. Proper planning for a koi fish pond ensures healthy fish and easier maintenance down the line. Choose a relatively flat area that receives partial sunlight and shade throughout the day to maintain optimal water temperatures.
Key location considerations include:
- Sunlight exposure of 4-6 hours daily for balanced algae control and plant growth
- Distance from trees of at least 10 feet to avoid root damage and leaf debris
- Easy accessibility for routine maintenance and water testing
- Proximity to electrical outlets for pump and filtration equipment
For a thriving koi environment, aim for a minimum depth of 4 feet, which allows fish to hibernate comfortably during winter and escape predators. When considering optimal pond shapes remember that koi need plenty of swimming space to grow healthy and strong. A good rule of thumb is to provide at least 250 gallons of water per adult koi.
For beginners, start with a pond size of about 8×10 feet, which comfortably houses 4-5 koi. If space permits, going bigger is always better. Consider 10×15 feet or larger. Remember to account for filtration equipment, plants, and decorative elements in your space planning.
The pond should also be visible from your home to enjoy your aquatic pets year-round and monitor their well-being easily. Consider proximity to viewing areas like patios or decks where you’ll spend time watching your koi.
Diagram showing ideal koi pond dimensions and depth zones
Budget-Friendly Materials List
Here’s a cost-effective list of materials for your diy pond project. Smart shopping and a few creative substitutions can trim your overall spend quite a bit, and that matters even more if you’re planning a koi pond, where the liner, pump and filtration all carry more weight.
Start with the liner. Heavy-duty EPDM pond liner is the go-to choice for most backyard builds. It’s fish-safe, UV-stable, and comes with a 25-year guarantee. You can buy it cut to size or by the roll, so you only pay for what your pond actually needs. As a current reference point, the Rollgum Smooth EPDM Pond Liner in 3m width and 1mm thickness is priced from $89.97 to $2,609.13 including GST, depending on the length you order. Older rule-of-thumb figures of $1.50 to $2.50 per square foot are a rough guide only. Treat your supplier’s quote for your exact dimensions as the real number. Recycled billboard vinyl can work as a budget alternative for non-fish water features, but for a koi pond, stick with a fish-safe EPDM liner.
Essential materials:
- Pond liner (EPDM rubber): cut to size or by the roll, priced by supplier and length
- Underlayment fabric: $0.75-1.25 per square foot
- PVC pipes (various sizes): $6-18 per 10-foot length
- Pond pump: $60-180 (look for energy-efficient models to save long-term)
- Filter system: $120-250 (DIY options available using plastic bins)
- Rocks and gravel: $4-7 per bag (check local landscaping suppliers)
If you’d rather buy a bundled setup, complete kits exist. The Crystal Clear DIY Pond Kit 10,000L costs $2,199.00 including GST, and the 20,000L version costs $3,359.00 including GST. That’s a bigger upfront outlay than piecing materials together, but it takes the guesswork out of matching parts. On the filtration side, the Maple Aqua Pond Filter Box system is in stock. If you’re weighing up filter options, our guide to filters for your small water garden covers the basics.
Money-saving alternatives:
- Use recycled concrete blocks instead of expensive stone walls
- Repurpose old bathtubs or stock tanks for small ponds
- Create natural filtration with aquatic plants ($7-20 each)
- Use local river rocks instead of store-bought decorative stones
- Build DIY skimmers using plastic storage containers
Additional budget-friendly items:
- Garden hose and fittings: $25-40
- Rubber boots: $20-35
- Basic tools (already owned by most): shovel, level, utility knife
- Aquatic plant baskets: $3-7 each
- Water testing kit: $25-40
Pro tip: Check online marketplaces and local buy/sell groups for used pond equipment. Plenty of diy pond builders upgrade their systems and sell perfectly good pumps and filters for less than retail. Inspect anything secondhand before you hand over cash, and run a pump in a bucket first. Skip used liners, since a hidden pinhole will cost you far more than you saved.
Step-by-Step Construction Process
Excavation and Base Preparation
Good koi ponds start in the dirt, long before any water goes in. Mark your pond shape with spray paint or rope, and make the outline about 15-20% larger than your planned finished size. That extra room covers the edges, shelves and the slight shrinkage you’ll get once the liner and underlayment go in.
For koi, aim for at least 4 feet at the deepest point. Depth keeps water temperatures steadier through summer heat and winter chill, and it gives your fish room to move. Build in shelves as you dig: about 12 inches deep for marginal plants, around 2 feet for water lilies, and the full depth in the centre for the koi themselves.
Digging is the dull part, but be fussy about it. Pull out every rock, root and sharp object, because one pointed stone can eventually work through a liner. Level the bottom with a spirit level, then spread a 2-inch layer of sand. It gives you a smooth bed and a bit of cushioning under the liner.
Slope the floor gently from the edges toward the centre, roughly 1 inch per foot, so debris and water drain toward the deepest spot during maintenance. Clay soil needs extra care. Add more sand or a layer of underlayment so hard clay lumps can’t press into the liner.
Your liner choice shapes how much prep you need, so decide before you finish digging. Heavy-duty EPDM liners are fish-safe and UV-stable, and they come with a 25-year guarantee. They’re sold cut to size or by the roll, which makes them handy for custom shapes. If you’d rather skip the guesswork, kits are another route. The Crystal Clear DIY Pond Kit is listed at $2,199.00 including GST for the 10,000L size and $3,359.00 including GST for the 20,000L size. The Rollgum Smooth EPDM Pond Liner in 3m width and 1mm thickness is priced from $89.97 to $2,609.13 including GST, depending on the size you choose. Whichever you pick, measure your excavation first and allow extra material for overlap at the edges.
If you plan to filter with a box-style system, think about its position now rather than after the hole is dug. The Maple Aqua Pond Filter Box system is in stock, and our guide to filters for your small water garden will help you work out where one should sit. For layout ideas, these koi pond shapes are worth a look before you commit to an outline.
Pro tip: Call your local utilities provider to have underground lines marked before a spade goes in the ground. Check local building codes too, since depth requirements and permits vary. Rushing this stage is how people end up with expensive repairs later.
Last thing: stockpile your good topsoil for landscaping around the pond, and sort out where the excavated earth is going. A deep koi pond produces a surprising amount of spoil. If you want ideas for what to do around the finished edge, our guide to simple pond landscaping is a good next step.
Liner Installation and Edge Design
Installing your pond liner takes careful attention to detail, but it’s very manageable. Start by removing any sharp rocks or roots from the excavated area, then lay down a thick underlayment material to protect your liner from punctures. This protective layer is your pond’s first defense against leaks, so don’t skip it.
Material choice matters just as much as prep. For a koi fish pond especially, go with a heavy-duty EPDM liner. It’s fish-safe, UV-stable and comes with a 25-year guarantee, so you won’t be worrying about it leaching into the water or breaking down in the sun. It’s also cut to size or sold by the roll, which makes it easy to match to your DIY pond.
When placing the liner, leave 12 to 18 inches of excess material around all edges. That gives you wiggle room for adjustments and ensures proper coverage without leaving a pile of spare liner to hide. On a warm, sunny day, let the liner sit in the sun for about an hour before final positioning. This makes it more flexible and easier to work with.
Now for the fun part, creating beautiful edges. One popular approach is the rock overlap method. Layer flat stones over the liner’s edge, creating a natural-looking border that securely holds the liner in place. For a more polished look, consider installing pond edging strips, which provide a clean finish while safely securing the liner.
Want something unique? Try creating a beach entry area where the edge gradually slopes into the water. This looks fantastic and also provides easy access for maintenance. Another creative option is wooden decking that partially extends over the pond’s edge, hiding the liner while creating an attractive seating area.
Remember to maintain a slight slope towards the pond on your edges so rainwater flows into your pond rather than behind the liner. This small detail makes a big difference in preventing future problems with liner displacement or soil erosion.
Step-by-step photo of liner installation process
- Lay underlayment material over the sand base, smoothing out all wrinkles and ensuring complete coverage of the pond bottom and walls.
- Unfold the liner and center it over the pond excavation, allowing 12-18 inches of excess material around all edges for adjustments.
- Slowly fill the pond with water, pausing periodically to adjust and smooth the liner as it settles into place under the weight of the water.
- Trim excess liner once the pond is full, leaving 6-8 inches beyond the edge for secure finishing.
- Secure the edges using your chosen finishing method, ensuring the liner remains firmly in place.
Filtration System Setup
A well-designed filtration system is what keeps a koi fish pond healthy, and building one yourself can be cost-effective and genuinely satisfying. Here’s how to put together efficient filtration systems that keep the water clear season after season.
Start with a three-stage setup: mechanical, biological, and plant filtration. For the mechanical stage, build a basic filter box from a large plastic container with layered media. Put coarse material like filter mats or plastic pot scrubbers at the top, finer filter wool in the middle, and bio-balls at the bottom for bacterial growth. If you’d rather not build from scratch, a ready-made option such as the Maple Aqua Pond Filter Box system is in stock.
For the biological stage, a 55-gallon drum or a large plastic container works well. Fill it with lava rock or ceramic rings, which give beneficial bacteria plenty of surface area to colonise. Fit the inlet and outlet pipes with PVC connectors and seal them properly. A slow leak here will frustrate you for weeks.
For a natural approach, build a gravel bed filter: a shallow zone filled with gravel in graded sizes. It doubles as a planted feature while filtering the water. Put cattails and iris in this zone, since their roots pull excess nutrients out of the water.
Don’t skimp on the pump. Choose one that can cycle your entire pond volume at least once every two hours, set it at the pond’s deepest point, and connect it to the filter with flexible tubing. Return the water through a small waterfall or stream so it’s aerated on the way back in.
Plan for maintenance from day one. Build the filter housing slightly above ground level and give it removable lids, which makes weekly cleaning far easier. A bottom drain with a ball valve is worth adding for quick filter cleanouts. Keep the system easy to reach, but tuck it behind plants or rocks so it doesn’t dominate the view.
If you’re building a new pond around all this, the liner matters as much as the filter. Heavy-duty EPDM liners are fish-safe, UV-stable, and come with a 25-year guarantee, and they’re cut to size or sold by the roll. Complete kits are another route: the Crystal Clear DIY Pond Kit costs $2,199.00 including GST in the 10,000L size and $3,359.00 including GST in the 20,000L size.
Creative Landscaping Elements
Natural Rock Arrangements
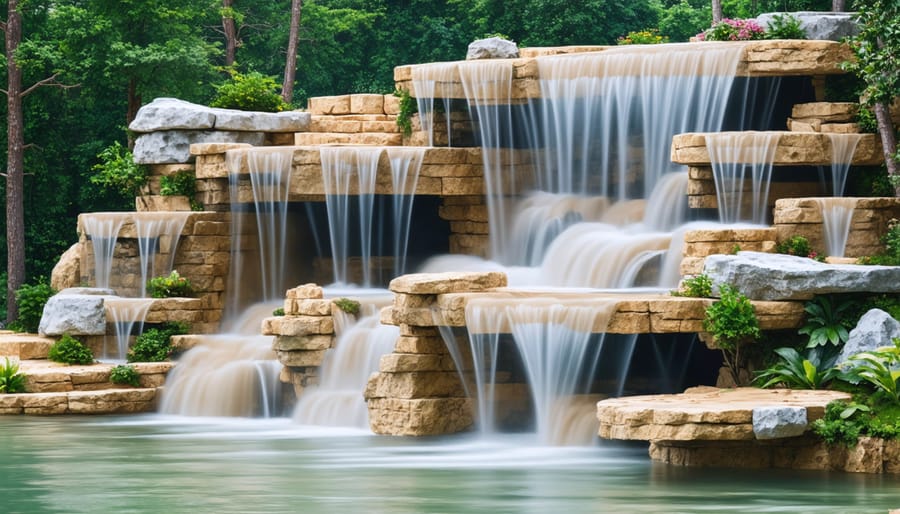
Creating stunning waterfalls and rock formations doesn’t have to break the bank. By following some basic natural landscaping techniques, you can build beautiful rock arrangements that look professionally designed.
Start by collecting local rocks of varying sizes – this can save you hundreds compared to buying landscaping stones. Look for rocks with interesting shapes and textures, focusing on pieces that naturally complement each other. Remember to clean them thoroughly before use.
For a basic waterfall, arrange larger rocks at the base to create a solid foundation. Stack medium-sized rocks to build height, ensuring each layer slopes slightly inward for stability. Use smaller rocks to fill gaps and create natural-looking transitions. Waterfall foam helps secure rocks while directing water flow exactly where you want it.
Create visual interest by positioning some rocks to jut out at different angles. This mimics natural formations and provides lovely spots for water to cascade. Add flat stones along the edges to hide liner and create shallow areas where koi can rest.
For budget-friendly accents, consider incorporating found materials like driftwood or locally sourced river rock. These elements add character while keeping costs down. Position taller rocks towards the back of your arrangement, with shorter ones in front for a natural-looking perspective.
Remember to leave some spaces between rocks for marginal plants – they’ll help soften edges and create a more established look over time. Regular maintenance is key; check periodically for stability and adjust rocks as needed to maintain water flow and aesthetics.
Plant Selection and Placement
Choosing the right plants for your koi pond does more than make it look good. It keeps the water healthier for your fish too. Start with underwater plants like hornwort and anacharis, which oxygenate the water and provide natural filtration. Aim for them to cover roughly half to 60% of the pond’s bottom area, though keep an eye on koi, because they’ll nibble tender growth and can uproot anything not anchored well.
For the edges, marginal plants like Japanese iris, cattails, and marsh marigolds create a natural transition between water and land. Plant these in shallow areas or on shelves built into the pond’s design. They help stabilize the soil around the banks and give your koi some cover.
Floating plants like water lilies and lotus matter more than people expect. The shade they cast helps regulate water temperature and gives your fish somewhere to retreat from predators overhead. Cover about 30-40% of the surface. Match the variety to the pond: dwarf types suit smaller ponds, full-size specimens suit larger ones.
When you arrange everything, think in layers. Underwater plants go in at the bottom, marginal plants sit at varied heights along the edges, and floating plants finish off the surface. Group similar plants together for visual impact, but leave open swimming channels so your koi aren’t boxed in. If you’re still working out the footprint, the ideas in beautiful koi pond shapes can help you plan shelves and planting zones before you dig.
Avoid plants with invasive root systems that could damage your liner. A heavy-duty EPDM liner is fish-safe and UV-stable, and it comes with a 25-year guarantee, but it’s still worth protecting from aggressive roots. Steer clear of toxic varieties such as elephant ears or water hemlock as well. Keep plants in removable containers or planting baskets. Maintenance gets easier, and nothing can take over the pond.
| Plant Name | Zone & Depth | Coverage % | Primary Benefit |
|---|---|---|---|
| Hornwort | Submerged, any depth | 30-40% | Oxygenation |
| Anacharis | Submerged, any depth | 20-30% | Filtration |
| Japanese Iris | Marginal, 0-6 inches | 10-15% | Aesthetics |
| Cattails | Marginal, 0-12 inches | 10-20% | Filtration |
| Water Lilies | Floating, 12-24 inches | 20-30% | Shade |
| Lotus | Floating, 6-18 inches | 10-15% | Shade |
Lighting and Decorative Features
A koi pond looks completely different after dark, and a few well-placed lights are usually all it takes to get there. Start with eco-friendly pond lighting options like solar-powered LED spotlights, which are easy to install and won’t disturb your fish. Aim them at a waterfall, a feature rock or a clump of marginal plants rather than straight across the surface.
Solar or low-voltage LED?
Solar lights are the simplest choice. There’s no cable to run, nothing to bury and no power point to worry about near water. The trade-off is consistency. They dim on overcast days and in shaded corners, so they suit accent spots better than a pond you want lit every evening.
Low-voltage LED systems give steadier, brighter output. They run from a transformer kept well away from the water, with the cable running to submersible or edge-mounted fittings. If you want reliable underwater lighting for a koi pond, this is the better route. Warm white tones look natural and are gentler on fish than harsh cool white or fast-changing colours.
Placement: avoid glare and algae
Less light is almost always better. Point fittings at features, not at your viewing position, so you see the glow and not the bulb. Underwater lights work best angled upward at a low intensity, with the fixture tucked behind a rock or plant so it doesn’t dazzle you.
Keep run times sensible too. Lights left on all night add to the hours of illumination your water already gets from the sun, and extra light feeds algae, especially in a pond that’s already carrying plenty of nutrients. A simple timer that switches everything off late in the evening keeps the water clearer and gives your koi a proper dark period to rest.
Wiring near water
This is the part not to improvise. Use only outdoor-rated, waterproof fittings and cable designed for the job, and keep all connections and transformers well clear of the pond edge, raised off the ground and under cover. Low-voltage systems are the safer DIY option, but anything on mains power should be installed or checked by a licensed electrician and protected by a safety switch. Leave a little slack in cables so they aren’t pulled tight when you clean or adjust fittings.
Decorative touches that suit a koi pond
Weatherproof fairy lights strung through nearby plants or along the pond’s edge add a soft glow without touching the water. Solar floating lily lights are a fun, low-effort extra, though lift them out if they start to crowd the surface or get tangled in plants. Mason jar lanterns with battery-operated candles are a cozy option for evening gatherings, kept on the paving rather than the water’s edge.
Handmade stepping stones around the pond can be finished with glow-in-the-dark paint for subtle path markers. Keep paints and sealants well away from the water, and let everything cure fully before it goes near the pond. A repurposed ceramic pot as a water spout or a simple bamboo fountain adds movement and sound, and extra aeration is never a bad thing for koi.
Keeping ornaments fish-safe
Anything that goes in the water needs to be inert. Stick to natural rock, well-seasoned driftwood and ceramics that are fully glazed or sealed with a fish-safe product. Avoid painted metal, anything that rusts or flakes, and treated timber in direct contact with the pond. If you build a small wooden bridge or viewing platform, keep it above the waterline and make sure no preservatives can leach in. Smooth any sharp edges too, since koi can scrape themselves on rough ornaments.
Carefully positioned rocks, driftwood and aquatic plants soften the lighting and make the whole setup feel like part of the garden. Use outdoor-rated materials throughout so it all lasts.
Completed koi pond with integrated lighting and plants
Maintenance Made Simple
Maintaining your DIY koi pond doesn’t have to be complicated. Following these essential maintenance guidelines will help keep your pond healthy and your fish happy. Start by checking your water quality weekly using testing strips to monitor pH, ammonia, and nitrate levels. Regular water changes are crucial. Aim to replace about 10-15% of the pond water every two weeks.
Keep your filtration system clean by rinsing filter media monthly and replacing it as needed. Remove debris like fallen leaves with a net daily to prevent excess organic matter from decomposing in the water. In autumn, consider installing a pond net to catch falling leaves before they sink.
Prune aquatic plants regularly and remove dead foliage to maintain water quality. Check your pump and UV clarifier monthly for proper operation, and clean them according to manufacturer instructions. During winter, use a de-icer to maintain a small opening in the ice for gas exchange.
Monitor your koi’s behavior daily, because they’re excellent indicators of pond health. Look for signs of stress or unusual swimming patterns that might signal water quality issues. Keep feeding areas clean and remove uneaten food after 5 minutes to prevent water contamination.
Seasonal maintenance is vital too. Spring calls for a thorough cleanup, summer requires attention to water levels due to evaporation, autumn means preparing for winter, and winter demands careful monitoring of ice formation. By staying on top of these simple tasks, your DIY koi pond will remain a beautiful and thriving ecosystem for years to come.
Quick-Reference Maintenance Schedule
| Frequency | Task |
|---|---|
| Daily | Net out debris, watch koi behavior, remove uneaten food after 5 minutes |
| Weekly | Test pH, ammonia, and nitrate levels with testing strips |
| Every two weeks | Replace about 10-15% of the pond water |
| Monthly | Rinse filter media, check and clean the pump and UV clarifier |
| Seasonally | Spring cleanup, summer water-level checks, autumn leaf netting, winter de-icer |
Creating your own koi pond is an exciting and rewarding project that can transform your outdoor space into a peaceful oasis. We’ve covered the essentials, from planning steps to creative design elements that make your pond unique. Successful pond building comes down to careful preparation, sound materials, and attention to detail. A heavy-duty EPDM liner, for example, is fish-safe, UV-stable, and backed by a 25-year guarantee, which is exactly the kind of long-term thinking a lasting koi fish pond needs.
Whether you build a simple above-ground design or an elaborate in-ground pond, the fundamentals stay the same: proper filtration, adequate depth, and sensible landscaping. Don’t be afraid to start small and expand your DIY pond as you gain confidence. Koi ponds reward consistency more than perfection, and the most important job is protecting water quality so your fish stay healthy.
Take time to research local regulations, gather quality materials, and plan your design thoroughly before breaking ground. With patience and steady upkeep through 2026 and beyond, your koi pond can become the centerpiece of your garden.
Ready to begin? Start with a simple sketch, gather your supplies, and take that first step toward your own backyard paradise. Happy pond building!