
Why Your Koi Pond Material Choices Matter More Than You Think
Choose your liner material based on your pond’s shape and your skill level—EPDM rubber offers flexibility for irregular designs and forgives installation mistakes, while RPE provides superior puncture resistance for formal rectangular builds but demands precise measuring. Match your underlayment weight to your soil conditions: lightweight geotextile fabrics work fine for soft, rock-free ground, but invest in heavy-duty underlayment or sand bases if you’re dealing with clay, roots, or rocky terrain that could puncture through over time.
Prioritize materials rated specifically for continuous water contact and fish safety when planning your koi pond, since standard construction materials often leach chemicals that harm koi gill function and water quality. Test any concrete, sealants, or adhesives for pH neutrality before they touch your water—even “waterproof” products can spike alkalinity and create toxic conditions for months.
Select plumbing components one size larger than minimum specifications to reduce pump strain and improve filtration efficiency, remembering that koi produce substantially more waste than goldfish or other pond fish. Budget for commercial-grade bottom drains and proper pipe slopes during initial construction rather than retrofitting later, which typically costs three times more and requires draining your established pond.
Compare total lifespan costs rather than upfront prices alone—a quality EPDM liner lasting 30 years with proper installation outperforms cheaper PVC alternatives that crack within 5-7 years under UV exposure. The materials you choose today determine whether you’ll enjoy decades of trouble-free koi keeping or face expensive repairs that disrupt your fish and landscape.
Understanding Your Material Options: The Core Components
Pond Liners: Your Water’s First Line of Defense
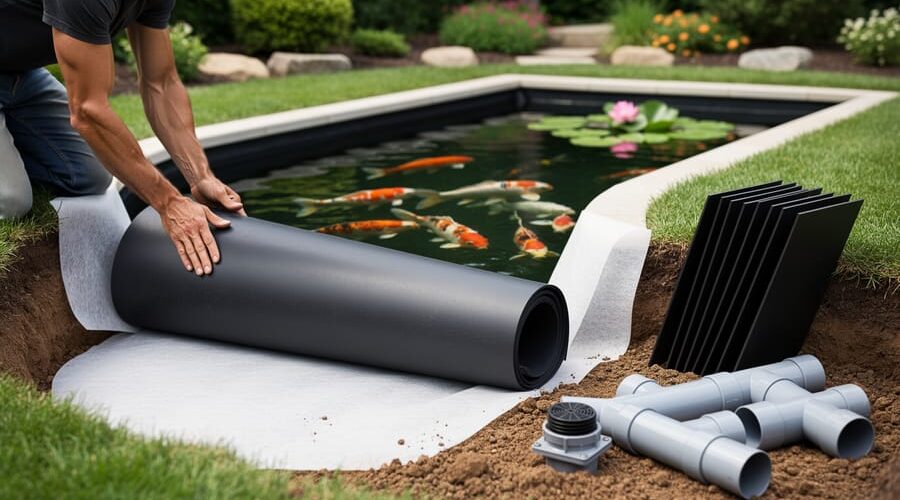
Think of your pond liner as the unsung hero of your koi pond—it’s literally what stands between a beautiful water feature and a muddy disaster in your backyard! I learned this the hard way when a friend’s pond developed a slow leak, and we spent weeks troubleshooting before discovering a tiny puncture in their liner. Trust me, choosing the right liner from the start saves you countless headaches down the road.
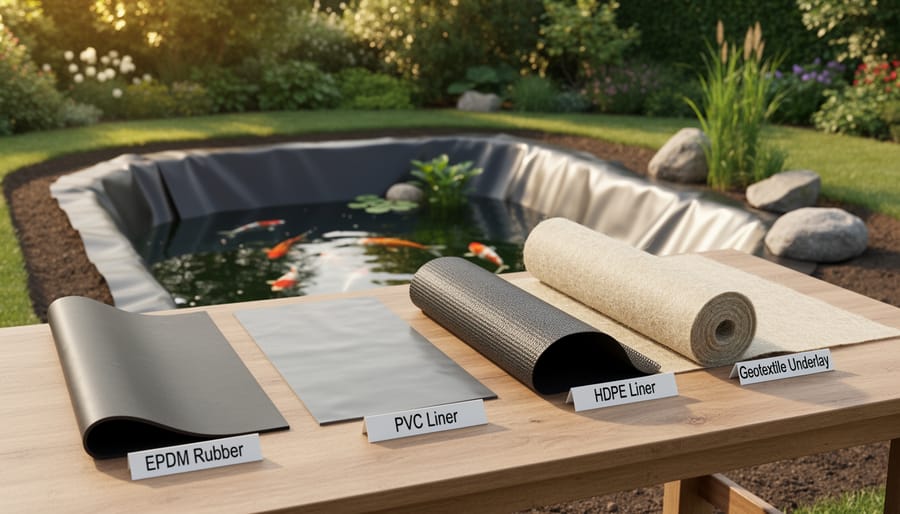
There are three main types you’ll encounter: EPDM rubber liners, PVC liners, and RPE (reinforced polyethylene) liners. EPDM is incredibly flexible and forgiving, making it perfect if you’re working with irregular shapes or rocky terrain. It’s what I used for my first pond, and I appreciated how it conformed to every contour without complaint. PVC liners are lighter and easier to seam together for larger ponds, though they can be less resistant to UV damage over time. RPE liners are the newcomers, offering excellent puncture resistance—ideal if you have aggressive diggers in your garden or tree roots nearby.
Beyond preventing leaks, your liner choice actually affects water chemistry. Some materials can leach chemicals or degrade, potentially harming your koi. Always look for fish-safe certifications and avoid bargain-bin options that don’t specify their composition.
Filtration Materials That Actually Work
Getting your filtration right makes all the difference between crystal-clear water and a murky mess. Let’s talk about the materials that’ll keep your koi happy and healthy.
For mechanical filtration, you’ll want a progression of filter pads or brushes. I always start with coarse Japanese filter mats—they’re workhorses that catch the big debris without clogging too quickly. Follow these with medium and fine pads to polish the water. Foam blocks work brilliantly too, especially the reticulated kind with different pore sizes. They’re easy to clean and last for years if you treat them well.
Biological filtration is where the magic happens. Plastic bio-media like K1 or similar moving bed carriers provide massive surface area for beneficial bacteria. They’re my go-to because they self-clean as they tumble. Static media options include ceramic rings, lava rock, or specialized sintered glass media. These work wonderfully in traditional filter chambers. If you’re new to filtration system basics, start simple—you can always upgrade later.
Whatever you choose, avoid anything that might leach chemicals or break down quickly. Quality filtration media is an investment that pays off in healthier koi and less maintenance headaches.
Structural and Edging Materials
The bones of your pond matter just as much as what you put inside it. When I built my first koi pond, I focused so much on the liner that I almost overlooked the structural elements that would give it character and longevity.
Your pond’s walls and edges serve double duty: they keep everything contained while creating that finished, polished look. Concrete blocks are workable favorites for building retaining walls, especially if you’re dealing with sloped terrain or want raised sections. They’re sturdy and relatively inexpensive, though you’ll want to seal them properly since concrete can leach lime into the water, affecting your pH levels.
Natural stone creates those gorgeous, timeless edges we all admire in magazine-worthy ponds. Flagstone, slate, and fieldstone blend beautifully with garden landscapes. The trick is making sure they’re stable and won’t shift over time. I learned this the hard way when my carefully arranged river rocks started sliding into the pond during heavy rains.
Treated lumber works well for creating timber edging or raised pond borders, but here’s the important part: make sure it’s fish-safe treatment. Modern copper-based treatments are generally okay, but avoid anything with arsenic or creosote. When in doubt, add a protective barrier between the wood and water.
For a cleaner, more contemporary look, poured concrete edges give you complete control over shape and finish. Yes, it’s more labor-intensive, but the durability payoff is substantial. Whatever material you choose, remember that edges get wet, freeze, and bear weight, so prioritize stability over pure aesthetics.
Diving Deep: Liner Materials for Long-Term Success
EPDM Rubber: The Reliable Workhorse
If you’ve done any research on koi pond liners, you’ve probably stumbled across EPDM rubber—and for good reason! This material has earned its reputation as the dependable choice that just keeps working year after year.
EPDM (ethylene propylene diene monomer, but who’s counting?) is a synthetic rubber that’s incredibly flexible and forgiving. I remember installing my first EPDM liner on a slightly irregular pond bottom, and it conformed beautifully to every curve and contour without complaint. That flexibility is a huge advantage when you’re working with creative pond shapes or dealing with less-than-perfect excavation.
One of EPDM’s standout features is its excellent UV resistance. Unlike some materials that break down under constant sun exposure, quality EPDM can handle decades of sunlight without becoming brittle or cracking. Most manufacturers back this up with warranties ranging from 20 to 30 years, though many pond keepers report their liners lasting even longer.
The material is completely fish-safe once installed and rinsed, making it perfect for koi ponds of any size. It works especially well for medium to large informal ponds where you want that natural, flowing look.
On the downside, EPDM can be vulnerable to punctures from sharp rocks or roots, so proper underlayment is essential. Seaming multiple pieces together for larger ponds also requires careful attention and the right adhesives. Budget-wise, it sits comfortably in the mid-range—more expensive than basic PVC but significantly less than premium options like RPE, making it an excellent value for most pond projects.
RPE and RPP Liners: When Durability is Everything
If you’re committed to keeping koi for the long haul and want a liner that matches that dedication, reinforced polyethylene (RPE) and reinforced polypropylene (RPP) liners are worth every penny. Think of these as the high-performance athletes of pond liners.
What makes these materials special? They’re built with multiple layers, typically including woven fabric sandwiched between sheets of polyethylene or polypropylene. This construction gives them exceptional tear resistance and puncture protection that standard liners just can’t match. I’ve seen RPE liners handle tree roots, settling soil, and even the occasional visit from determined wildlife without breaking a sweat.
RPE liners typically come in 30-40 mil thickness but feel substantially stronger than EPDM or PVC of similar measurements because of that internal reinforcement. They’re incredibly flexible in cold weather, making installation easier year-round, and they maintain their flexibility over decades. The seams can be heat-welded together, creating bonds that are actually stronger than the liner itself.
The trade-off? These premium liners cost roughly double what you’d pay for quality EPDM. But here’s my perspective after years of pond keeping: if you’re investing in expensive koi and planning a pond that’ll last 40-plus years, that upfront cost difference becomes negligible. You’re paying for peace of mind and eliminating the risk of catastrophic failures that could endanger your fish collection. For serious koi enthusiasts building their dream pond, RPE and RPP liners represent the gold standard in durability.
Concrete and Fiberglass: The Permanent Solutions
When you’re ready to build a pond that’ll last decades, concrete and fiberglass are your go-to champions. I remember chatting with a fellow pond enthusiast who’d tried three different liner ponds before finally going concrete. “I should’ve just done this first,” he told me, watching his koi glide through crystal-clear water five years later without a single repair.
Concrete ponds offer incredible flexibility in design and shape. You can create shelves, curves, and custom depths that perfectly suit your koi’s needs. The material itself is extremely durable, easily handling root intrusion and ground movement that would puncture liners. While the initial investment runs higher—typically $50-100 per square foot for professional installation—you’re looking at a 30-50 year lifespan with minimal maintenance. Just remember, concrete requires proper sealing since raw concrete can affect water pH levels.
Fiberglass ponds come pre-formed, making DIY pond construction surprisingly manageable. They’re lighter than concrete, resist algae growth beautifully, and won’t crack in freezing temperatures. The catch? You’re limited to available sizes and shapes, though many manufacturers offer custom options.
The cost-benefit sweet spot? If you’re planning a pond over 1,000 gallons that you want for the long haul, these permanent solutions save money over time. No more liner replacements every 10-15 years, no puncture worries, and significantly easier cleaning. Your koi deserve a forever home, and these materials deliver exactly that.
What to Avoid (And Why)
Here’s where I need to share a cautionary tale from my own early pond-building days. I once thought a basic polyethylene tarp would work just fine for my first koi pond. Big mistake! It deteriorated within a year, leaving my beloved fish in jeopardy.
Avoid regular plastic tarps at all costs. They’re not UV-stabilized and break down quickly under sunlight, creating toxic conditions for your koi. Similarly, generic PVC pond liners marketed for general water features often contain plasticizers that can leach into the water over time, harming your fish’s health.
Concrete blocks without proper sealing are another trap. While they seem sturdy, unsealed concrete leeches lime and raises pH to dangerous levels. Your koi won’t thrive in these conditions, and you’ll fight constant water chemistry battles.
Skip cheap preformed plastic ponds too. They’re typically too shallow for koi, crack easily in freezing temperatures, and their limited sizes restrict your koi’s growth. Remember, these fish need depth and space to truly flourish.
Filtration Media: Building a Biological Powerhouse
Mechanical Filter Materials
When it comes to mechanical filtration in your koi pond, choosing the right materials can make the difference between crystal-clear water and constant maintenance headaches. Let me walk you through the most popular options based on my years of trial and error.
Filter brushes are my personal favorite for beginners. These look like giant bottle brushes and create an amazing surface area for trapping debris. Water flows through the bristles, catching leaves, fish waste, and other particles while allowing beneficial bacteria to colonize. They’re incredibly easy to remove and rinse, which you’ll appreciate during weekly cleanings. The downside? They can be pricey upfront, though they last for years.
Filter foam comes in different densities, from coarse to fine. I always recommend using multiple layers, starting with coarse foam to catch larger particles before water reaches the finer layers. This setup prevents clogging and extends the life of each foam pad. Foam is budget-friendly and widely available, but it does compress over time and needs replacing every few seasons.
Japanese matting offers excellent mechanical and biological filtration combined. These rigid mats stack easily in filter chambers and resist clogging better than foam. They’re particularly good if you have heavy fish loads since they handle higher volumes of waste without losing effectiveness.
Bio balls and structured media work well in moving bed filters, constantly tumbling to prevent clogging. While primarily biological filters, they do capture some solid waste particles as water passes through.
Biological Media: Where the Magic Happens
Think of biological media as tiny apartment buildings for beneficial bacteria – the hardworking microorganisms that keep your koi healthy by converting harmful ammonia into safer compounds. The more surface area your media offers, the more bacteria can move in and do their job. Let’s compare your options.
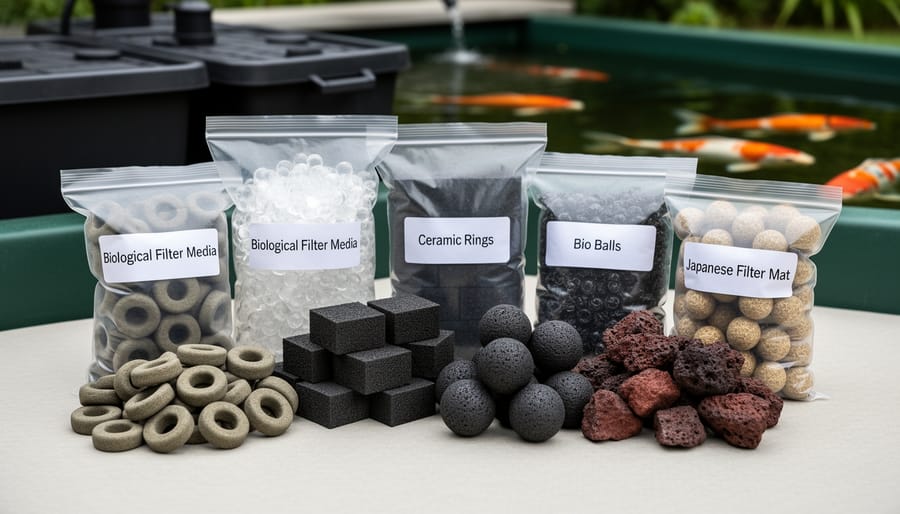
Bio-balls are the classic choice, featuring a spherical design with protruding spikes that create plenty of nooks and crannies. They’re lightweight, easy to clean, and provide approximately 60-70 square meters of surface area per cubic meter. I’ve used them in several pond builds, and they’re reliable workhorses, though not the most space-efficient option available today.
Ceramic rings take things up a notch with their porous structure. These cylindrical tubes offer around 300-500 square meters per cubic meter – that’s a massive upgrade! The tiny pores throughout the ceramic provide incredible colonization space. They’re heavier than bio-balls but exceptionally durable. I still have ceramic rings in my oldest pond that have been running strong for over a decade.
K1 media (also called moving bed media) features a wheel-like design that tumbles freely in the water flow. With approximately 800-900 square meters per cubic meter, these little wheels pack serious bacterial real estate into compact spaces. They’re self-cleaning as they tumble, which reduces maintenance significantly.
Lava rock brings natural aesthetics with impressive functionality – roughly 200-300 square meters per cubic meter. It’s the budget-friendly option that adds rustic charm while supporting robust bacterial colonies.
For effective filtration systems, combining different media types often yields the best results, giving bacteria varied environments to thrive while optimizing your available space.
Matching Media to Your Pond Size
Here’s a simple way to think about matching your filtration media to your pond: for every 100 gallons of water, you’ll want roughly one cubic foot of biological filtration media if you’re keeping a moderate koi population. That’s your baseline starting point.
Now, the koi load matters more than pond size alone. If you’re passionate about koi like I am and plan to stock heavily, bump that ratio up by 50-100%. So a 1,000-gallon pond with lots of beautiful koi might need 15-20 cubic feet of media rather than the basic 10.
For mechanical filtration, think layers. Start with coarse foam or matting (2-3 inches thick), followed by medium-grade materials, then fine polishing pads. Replace or swap these in sections every few weeks to maintain flow.
A quick reality check from my own experience: I initially under-filtered my first 800-gallon pond and spent months fighting cloudy water. Once I doubled my media volume, everything stabilized beautifully. Don’t skimp on filtration capacity. Your koi’s health depends on it, and you’ll save yourself countless headaches down the road.
Rock, Gravel, and Bottom Materials: Yes, They Matter
The Bare-Bottom vs. Substrate Debate
One of the biggest decisions you’ll face is whether to go with a bare-bottom pond or add substrate to the bottom. I’ll be honest with you—this topic sparks passionate debates among koi keepers, and both approaches have merit.
Bare-bottom ponds are the easier maintenance option, hands down. Debris doesn’t settle into gravel where it can decompose and affect water quality. When it’s time to clean, you simply drain or vacuum the bottom surface without worrying about disturbing substrate layers. Many serious koi breeders and show koi enthusiasts prefer bare-bottom setups because they can monitor their fish more easily and maintain pristine water conditions.
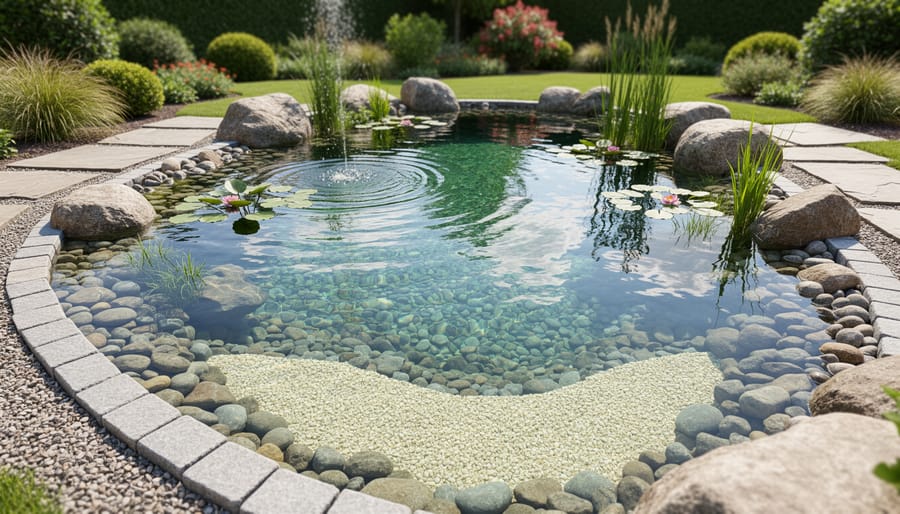
On the flip side, substrate creates a more natural look and provides surface area for beneficial bacteria to colonize. Some pond owners find that a thin layer of smooth river rock actually helps with filtration. The key word here is thin—we’re talking one to two inches maximum of larger stones, not several inches of small pebbles that trap waste.
My recommendation? If you’re primarily focused on keeping prize koi in top condition, go bare-bottom. If you want a balanced ecosystem with plants and a natural aesthetic, consider minimal substrate with excellent filtration to compensate for the added maintenance challenge.
Choosing Safe Stone and Rock
Not all rocks are created equal when it comes to koi safety! Some stones can actually harm your fish by leaching minerals that alter water chemistry. Here’s what you need to know before decorating your pond.
The safest rocks for koi ponds include granite, basalt, slate, and river rocks. These are typically inert, meaning they won’t dissolve or release substances into your water. I learned this the hard way years ago when I used some beautiful limestone rocks, only to watch my pH skyrocket within weeks!
Avoid limestone, marble, and other calcareous rocks that contain calcium carbonate. These dissolve slowly and continuously raise your pH and hardness levels, creating unstable water conditions that stress koi. Similarly, skip rocks with metallic veins or rusty-looking patches, as these may contain copper or iron that can be toxic.
Size matters too! Choose rocks that are proportional to your pond and large enough that koi won’t get trapped. Smooth river rocks are perfect for pond bottoms, while larger feature stones create visual interest. Always rinse rocks thoroughly before adding them, scrubbing away dirt and debris that could cloud your water or introduce unwanted bacteria.
Decorative Edging Materials
The finishing touches around your pond’s perimeter deserve just as much thought as what goes underneath! Your pond edging design needs to balance beauty with safety for your koi. Natural stone like flagstone or river rock creates organic-looking borders that blend seamlessly with landscaping, though ensure pieces are stable and won’t tumble into the water. Brick pavers offer clean lines and durability, perfect if you’re after a more formal aesthetic. For planted edges, coir matting or specialized pond edging strips help secure soil while preventing erosion. Whatever material you choose, make sure edges slightly overhang the water to hide liner and create shade, which koi appreciate. Avoid sharp edges or loose gravel that could trap or injure fish. Remember, edging isn’t just decorative—it protects your liner from UV damage and keeps lawn debris from washing into your pond.
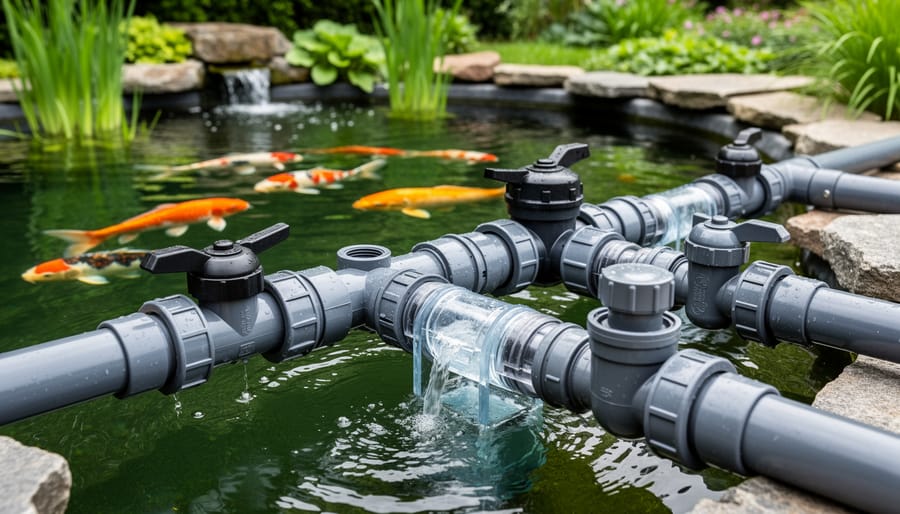
Plumbing and Connection Materials: The Overlooked Essentials
PVC vs. Flexible Tubing: Making the Right Choice
I’ve learned through trial and error that choosing between rigid PVC and flexible tubing really comes down to your specific situation. Here’s my practical take: use rigid PVC for your main runs where you need straight, permanent lines that won’t kink or collapse under pressure. It’s fantastic for bottom drains, pond returns, and anywhere you need structural integrity. The fittings are secure, and once it’s glued, it stays put.
Flexible tubing, on the other hand, is your best friend for those tricky spots. I absolutely love it for connecting skimmers, navigating around rocks, or making final connections to filters where you might need to adjust things later. It’s also much easier on the hands during installation, which your knuckles will appreciate on day three of your build.
Here’s a tip from my own pond journey: use flexible tubing with proper clamps for sections you might need to access for maintenance. I once glued everything with PVC only to realize I needed to move my UV clarifier later. Not fun. For high-pressure pump outputs, though, stick with rigid PVC rated for at least 200 PSI. The combination approach gives you the best of both worlds.
Fish-Safe Adhesives and Sealants
When bonding pond materials together, choosing the right adhesive isn’t just about creating a strong seal—it’s about keeping your koi healthy and thriving. The wrong product can leach harmful chemicals into your water for months, causing stress or worse for your fish.
Your safest bet is silicone labeled specifically as fish-safe or aquarium-grade. Look for 100% silicone sealants without mildewcides, fungicides, or other additives. These additives might prevent mold in your bathroom, but they’re toxic to fish. GE Silicone I (not II) is a popular choice among pond builders because it’s additive-free and readily available at most hardware stores.
For underwater repairs, two-part epoxy putties designed for aquatic use work beautifully. They cure even when submerged and create permanent bonds without releasing toxins.
Here’s what to absolutely avoid: standard construction adhesives, polyurethane foam sealants, and any product containing VOCs or anti-microbial agents. I once helped a neighbor troubleshoot why his koi were gasping at the surface—turns out he’d used regular bathroom caulk around his waterfall. After removing it and resealing properly, his fish recovered within days.
Always let any sealant cure completely before filling your pond, typically 48-72 hours, and rinse treated areas thoroughly.
Bulkhead and Fitting Material Quality
I learned this lesson the hard way when a bargain bulkhead cracked after just one winter, dumping 2,000 gallons into my yard. Quality bulkheads and fittings might cost three times more upfront, but they’re your pond’s critical connection points. When these fail, you’re looking at expensive emergency repairs, stressed koi, and potential equipment damage. Invest in thick-walled schedule 40 or schedule 80 PVC fittings with proper gaskets and stainless steel hardware. Marine-grade bulkheads designed for continuous underwater use will outlast cheap alternatives by decades. Think of it this way: spending an extra $50 on quality fittings now saves you from a $500 disaster later.
Making Smart Material Investments: Budget vs. Quality
The Three Materials You Should Never Skimp On
After building three ponds and making some expensive mistakes along the way, I’ve learned there are three materials you absolutely cannot cheap out on if you want a thriving koi pond.
First up is your pond liner. This is the heart of your entire system, and a failure here means disaster. Quality EPDM or RPE liners cost more upfront, but they’ll last 20-30 years without leaking. I once tried saving money with a thin PVC liner, and within two years, I was draining my pond for emergency repairs. Not fun when you’ve got happy koi to relocate.
Second, never skimp on your filtration system. Your biological filter is what keeps ammonia and nitrites from harming your fish. Undersized or poor-quality filters mean you’re constantly fighting water quality issues. Trust me, spending an extra few hundred dollars here saves you countless hours of frustration and potentially saves your koi’s lives.
Finally, invest in a quality bottom drain if you’re building an in-ground pond. Proper circulation starts at the pond floor, and a well-installed bottom drain makes maintenance infinitely easier. The cheap options clog easily and deteriorate quickly, creating headaches you don’t need.
Where Budget-Friendly Choices Work Fine
Here’s the good news: you can save some serious cash in certain areas without sacrificing performance! Let’s talk about where budget-friendly choices make perfect sense.
Pond netting and skimmer baskets are excellent examples. Whether you spend $15 or $50, most netting does the same job of keeping out leaves and protecting your koi from predators. I’ve used both expensive and bargain-bin options, and honestly, they all need replacing eventually anyway. Just make sure the mesh is small enough and UV-resistant.
Test kits are another area where mid-range wins. You don’t need the fanciest digital meters when reliable liquid test kits give you accurate readings for a fraction of the price. I’ve been using the same basic test kit brand for years with excellent results.
PVC pipe and fittings also fall into this category. Schedule 40 PVC from your local hardware store works just as reliably as premium brands for plumbing your filtration system. The key is proper installation, not the price tag.
Finally, decorative rocks and gravel perform identically whether you buy them from specialty pond suppliers or landscaping centers. Just rinse them thoroughly before adding them to your pond, and you’re good to go!
Choosing the right materials for your koi pond doesn’t have to feel overwhelming. By now, you’ve explored everything from liner options to filtration components, and hopefully you’re feeling more confident about making informed decisions. The key takeaway is this: there’s no single “perfect” material for every situation. Your climate, budget, skill level, and long-term vision all play important roles in determining what works best for you.
Before you rush to make any purchases, take time to create a solid plan. Sketch out your pond design, list every component you’ll need, and research suppliers. I’ve learned from experience that buying materials in stages often leads to mismatched components and unnecessary trips to the store. When you plan thoroughly upfront, you’ll save money, avoid frustration, and ensure everything works together seamlessly.
Remember that investing in quality materials where it matters most, like your liner and filtration system, pays dividends down the road. These foundational choices directly impact your koi’s health and your ongoing maintenance workload. Skimping on critical components might save a few dollars today, but it often costs more in repairs and replacements later.
The wonderful news is that thoughtful material selection sets you up for years of low-maintenance enjoyment. When your pond is built with appropriate, quality materials, you’ll spend less time troubleshooting problems and more time appreciating your beautiful koi and peaceful water garden. That’s the reward for doing your homework now.