
Why Ducks Ignore Most Nesting Boxes (And How to Build One They’ll Actually Use)
Position nesting boxes 3-6 feet above water level on sturdy posts or platforms, ensuring the entrance faces away from prevailing winds and receives morning sun. This height protects ducklings from ground predators while giving mother ducks clear visibility of approaching threats. Install boxes by late winter—January through February—so ducks can claim territories before breeding season peaks in March.
Build boxes measuring 12×12 inches floor space with 18-inch height for most duck species, using untreated cedar or cypress that withstands moisture without harmful chemicals. Drill four quarter-inch drainage holes in the floor and add ventilation gaps near the roofline. Line the bottom with 4 inches of pine shavings mixed with dry grass—never use cedar shavings, which can harm ducklings.
Place multiple boxes around your pond perimeter if space allows, spacing them at least 30 feet apart to accommodate territorial behavior. Wood ducks and mallards readily use elevated boxes, while other species prefer ground-level houses tucked into shoreline vegetation. Consider your wildlife pond design when selecting locations—natural screening from cattails or rushes makes ducks feel secure while dense overhead cover from trees offers protection from aerial predators.
Check boxes weekly during breeding season to remove debris and watch for signs of use like feather accumulation. Clean thoroughly each fall after nesting concludes, removing old nesting material to prevent parasites. Success often takes patience—ducks may scout your boxes for an entire season before committing to nest, but once they do, they’ll return year after year.
Understanding Duck Nesting Behavior Around Ponds
What Ducks Need to Feel Safe
Understanding what makes ducks feel secure is the first step to creating a nesting box they’ll actually use. From my years watching ducks around ponds, I’ve noticed they’re surprisingly picky about their nesting spots, and for good reason.
First and foremost, ducks want to nest close to water—ideally within 50 feet of your pond. This proximity gives them a quick escape route if predators approach and makes it easier to lead their ducklings to water once they hatch. I’ve seen ducks completely ignore perfectly good nesting boxes simply because they were too far from the water’s edge.
Predator protection ranks high on their priority list. Ducks prefer nesting sites that shield them from overhead threats like hawks and ground predators such as raccoons and foxes. This means your nesting box needs proper placement—elevated enough to deter climbing predators but accessible for the duck.
Privacy matters tremendously. Ducks are cautious nesters who avoid high-traffic areas. They want a quiet spot where they won’t be disturbed by people, pets, or lawn equipment constantly passing by. The entrance should face away from the main activity areas of your yard.
Finally, easy access is essential. The entrance hole should be appropriately sized, and there should be a clear flight path to and from the box without obstacles blocking their approach.
Common Species and Their Preferences
Different duck species have unique nesting preferences, so understanding your local visitors helps you create the perfect setup. Mallards, the most common pond ducks, are ground nesters by nature but will use raised boxes placed close to water level. They prefer boxes with easy walk-in access and appreciate protective vegetation nearby.
Wood ducks are the enthusiastic cavity nesters you’ll want to attract if you’re creating waterfowl-friendly ponds. These beautiful ducks naturally nest in tree hollows and readily accept elevated boxes mounted 5-15 feet high. They need a box entrance of about 4 inches wide and don’t mind being quite close to human activity.
Black ducks, similar to mallards, appreciate ground-level or slightly elevated boxes with plenty of surrounding cover. Hooded mergansers, smaller cavity nesters, will compete with wood ducks for elevated boxes but prefer slightly smaller entrance holes.
Each species benefits from wood shavings or straw bedding, and most appreciate a view of the water from their entrance. Observing which ducks visit your pond throughout the seasons will guide your nesting box strategy perfectly.
Choosing the Right Location for Your Duck Nesting Box
Distance from the Water’s Edge
Getting the distance right can make or break your nesting box success! Most duck species prefer their boxes placed within 3 to 30 feet from the water’s edge. Wood ducks, our most common cavity nesters, typically feel comfortable at 10 to 20 feet away. This gives them a safe buffer from predators while keeping their ducklings’ waddle to water nice and short.
Here’s something I learned the hard way during my first season: placing a box too close (under 3 feet) actually scared ducks away because predators like raccoons could easily access it from the shoreline. On the flip side, boxes farther than 30 feet meant a treacherous journey for newly hatched ducklings making their first trip to water.
Different species have different comfort zones. Mallards might accept boxes slightly farther out, while hooded mergansers prefer snugger placements closer to 10 feet. Consider your pond’s shoreline vegetation too—some natural cover between the box and water helps ducklings feel protected during that vulnerable first walk.
Protection from Predators and Weather
Positioning your duck nesting box correctly is crucial for keeping your feathered friends safe and comfortable. Mount boxes at least 4-6 feet high on sturdy posts or tree trunks to discourage raccoons and snakes from climbing up. Adding a metal predator guard or cone-shaped baffle around the post creates an extra barrier that climbing predators simply can’t navigate. I’ve found this works brilliantly in my own pond setup!
Face the entrance away from prevailing winds and driving rain, typically southeast in most regions. This simple adjustment keeps nesting ducks dry during storms. Ensure the box has proper drainage holes in the floor and adequate ventilation near the roof to prevent moisture buildup.
Avoid placing boxes directly over water where predators might swim up, and keep them at least 10 feet from dense vegetation where ambush predators hide. Protecting against pond predators requires thoughtful placement. Position boxes where you can easily observe activity but maintain respectful distance during nesting season. A well-protected box means happy, returning ducks year after year!
Avoiding Common Location Mistakes
I’ve seen well-intentioned pond owners make the same mistakes over and over. One common error is placing boxes on the sunny south side where they become sweltering ovens by midday. Ducks will abandon overheated boxes immediately. Another frequent problem is positioning boxes too close to active areas like patios or walkways. My neighbor placed hers just fifteen feet from his back door, and despite perfect pond access, no duck ever used it because of constant human traffic.
Mounting boxes directly on shaky posts or flimsy structures rarely works either. Ducks need stability and won’t trust a wobbly platform for their eggs. I also learned the hard way that ground-level boxes near dense brush invite predators. One season, raccoons raided three ground boxes before I relocated them to elevated platforms. Finally, avoid placing boxes where dogs have regular access. Even friendly pets will deter nesting ducks who need to feel completely secure during their vulnerable nesting period.
Building Your Duck Nesting Box: Step-by-Step
Materials and Tools You’ll Need
Gathering your materials before starting makes this project so much smoother! You’ll need untreated cedar or cypress lumber, which naturally resists water damage without harmful chemicals that could affect your feathered visitors. I learned this the hard way when my first attempt with regular pine started rotting within months. Grab galvanized or stainless steel screws and hinges to prevent rust near water. For the entrance hole, a 4-inch hole saw attachment for your drill works perfectly. You’ll also want exterior wood glue rated for marine use, a waterproof roof material like metal flashing or rubber roofing, and predator guard hardware cloth with quarter-inch mesh. Don’t forget basic tools: circular saw, drill, measuring tape, and sandpaper to smooth rough edges. A waterproof wood sealer designed for wildlife structures helps extend your box’s life while keeping it safe for ducks. Finally, mounting hardware like lag bolts or heavy-duty brackets will secure your finished box to its location.
The Perfect Dimensions for Different Duck Species
Getting the dimensions right makes all the difference! For Mallards, the most common pond visitors, aim for a box that’s 12-14 inches square with a floor space of at least 10×10 inches. The entrance hole should be 4 inches in diameter, positioned about 17 inches above the floor to give mom a sense of security.
Wood Ducks prefer a slightly taller setup—a box about 24 inches high with a 10×10 inch floor works beautifully. Their entrance hole can be 3-4 inches wide, placed roughly 17-20 inches up from the bottom.
If you’re hoping to attract Hooded Mergansers, they’ll appreciate similar dimensions to Wood Ducks but can manage with a cozier 9×9 inch floor space.
Here’s a quick tip from my own pond: interior height matters more than you’d think! Ducks need enough headroom to stand comfortably but not so much space that predators feel welcome. A minimum interior height of 12-15 inches keeps everyone happy and safe.
Construction Steps
Building your duck nesting box is surprisingly straightforward, and I promise you’ll feel like a pro by the end! Let’s walk through this together.
Start by cutting your lumber according to your chosen dimensions. For a standard box, cut the floor piece at 12×12 inches, front and back walls at 24 inches tall, and side walls at 18 inches. Don’t worry if your cuts aren’t perfectly straight—ducks aren’t picky about craftsmanship! Sand any rough edges to prevent splinters during assembly.
Next, assemble the walls by attaching them to the floor piece using 2-inch screws. Pre-drill your holes to prevent the wood from splitting—I learned this the hard way when my first attempt cracked right down the middle. Work on a flat surface and check that corners are square as you go.
Before attaching the roof, drill four drainage holes in the floor, about half an inch in diameter. These prevent water accumulation and keep nesting materials dry. Trust me, soggy nests won’t attract any residents!
Now secure the roof at a slight angle to encourage water runoff. Leave a small overhang at the front for extra weather protection. For the entrance, cut an oval opening about 10 inches wide and 12 inches tall on the front panel, positioning it several inches from the floor.
Finally, apply weatherproof stain or sealant to all exterior surfaces. Skip the interior—those fumes can be off-putting to nesting birds. Let everything dry completely for 48 hours before installation. Add a thin layer of straw inside as starter bedding, and your welcoming duck home is ready!
Adding the Finishing Touches
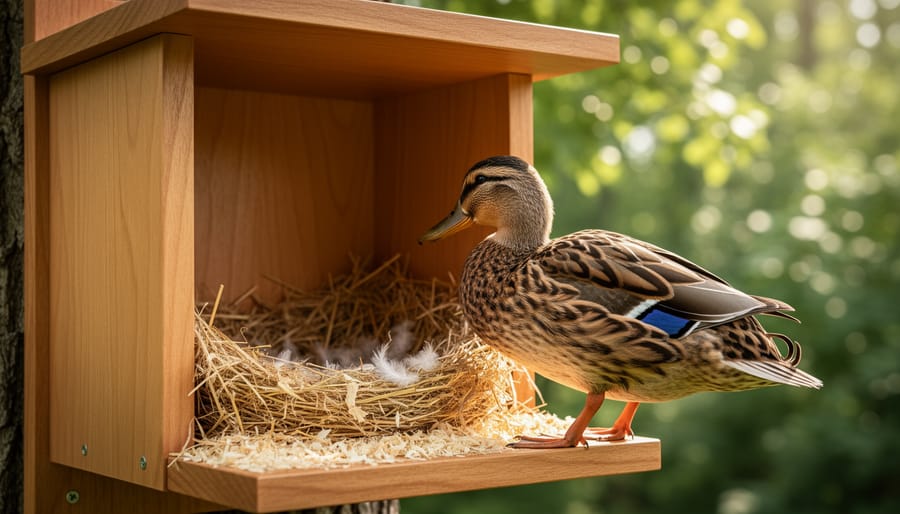
Now for those important finishing touches that’ll keep your duck family safe and comfortable! Start with bedding—add about 4 inches of pine shavings or straw inside the box. Ducks will rearrange it to their liking, so don’t worry about making it perfect. I’ve found that pine shavings work better than hay since they dry faster if they get damp.
For the entrance, attach a simple wooden ramp from the hole down to the ground or water. Cut shallow grooves across it every few inches to give mama duck good grip. If your box sits over water, make sure the ramp reaches just above the waterline.
Predator guards are essential! Install a metal collar around any supporting pole to stop raccoons from climbing up. You can also add a predator guard—a 4-inch wooden extension around the entrance hole—to prevent reaching paws.
Finally, drill three or four quarter-inch ventilation holes near the top of the box on opposite sides. This prevents overheating during warm spring days while keeping rain out. These small details make all the difference between a box that gets ignored and one that becomes a duck nursery!
Installation and Mounting Techniques
Post-Mounted Installations
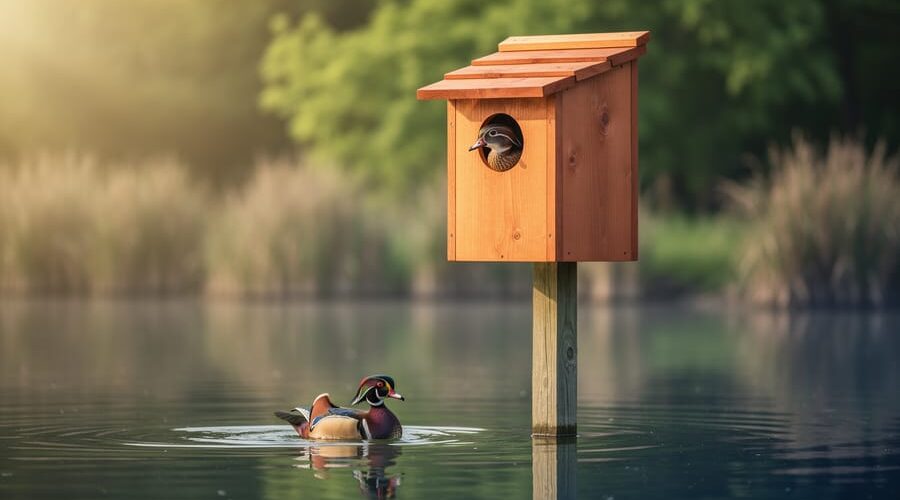
Post-mounted installations give you maximum flexibility for placing duck nesting boxes exactly where your feathered friends feel safest. Start by selecting a sturdy 4×4 post that’s at least 8 feet long—you’ll sink 2-3 feet into the ground while keeping the box 5-6 feet above water or ground level. This height keeps ducklings safe while making it easy for mama duck to keep watch.
Here’s my favorite trick from years of pond projects: wrap a 2-foot section of metal flashing or smooth PVC around the post about 3 feet up. This creates a predator baffle that raccoons and snakes simply can’t climb past. Secure it tightly so there are no gaps for clever claws to grip.
When installing, dig your post hole near the water’s edge and use quick-setting concrete for stability. The box should face away from prevailing winds, ideally with morning sun exposure. Before mounting the box, check that your post stands perfectly vertical—a wobbly installation will make ducks nervous and less likely to nest. Add a slight forward tilt to the box itself so rain runs off the entrance rather than pooling inside.
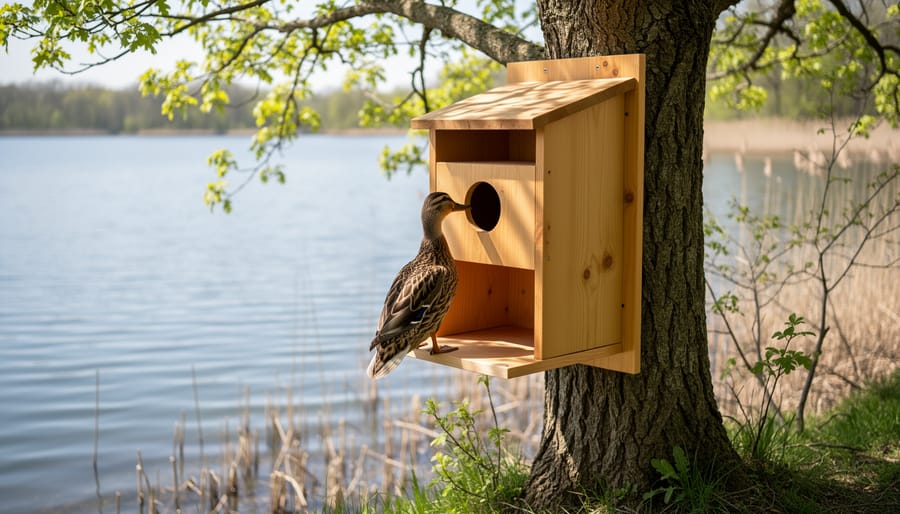
Tree and Structure Mounting
Mounting your duck nesting box properly protects both the tree and your investment. For tree mounting, choose healthy trees at least 10 inches in diameter. Use galvanized lag bolts rather than nails, which can damage the bark and invite disease. Drill pilot holes slightly smaller than your bolts to prevent splitting. Position bolts to go through the back mounting board of your box, spacing them about 12 inches apart vertically for stability.
If you’re attaching to existing pond structures like docks or pilings, metal L-brackets work beautifully. Secure the brackets to the structure first, then attach your box. This method makes seasonal removal easier if needed.
A great trick I learned from fellow pond keepers is using ratchet straps around tree trunks for temporary installations. This lets you test locations without drilling into trees. Just pad the straps with rubber or burlap to protect the bark and check them monthly, as growing trees need adjustments.
Always ensure your mounting creates a slight forward tilt so rainwater drains out the entrance rather than pooling inside where eggs would sit.
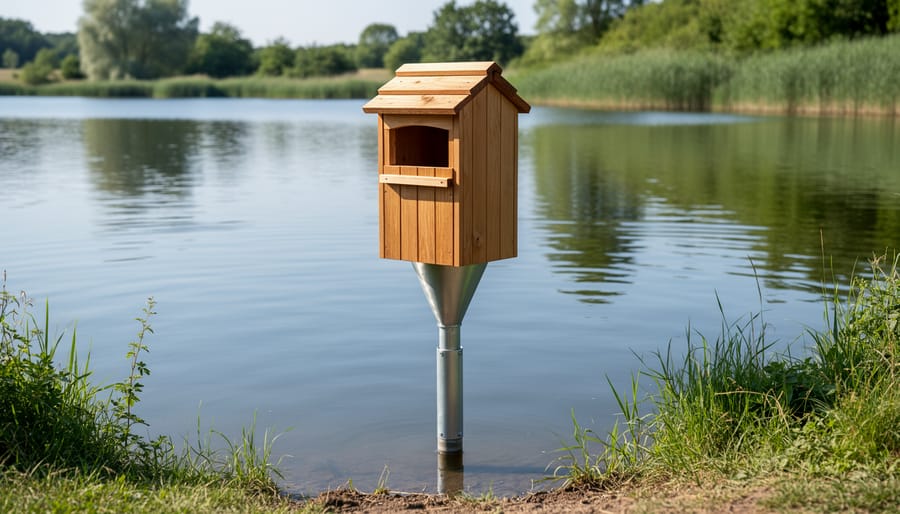
Floating Platform Options
If your pond lacks suitable shoreline spots, a floating platform might be your perfect solution! These clever structures anchor to the pond bottom or float freely while providing a stable nesting surface. Build your platform using foam-filled docks or large styrofoam blocks covered with plywood, ensuring it’s wide enough—at least 3 feet square—to prevent tipping when ducks climb aboard. Attach the nesting box securely to the platform’s center for maximum stability. To keep it from drifting away, tether it with rope and a concrete block anchor, leaving enough slack for seasonal water level changes. Position your floating platform 15-20 feet from shore in calmer water areas, away from boat traffic. This setup works wonderfully for wood ducks and mallards who’ll appreciate having their own private island nursery!
Making Your Box Irresistible to Nesting Ducks
When to Put Out Your Nesting Box
Timing is everything when it comes to duck nesting! You’ll want to install your nesting box in late winter, ideally by mid-February or early March. This gives ducks plenty of time to discover and inspect your box before they start actively seeking nesting sites in early spring.
Ducks are house-hunters during late winter, scouting locations well before laying season begins. If you set up your box too late, they may have already claimed other spots around your pond or moved elsewhere entirely. I learned this the hard way my first year—putting boxes out in April meant watching ducks nest everywhere except my carefully crafted boxes!
In warmer climates, aim for January installation, while colder regions can wait until snow begins melting but before ice fully breaks up on ponds. The key is having everything ready before those first warm spring days trigger nesting behavior.
Bedding and Nesting Material Setup
Line your nesting box with 3-4 inches of soft, absorbent material that mimics what ducks would naturally choose. Pine shavings work wonderfully and are my personal favorite—they’re affordable, easy to replace, and provide excellent cushioning. Straw is another great option, though it can get matted when wet. Avoid cedar shavings, as they can irritate ducks’ respiratory systems.
I like to create a slight depression in the center where the nest will form, which helps keep eggs together. Replace bedding completely at the start of each nesting season, and add a bit more material if you notice it’s becoming compacted or damp. Keep spare bedding nearby for quick touch-ups, especially after heavy rains. The goal is maintaining a dry, cozy environment that feels safe and inviting to prospective duck parents.
Creating a Duck-Friendly Pond Environment
A nesting box alone won’t convince ducks to settle in—they need the complete package! Think of it like preparing a vacation rental: you wouldn’t just offer a bedroom without considering the entire experience, right?
Start by establishing native vegetation around your pond. Ducks adore cattails, sedges, and grasses that provide both cover from predators and nesting materials. Leave some areas a bit wild rather than overly manicured—ducks prefer natural-looking spaces.
Your pond’s edge matters too. Create shallow areas where ducklings can easily access water and dabble for food. A gradual slope beats steep banks every time. Adding aquatic plants like duckweed and water lilies offers natural food sources and hiding spots for young ducks.
Consider leaving fallen logs or branches near the shoreline—these create perfect loafing spots where ducks can rest and preen. With these elements in place alongside your nesting box, you’ll create an irresistible duck paradise!
Maintenance and Seasonal Care
Post-Nesting Season Cleanup
Once your ducklings have fledged and the family has moved on, typically by late summer or early fall, it’s time for a thorough cleanup. Wait at least two weeks after the last sighting to ensure the box is truly abandoned. Start by removing all nesting material, old bedding, and any debris. This prevents parasites and disease from lingering into the next season.
For cleaning, a simple solution of one part white vinegar to three parts water works wonderfully and is safe for wildlife. Scrub all interior surfaces with a stiff brush, paying special attention to corners where mites might hide. Rinse thoroughly with clean water and let the box air dry completely in the sun, which naturally disinfects. Avoid harsh chemical cleaners or bleach, as residues can deter nesting next season.
Once dry, inspect for any needed repairs like loose screws or weather damage. Adding fresh pine shavings at this stage gives you a head start for next spring. I like to do my cleanup on a sunny autumn day, making it feel less like a chore and more like preparing a cozy welcome for next year’s residents.
Year-Round Monitoring and Repairs
Check your duck nesting box monthly during nesting season and quarterly during off-months. I make it a habit to inspect mine with my morning coffee, watching for loose screws, warped wood, or predator damage. Look for water pooling inside, which means drainage holes need clearing, and check that the entrance remains secure and properly sized.
Common repairs include replacing worn bedding material, resealing gaps where weather has separated joints, and tightening hardware that’s worked loose from seasonal temperature changes. Predators sometimes scratch at entrance holes, enlarging them, so reinforce these areas with metal flashing if needed. Replace rotted boards immediately to prevent collapse.
After each nesting season, remove old nesting material and sanitize with a mild bleach solution, rinsing thoroughly. This prevents parasites and disease buildup. Reapply weatherproofing annually to exterior surfaces. Keep a simple repair kit nearby with screws, wood glue, and extra bedding material. These small maintenance tasks ensure your box remains a safe, inviting home for returning ducks year after year.
Troubleshooting: What to Do When Ducks Won’t Use Your Box
Don’t worry if your ducks seem hesitant about their new accommodations! It’s actually pretty common, and usually fixable with a few simple adjustments.
First, give it time. Ducks can be cautious creatures, and they might need several weeks or even a full season to discover and trust a new nesting box. I’ve had boxes sit empty for months before suddenly becoming the neighborhood hotspot!
If you’re seeing ducks around your pond but they’re ignoring the box, check for competing wildlife. Raccoons, possums, or even aggressive geese might be deterring your ducks. Look for tracks, droppings, or disturbance around the entrance. Installing a predator guard or relocating the box to a more protected spot often solves this issue.
Location problems are another common culprit. If the box gets full afternoon sun, it might be too hot inside. Conversely, a completely shaded box in a damp area could feel uninviting. The box should also face away from prevailing winds and have clear water access. Sometimes moving it just 10 to 15 feet makes all the difference.
The entrance hole size matters too. Wood ducks need about 4 inches, while mallards prefer ground-level boxes. Make sure you’ve matched the design to your visiting species.
Here’s an important rule: never make adjustments during nesting season if you see any signs of use, like feathers or droppings inside. Wait until fall or winter to modify your setup. Proper waterfowl habitat management means respecting their breeding cycles.
Try adding fresh wood shavings or straw to make the interior more inviting. Sometimes ducks just need that cozy touch to call it home!
Setting up a duck nesting box takes patience, but the reward is absolutely worth it. Don’t get discouraged if ducks don’t move in during the first season—it often takes time for them to discover and trust a new nesting site. Keep your box clean, maintain the area around it, and give your feathered friends the space they need to feel secure.
I’ll never forget the morning I watched a mama wood duck lead her fluffy ducklings from their box to the pond edge. One by one, they tumbled into the water for their very first swim, chirping excitedly as they paddled behind her. That moment made every bit of effort worthwhile.
Remember, you’re creating more than just a nesting spot—you’re providing a safe haven for wildlife and adding vibrant life to your pond. Whether you’re an experienced pond keeper or just starting out, welcoming nesting ducks brings joy that lasts season after season. Keep realistic expectations, stay patient, and celebrate when those ducklings finally arrive at your pond.