
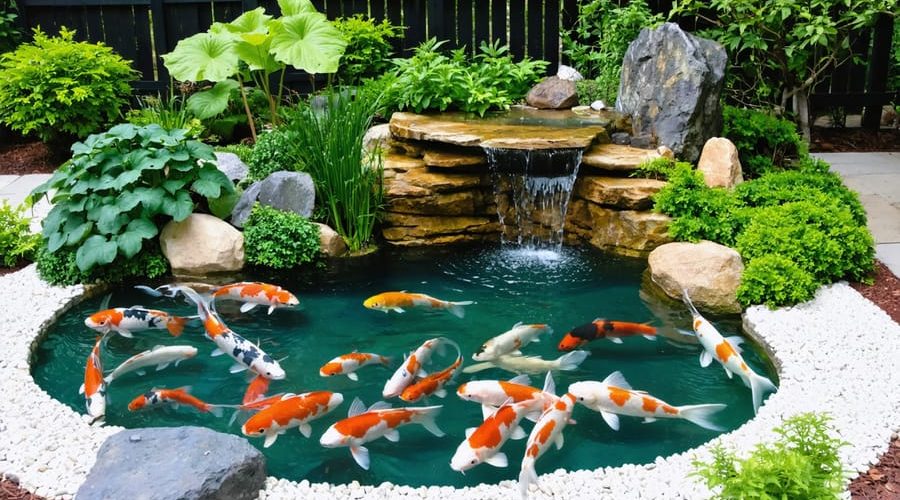
Transform Your Backyard Into a Peaceful Koi Paradise (Without Breaking the Bank)
Transform your backyard into a serene oasis with a DIY koi pond that combines natural beauty with the mesmerizing grace of Japanese carp. Building your own koi pond not only saves thousands in professional installation costs but also creates a stunning focal point that enhances your property’s value and provides years of tranquil enjoyment.
From selecting the perfect location to choosing the right filtration system, this comprehensive guide breaks down every step of creating a thriving ecosystem for your aquatic pets. Whether you’re working with a modest budget or planning an elaborate water feature, we’ll explore creative design options, essential equipment, and proven construction techniques that ensure your pond’s success.
Learn how to avoid common beginner mistakes while incorporating elements like natural stone waterfalls, aquatic plants, and strategic lighting that make your pond truly spectacular. With proper planning and our expert tips, you’ll build a low-maintenance koi habitat that brings the peaceful ambiance of Japanese gardens right to your doorstep.
Ready to dive into your pond-building journey? Let’s explore the materials, methods, and money-saving strategies that will help you create the koi pond of your dreams, starting with the crucial first steps of site selection and design planning.
Planning Your DIY Koi Pond Project
Location and Size Requirements
When planning your koi pond, location and size are crucial factors that will determine your project’s success. Choose a relatively flat area that receives partial sunlight and shade throughout the day to maintain optimal water temperatures. Avoid placing the pond directly under trees to prevent excess leaf debris and root interference.
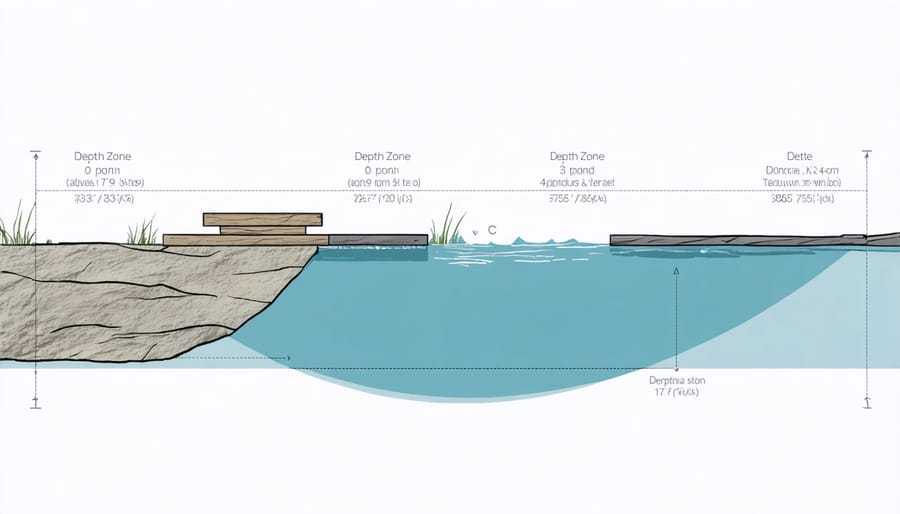
For a thriving koi environment, aim for a minimum depth of 4 feet, which allows fish to hibernate comfortably during winter and escape predators. When considering optimal pond shapes, remember that koi need plenty of swimming space to grow healthy and strong. A good rule of thumb is to provide at least 250 gallons of water per adult koi.
For beginners, start with a pond size of about 8×10 feet, which comfortably houses 4-5 koi. If space permits, going bigger is always better – consider 10×15 feet or larger. Remember to account for filtration equipment, plants, and decorative elements in your space planning.
Ensure your chosen location has easy access to electrical outlets for pumps and filters, and consider proximity to viewing areas like patios or decks. The pond should also be visible from your home to enjoy your aquatic pets year-round and monitor their well-being easily.
Budget-Friendly Materials List
Here’s a cost-effective list of materials you’ll need for your DIY koi pond project. Remember, smart shopping and creative alternatives can significantly reduce your overall expenses!
Essential Materials:
– Pond liner (EPDM rubber): $1-2 per square foot (consider recycled billboard vinyl as a budget alternative)
– Underlayment fabric: $0.50-1 per square foot
– PVC pipes (various sizes): $5-15 per 10-foot length
– Pond pump: $50-150 (look for energy-efficient models to save long-term)
– Filter system: $100-200 (DIY options available using plastic bins)
– Rocks and gravel: $3-5 per bag (check local landscaping suppliers)
Money-Saving Alternatives:
– Use recycled concrete blocks instead of expensive stone walls
– Repurpose old bathtubs or stock tanks for small ponds
– Create natural filtration with aquatic plants ($5-15 each)
– Use local river rocks instead of store-bought decorative stones
– Build DIY skimmers using plastic storage containers
Additional Budget-Friendly Items:
– Garden hose and fittings: $20-30
– Rubber boots: $15-25
– Basic tools (already owned by most): shovel, level, utility knife
– Aquatic plant baskets: $2-5 each
– Water testing kit: $20-30
Pro tip: Check online marketplaces and local buy/sell groups for used pond equipment. Many pond owners upgrade their systems and sell perfectly good used components at fraction of retail prices.
Step-by-Step Construction Process
Excavation and Base Preparation
Before bringing your koi pond dreams to life, proper excavation and base preparation are absolutely essential. Start by marking your desired pond shape with spray paint or rope, making it about 15-20% larger than your planned size to account for edges and shelves.
For a healthy koi environment, aim for a minimum depth of 4 feet in the deepest area. This depth helps maintain stable water temperatures and gives your fish plenty of space to thrive. Create different depth zones by incorporating shelves: 12 inches for marginal plants, 2 feet for water lilies, and the deepest area for your koi.
When digging, remove all rocks, roots, and sharp objects that could damage the pond liner. Level the bottom carefully, using a spirit level to ensure even surfaces. Add a 2-inch layer of sand as your base layer – this creates a smooth foundation and helps protect your liner from punctures.
Consider building a gradual slope from the edges to the center (about 1 inch per foot) to help with drainage during maintenance. If you’re working with clay soil, add extra sand or underlayment to prevent sharp clay chunks from damaging the liner.
Pro tip: Before digging, always call your local utilities company to mark underground lines. Also, check local building codes regarding depth requirements and necessary permits. Take your time with this stage – rushing through excavation can lead to costly mistakes down the line.
Remember to stockpile good topsoil for later landscaping around your pond, and have a plan for disposing of the excavated earth. Your careful preparation now will pay off with years of trouble-free pond enjoyment.
Liner Installation and Edge Design
Installing your pond liner requires careful attention to detail, but don’t worry – it’s totally manageable! Start by removing any sharp rocks or roots from the excavated area, then lay down a thick underlayment material to protect your liner from punctures. This protective layer is your pond’s first defense against leaks, so don’t skip it!
When placing the liner, leave plenty of excess material around the edges – about 2 feet extra on all sides. This gives you wiggle room for adjustments and ensures proper coverage. On a warm, sunny day, let the liner sit in the sun for about an hour before final positioning. This makes it more flexible and easier to work with.
Now for the fun part – creating beautiful edges! One popular approach is the rock overlap method. Layer flat stones over the liner’s edge, creating a natural-looking border that securely holds the liner in place. For a more polished look, consider installing pond edging strips, which provide a clean finish while safely securing the liner.
Want something unique? Try creating a beach entry area where the edge gradually slopes into the water. This not only looks fantastic but also provides easy access for maintenance. Another creative option is incorporating wooden decking that partially extends over the pond’s edge, hiding the liner while creating an attractive seating area.
Remember to maintain a slight slope towards the pond on your edges to ensure rainwater flows into your pond rather than behind the liner. This small detail makes a big difference in preventing future problems with liner displacement or soil erosion.

Filtration System Setup
A well-designed filtration system is crucial for maintaining healthy koi, and building one yourself can be both cost-effective and rewarding. Let’s explore how to create efficient filtration systems that will keep your pond crystal clear.
Start with a three-stage filtration setup: mechanical, biological, and plant filtration. For mechanical filtration, create a basic filter box using a large plastic container with multiple layers. Begin with coarse filter media like filter mats or plastic pot scrubbers at the top, followed by finer materials like filter wool in the middle, and bio-balls at the bottom for bacterial growth.
You can build a DIY biological filter using a 55-gallon drum or large plastic container. Fill it with bio-media like lava rock or ceramic rings, which provide excellent surface area for beneficial bacteria. Install inlet and outlet pipes using PVC connectors, ensuring they’re properly sealed to prevent leaks.
For a natural approach, construct a gravel bed filter by creating a shallow area filled with different-sized gravel layers. This area can double as a beautiful planted section while filtering water naturally. Position water plants like cattails and iris in this zone – their roots help remove excess nutrients.
Don’t forget the pump system! Choose a pump that can cycle your entire pond volume at least once every two hours. Install it at the pond’s deepest point and connect it to your filter system using flexible tubing. Create a small waterfall or stream return to help aerate the water as it flows back into the pond.
For maintenance access, build your filter housing slightly above ground level and include removable lids. This makes weekly cleaning much easier. Consider adding a bottom drain with a ball valve for quick filter cleanouts. Remember to position your filtration system where it’s easily accessible but can also be cleverly disguised with plants or rocks.
Creative Landscaping Elements
Natural Rock Arrangements
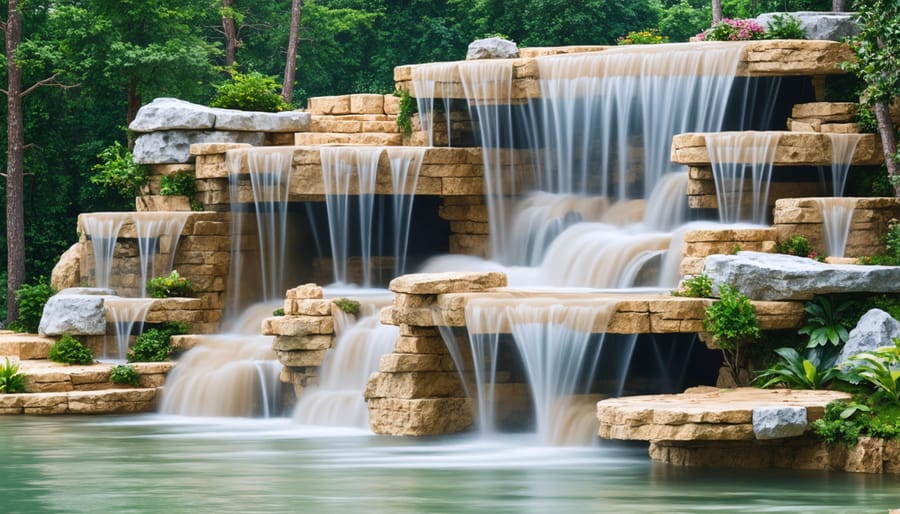
Creating stunning waterfalls and rock formations doesn’t have to break the bank. By following some basic natural landscaping techniques, you can build beautiful rock arrangements that look professionally designed.
Start by collecting local rocks of varying sizes – this can save you hundreds compared to buying landscaping stones. Look for rocks with interesting shapes and textures, focusing on pieces that naturally complement each other. Remember to clean them thoroughly before use.
For a basic waterfall, arrange larger rocks at the base to create a solid foundation. Stack medium-sized rocks to build height, ensuring each layer slopes slightly inward for stability. Use smaller rocks to fill gaps and create natural-looking transitions. Waterfall foam helps secure rocks while directing water flow exactly where you want it.
Create visual interest by positioning some rocks to jut out at different angles. This mimics natural formations and provides lovely spots for water to cascade. Add flat stones along the edges to hide liner and create shallow areas where koi can rest.
For budget-friendly accents, consider incorporating found materials like driftwood or locally sourced river rock. These elements add character while keeping costs down. Position taller rocks towards the back of your arrangement, with shorter ones in front for a natural-looking perspective.
Remember to leave some spaces between rocks for marginal plants – they’ll help soften edges and create a more established look over time. Regular maintenance is key; check periodically for stability and adjust rocks as needed to maintain water flow and aesthetics.
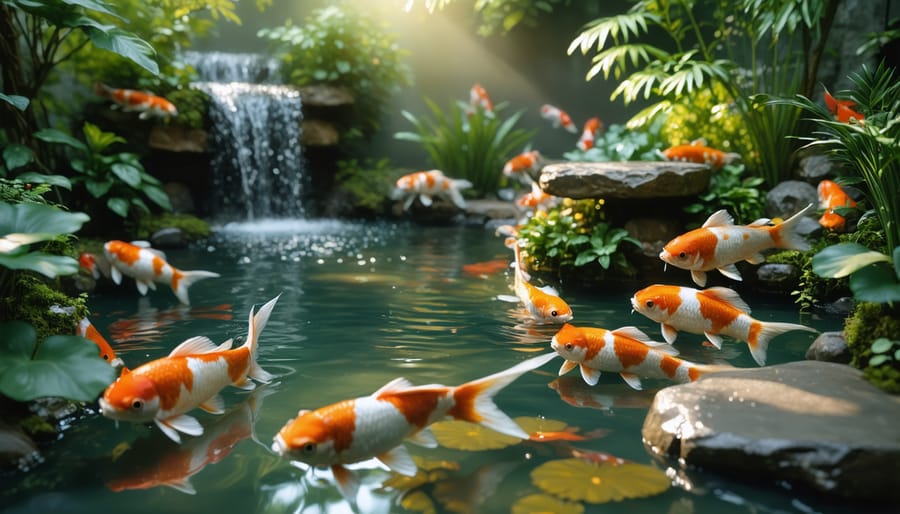
Plant Selection and Placement
Selecting the right plants for your koi pond not only enhances its beauty but also helps maintain a healthy ecosystem for your fish. Start with underwater plants like hornwort and anacharis, which oxygenate the water and provide natural filtration. These plants should cover about 50-60% of your pond’s bottom area.
For the pond edges, marginal plants like Japanese iris, cattails, and marsh marigolds create a natural transition between water and land. Plant these in shallow areas or on shelves built into your pond’s design. They’ll help stabilize the soil and provide shelter for your koi.
Floating plants like water lilies and lotus are essential for providing shade, which helps regulate water temperature and gives your koi hiding spots from predators. Aim to cover about 30-40% of your pond’s surface with these plants. Choose varieties that match your pond’s size – dwarf varieties for smaller ponds, full-size specimens for larger ones.
When arranging your plants, think in layers. Start with underwater plants at the bottom, add marginal plants at different heights along the edges, and finish with floating plants on the surface. Group similar plants together for visual impact, but leave open swimming channels for your koi.
Remember to avoid plants with invasive root systems that could damage your pond liner. Also, steer clear of toxic varieties like elephant ears or water hemlock. Place plants in removable containers or planting baskets for easier maintenance and to prevent them from taking over your pond.
Lighting and Decorative Features
Transform your koi pond into a magical nighttime retreat with thoughtful lighting and decorative elements. Start with eco-friendly pond lighting options like solar-powered LED spotlights, which are easy to install and won’t disturb your fish. Position these lights to highlight water features or create subtle underwater illumination.
For a enchanting touch, string weatherproof fairy lights through nearby plants or along the pond’s edge. Solar-powered floating lily lights add a whimsical element while providing gentle illumination. Consider creating DIY lanterns using mason jars and battery-operated candles for a cozy ambiance during evening gatherings.
Decorative features can include handmade stepping stones placed strategically around the pond’s edge. Paint them with glow-in-the-dark paint for added nighttime appeal. Repurpose old ceramic pots as water spouts, or create a simple bamboo fountain for both visual interest and soothing sounds.
Natural elements like carefully positioned rocks, driftwood, and aquatic plants can transform your pond’s appearance. Try building a small wooden bridge or viewing platform using treated lumber – it’ll serve as both a decorative feature and a practical viewing spot. Remember to keep all electrical components safely away from water and use outdoor-rated materials for longevity.
Maintenance Made Simple
Maintaining your DIY koi pond doesn’t have to be complicated. Following these essential maintenance guidelines will help keep your pond healthy and your fish happy. Start by checking your water quality weekly using testing strips to monitor pH, ammonia, and nitrate levels. Regular water changes are crucial – aim to replace about 10-15% of the pond water every two weeks.
Keep your filtration system clean by rinsing filter media monthly and replacing it as needed. Remove debris like fallen leaves with a net daily to prevent excess organic matter from decomposing in the water. In autumn, consider installing a pond net to catch falling leaves before they sink.
Prune aquatic plants regularly and remove dead foliage to maintain water quality. Check your pump and UV clarifier monthly for proper operation, and clean them according to manufacturer instructions. During winter, use a de-icer to maintain a small opening in the ice for gas exchange.
Monitor your koi’s behavior daily – they’re excellent indicators of pond health. Look for signs of stress or unusual swimming patterns that might signal water quality issues. Keep feeding areas clean and remove uneaten food after 5 minutes to prevent water contamination.
Seasonal maintenance is vital too. Spring calls for a thorough cleanup, summer requires attention to water levels due to evaporation, fall means preparing for winter, and winter demands careful monitoring of ice formation. By staying on top of these simple tasks, your DIY koi pond will remain a beautiful and thriving ecosystem for years to come.
Creating your own koi pond is an exciting and rewarding project that can transform your outdoor space into a peaceful oasis. We’ve explored various DIY ideas, from essential planning steps to creative design elements that make your pond unique. Remember that successful pond building is all about careful preparation, proper materials selection, and attention to detail.
Whether you choose a simple above-ground design or an elaborate in-ground pond, the key is to ensure proper filtration, adequate depth, and appropriate landscaping. Don’t be afraid to start small and expand your pond later as you gain confidence and experience. The most important aspects are maintaining water quality and creating a healthy environment for your koi.
Take time to research local regulations, gather quality materials, and plan your design thoroughly before breaking ground. With patience and dedication, you can create a beautiful koi pond that will provide years of enjoyment and become the centerpiece of your garden.
Ready to begin your koi pond journey? Start with a simple sketch, gather your supplies, and take that first step toward creating your own backyard paradise. Happy pond building!