
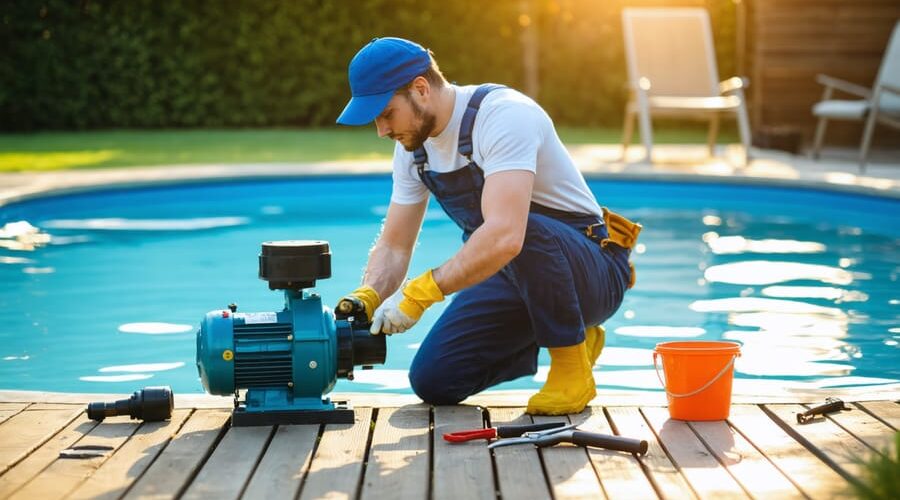
Your Pond Pump Stopped Working? Fix It Yourself in 30 Minutes
**Recognize the Warning Signs Before Your Pool Pump Dies Completely**
Listen for unusual grinding noises, check for water leaks around the motor housing, and watch for weak water flow—these symptoms tell you exactly what’s failing in your pool pump and filter system. Most repairs you can handle yourself with basic tools and about an hour of your time, saving hundreds in service calls.
Your pool pump works hard every single day, circulating thousands of gallons through your filtration system. When it starts acting up—whether it’s a clogged impeller, a worn-out seal, or a filter that won’t hold pressure—you’re looking at cloudy water, algae growth, and potentially a complete system breakdown if ignored.
The good news? Most pool pump and filter problems follow predictable patterns. That humming sound without water movement? Likely a jammed impeller you can clear in 15 minutes. Pressure gauge reading too high? Your filter needs cleaning or the media needs replacement. Water spraying from the pump housing? Time to replace those O-rings and seals.
This guide walks you through diagnosing what’s actually wrong with your equipment, then shows you step-by-step how to fix it. You’ll learn which problems you can tackle on a Saturday afternoon and which ones signal it’s time to upgrade. Whether you’re maintaining a small garden pond pump or a full-sized pool filtration system, these troubleshooting techniques will keep your water crystal clear and your equipment running strong for years to come.
When Your Pump Starts Acting Strange: Warning Signs You Shouldn’t Ignore
Unusual Sounds and What They Mean
Your pump speaks to you through sounds—you just need to know what it’s saying! A grinding noise usually means something’s stuck in the impeller, like pebbles or debris that snuck past the filter basket. Turn off your pump immediately and check for obstructions. Humming without water flow often indicates a seized motor or capacitor issue—the pump’s trying to start but can’t quite get going. This might need a gentle tap to free it up or a capacitor replacement. Clicking sounds typically point to electrical problems, possibly a failing relay or loose wiring connection. High-pitched squealing? Your bearings are likely wearing out and crying for help. Each sound is a clue, and catching these early can save you from a complete pump breakdown. I once ignored a faint grinding sound for a week, thinking it would go away—big mistake! The small pebble I could’ve easily removed ended up damaging my impeller.
Water Flow Problems
Water flow issues are among the most frustrating common pump issues you’ll encounter. Reduced flow typically signals a clogged impeller or dirty filter—debris accumulates over time and restricts water movement. No flow at all often points to a completely jammed impeller, a burnt-out motor, or a stuck check valve that’s preventing water from moving through the system. Intermittent operation is usually electrical in nature—loose wiring connections, a failing capacitor, or an overheating motor that cycles on and off. I’ve found that air leaks in the suction line can also cause sporadic flow as the pump loses its prime. Start troubleshooting by checking the obvious: is the filter basket clean? Are all valves open? Then work your way through the system methodically to pinpoint the culprit.
Visible Signs of Trouble
Your pool pump might be crying out for help in ways that are hard to miss! The most obvious red flag is water where it shouldn’t be—puddles around the pump housing or drips from connections mean seals or gaskets need attention. If your once-crystal-clear water has turned cloudy or greenish, your filter might not be doing its job properly, allowing debris and algae to party in your pond.
Keep an eye out for unusual sounds too. A grinding, squealing, or humming noise that wasn’t there before often points to motor or bearing problems. You might also notice debris accumulating faster than usual, or your skimmer basket overflowing—classic signs your filter is clogged or your pump isn’t pulling with enough strength.
Electrical issues are serious business. If your pump won’t start, keeps tripping the breaker, or runs intermittently, don’t ignore it. These problems won’t fix themselves and can worsen quickly. I learned this the hard way when I delayed fixing a small leak, only to find my pump motor completely corroded a month later!
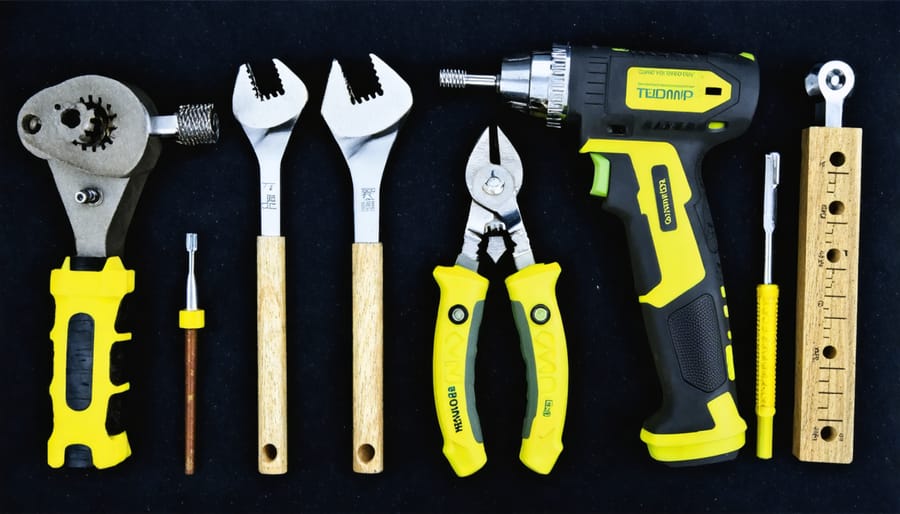
Essential Tools and Safety Gear (You Probably Have Most Already)
Good news! You won’t need to make a special trip to the hardware store for most pump and filter repairs. Let me walk you through what you’ll need, and I bet you’ll find most of these items already sitting in your garage or toolbox.
**Basic Tools You Probably Already Have:**
A standard screwdriver set (both Phillips and flathead) will handle most pump housing screws. You’ll also want an adjustable wrench or basic socket set for tightening connections and removing filter housings. A pair of needle-nose pliers comes in handy for extracting debris or manipulating small parts. Don’t forget a flashlight—trust me, pump issues always seem to happen in the shadiest corner of your yard! A bucket or large container is essential for catching water when you open the filter, and old towels or rags will keep things tidy.
**A Few Specific Items:**
Silicone-based lubricant (like what you’d use on o-rings) is crucial for reassembling parts properly. If you maintain a water garden, you might already have this for fountain pump maintenance. A garden hose with good pressure helps flush out filter cartridges during cleaning.
**Safety First—This Is Important:**
Before touching anything, always turn off the pump’s power at the circuit breaker, not just the switch. Water and electricity are a dangerous combination, and I can’t stress this enough. Wear safety glasses when working with pressurized systems—filters can spray water unexpectedly when opened. Keep work gloves handy for handling sharp debris or rough filter cartridges.
That’s really it! Simple tools, common sense safety measures, and you’re ready to tackle most repairs.
The Most Common Pump Problems and How to Fix Them
Clogged Impeller (The #1 Culprit)
In my years of maintaining water features, I’ve found that a clogged impeller causes about 80% of weak flow problems. The good news? It’s one of the easiest fixes you can tackle yourself!
**Getting to the Impeller**
First, turn off your pump and unplug it—safety first! Release the pressure by opening the air relief valve on top of your filter. Now, remove the pump basket housing (usually a clear lid that twists off). Lift out the basket and set it aside. You’ll see a plate or housing covering the impeller underneath. Remove the screws holding this plate in place—usually 4-6 bolts. Keep track of these screws!
**Cleaning Time**
Once you’ve exposed the impeller, you’ll likely find the culprit: hair, leaves, small twigs, or that mystery debris that seems to appear from nowhere. I once found an entire leaf bundle wrapped so tight it looked like a bird’s nest! Carefully pull out any visible debris. Check the impeller blades for cracks or damage. Use a small brush or your fingers to clear stubborn bits from between the blades.
**Reassembly**
Replace the impeller cover plate, tightening screws in a crisscross pattern for even pressure. Reinstall the basket, secure the housing lid, and you’re done! Prime your pump according to manufacturer instructions before restarting. You should immediately notice improved water flow.
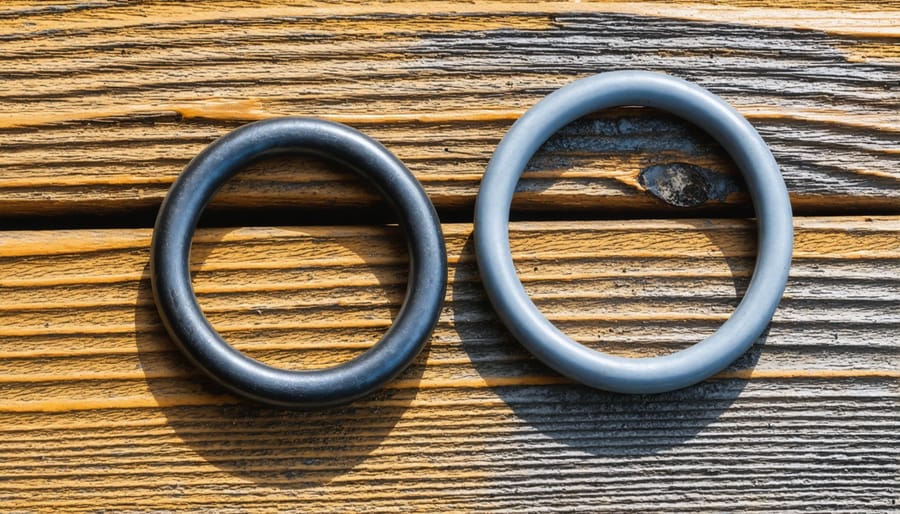
Damaged Seals and O-Rings
Seals and O-rings are the unsung heroes of your pump system, quietly keeping water where it belongs. When they wear out, you’ll notice water pooling around connections or a drop in pressure—telltale signs it’s time for replacement.
Start by turning off your pump and releasing any pressure from the system. Take a photo before disassembling anything—trust me, your future self will thank you! Carefully inspect each seal and O-ring for cracks, flattening, or brittleness. They should feel flexible, not hard or sticky.
Here’s a trick I learned the hard way: remove old seals gently using a plastic tool or your fingers, never metal screwdrivers that can scratch the groove. Clean the seating area thoroughly with a soft cloth to remove debris and old lubricant.
Before installing new seals, apply a thin layer of silicone-based lubricant—this helps them slide into place and creates a better seal. Roll the O-ring into position rather than stretching it, which can cause premature wear. Make sure it sits evenly in its groove without twisting. When you reassemble, hand-tighten first, then give it that final snug turn. Over-tightening actually damages seals faster!
Electrical Connection Issues
Before diving into any electrical work, always turn off the power at your circuit breaker—safety first! Start by inspecting the pump’s power cord for visible damage like fraying, cracks, or exposed wires. These are telltale signs you’ll need a replacement cord before running your pump again.
Next, check that all connections are tight and dry. Water and electricity don’t mix well, so make sure your outlet has proper weatherproofing if it’s outdoors. I once lost a whole weekend troubleshooting a pump that simply had a loose plug connection—sometimes the simplest things trip us up!
If your pump keeps tripping the breaker or GFCI, you’re likely dealing with electrical connection problems that need attention. Test your GFCI outlet by pressing the “test” and “reset” buttons—if it won’t reset, the outlet itself might be faulty.
Here’s the golden rule: if you’re uncomfortable working with electricity, smell burning, or can’t identify the problem, call a licensed electrician. There’s absolutely no shame in getting professional help when it comes to electrical safety. Your pond will still be there when the expert finishes the job safely!
Air Lock Problems
Air locks happen when air gets trapped in your pump system, preventing water from flowing properly. You’ll know you have one if your pump is running but barely moving water, or if you see lots of bubbles shooting into your pool.
The most common culprits? A low water level that lets air get sucked into the skimmer, loose pump lid o-rings, or simply starting up after winter storage. I’ve lost count of how many times I’ve panicked over a “broken” pump, only to find it just needed a good priming!
Here’s the fix: First, turn off your pump. Open the pump lid and fill the basket housing completely with water using a garden hose or bucket. Replace the lid tightly—that o-ring needs to seal perfectly. Turn the pump back on and let it run for a few minutes. You should hear the gurgling stop as trapped air escapes through your filter’s air relief valve. If it doesn’t prime within three minutes, repeat the process. Sometimes stubborn air pockets need a second try!
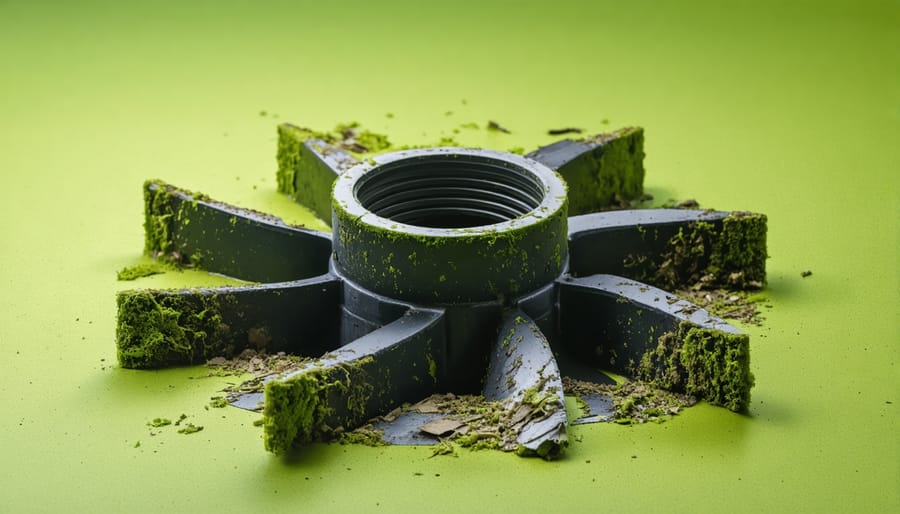
Worn or Broken Impeller Blades
Your pump might be running, but if water flow is weak, worn or broken impeller blades are often the culprit. The impeller is like the heart of your pump—those spinning blades push water through your system. Over time, debris can chip them, or they simply wear down from constant use.
**Spotting the Problem:** Remove the pump housing and inspect the impeller. Look for cracks, missing pieces, or rounded edges where sharp blades once were. If you can wobble the impeller excessively on its shaft, that’s another red flag.
**Replacing the Impeller:** First, turn off power and drain the pump. Remove the pump housing bolts and lift off the motor assembly. The impeller typically unscrews counterclockwise (some have a reverse thread, so check your manual!). Clean the motor shaft thoroughly, then thread on your new impeller hand-tight. Reassemble everything, ensuring all O-rings are properly seated. I learned this the hard way after my first attempt leaked everywhere!
This straightforward fix can breathe new life into your pump.
Filter Maintenance That Prevents Future Breakdowns
Mechanical Filter Cleaning
Regular mechanical cleaning keeps your filter running smoothly without disturbing the helpful bacteria that keep your pond healthy. Here’s how to do it right!
For foam pads and filter media, I recommend a gentle squeeze-and-rinse every two to four weeks, depending on your pond’s load. Here’s my trick: use pond water you’ve removed during a water change, never tap water. The chlorine in tap water will kill those beneficial bacteria you’ve worked so hard to cultivate! Simply swish the media around in a bucket of pond water, gently squeeze out the debris, and pop it back in.
Filter brushes can go a bit longer—usually four to six weeks between cleanings. Give them a good shake and rinse in pond water to remove accumulated muck. If you notice water flow slowing down before your scheduled cleaning, don’t wait! A clogged filter works harder and wears out faster.
When choosing the right filter, consider how easy it’ll be to maintain. I’ve learned that spending an extra few minutes on regular gentle cleaning beats dealing with a complete filter breakdown every time. Your pump will thank you, and your fish will too!
Biological Filter Care
Biological filters are the unsung heroes of your pond, housing millions of beneficial bacteria that keep your water crystal clear. Unlike mechanical filters, these need a gentler touch—think of it as caring for a living community rather than just cleaning equipment!
When your biological filter shows signs of clogging (usually reduced flow or cloudy water), resist the urge to scrub everything spotless. Here’s the key: never use tap water for cleaning, as chlorine will wipe out those helpful bacteria you’ve worked so hard to cultivate. Instead, fill a bucket with pond water and gently swish your filter media in it. You’re just removing the excess muck, not sterilizing everything.
I learned this lesson the hard way when I zealously bleached my bio-filter years ago. My pond turned green within days! Now I follow the “rinse and return” method—squeeze out sponges lightly, shake off larger debris from bio-balls, and leave a healthy layer of that brownish slime. It might look unappealing, but that’s where the magic happens.
Clean biological filters only when absolutely necessary—typically every 4-6 weeks during peak season. Your bacteria colonies will thank you with sparkling, balanced water!

UV Clarifier Maintenance
UV clarifiers work wonders keeping pond water crystal clear, but they need regular TLC to stay effective. Every few months, power off and unplug your unit, then carefully remove the quartz sleeve—this glass tube protects the bulb from water. You’ll likely find it coated with mineral deposits or algae film. Gently clean it with white vinegar and a soft cloth, rinsing thoroughly. While you’re at it, check the UV bulb itself. Even if it still glows, UV bulbs lose their bacteria-zapping power after about 12-14 months of use, so mark your calendar for annual replacements. I learned this the hard way when my pond stayed murky despite a “working” clarifier—turned out the bulb was past its prime! When reassembling, ensure the O-rings are properly seated to prevent leaks. A quick wipe-down of the unit’s exterior and checking all connections completes your maintenance routine, keeping your water sparkling and healthy.
Pressure Filter Backwashing
Backwashing keeps your pressure filter running efficiently by reversing water flow to flush out trapped debris. When your pressure gauge reads 8-10 PSI above the clean baseline, it’s time to backwash. Simply turn off your pump, rotate the multiport valve to “backwash,” then run it until the sight glass shows clear water—usually 2-3 minutes.
Here’s a tip from my own pond: I mark my clean pressure reading with a piece of tape right on the gauge so I never forget what “normal” looks like!
Backwash weekly during heavy use, but if you’re backwashing more than twice weekly or notice cloudy water even after cleaning, your filter media (sand, glass, or zeolite) is probably exhausted. Sand typically lasts 3-5 years. When backwashing no longer improves pressure or clarity, it’s replacement time—a straightforward afternoon project that’ll have your filter performing like new again.
Seasonal Maintenance That Saves You Headaches
Spring Startup Checklist
After months of winter slumber, your pond pump and filter need a gentle awakening! Start by removing any protective covers and clearing away debris that’s accumulated around your equipment. Before plugging anything in, give your pump a thorough inspection—check for cracks, worn seals, or any winter damage. Clean out the filter media, replacing what’s worn and rinsing reusable components with pond water (never tap water, which can kill beneficial bacteria).
Next, reassemble everything carefully, ensuring all connections are snug and O-rings are properly seated. Fill your filter housing with water before starting—this prevents air locks and protects your pump from running dry. When you’re ready, power up your system and watch closely for the first few minutes. Listen for unusual sounds and check for leaks around connections.
The flow might seem sluggish initially, but it should stabilize within minutes. This springtime ritual is crucial to regular pond maintenance and sets the stage for a healthy season ahead!
Summer Monitoring Tips
Summer is when your pool pump works overtime, so a little extra attention goes a long way! Check your system daily during heat waves—I learned this the hard way when my pump overheated on a 95-degree day. Listen for unusual sounds like grinding or squealing, which often signal bearing problems before they become serious. Monitor your pressure gauge closely; sudden spikes usually mean your filter needs cleaning more frequently in summer due to increased debris, sunscreen oils, and higher bather loads. Keep an eye on water levels too—evaporation can expose your pump to air, causing it to run dry and damage the seals. Finally, feel the pump motor after it’s been running; it should be warm but not too hot to touch. These quick daily checks take just two minutes but can save you from costly mid-season breakdowns when you need your pool most!
Fall Winterization Basics
When freezing temperatures approach, your pump and filter need special attention to avoid costly damage. I learned this lesson the hard way one winter when I forgot to drain my filter—the ice expansion cracked the housing, and I spent spring thawing out my wallet for repairs!
Start by disconnecting power and draining all water from your pump, filter, and connecting pipes. Turn everything upside down if possible to ensure complete drainage. Even small amounts of trapped water can freeze and crack components. Remove drain plugs and store them safely so you remember where they go come spring.
For thorough winterization procedures, clean your filter media one last time before storage. Store smaller equipment indoors in a dry location. If your pump must stay outside, cover it with waterproof material but ensure ventilation to prevent moisture buildup. Take photos during disassembly—future you will thank present you when reassembly time arrives!
When to Repair vs. When to Replace
I learned this lesson the hard way when my pond pump started making a grinding noise three summers ago. I spent $60 on parts trying to save it, only to replace it a month later anyway. Here’s how to avoid my mistake and make smart decisions about your equipment.
**The Age Factor**
Most pond pumps last 5-7 years with proper maintenance, while filters typically run 7-10 years. If your equipment is within these ranges and experiencing minor issues—like a worn impeller or cracked O-ring—repair makes perfect sense. But if your 8-year-old pump needs a new motor, you’re probably throwing good money after bad.
**The 50% Rule**
This guideline has saved me countless times: if the repair cost exceeds 50% of replacement value, invest in new equipment instead. A $30 impeller replacement on a $200 pump? Absolutely. A $150 motor rebuild on that same pump? Time to shop for a replacement.
**Multiple Repair Red Flags**
One repair is maintenance. Two or three repairs in a single season means your equipment is telling you something. I once nursed a filter through repeated gasket failures before accepting it had simply reached its end. Listen to these signals.
**Energy Efficiency Matters**
Newer pumps often use 30-40% less electricity than older models. If your pump runs continuously like mine does, those energy savings can offset replacement costs within 2-3 years. Calculate your potential savings—it might surprise you.
**Trust Your Instincts**
If you’re constantly worried about equipment failure or losing fish during a breakdown, that stress has value too. Peace of mind from reliable new equipment is sometimes worth the investment, even when repairs are technically feasible.
Money-Saving Tips From Years of Pond Keeping
After years of maintaining my own pond pumps and filters, I’ve learned that the biggest money-saver isn’t finding cheap parts—it’s avoiding the mistakes that destroy equipment in the first place. Here’s what I wish someone had told me when I started.
**Buy Quality O-Rings and Seals From the Start**
I used to grab whatever replacement O-rings looked “close enough” at the hardware store. Big mistake! Those generic seals would fail within months, causing leaks and forcing me to drain and disassemble everything again. Now I only buy manufacturer-specific seals. Yes, they cost a few dollars more, but they last years instead of months. That’s real savings.
**Clean Before Problems Start**
The single lesson that’s saved me the most money? Regular cleaning prevents repairs. I learned this the hard way when I let my filter go six months without maintenance. The impeller seized, the motor overheated, and I ended up replacing the entire pump head—$150 I could’ve avoided with a simple monthly cleaning routine.
**Don’t Over-Tighten Anything**
My enthusiasm once cracked a filter housing because I cranked down those wing nuts like I was securing a rocket ship. Hand-tight is usually tight enough. Stripped threads and cracked housings are expensive lessons in restraint.
**Keep Spare Parts On Hand**
Having backup O-rings, impellers, and basic gaskets means fixing problems immediately instead of waiting for shipping while your pond suffers. I keep a small tackle box with essentials—it’s paid for itself many times over.
You’ve made it through the troubleshooting, the repairs, and maybe even gotten your hands a little dirty—and that’s something to be proud of! The truth is, most pump and filter repairs aren’t as intimidating as they first appear. Armed with a few basic tools, some patience, and the willingness to learn, you can handle the majority of issues that come your way. Each repair you tackle yourself not only saves money but also deepens your connection with your pond ecosystem.
Remember, the best repair is the one you never have to make. Keeping up with regular maintenance—cleaning filters, checking O-rings, monitoring water flow—goes a long way in preventing those frustrating breakdowns. Set reminders on your phone, keep spare parts on hand, and make pond checks part of your weekly routine. Your pump and filter work hard to keep your water clear and your fish healthy, so giving them a little attention pays off in crystal-clear results.
There’s something deeply satisfying about standing beside your pond, watching the water flow smoothly, knowing you diagnosed and fixed the problem yourself. That gentle sound of water moving through a well-maintained system is more than just white noise—it’s the heartbeat of your thriving water garden. So dive into those repairs with confidence, and enjoy every moment of your beautiful, healthy pond!