
The Foundation That Makes or Breaks Your Water Feature
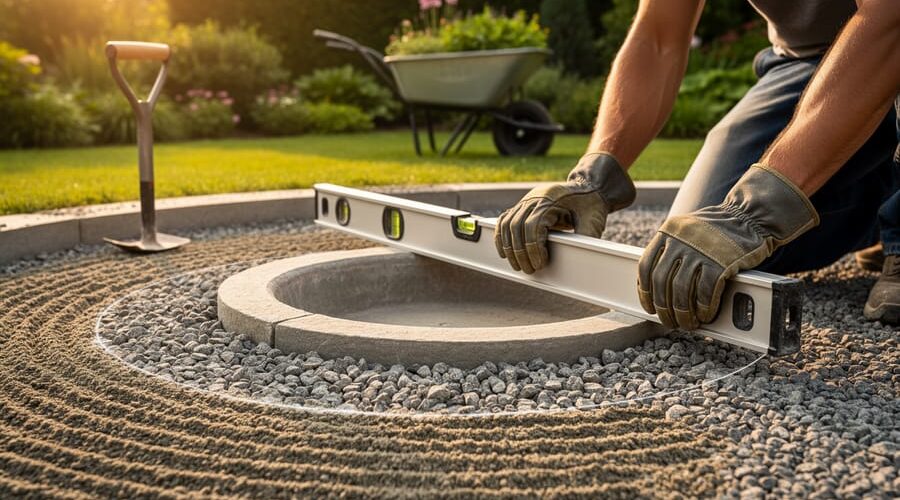
Level your base properly by excavating at least 2-3 inches deep and removing all organic material like roots and grass that will decompose and cause settling. Pack a layer of crushed gravel or decomposed granite into the excavated area, compacting it thoroughly with a hand tamper or plate compactor to create a rock-solid foundation that won’t shift under the weight of your water feature.
Choose your base material based on your feature’s size and weight. Small fountains under 50 pounds work fine on compacted sand, while larger pond installations need concrete footings or reinforced gravel bases up to 6 inches thick. The ground beneath must drain well, so if you’re working with clay soil, add an extra 2 inches of drainage gravel before your main base layer.
Test for level constantly during installation using a long spirit level in multiple directions. Even a slight tilt causes uneven water distribution, pump strain, and that annoying sound of water trickling where it shouldn’t. I learned this the hard way when my first fountain’s water pooled on one side because I eyeballed the level instead of measuring it properly.
Extend your base 6-12 inches beyond your feature’s footprint to prevent edge erosion and provide stable support for decorative elements. This extra foundation prevents the surrounding soil from washing away during heavy rain and gives you flexibility for future water feature enhancements like lighting or additional pumps.
A properly prepared base isn’t glamorous work, but it determines whether your water feature becomes a lasting centerpiece or a frustrating maintenance problem.
Why Your Water Feature Base Deserves More Attention
I’ll be honest with you—when I built my first backyard fountain, I was so excited about the design and the sound of trickling water that I barely gave the base a second thought. Big mistake. Within six months, my beautiful creation had started tilting, the liner developed tears, and the pump struggled because sediment had worked its way into everything. I learned the hard way that your water feature is only as good as what’s underneath it.
Think of your base as the foundation of a house. You wouldn’t build your dream home on unstable ground, right? The same principle applies here. A properly prepared base does three essential jobs: it distributes weight evenly to prevent sinking or shifting, protects your liner from punctures caused by rocks or roots, and ensures your feature stays level so water flows exactly where you want it to.
When the base gets overlooked or rushed, problems show up fast. Uneven settling creates low spots where debris collects and algae thrives. Sharp objects hiding beneath the surface can puncture liners, leading to frustrating leaks that are difficult to locate and expensive to repair. Without proper compaction, the entire structure can shift during freeze-thaw cycles or heavy rain, throwing off your carefully planned water levels and potentially damaging pumps.
I’ve seen countless DIYers spend hundreds on beautiful stones, quality liners, and top-notch pumps, only to skimp on the base preparation. Then they wonder why their feature needs constant adjustments or fails within a year. Investing time and effort into your base from the start saves you money, headaches, and disappointment down the road. Trust me on this one.
What Makes a Proper Water Feature Base
Level Ground: The Starting Point Everyone Rushes Past
I learned this lesson the hard way with my first waterfall. I was so excited to get water flowing that I skipped the tedious leveling part. Big mistake! Within a week, my pond looked lopsided, water pooled on one side, and the whole thing just looked… wrong. Here’s the thing: an unlevel base means uneven water distribution, visible liner edges where they shouldn’t be, and a feature that screams “amateur hour” instead of “peaceful oasis.”
Checking for level is easier than you think. Grab a long, straight board and a standard bubble level. Place the board across your excavated area in different directions, setting the level on top. The bubble should sit dead center. No fancy tools needed! For larger features, consider a laser level, but honestly, the board-and-bubble method works great for most backyard projects.
If you’re off-level, don’t panic. Remove soil from high spots rather than adding to low spots, which can settle over time and throw everything off again. Take your time here. Those extra twenty minutes spent getting it right will save you from months of frustration and a wonky-looking water feature that bugs you every time you see it.
The Right Underlayment Materials
Think of your underlayment materials as insurance for your water feature liner. I learned this the hard way when a sharp rock I missed punctured my first pond liner just weeks after installation!
Sand is your foundational workhorse. A two-inch layer of damp, compactable sand creates a smooth, cushioning surface that helps prevent punctures from below. It’s perfect for rigid preformed liners and flexible rubber liners alike. The key is using masonry sand or builder’s sand, not play sand, which doesn’t compact well.
Underlayment fabric, often called geotextile fabric, acts as your protective barrier between the ground and your liner. This thick, felt-like material cushions against stones, roots, and sharp objects that might work their way up through the soil. I always use it in rocky soil conditions or when tree roots are nearby. You can purchase commercial pond underlayment or use old carpet padding in a pinch, though the commercial stuff lasts longer.
For extra-challenging sites with lots of rocks or tree roots, consider layering your protection. Start with fabric, add sand, then another layer of fabric before your liner goes down. Yes, it’s more work and expense upfront, but replacing a damaged liner later costs far more in time, money, and heartache.
Structural Support for Heavy Features
When you’re planning to install a larger fountain or a beautiful statue surrounded by water, you absolutely need a solid foundation—trust me, I learned this the hard way when my first tiered fountain started tilting after just one season! Heavy water features demand more than a simple sand bed.
Start with a reinforced concrete base for any feature weighing over 100 pounds. Dig down at least 6-8 inches below ground level and pour a concrete pad that extends 6 inches beyond the feature’s footprint on all sides. This extra width distributes weight more evenly and prevents sinking. For extra-large installations, consider adding rebar or wire mesh within the concrete for added strength.
The edges of your feature need special attention too. Reinforced edges prevent crumbling and erosion, especially where water splashes or flows over the sides. You can use concrete blocks, large natural stones, or specially designed edging pavers to create a sturdy perimeter that holds everything in place.
For statuary sitting in or near water, I recommend creating a dedicated pedestal or platform slightly raised above the water line. This prevents constant water contact from degrading the base and gives you better stability. If your statue weighs more than 200 pounds, consider hiring a professional to assess the foundation requirements—some features genuinely need engineered solutions to stay safe and level for years to come.
Matching Your Base to Your Water Feature Type
Pond Bases: Flexible but Forgiving
Pond bases are wonderfully forgiving, which makes them perfect for DIY pond projects. Whether you’re working with a preformed shell or flexible liner, getting the foundation right sets you up for success.
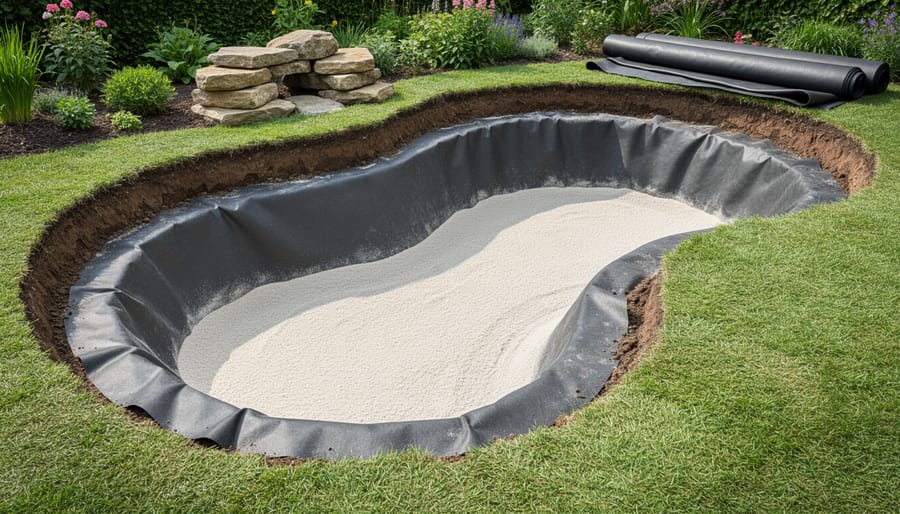
Start by excavating slightly deeper than your pond’s depth to accommodate a sand cushion layer. For preformed ponds, dig about 2 inches extra; for liner ponds, aim for 3-4 inches. This extra space is crucial for creating a protective buffer.
Before adding anything, clear the hole completely. Remove sharp rocks, protruding roots, and any debris that could puncture your liner or stress your preformed shell over time. I learned this the hard way when a forgotten tree root caused a slow leak in my first pond.
Next, spread a 2-3 inch layer of sand across the bottom and up the sides. This creates a smooth, forgiving surface that cushions your pond base. For extra protection with liner ponds, consider adding underlayment fabric beneath the liner. This combination gives you double insurance against punctures.
Level the edges carefully using a spirit level. An unbalanced pond looks awkward and can cause uneven water distribution, potentially weakening your installation over time.
Fountain Bases: Stability is Everything
Freestanding and tiered fountains have unique challenges—they’re top-heavy and constantly dealing with water weight and vibration. I learned this the hard way when my beautiful three-tiered fountain started leaning after just two weeks! The problem? I’d skipped proper base preparation.
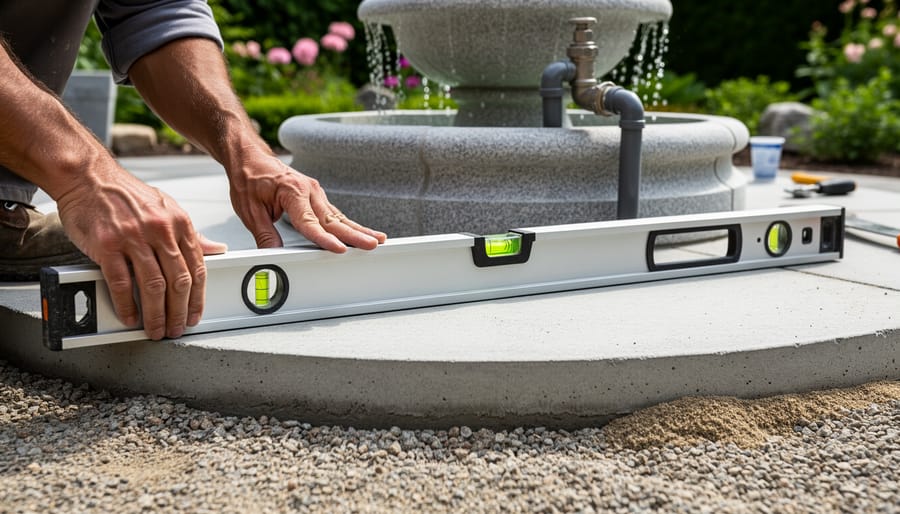
For any fountain, your base needs to be absolutely level. Even a slight tilt will cause uneven water flow and eventual structural stress. Start with a compacted gravel foundation at least 4 inches deep, then add either a concrete pad or multiple flat paving stones. The surface should extend at least 2 inches beyond the fountain’s footprint on all sides.
Wall fountains require solid backing—mount them to studs or use heavy-duty anchors rated for the fountain’s weight when filled. Don’t forget that water adds significant weight. A 20-pound fountain can weigh 50 pounds when operating!
For tiered features, check that each connecting piece sits perfectly level before adding the next tier. I now use a small torpedo level at each stage, which takes an extra five minutes but saves countless headaches. The basin below should be slightly larger than the spray pattern to catch all recirculating water and prevent erosion around your carefully prepared base.
Stream and Waterfall Bases: Working with Slopes
Working with slopes adds an exciting dimension to water features, but it requires extra attention to prevent erosion and shifting. I learned this the hard way when my first hillside waterfall developed a worrying tilt after just one season!
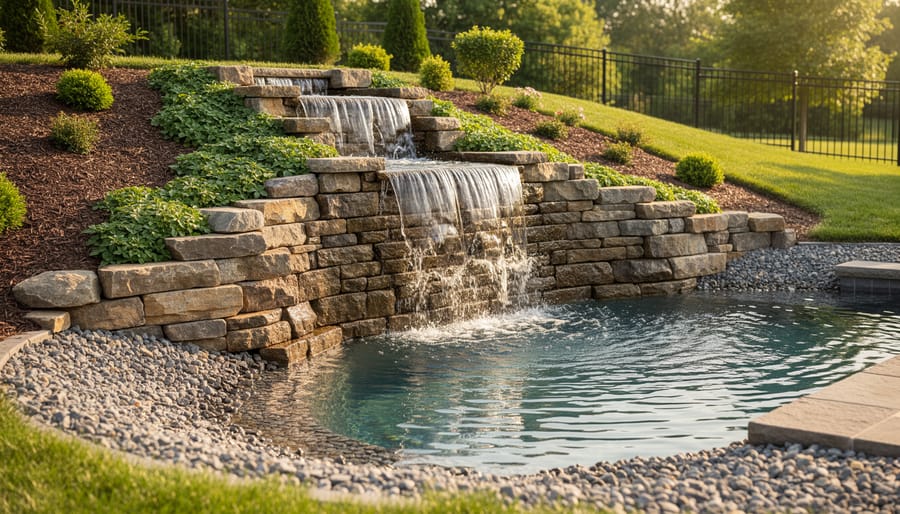
Start by cutting terraced steps into your slope rather than simply laying materials on an angle. Each cascade point needs its own level platform, almost like creating little shelves going down the hill. This distributes water weight evenly and prevents the dreaded downhill creep.
For stream beds on inclines, dig deeper than you think necessary and compact the soil in layers. Pack each 2-3 inch layer firmly before adding the next. This compacted base acts like a staircase foundation, resisting the natural downward pull of gravity and flowing water.
Consider adding retaining elements like large foundation stones or landscape timbers along the edges. These anchor your feature and catch any soil that might try to migrate downhill. Place your underlayment and liner so they overlap uphill, not down, preventing water from sneaking underneath and causing erosion.
The steeper your slope, the more important proper drainage becomes behind your feature. Install a perforated drain pipe along the back edge to redirect groundwater away from your carefully constructed base.
Step-by-Step: Building a Rock-Solid Water Feature Base
Preparation and Planning
Before you start digging, take time to plan your water feature properly. First, mark out your desired area using spray paint, garden hoses, or stakes and string. This helps you visualize the final size and shape. Next, contact your local utility company to identify any underground pipes, cables, or wires. Trust me, you don’t want any surprises when you’re knee-deep in excavation!
Assess your site’s proper drainage carefully. Water features need good drainage to prevent overflow issues during heavy rain. Check where water naturally flows and consider how runoff might affect your feature.
Gather all your materials before starting. You’ll typically need underlayment fabric, sand or gravel for leveling, your chosen base material, and tools like a level, shovel, and tamper. Having everything on hand prevents frustrating mid-project trips to the hardware store and keeps your momentum going.
Excavation Done Right
Getting your excavation right from the start saves you headaches down the road. For most small to medium water features, you’ll want to dig 12-18 inches deep, though larger ponds may need 24 inches or more. Here’s my best advice: dig slightly deeper than your planned base materials require, allowing room for sand, underlayment, and your chosen foundation layer.
As you dig, create gentle contours rather than sharp angles. Think smooth transitions that mimic nature. Remove all debris as you go—rocks, roots, and sharp objects are enemies of your liner and can create settling issues later. I learned this the hard way when a forgotten tree root punctured my first pond liner!
Common mistakes to avoid? Don’t rush this step. Many eager DIYers dig too shallow or leave the bottom uneven, which causes water pooling and structural problems. Use a level frequently and compact the soil as you work. Take your time removing every stick and stone you encounter. Your future self will thank you when everything stays watertight and stable for years to come.
Layering Your Foundation
Now comes the fun part where you really start building! Begin by spreading a two to three-inch layer of sand evenly across your excavated area. I learned the hard way that skimping on sand leads to uneven settling, so trust me on this one. Use a rake to distribute it uniformly, then grab a hand tamper or plate compactor. Compact the sand thoroughly, working in overlapping passes until you can walk across it without leaving footprints. This step is crucial for preventing future sinking or shifting.
Next, lay down your underlayment material, whether it’s geotextile fabric or specialized pond underlayment. This protective layer cushions your liner from sharp objects and roots. Overlap seams by at least six inches and smooth out any wrinkles as you go. Finally, add a thin layer of sand on top and gently smooth it with your hands or a soft broom. You want a surface that feels like freshly combed sand at the beach. Take your time here because a smooth, well-prepared base means your water feature will look professional and last for years.
Final Checks Before Installation
You’re almost there! Before setting your water feature in place, take a few minutes for these final checks—they’ll save you headaches down the road.
First, grab your level and check the base one more time. I know we already leveled during construction, but settling happens, especially after compacting. Place your level in multiple directions across the surface. Even small slopes can cause uneven water distribution or visible tilting once your feature is installed.
Next, walk around the perimeter and test the edge stability. Press down firmly with your hands at various points along the rim. Everything should feel rock-solid with no give or wobbling. Unstable edges are a common culprit for future cracking or shifting.
Take a step back and visually inspect the entire base. Look for any loose stones, gaps, or areas that seem uneven. Run your hand across the surface—it should feel smooth and uniform without any protruding rocks that could puncture liners.
Finally, brush away any debris, dirt, or small pebbles. A clean surface ensures proper contact between your base and water feature, preventing future movement or damage.
Common Base Mistakes (And How to Avoid Them)
We’ve all been there – you’re excited about your new water feature, you rush through the prep work, and then… uh-oh. Let me share some mistakes I’ve seen (and yes, made myself) so you can skip the headaches.
The “I Skipped the Compacting Step” disaster is probably the most common. Picture this: You dig your hole, add sand, set your liner, and fill it up. Everything looks perfect! Fast forward six months, and one side of your pond has sunk three inches lower than the other. What happened? The sand or soil settled because it wasn’t properly compacted. Always tamp down each layer as you go – think of it like making a layer cake where each tier needs to be solid before adding the next.
Then there’s the “Just a Little Slope Won’t Hurt” situation. I once helped a neighbor who insisted their slightly uneven base was “close enough.” Their fountain pump kept running dry on one side while the other overflowed. Even a small slope means water won’t distribute evenly. Use that level obsessively, even if it feels excessive. Your future self will thank you.
The “Sand Solves Everything” mistake catches many beginners. Sand is wonderful, but it’s not magical. I’ve seen folks pour sand directly over rocks and roots, thinking it’ll cushion everything. Nope. That sharp rock will eventually poke through. Always remove debris first, then add your sand layer.
Finally, watch out for the “Too Thin is Fine” trap. Skimping on base materials to save a few dollars usually backfires. A proper base needs adequate thickness – at least two to three inches of sand for most features. Cutting corners here means potential liner punctures, uneven settling, and costly do-overs.
The good news? These mistakes are totally preventable with patience and proper prep. Take your time with each layer, and your water feature will reward you with years of trouble-free enjoyment.
When to Upgrade or Repair Your Existing Base
Your water feature base won’t last forever, and knowing when it needs attention can save you from a complete collapse down the road. I learned this the hard way when my backyard fountain started tilting after a particularly wet spring. Catching problems early makes all the difference.
Watch for these telltale signs that your base needs work. If you notice your water feature leaning or settling unevenly, that’s your foundation crying for help. Cracks in the surrounding area, water pooling where it shouldn’t, or visible erosion around the edges all point to base issues. Sometimes you’ll see the water level dropping faster than usual, which might mean your liner is compromised because the base has shifted.
Here’s the good news: not every problem requires a complete rebuild. Small settling issues often respond well to strategic leveling. You can add compacted gravel or sand beneath specific areas to correct minor tilts. If you catch erosion early, reinforcing the edges with additional base material usually does the trick. Cracks in concrete bases sometimes need just a quality sealant rather than total replacement.
However, some situations demand starting fresh. If your feature has sunk more than a couple inches, if the base material has completely washed away in sections, or if you’re seeing structural damage to the feature itself, rebuilding is probably your best bet. Major slope changes or tree root invasion also typically require complete reconstruction.
When approaching repairs, work during dry weather and drain your feature completely. Assess the damage thoroughly before deciding your course of action. Sometimes what looks like a major disaster is actually fixable with some patient troubleshooting and the right materials.
I know the base isn’t the most exciting part of creating your water feature. There are no shimmering waterfalls or colorful koi to show off at this stage. But here’s the truth: every single water feature that brings joy year after year starts right here, beneath the surface, with a foundation built properly from the ground up.
Think of it this way. You’re not just laying sand and rocks. You’re creating the invisible guardian that protects your investment, prevents headaches, and gives you the gift of a water feature that simply works. The few extra hours you spend now, carefully leveling, compacting, and positioning your base, will reward you with countless peaceful evenings listening to trickling water instead of troubleshooting leaks or dealing with collapsing edges.
Your water gardening journey is uniquely yours, and every step you take teaches you something new. Be patient with yourself during this foundational work. Take those measurements twice. Check your level one more time. Future you will be incredibly grateful. You’ve got this, and the beautiful water feature you’re imagining is absolutely within your reach.