
Keep Your Pond From Freezing (Without Expensive Heaters)
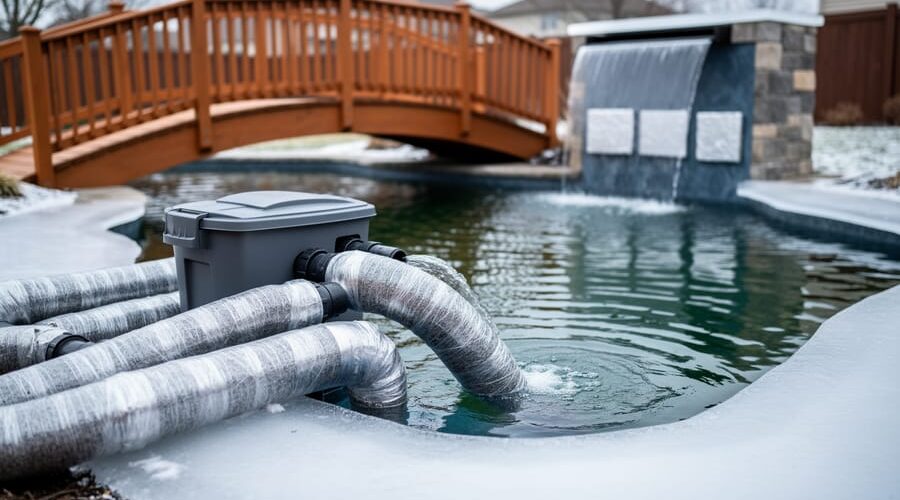
Wrap exposed plumbing and filter housings with fiberglass batts during freezing weather to prevent cracked pipes and equipment damage that could cost hundreds in repairs. Layer the insulation around vulnerable components, secure it with weatherproof tape, and cover with a protective barrier like plastic sheeting to keep moisture out while trapping heat in.
Insulate the underside of pond bridges and waterfall spillways where heat escapes fastest, creating cold spots that encourage ice formation. Cut fiberglass panels to fit these areas snugly, ensuring you wear gloves and long sleeves to avoid skin irritation from loose fibers.
Create an insulated lid for smaller ponds by sandwiching fiberglass between two sheets of plywood, leaving strategic openings for gas exchange and aeration equipment. This approach is particularly effective when winter-proofing your pond in regions with moderate freezes rather than extreme cold.
Protect your pond heater’s efficiency by wrapping its housing with fiberglass insulation, which reduces energy consumption by up to 30 percent while maintaining optimal water temperature for fish survival. The insulation acts as a thermal barrier, keeping the heat where it belongs and reducing the workload on your heating system throughout winter months.
Why Your Water Garden Loses Heat (And Why It Matters)
Here’s what’s happening in your pond when temperatures drop, and trust me, it’s more dramatic than you might think. Water temperature isn’t just a number on a thermometer—it’s the invisible conductor orchestrating everything in your aquatic ecosystem.
Your fish are cold-blooded creatures, meaning their body temperature matches the water around them. When pond water gets too cold too quickly, their metabolism slows dramatically. They become sluggish, stop eating, and their immune systems weaken, making them vulnerable to diseases. I’ve seen healthy koi struggle through winters simply because their pond lost heat too rapidly, without giving them time to adjust naturally.
But it’s not just about the fish. Those beneficial bacteria working quietly in your filter? They’re temperature-sensitive too. Below 50°F, they start shutting down, and your biological filtration becomes less effective right when you need it most. Your overwintering plants also depend on relatively stable temperatures to survive dormancy without shock.
Now, here’s where pond design creates different challenges. Above-ground ponds lose heat from all sides—bottom, walls, and surface. They’re essentially giant radiators releasing warmth into the cold air. In-ground ponds have some natural insulation from the surrounding earth, but their walls and bottoms still conduct heat away, especially in regions where frost penetrates deep into the soil.
The real problem happens during freeze-thaw cycles. Rapid temperature swings stress everything in your pond far more than steady cold would. This is where proper autumn preparation and insulation become critical, particularly if you live in climates with harsh winters or unpredictable temperature fluctuations.
Without adequate insulation, you’re fighting a losing battle against physics, watching your carefully balanced ecosystem struggle through every cold snap.
What Makes Fiberglass Insulation Perfect for Ponds
The Good, the Bad, and the Itchy
Let’s be completely honest here – fiberglass insulation is a bit like that friend who’s great at parties but needs some boundaries. It has some fantastic qualities, but you need to know its quirks before inviting it to your pond project.
On the bright side, fiberglass insulation is a thermal superstar. Those tiny glass fibers trap air pockets beautifully, creating an effective barrier against winter’s chill. This means your pond equipment stays warmer and your fish enjoy a more stable environment. Plus, it’s wonderfully affordable compared to fancy foam boards, and you can find it at practically any home improvement store. No special ordering or waiting around – just grab it and go.
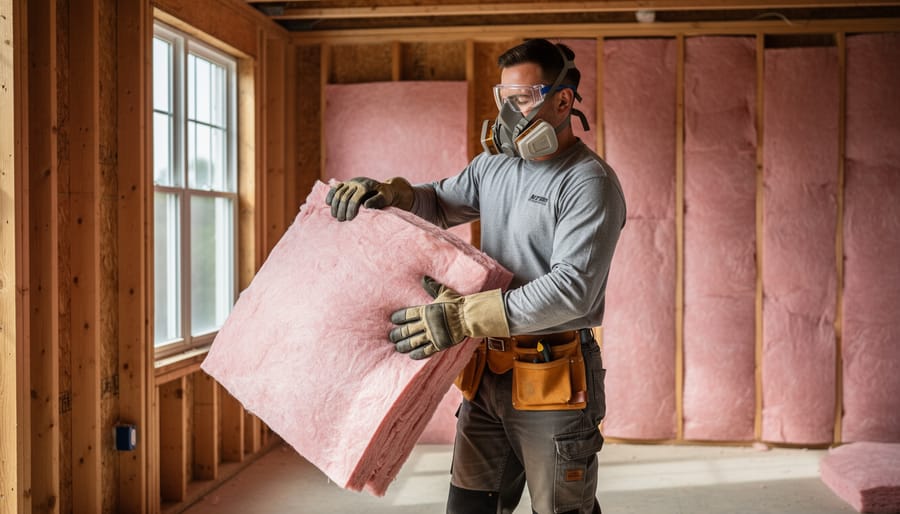
Here’s where things get a bit tricky, though. Fiberglass is notoriously itchy to work with. Those glass fibers love to irritate your skin, eyes, and lungs, so you’ll absolutely need gloves, long sleeves, safety glasses, and a good dust mask during installation. I learned this the hard way during my first pump house project – let’s just say I was scratching for days!
The bigger limitation for pond applications is moisture. Fiberglass loses much of its insulating power when wet, and direct water contact can cause it to compress and become essentially useless. This means you’ll always need to protect it with waterproof barriers or housing. It’s perfect inside a pump shed or wrapped around pipes with proper covering, but never directly against pond water or buried in damp soil without protection.
Where to Use Fiberglass Insulation in Your Water Garden
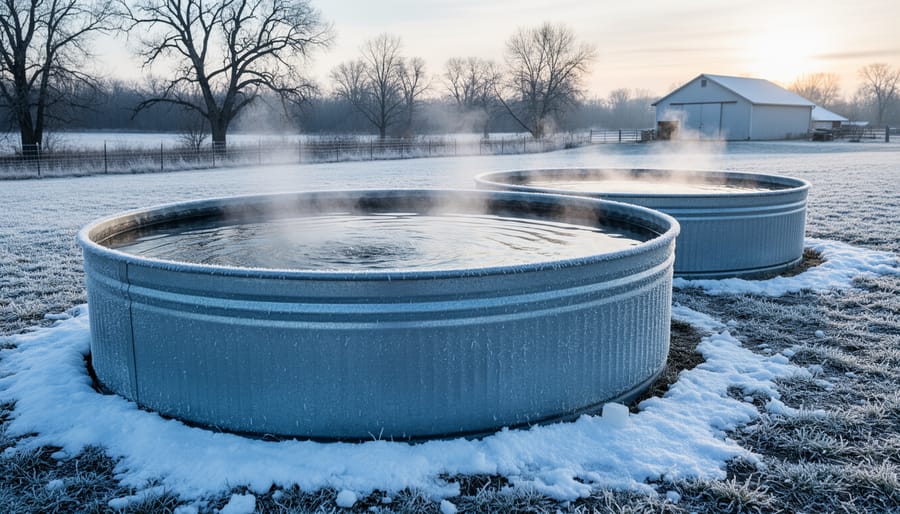
Insulating Above-Ground Ponds and Stock Tanks
Above-ground ponds and stock tanks lose heat much faster than in-ground versions because their walls are exposed to cold air and wind. I learned this the hard way my first winter with a raised trough pond—my poor goldfish were stressed, and I spent a fortune on pond heaters! Insulating the exterior walls is a game-changer for keeping water temperatures stable.
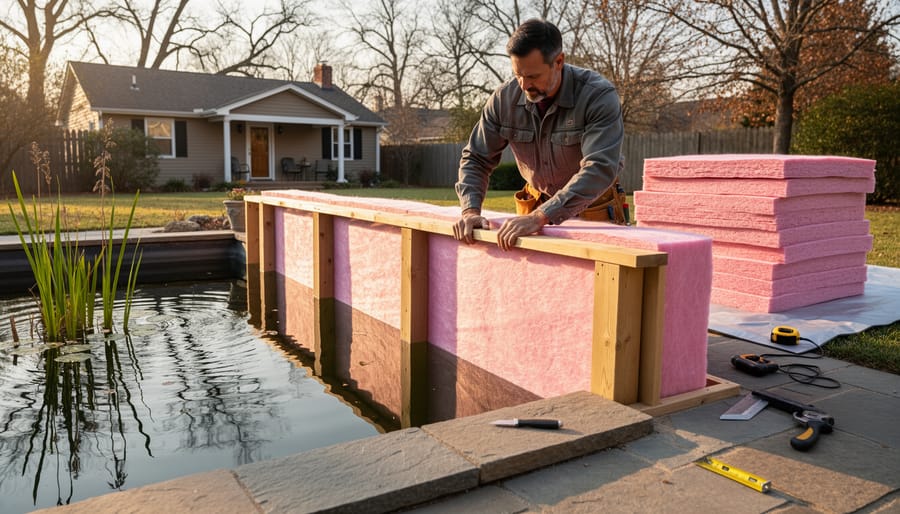
Start by measuring the circumference and height of your pond or tank. Cut fiberglass insulation batts to fit these dimensions, adding about two inches extra in height. Unfaced insulation works fine since you’ll be covering it completely. Carefully wrap the insulation around the exterior walls, securing it temporarily with twine or bungee cords as you work your way around.
Next, you’ll need a protective outer layer. Heavy-duty plastic sheeting or pond liner material works wonderfully for weatherproofing. Wrap this over the insulation, overlapping seams by at least six inches. Secure it with zip ties, duct tape, or waterproof adhesive. Make sure the bottom edge extends a few inches below the insulation to create a moisture barrier.
For a more polished look, consider creating a wooden skirt around the pond. Use fence boards, cedar planks, or even decorative lattice panels. These not only hide the insulation but also add visual appeal to your water garden. Leave a small air gap between the wood and the insulation wrap for ventilation.
Don’t forget to insulate the exposed plumbing and filter housing too! Wrap pipes with fiberglass pipe insulation and protect them with pipe sleeves or foam covers. Creating an insulated “blanket” around your entire pond system ensures consistent temperatures and happier aquatic life throughout winter months.
Protecting Pump Houses and Filter Boxes
Your pump house or filter box is the heart of your pond system, and keeping it warm during winter is essential for preventing frozen pipes and equipment damage. Fiberglass insulation offers an excellent solution for these small but mighty structures.
Start by measuring your pump house walls, ceiling, and any access doors. For wooden structures, fit fiberglass batts between wall studs, cutting them slightly larger than needed for a snug fit. Always wear gloves, long sleeves, and a dust mask when handling fiberglass. Secure the insulation with staples or friction fit, ensuring there are no gaps where cold air can sneak through.
Don’t forget the ceiling, where heat naturally rises and escapes. A double layer here provides extra protection during harsh freezes. For the floor, consider placing rigid foam board underneath before adding fiberglass if you’re building new or doing major renovations.
Seal your work by covering the insulation with plywood or moisture-resistant panels. This creates a protective barrier and prevents the fiberglass from getting wet or damaged. Add weatherstripping around doors to eliminate drafts. Remember, even a small heated space stays warmer much longer when properly insulated, keeping your pumps running smoothly all winter.
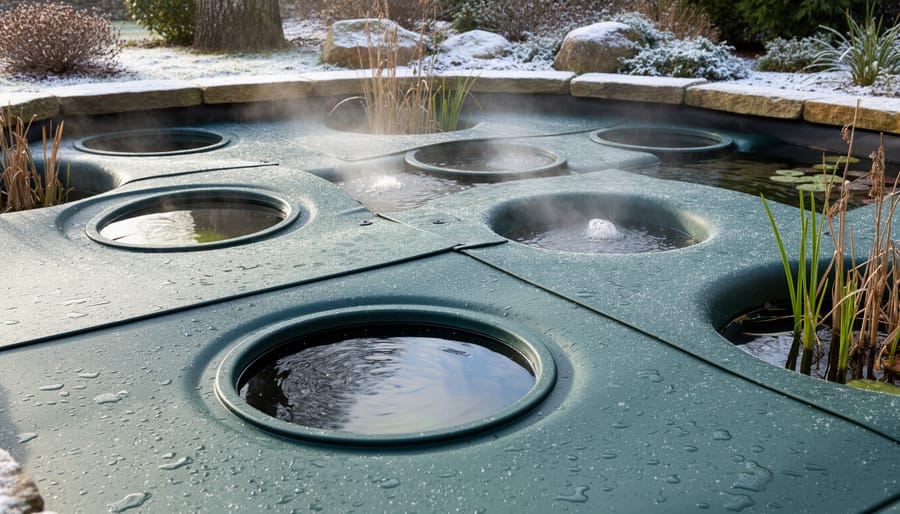
Insulating Pond Covers and Lids
Creating a partial pond cover with fiberglass insulation is like giving your pond a cozy winter blanket, but you need to be smart about it. The key word here is “partial” because your pond still needs to breathe, just like we do.
I learned this the hard way my first winter when I got a bit too enthusiastic and covered my entire pond. The next morning, I noticed my fish acting sluggish near the surface. Turns out, even in cold weather, beneficial bacteria and fish need oxygen, and harmful gases like ammonia need to escape. Now I never cover more than 60-70% of my pond’s surface.
Here’s how to build a safe, effective cover. Cut rigid foam insulation boards (the kind with foil facing works great) to fit sections of your pond, leaving generous openings for gas exchange. You can secure these panels with wooden frames that rest on the pond edges, making them easy to remove for feeding or maintenance.
For extra protection, sandwich fiberglass batt insulation between two layers of waterproof material like pond liner scraps or heavy-duty tarps. Secure everything with zip ties or staples, ensuring no loose fibers can reach the water.
Always position your covers away from areas where you have aeration equipment or pond heaters working, as these create crucial open water zones. Check daily that ice hasn’t sealed off your ventilation areas, and never place covers directly on the water surface where they could trap fish underneath.
How to Install Fiberglass Insulation Safely Around Your Pond
Safety First: Working With Fiberglass
Working with fiberglass insulation is straightforward when you know what to expect. The tiny glass fibers can tickle your skin a bit, but with simple precautions, you’ll be just fine.
Before starting your pond insulation project, grab these basics: long sleeves, long pants, work gloves, and safety glasses. A simple dust mask helps if you’re cutting fiberglass in an enclosed space. Think of it like gardening gear – you’re just protecting yourself from minor irritants, not hazardous materials.
Here’s a helpful tip from my own experience: work on a calm day when possible. Breezy conditions can send those tiny fibers floating around more than you’d like. Keep the insulation in its packaging until you’re ready to use it, and handle it gently rather than shaking or fluffing it.
If fiberglass does touch your skin, don’t panic or rub the area. Instead, use cold water to rinse – cold water keeps your pores closed. Pat dry gently and use tape to lift any remaining fibers. A cool shower afterward works wonders.
Most importantly, remember that any discomfort is temporary and mild. You’re simply being smart about a perfectly manageable DIY project that’ll keep your pond friends cozy all winter long.
Creating a Protective Barrier
Here’s the most important step in your insulation project – creating a waterproof barrier between the fiberglass and your pond water. Trust me, you don’t want those tiny glass fibers anywhere near your fish or plants!
Think of this barrier as a protective shield. The best materials for this job are heavy-duty plastic sheeting (at least 6 mil thick), leftover pond liner material, or rigid foam insulation boards. I personally love using pond liner scraps because they’re super durable and you might already have some lying around from your original pond installation.
Start by measuring the area you’ll be insulating. Cut your barrier material about 6 inches larger than needed on all sides – this extra material is your insurance policy. Lay the barrier directly against the pond structure before adding any fiberglass. If you’re working on vertical surfaces like pond walls, secure the plastic sheeting with outdoor-grade tape along the top edge first, then let gravity help you as you smooth it down.
For horizontal surfaces like over the pond or on bridges, overlap your barrier sheets by at least 12 inches and seal those seams with waterproof tape. Pay special attention to corners and edges where the barrier meets the pond rim. Use heavy stones, bricks, or landscape staples to anchor everything firmly in place.
Once your barrier is completely secured with zero gaps, you’re ready to add the fiberglass insulation on top. This protective layer ensures your pond stays a safe, healthy environment all winter long.
Weatherproofing Your Insulation
Once your fiberglass insulation is installed around your pond setup, you’ll want to protect it from the elements to ensure it lasts through many winter seasons. Think of this step as giving your insulation a raincoat and sunglasses!
Moisture is fiberglass insulation’s biggest enemy. When I first insulated my pond filter box, I learned this lesson the hard way during a particularly wet winter. The unprotected insulation absorbed water like a sponge and lost most of its effectiveness. Now I always add a protective layer, and you should too.
For vertical surfaces like insulated pond covers or filter boxes, vinyl siding works beautifully. It’s inexpensive, easy to cut with a utility knife, and comes in colors that can match your garden aesthetic. Alternatively, you can use weatherproof house wrap or heavy-duty pond liner material secured with zip ties or staples.
Horizontal surfaces need extra attention since they collect rain and snow. A simple plywood cover topped with waterproof paint creates an excellent shield. For a more decorative approach, consider using outdoor-rated fabric covers or building attractive wooden enclosures that double as garden benches or plant stands.
Don’t forget UV protection! Direct sunlight breaks down fiberglass over time, causing it to become brittle. Even a simple tarp can extend your insulation’s life by years, keeping your pond protection system working efficiently season after season.
Other Thermal Insulation Options Worth Considering
While fiberglass works wonderfully for many water garden applications, it’s smart to know what else is out there. Think of it like choosing the right tool from your shed – sometimes a different option might suit your specific situation better!
Rigid foam boards are fantastic alternatives, especially if you’re working on above-ground pond projects. They’re super easy to cut with a utility knife (I’ve shaped dozens during weekend projects), resist moisture brilliantly, and provide excellent R-values. Pink or blue foam boards from your local hardware store work great for boxing in pump houses or creating insulated pond covers.
Bubble wrap might sound quirky, but hear me out! The heavy-duty stuff designed for greenhouses creates air pockets that trap heat effectively. I’ve wrapped it around smaller preformed ponds with amazing results. It’s lightweight, affordable, and perfect for temporary winter protection.
For the truly adventurous DIYers, straw bales offer natural insulation with rustic charm. Stack them around your pond’s perimeter for earth-friendly protection. They decompose over time, so consider them seasonal rather than permanent solutions.
Earth berming involves mounding soil around your pond’s edges. It’s one of those thermal insulation techniques that works with nature rather than against it. While it requires more initial effort (hello, workout!), it provides long-lasting insulation and looks beautifully natural.
Each method has its sweet spot. Fiberglass shines for permanent installations and technical applications, while these alternatives might better suit temporary setups, budget constraints, or aesthetic preferences. Consider your pond’s size, your climate zone, and how hands-on you want to be before making your final choice.
You’ve made it through all the technical details, and here’s the wonderful news: insulating your water garden really is achievable, even if you’re tackling it for the first time. I remember feeling overwhelmed when I first considered winterizing my pond, but taking that first step made all the difference for my fish.
Here’s something important to remember: even partial insulation helps. If you can’t insulate every surface or afford every material right now, start with what you can manage. Maybe that’s just insulating the exposed pipe runs this year, or adding a simple cover to your pond. Every bit of protection you provide reduces heat loss and gives your fish a better chance of thriving through winter.
The rewarding feeling of watching your fish swim happily in spring, knowing you kept them safe through harsh conditions, is truly special. You’ve invested in creating a beautiful water garden, and with extreme weather protection like fiberglass insulation, you’re ensuring it remains a thriving ecosystem year-round.
Don’t worry about getting everything perfect immediately. Start small, learn as you go, and remember that every winter teaches you something new about your pond’s unique needs. You’ve got this!