
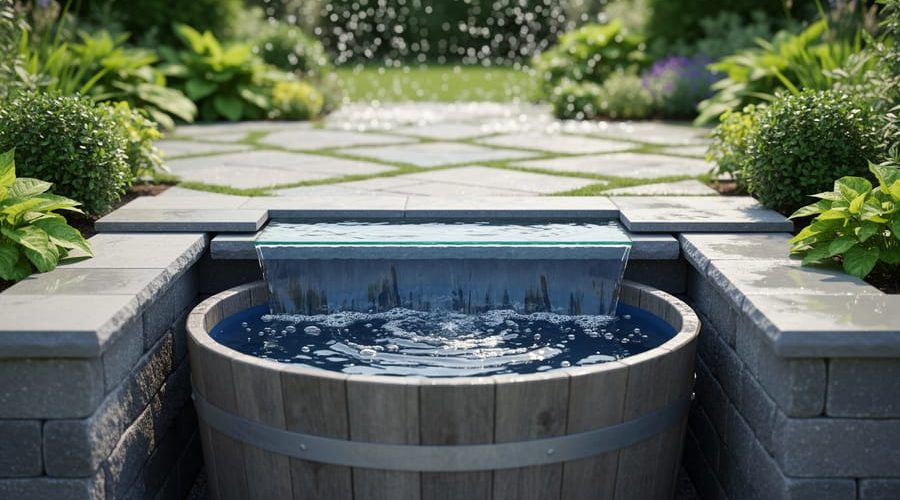
How to Build an Overflow Water Feature for Your Garden Pond
An overflow water feature creates a continuous, smooth sheet of water that spills over the edge of your pond or basin, delivering that elegant infinity-edge look you’ve seen at luxury resorts. Most DIYers complete this upgrade in a weekend using a dedicated basin pump, flexible liner, and a level edge surface, with typical project costs ranging from $200 to $600 depending on scale.
The magic happens when water flows over a perfectly level rim into a hidden catch basin below, then recirculates back to start the cycle again. Unlike traditional waterfalls that rely on stacked rocks and visible plumbing, an overflow feature depends entirely on precision leveling. Even a quarter-inch deviation will send water sheeting to one side instead of cascading evenly across your designed edge.
I added my first overflow feature three years ago to a half-barrel pond on my patio, and the transformation was immediate. The gentle, consistent water movement created a calming soundscape without the splashing noise of conventional fountains. More importantly, the circulation kept mosquitoes away and oxygenated the water for my goldfish far better than my old bubbler ever did.
This project suits anyone comfortable with basic plumbing and willing to invest time in getting the rim absolutely level. You’ll need moderate physical effort to excavate the catch basin and handle wet stone or concrete, but the techniques themselves are straightforward. The reward is a sophisticated water feature that looks professionally installed and adds genuine value to your outdoor space while requiring minimal ongoing maintenance once you’ve dialed in the flow rate.
Understanding Overflow Water Features
An overflow water feature creates a mesmerizing effect where water spills cleanly over a defined edge, similar to an infinity pool. The system works by pumping water from a lower catch basin up to the overflow point, where it cascades over the edge in a smooth sheet or curtain before returning to the basin below. This continuous cycle creates movement, sound, and visual interest that transforms an ordinary pond into a focal point.
The magic happens through precise leveling. When the overflow edge sits perfectly horizontal, water spreads evenly across its entire length, creating that signature glass-like sheet effect. Any slight tilt concentrates the flow to one side, breaking the illusion. The pump pushes just enough water to maintain a thin, steady flow over the lip without flooding, typically creating a quarter-inch to half-inch layer that catches light beautifully.
Three main styles suit different spaces and aesthetics. The infinity edge creates that vanishing-horizon effect where water appears to drop off into nothingness, perfect for elevated ponds with a view. A spillway design channels water through a narrower opening, concentrating the flow for a more dramatic waterfall sound and appearance. Rim overflow wraps around part or all of the pond perimeter, creating a subtle, modern look where water constantly refreshes itself over the edges.
Beyond looks, these features improve pond health. The cascading action oxygenates water as it falls and tumbles, benefiting fish and plants. The surface movement discourages mosquitoes and reduces stagnant zones. Choose your style based on your pond’s location, existing shape, and whether you want peaceful trickling sounds or a bolder statement piece.
What You’ll Need to Get Started
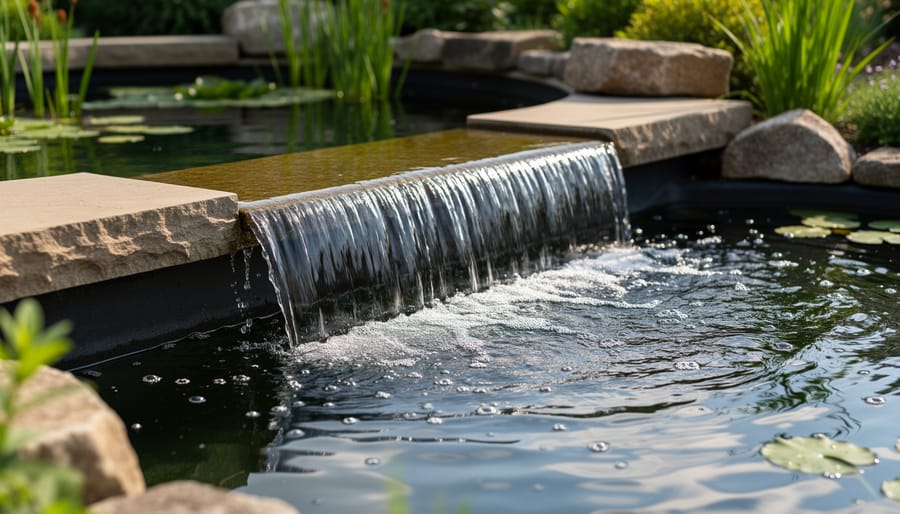
Before you break ground on your overflow water feature, gathering the right tools and materials will make the build smoother and help you avoid mid-project trips to the store. Think of this as your shopping list, each item plays a specific role in creating that elegant sheet of water cascading over the edge.
Essential Tools and Materials
- 4-foot level, critical for achieving an even overflow edge so water sheets across uniformly rather than pouring from one spot
- Shovel and spade, for excavating the overflow area and catch basin
- Rubber mallet, gently taps stones and edging into place without cracking them
- Utility knife, cuts liner and tubing cleanly to exact measurements
- Flexible pond liner (EPDM or rubber), forms the waterproof barrier for your overflow channel and catch basin, sized with at least 12 inches of overlap on all sides
- Spillway box or custom weir, the structure that creates the overflow lip; preformed boxes simplify installation, while custom weirs offer more design freedom
- Submersible pump rated for your desired flow (typically 2000-4000 GPH for most garden overflows), powers the water circulation from catch basin back to pond
- Flexible PVC tubing (1.5 to 2 inches diameter), connects pump to overflow point, sized to match your pump’s output
- Flat stones, pavers, or custom edging material, caps the overflow lip and creates the finished aesthetic
- Silicone sealant or pond-safe adhesive, seals gaps between stones and liner to prevent leaks
You’ll also want a tape measure, work gloves, and a wheelbarrow for moving materials. If you’re building a raised overflow edge rather than excavating, add concrete blocks or stacked stone to your list. The pump is your most important investment, undersizing it means disappointing trickle flow, while the right GPH rating delivers that satisfying water curtain effect. Don’t skimp on liner quality either; cheap material develops leaks within a season, turning your feature into a repair project.
Important Safety and Planning Considerations
Building an overflow water feature involves real risks that deserve your attention before you pick up a shovel. Electrical work near water is the biggest concern, always use GFCI-protected outlets and never run extension cords to your pump. If you’re not comfortable with electrical installations, hire a licensed electrician. It’s worth the cost for peace of mind and compliance with local codes.
Check your local building codes before starting, as some areas require permits for water features or have restrictions on pond modifications. You’ll also be moving heavy materials like stone edging and possibly excavating soil, so use proper lifting techniques and ask for help with anything you can’t safely handle alone. Plan for maintenance access from the start, you’ll need to reach the pump, clean the overflow edge, and inspect connections regularly. These basic pond safety tips apply here too, especially if kids or pets are around during construction.
Don’t proceed if your ground is unstable, soggy, or showing signs of shifting. Likewise, if your electrical setup isn’t properly grounded and protected, stop until it’s corrected. An overflow feature relies on consistent levels and reliable power, compromising either sets you up for frustration and potential damage down the line.
Step-by-Step: Building Your Overflow Water Feature
Planning Your Overflow Design
Before you break ground, take time to map out your overflow design on paper. Start by walking around your pond and identifying the best overflow location, you’ll want a spot where visitors naturally gather or where the view from your favorite seating area will showcase the water sheet. Consider sun exposure too; east or west-facing overflows catch beautiful light at dawn or dusk.
Measure your desired drop height from the overflow lip to the catch basin below. Most DIY overflows work well with drops between 6 and 18 inches. Taller drops create more drama and splash, while shorter ones produce a gentler sheet of water. Sketch your design showing the overflow width (start with 18-24 inches for manageable construction), the pump location, and how water will return to the main pond.
Now calculate flow requirements. A good rule: plan for 100-150 gallons per hour for each inch of overflow width. So a 24-inch overflow needs roughly 2,400-3,600 GPH. Factor in head height, your pump must push water up to the overflow level and overcome friction loss in the tubing.
If you’re adding this to an existing pond, plan how the new feature will complement current waterfalls or streams rather than competing with them.
Preparing the Overflow Edge
The overflow edge is where the magic happens, so precision here pays off. Start by marking the exact line where water will spill over. If you’re working with an existing pond, you may need to excavate soil to lower one section of the rim, or build up an edge with stacked stone or concrete blocks to create the drop. Either way, the critical task is achieving perfect level across the entire overflow lip, even a quarter-inch difference will cause water to cascade unevenly from one spot instead of creating that smooth sheet effect you’re after.
Use a long spirit level or a laser level to check the edge repeatedly as you work. For a concrete pond spillway you’ll pour and screed carefully to lock in that level permanently. For other materials like stone or timber, shim and adjust until everything’s dead flat.
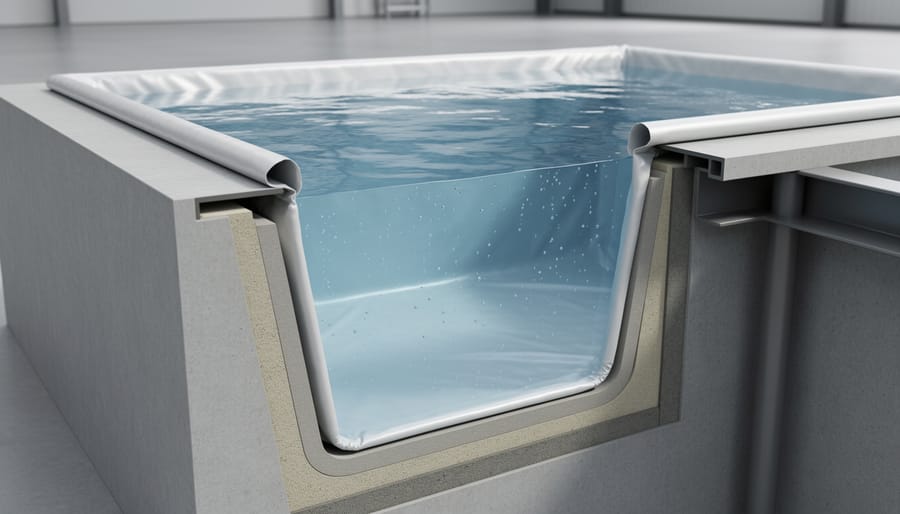
Once the structure is level, lay your pond liner over the edge with at least 30 cm of overlap extending beyond the spillway point. The liner must drape smoothly without wrinkles that could redirect water flow. Secure it temporarily with smooth stones (no sharp edges that might puncture), then fold and tuck the overlap neatly on the downstream side. You’ll hide this excess later with edging material, but for now, just ensure water can’t sneak underneath and erode the base.
Installing the Pump and Plumbing
Position your pump in the catch basin at a depth that keeps the intake fully submerged during normal operation, typically 6 to 12 inches below the minimum water level. This prevents air intake and noisy cavitation. Secure the pump on a flat stone or plastic base to keep debris from clogging the intake screen.
Run flexible tubing from the pump outlet to your overflow point, choosing a diameter that matches your pump’s specifications (usually 1 to 2 inches for most garden features). Avoid sharp bends that restrict flow; if you must turn corners, use gentle sweeping curves or proper elbow fittings. Secure tubing with stainless steel hose clamps at every connection point, finger-tight plus one quarter turn with a screwdriver prevents leaks without crushing the fittings.
Bury the supply line underground or hide pond pumps and tubing behind rocks, plants, or decorative edging as it travels from catch basin to overflow. If running tubing above ground temporarily during testing, stake it down so it doesn’t shift. Leave a small service loop near the pump, an extra foot of slack makes future maintenance much easier without redoing the entire plumbing run.
Test all connections under pressure before backfilling or final camouflage work.
Finishing the Overflow Edge
The final edge treatment determines whether your overflow looks polished or amateur. Start by selecting edging material that’s both smooth and level, natural stone, bluestone pavers, or porcelain tile all work beautifully. Whatever you choose, avoid rough or porous surfaces that’ll cause turbulent, uneven flow.
Lay your edging pieces dry first to check the fit and alignment. Use a torpedo level constantly, even a quarter-inch variance creates noticeable dips in the water sheet. Once satisfied, secure the edging with waterproof construction adhesive or mortar, working in small sections. The overflow lip should extend slightly beyond the liner edge, creating a clean break point where water detaches and falls.
Seal every gap and joint with clear silicone or pond-safe sealant. Water finds the smallest opening, and leaks here waste pump energy while creating muddy messes below. Pay special attention to corner joints and where edging meets vertical surfaces.
For the cleanest flow, create a subtle bevel on the overflow lip’s top surface, sloping gently toward the drop edge. This guides water forward and prevents backflow that clings to the underside. Test with a garden hose before calling it finished, the water should sheet evenly across the entire length without splitting or dribbling backward.
Creating the Catch Basin and Return
The catch basin collects overflow water before returning it to your pond, so it needs sufficient volume and a watertight seal. Dig a depression below your overflow edge, aim for at least 12 inches deep and wide enough to handle peak flow without splashing out. The basin size depends on your pump’s GPH rating; as a rule, you want capacity for at least two minutes of overflow volume.
Line the basin with the same EPDM or PVC liner used for your pond, extending it up the sides and overlapping with your overflow edge liner by at least six inches. Seal the overlap with liner tape or adhesive to prevent leaks. Place your return pump at the lowest point of the catch basin, then run the supply line back to feed your overflow point, this closed loop keeps water circulating continuously.
Disguise the catch basin with stacked rocks around the perimeter, leaving gaps for water entry, or plant moisture-loving ground covers like creeping Jenny to soften the edges. If you’re tackling a more complex setup with filtration, the principles mirror a sediment pond build where equipment stays hidden yet accessible. Ensure you can reach the pump easily for cleaning without dismantling your entire rock arrangement.
Testing and Fine-Tuning Your Overflow
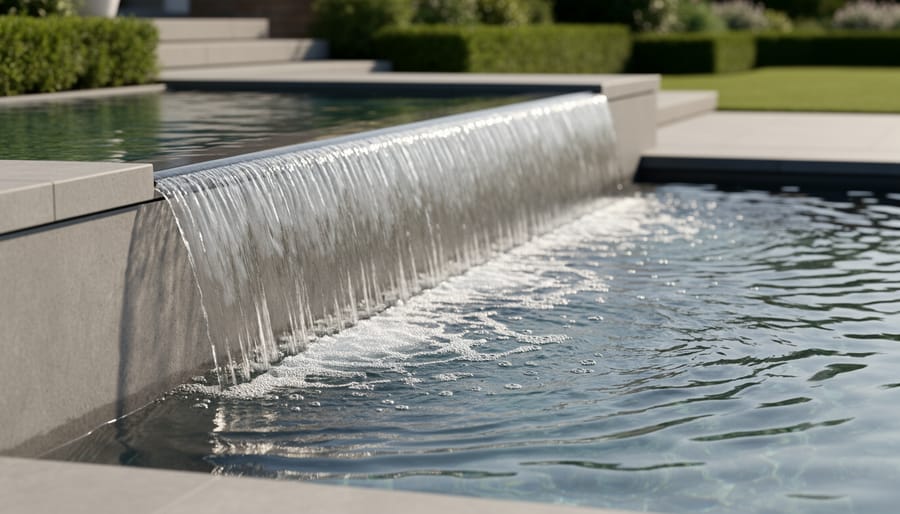
Fill the system and run the pump at about 75% capacity for the first test. Walk around the entire overflow edge and watch how water behaves. An even, continuous sheet means your leveling was spot-on; if certain sections barely trickle while others gush, you’ll need to make adjustments. Mark the dry or overactive spots with stakes, shut down the pump, and use shims or additional base material under the low areas. Recheck with a long spirit level and test again until the flow is uniform.
Before considering the job complete, verify these critical points:
- Water flows evenly across the entire overflow edge without gaps or heavy spots
- No leaks appear in the liner, connections, or catch basin during a full cycle
- The pump runs smoothly without straining or making unusual noises
- The catch basin handles peak flow without overflowing or backing up
- The finished appearance matches your design vision and blends naturally
Test at different pump speeds to find the sweet spot. Full power might create too aggressive a cascade or drain the catch basin faster than it refills, while low settings may not produce the visual effect you want. Listen for gurgling sounds, which usually mean air is entering the system through a loose connection or the pump intake is too close to the surface. Tighten fittings and adjust the pump depth to eliminate these noises.
Run the system for several hours and monitor water levels. Some evaporation is normal, but if you’re adding water constantly, trace every connection and inspect the liner for punctures. Pay special attention to where tubing enters the overflow structure, as these junctions often develop small leaks that only show up under sustained operation. A properly tuned overflow should run for days with minimal water loss beyond normal evaporation.
Maintenance and Seasonal Care
Your overflow feature will deliver years of stunning performance with a simple maintenance routine. Check the overflow edge weekly during the active season, wiping away any algae film or debris that accumulates along the lip, even a thin layer disrupts the clean water sheet you’ve worked to create. Pairing your overflow with smart filtration keeps the water crystal clear and reduces cleaning frequency.
Inspect your pump monthly: pull the intake screen, rinse it thoroughly, and confirm all connections remain watertight. Every spring, verify the overflow edge is still perfectly level, ground settling happens, and a millimetre off-level creates uneven flow. Adjust shims or edging stones as needed. During summer’s peak evaporation, top up your pond more frequently and watch for exposed liner at the catch basin.
Before winter in cold climates, shut down the overflow system completely. Drain all plumbing lines, remove and store the pump indoors, and cover the overflow edge to prevent ice damage. In milder regions, you can run the system year-round at reduced flow, but monitor for freezing overnight. When spring arrives, restart slowly: check all seals, clear any winter debris, and run the pump at low speed initially to catch leaks before ramping up to full flow.
Common Questions About Overflow Water Features
People planning an overflow water feature often have similar questions before they start. Here are answers to the most common concerns that’ll help you move forward with confidence.
How much does an overflow water feature typically cost?
Costs range from $200 for a simple DIY spillway edge on a small pond to $2,000 or more for elaborate infinity-edge designs with custom stonework and high-capacity pumps. Most backyard projects fall between $400 and $800, depending on materials and pond size.
Can I add an overflow feature to my existing pond?
Absolutely, retrofitting is one of the most popular applications. You’ll need to create an overflow edge at or slightly above the existing water level, then install a catch basin below it with a return pump. The key is ensuring your current pond structure can support the additional weight and water movement.
What size pump do I need for my overflow?
A good rule is 100 to 150 gallons per hour for every inch of weir width. A 24-inch-wide overflow edge needs a pump rated 2,400 to 3,600 GPH for a smooth, glass-like sheet of water. Undersizing creates a trickle instead of an impressive cascade.
Will an overflow feature work with fish and plants?
Yes, and it actually benefits both. The continuous water movement increases oxygen levels, which fish love, and the circulation helps distribute nutrients to plants. Just ensure fish can’t get swept into the overflow by using a screened intake or keeping the overflow velocity moderate.
Evaporation is another practical concern. Expect to lose about one to two inches of water per week during warm months, mostly from the exposed overflow surface and increased aeration. This is manageable with an automatic top-off valve or a weekly manual refill, just part of routine maintenance. The dramatic visual effect and improved water quality make the small extra effort worthwhile.
Noise levels surprise many first-time builders in a good way. A properly leveled overflow creates a gentle, soothing sheet of water rather than splashing chaos. You’ll hear a soft, consistent sound similar to a natural stream. If you get gurgling or loud splashing, it usually means the edge isn’t perfectly level or the flow rate needs adjustment.
Building an overflow water feature transforms your garden pond from a simple water basin into a dynamic, living centerpiece. You’ve learned how to create that mesmerizing sheet of water cascading over a perfectly level edge, a feature that not only catches the eye but also improves circulation and oxygenation for your pond ecosystem.
The key to success lies in careful planning and taking your time with the leveling stage. Rush that part, and you’ll spend weeks tweaking. Get it right from the start, and you’ll enjoy years of trouble-free operation with minimal upkeep beyond routine cleaning.
Start small if you’re feeling uncertain. Even a modest overflow section along one side of your pond creates stunning visual impact. You can always expand later once you’ve mastered the technique and seen how your specific site responds.
Now that your overflow is running smoothly, consider what else might enhance your water garden. Underwater lighting, additional waterfalls, or strategic plantings around the catch basin can multiply the drama. Each addition builds on what you’ve already accomplished.
Take a moment to enjoy what you’ve built. That soothing sound of flowing water and the optical illusion of an endless edge, that’s your handiwork paying dividends every single day.