
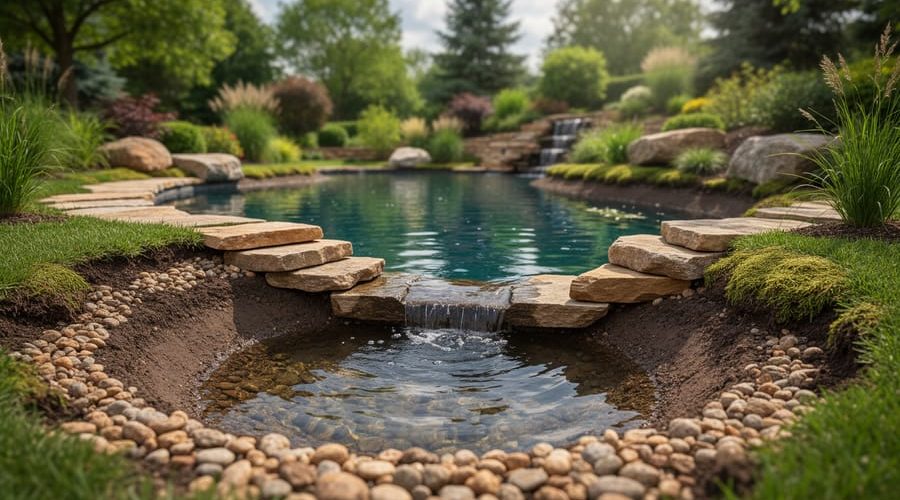
How to Build a Sediment Pond That Hides Pipes, Filters, and Equipment
Building a sediment pond starts with excavating a settling basin upstream of your main pond, sizing it to hold roughly 10-20% of your primary pond’s volume, then shaping the bottom with a gentle slope toward a cleanout point. This pre-filter captures soil, debris, and organic matter before they cloud your feature pond, and when designed thoughtfully, the entire system including inlet pipes, overflow structures, and access points can blend seamlessly into your landscape rather than announce itself as a utility basin.
I learned this the hard way years ago when my first attempt at a sediment pond looked exactly like what it was: a muddy crater with exposed PVC sticking up at odd angles. Functional? Yes. Beautiful? Absolutely not. The good news is that concealing the mechanical bits doesn’t require advanced masonry skills or a landscaping budget that makes you wince. Strategic plantings, natural stone placement, and burying lines during the initial dig accomplish most of the work.
The construction process involves careful site selection, proper excavation depth and profile, liner installation if your soil won’t hold water, and thoughtful routing of inlet and outlet structures. Each decision affects both how well the pond traps sediment and how naturally it sits in your yard. You’ll finish with a working system that protects your main pond from constant maintenance while looking like it’s always been part of the scenery.
This guide walks you through the complete build, from marking out your site through final planting and testing, with concealment strategies woven into each phase rather than tacked on afterward. Whether you’re working with a small backyard runoff issue or managing drainage for a larger water feature, the principles stay the same.
What You’ll Need: Tools and Materials
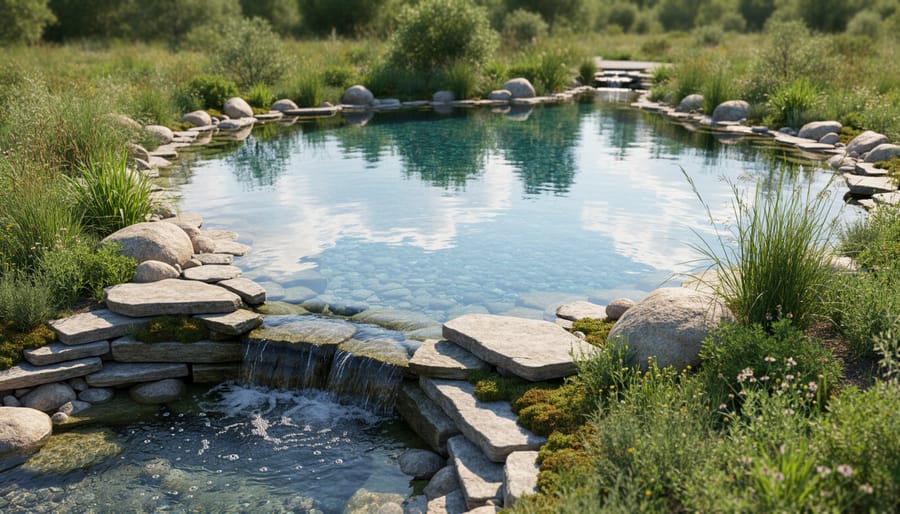
Before you break ground on your sediment pond, gather everything you’ll need for each phase of the project. Organizing your supplies ahead of time prevents frustrating mid-construction trips to the hardware store and helps you understand the full scope of the build.
Excavation Phase:
- Spade and flat shovel for digging and shaping
- Wheelbarrow for moving soil and materials
- Garden hose or marking paint to outline the pond
- Level and measuring tape for checking depth and dimensions
- Work gloves and sturdy footwear
Liner Installation Phase:
- Geotextile underlayment fabric sized to your excavation
- Flexible EPDM or PVC pond liner with extra for edges
- Sand or old carpet scraps for additional cushioning
- Bricks or heavy stones to temporarily hold liner in place
Plumbing and Filtration Phase:
- PVC pipes and fittings for inlet and outlet connections
- Submersible pump appropriate for your water volume
- Filter media such as lava rock, gravel, or bio-balls
- PVC cement and Teflon tape for watertight connections
- Flexible tubing if routing around obstacles
Concealment and Finishing Phase:
- Natural fieldstone, river rocks, and cobbles in varying sizes
- Marginal aquatic plants like rushes, iris, or cattails
- Aquatic planting baskets and media
- Additional decorative rocks to hide equipment housings
- Mulch or pea gravel for finishing edges
You won’t necessarily use every item in equal measure. The rock quantities depend heavily on how much infrastructure you need to hide, while plant selection varies with your climate and aesthetic preferences. Start with the essentials for excavation and liner work, then adjust your concealment materials as the structure takes shape.
Safety First: Before You Dig
Before you break ground, take these precautions seriously. Call 811 at least two business days before digging to have underground utility lines marked for free. You’ll avoid hitting electrical, gas, water, or communication lines that could cause injury, property damage, or service disruption.
Wear sturdy work boots, heavy-duty gloves, and eye protection throughout the project. Excavation work strains your back, so lift with your legs and get help moving heavy rocks or equipment. If you’re digging deeper than two feet, watch for cave-ins and avoid working alone in the hole.
Stop and call a professional if you encounter unexpected underground obstacles, standing water that won’t drain, or soil conditions that seem unstable. These aren’t DIY fixes. For comprehensive guidance on creating a safe water feature, review our pond safety tips that cover hazards beyond construction.
Keep children and pets away from the work area, especially around open excavations and power tools. Mark the perimeter clearly if you need to leave the site unfinished overnight.
Step-by-Step: Building Your Sediment Pond
Step 1: Plan the Layout and Mark Your Site
Start by measuring your main pond’s surface area, your sediment pond should be roughly 10-15% of that size. For a 1,000-gallon main pond, you’re looking at a sediment pond around 100-150 gallons. This ratio gives enough settling time for particles to drop out before water moves downstream.
Location matters more than you might think. Position your sediment pond upstream from the main pond, ideally where water first enters your system, whether that’s from a stream, runoff channel, or pump return. You want gravity working with you, not against you. Walk the area and identify the natural flow path, then mark a spot that’s higher than your main pond’s water level.
Depth should be 18-24 inches at the center. Deeper ponds settle sediment better, but they’re harder to maintain. Mark out your shape using landscape paint, stakes, or a garden hose laid on the ground. Make it kidney-shaped or irregular rather than perfectly round, this looks more natural and gives you flexibility for hiding pipes later.
While marking, plan your pipe route from the sediment pond to the main pond. Mark this path with stakes or flags. Look for spots where you can dig the pipe trench slightly deeper or tuck it behind a future rock grouping. These decisions now save you headaches when you’re trying to conceal everything later.
Step 2: Excavate and Shape the Basin
Start digging from the center outward, removing soil in layers rather than trying to reach full depth all at once. Aim for 18 to 24 inches deep in the main basin, this gives you enough volume to slow water flow and let sediment drop out, but it’s not so deep that you’re wrestling with unstable walls or excessive liner material.
As you dig, slope the edges gradually at about a 20-degree angle. Steep sides will shed rocks and make planting impossible, while gentle slopes create stable surfaces for stones and marginal plants that’ll eventually hide your infrastructure.
Carve a shallow shelf six to eight inches below the planned waterline around the perimeter. This shelf serves double duty: it’s where you’ll position plants in pots or gravel pockets, and it gives you a stable ledge for arranging rocks that conceal pipe entries and exits.
Before you finish, dig narrow channels along the routes where pipes will run, typically from the inlet on one side to the outlet on the other. These channels should be just deep enough to nestle pipes below the liner’s final surface, letting you cover them with substrate and rocks without creating obvious mounds. I’ve found that marking these paths with stakes before you start digging saves you from awkward retrofitting later.
Tamp down loose soil in the basin floor so it won’t settle unevenly under the liner’s weight.
Step 3: Install Underlayment and Liner
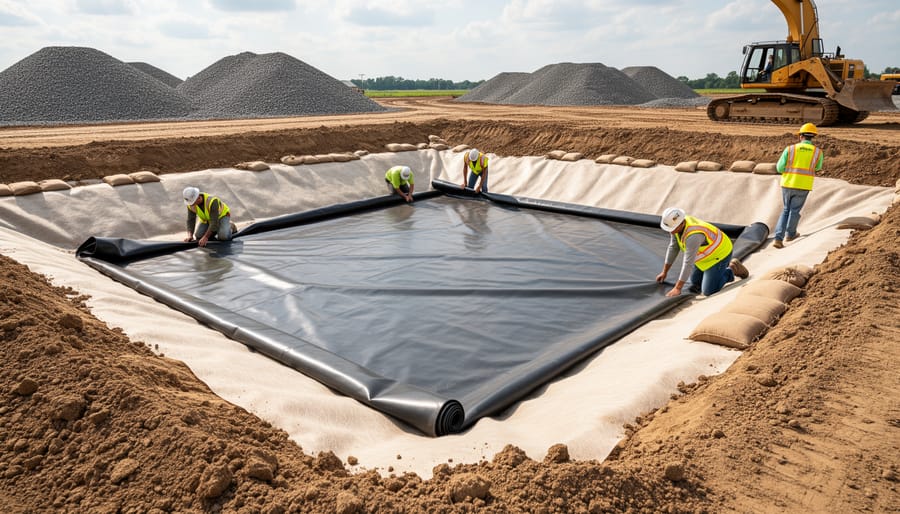
Start with the underlayment. Roll out your protective fabric across the excavated basin, working from the center outward. Overlap seams by at least six inches and let the material extend up the sides and over the edges by about 12 inches. Don’t pull it tight; leave some slack so it can settle with the liner.
Position your flexible liner next. Unfold it carefully and drape it into the depression, centering it over the underlayment. Let gravity help here rather than forcing it into corners. As you spread the liner, create deliberate pleats and folds at curves rather than bunching the material randomly. These organized folds will later serve as channels where you can tuck pipes out of sight.
Where pipes will enter or exit the pond, form the liner into gentle valleys or pockets. For instance, if your inlet pipe approaches from the north side, shape a small trough in the liner at that point. You’ll nestle the pipe into this depression before covering it with rocks. The same approach works for outlet pipes heading toward your main pond. The goal is giving yourself built-in hiding spots rather than having pipes lie on top of the liner where they’re obvious.
Secure the edges temporarily with smooth stones or sandbags while you adjust the fit. Trim excess liner once everything sits naturally, leaving at least eight inches beyond the waterline for final edging. At planned overflow areas, create a low spot in the liner edge so water spills where you want it, not randomly.
Step 4: Set Up the Filtration and Plumbing
Now you’re ready to bring your sediment pond to life with the plumbing that makes it work. The inlet pipe carries water from your source into the pond, where it flows through filter media before exiting to your main pond. The trick is setting up this system so everything functions smoothly while staying completely hidden.
Start by running your inlet pipe from the water source to the sediment pond’s deepest area. If you’re working with a stream or waterfall, position the inlet where water enters naturally. For pump-fed systems, route the pipe beneath the liner edge before it enters the basin, this keeps it invisible from the start. Secure the pipe with rocks or soil outside the pond, then bring it through a small fold or cut in the liner. Seal any liner penetrations with appropriate pond-safe sealant.
Next, spread your filter media across the pond bottom. A 4-6 inch layer of pea gravel or specialized filter rock works well for trapping sediment. River rock (2-4 inches) on top creates a natural streambed appearance while supporting beneficial bacteria. This layered approach is part of smart filtration that handles debris before it reaches your main pond.
Install the outlet pipe where water exits to your main pond. Position it slightly elevated from the bottom so sediment settles below the outflow. Route this pipe beneath rocks or through a spillway formation you’ll build in the next step. Test the flow by adding water, it should move steadily through the gravel bed without creating channels or exposing the liner. Adjust rock placement if you spot any pipes showing through.
Step 5: Conceal Pipes and Equipment with Natural Materials
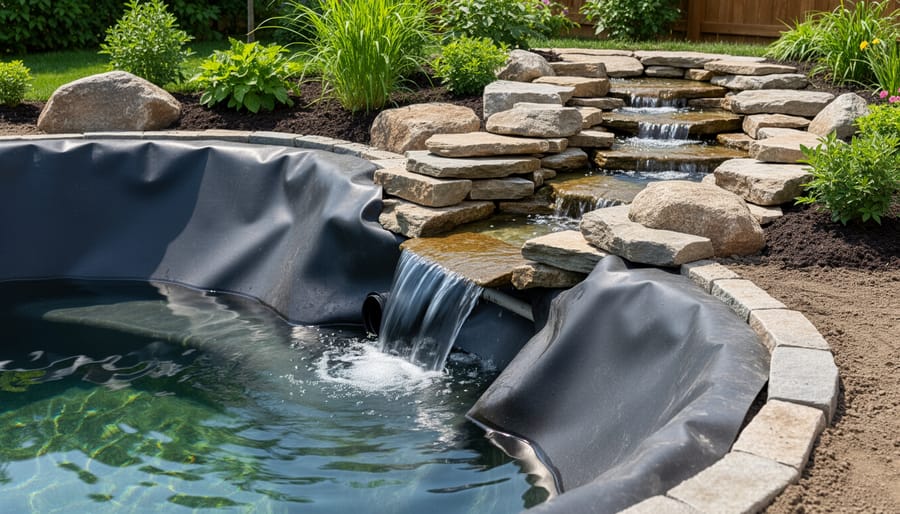
Now you get to transform raw infrastructure into something that looks like it’s always been there. This step makes the difference between a pond that screams “DIY project” and one that feels like a natural water feature.
Start with your exposed pipes. Layer flat rocks along pipe runs, stacking them loosely enough to access if needed but tightly enough to create a convincing stone formation. I once used river cobbles to create a meandering “dry creek bed” that completely disguised the inlet pipe, visitors assumed it was decorative, not functional. For vertical pipe sections, build cairn-style stone pillars around them or position larger boulders with the pipe tucked in the shadowed gap behind.
The outlet pipe deserves special attention. Instead of a visible pipe end, create a spillway by stacking flat stones in a cascading arrangement over and around the outlet. Water flows through the gaps naturally, and the pipe disappears entirely. Use progressively smaller stones as you build upward to maintain stability and visual interest.
Plants become your best allies here. Position tall marginals like rushes or iris directly in front of pump housings and filter boxes. Their foliage creates a living screen that moves with the breeze, far more convincing than static rocks. Creeping Jenny or water mint trailing over stone edges softens hard lines beautifully.
For filter housings, build a stone grouping that looks intentionally placed for aesthetics, not function. Mix rock sizes and types as you would in natural outcropping, leaving the front accessible while the stones wrap around sides and back. This approach helps you hide pumps and filters without sacrificing maintenance access.
Step back frequently. If something catches your eye as “too perfect” or geometric, adjust it. Nature rarely creates straight lines or symmetrical patterns.
Step 6: Add Planting Shelves and Marginal Plants
With the hardscape in place, it’s time to bring your sediment pond to life with plants that work double duty, filtering water and hiding any remaining visible infrastructure.
Start by placing a layer of aquatic soil or heavy clay on your shelves, about 2-3 inches deep. This gives plant roots something to grip without clouding the water too much. For sediment ponds, choose tough, adaptable species: soft rush (Juncus effusus) handles variable water levels beautifully, while blue flag iris adds color and screens pipe edges. Cattails are workhorses for filtration, though they spread aggressively, plant them in contained pockets if space is tight.
Position taller plants like cattails and rushes near inlet pipes or filter housings to create natural vertical screens. Lower-growing iris and pickerel rush work well along shelves where pipes run horizontally. Tuck roots gently around rocks so plants appear to emerge from stone rather than sitting on top of it. This plant integration softens hard edges and completes the illusion that everything grew there naturally.
Give new plantings a week to establish before adjusting water flow to full strength. Their roots will stabilize sediment and pull nutrients from incoming water, making them functional filters as well as living camouflage.
Step 7: Final Touches and Water Testing
With your pond taking shape, it’s time to refine the details that transform it from a construction site into a natural pond edge. Start by walking around the entire perimeter and adjusting any rocks that look obviously placed rather than settled. Tuck smaller stones into gaps between larger ones, angling them slightly to mimic how water and time arrange rocks naturally.
Turn on the water flow and watch how it moves through the system. You’ll notice high spots where water pools or fast channels where it rushes. Reposition rocks to create gentle cascades at the outlet, slowing the flow and hiding that pipe completely beneath the spillway. Check every connection point for leaks, paying special attention to where pipes enter or exit the liner.
Let the system run for at least 24 hours before adding any fish or plants to the main pond. You’ll see sediment begin to collect in the basin, which proves the pond is doing its job. Add a layer of shredded bark mulch around the pond’s edge to blend it into the surrounding landscape. Tuck in a few final clumps of low-growing plants like creeping Jenny or sweet flag between rocks to soften any remaining hard edges. Step back and look for anything that still screams “artificial,” then adjust until it doesn’t.
How to Know It’s Working: Testing and Verification
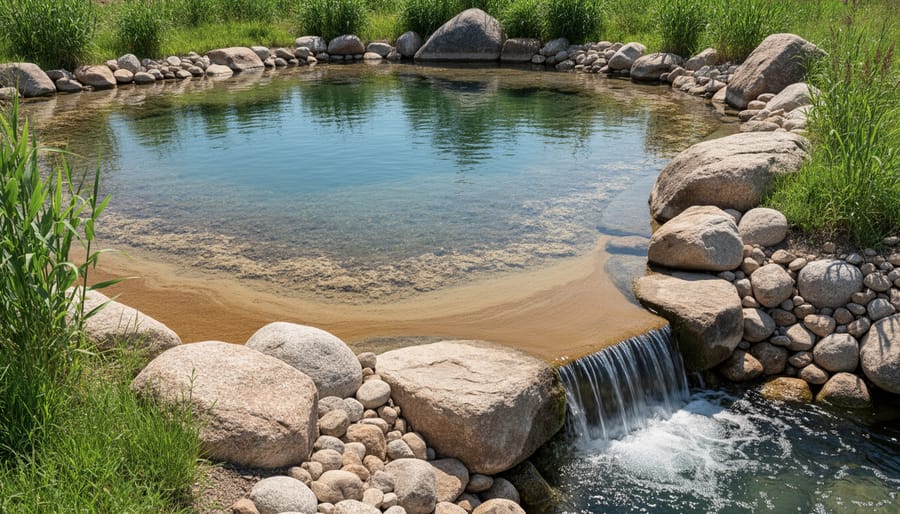
Your sediment pond is working when you see clear water flowing into your main pond, sediment collecting in the basin rather than traveling downstream, and plants thriving on the shelves. The infrastructure you worked to conceal should remain invisible, with rocks and plantings intact around pipe entries and outlets.
Walk around your pond and look at the outlet where water flows to the main pond. The water should be noticeably clearer than what enters through the inlet. You’ll see sediment settling in the deepest part of your basin, usually appearing as a layer of fine particles on the liner or gravel bed. This buildup is exactly what you want because it means debris isn’t reaching your main pond.
Check that all pipes remain hidden beneath rocks and liner folds. Gently test rock stability around pipe entries without disturbing the arrangement. Your concealment work should look natural and undisturbed, with no exposed black liner or visible plumbing.
For a simple flow test, drop a small floating object like a leaf into the inlet and time how long it takes to reach the outlet. The sediment pond should slow the water enough that particles can settle. If water rushes straight through in seconds, you may need to add more filter media or adjust the basin depth.
Healthy marginal plants signal that your system is balanced. Rushes and iris should show new growth within a few weeks of planting, and their roots will help stabilize the concealment materials you’ve placed around pipes. Yellowing or dying plants might indicate water flow problems or inadequate planting depth.
Maintenance and What Comes Next
Your sediment pond won’t stay effective without regular upkeep, but the good news is that concealing the infrastructure makes the maintenance tasks more obvious, you can immediately see when something needs attention.
Every few months, check the sediment accumulation in the basin. When the settled material reaches about one-third of the pond’s depth, it’s time to remove it. Use a pond vacuum or carefully scoop out the debris with a flat shovel, working from the deepest point outward. Dispose of the sediment in garden beds where it can enrich the soil. This is also your chance to inspect those concealed pipes, gently move aside the rocks covering inlet and outlet connections, check for clogs or damage, then replace the stones in their natural arrangement.
Trim back marginal plants as they grow, especially if they’re blocking access to hidden equipment or creating too much debris. Divide overcrowded plants every two to three years to maintain their screening effectiveness without overwhelming the space.
Seasonal adjustments matter. In spring, clean out any winter debris before restarting the system. In fall, trim plants back and consider installing netting to catch leaves before they settle. In freezing climates, winterize by draining pipes or running a de-icer to prevent ice damage to concealed plumbing.
The concealment rocks can shift over time, especially during cleaning. Keep a few extra stones nearby to adjust coverage as needed. Check that spillways and overflow areas remain clear, blocked outlets can expose pipes you’ve worked hard to hide.
With consistent attention, your sediment pond continues protecting water quality while looking like it belongs in nature.
Common Questions About Sediment Pond Construction
How big should my sediment pond be compared to my main pond?
A good rule of thumb is making the sediment pond about 10-15% of your main pond’s surface area. For example, if your main pond is 100 square feet, aim for a sediment pond around 10-15 square feet with adequate depth for settling.
What if my pipes keep showing after I cover them with rocks?
Layer your rocks in stages, starting with larger foundation stones that create pockets, then filling gaps with smaller stones and gravel. Plants with spreading foliage like creeping Jenny or low-growing sedges work wonders for covering stubborn exposed sections.
Which plants hide equipment best without taking over?
Japanese iris, dwarf cattails, and pickerel rush stay manageable while providing excellent screening. Place taller varieties like dwarf cattails behind filter housings, and use shorter iris varieties around pipe entries where you need softer concealment.
How often do I need to clean out accumulated sediment?
Most sediment ponds need cleaning once or twice per year, typically in early spring and late fall. You’ll know it’s time when water flow slows noticeably or the basin looks more than half-full of settled material.
Another common concern is whether concealment makes maintenance harder. The short answer is yes, but only slightly. When you build with access in mind from the start, checking hidden pipes means lifting a few strategic rocks rather than dismantling an entire arrangement. I’ve learned to place my heaviest decorative stones in spots I rarely need to reach, keeping the areas around valve connections and filter cleanouts accessible with lighter, easily moved rocks.
If your sediment pond isn’t filtering well, the problem usually isn’t the concealment but the flow rate or media depth. Check that water moves slowly enough through the basin for sediment to drop out. Fast-flowing water carries particles straight through to your main pond. Adding more filter media or creating gentle baffles with submerged rocks can slow things down without compromising your natural look. The beauty of thoughtful concealment is that functional adjustments hide just as easily as the original installation.
Building a sediment pond that actually works while looking completely natural isn’t just satisfying, it changes how you experience your whole water garden. You’ll have cleaner water flowing into your main pond and a feature that visitors will admire without ever guessing there’s infrastructure hidden beneath those rocks and plants. The construction process requires careful planning and attention to detail, but none of the steps are beyond a motivated DIYer’s abilities. Start with a clear layout, build in your concealment strategies as you go rather than trying to hide things afterward, and give your plants time to establish. The result is a pre-filter pond that protects your water quality year-round while blending seamlessly into your landscape. You’ve got the complete roadmap now, grab your shovel and get started.