
How to Build a Thermal Mass Wall for Your Water Garden (Step-by-Step)
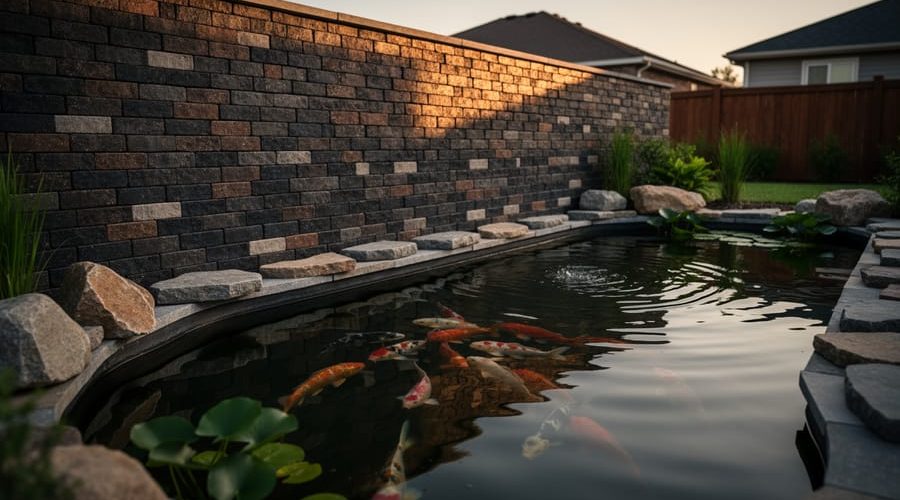
A thermal mass wall is a dense, heat-absorbing structure positioned on the sunny side of your pond that captures warmth during the day and releases it slowly at night, smoothing out the temperature swings that stress koi, goldfish, and aquatic plants. Building one takes a weekend and requires just basic masonry skills, but the payoff is significant: you’ll see pond temperatures stabilize by several degrees, reducing shock to sensitive species and extending your growing season at both ends of the year.
Think of it as a battery for heat. Dark-colored stone, brick, or concrete soaks up solar radiation throughout sunny hours, then radiates that stored energy back toward the water as evening cools. The thicker and denser your wall, the more heat it can hold and the longer it takes to release. This passive temperature regulation works year-round, warming spring water faster and buffering autumn’s chill without electricity or moving parts.
If you’ve already explored water garden insulation methods like pond covers or buried liners, a thermal mass wall is the natural next step. It complements those strategies by actively moderating the microclimate around your pond rather than simply blocking heat loss. You’re not just insulating against the cold. You’re creating a thermal buffer zone that makes your water garden more resilient through every season.
The technique is borrowed from passive solar building design, where south-facing masonry walls have regulated indoor temperatures for centuries. Adapting it to a pond setting is straightforward, and the materials are affordable and widely available. Let’s walk through exactly how to plan, build, and position a thermal mass wall that will keep your fish happy and your plants thriving through the ups and downs of the calendar.
What Is a Thermal Mass Wall and Why Your Pond Needs One
Think of a thermal mass wall as a battery for heat. During sunny days, it soaks up warmth like a sponge absorbs water. Then, when temperatures drop at night, it slowly releases that stored heat back into the air around your pond. This natural temperature buffering happens because dense materials, stone, brick, concrete, absorb thermal energy and hold onto it far longer than air or water alone.
For your water garden, this means fewer dramatic temperature swings. Instead of your pond water heating up rapidly during the day and plummeting at night, a properly positioned thermal mass wall evens out those extremes. Your fish experience less stress because their environment stays more consistent. Koi and goldfish, in particular, struggle when water temperatures fluctuate wildly, and maintaining thermal environment stability directly supports their health and immune function.
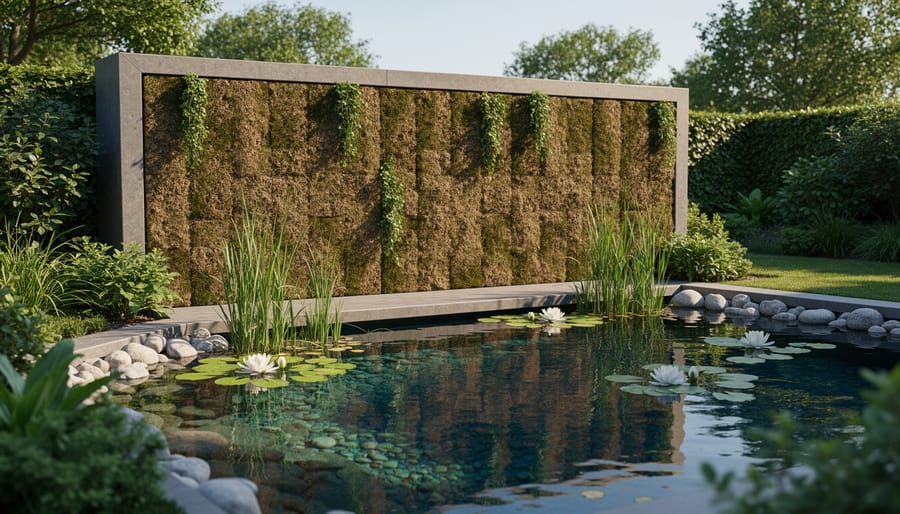
The benefits extend to your plants as well. Water lilies, lotus, and marginal plants thrive when they get a longer, more stable growing season. A thermal mass wall can push your effective gardening window by two to three weeks on each end of the season, giving you more blooms and healthier foliage. In colder months, the wall helps keep pond from freezing as quickly, reducing ice formation that can harm both fish and equipment.
I learned this firsthand when I added a stone wall along the south side of my pond. The difference was remarkable, my water hyacinths kept blooming into late autumn, and my goldfish were noticeably more active during cool mornings. The wall essentially created a microclimate that made my pond feel like it was located one zone warmer.
Tools and Materials You’ll Need
Getting your materials together before you start makes the building process so much smoother. I learned this the hard way on my first thermal mass wall project when I had to make three trips to the hardware store in one afternoon! Here’s everything you’ll need, organized so you can check it off as you gather items.
- Thermal mass materials: Natural stone, brick, concrete blocks, or adobe (choose materials at least 4 inches thick for proper heat absorption and storage)
- Mortar mix: Type N or S mortar for outdoor use (bonds materials together and withstands weather)
- Gravel or crushed stone: For foundation base (provides drainage and stability)
- Sand: Fine sand for leveling and mixing with mortar if needed
- Level: 4-foot carpenter’s level (ensures your wall stands straight)
- Trowel: Pointing trowel and margin trowel (for applying and shaping mortar)
- Wheelbarrow: For mixing mortar and moving materials
- Shovel and rake: For site preparation and spreading gravel
- String line and stakes: To mark your wall layout and keep it straight
- Rubber mallet: For adjusting stone or block placement without damage
- Work gloves: Heavy-duty gloves protect your hands from rough materials
- Safety glasses: Essential when cutting or chipping stone
- Bucket and sponge: For cleaning and keeping mortar workable
Optional items that make the job easier include a masonry saw for cutting materials to size, a mixing drill with paddle attachment for larger batches of mortar, and knee pads if you’ll be working at ground level for extended periods. The beauty of thermal mass materials is that stone and brick naturally absorb and release heat effectively without any special treatment, though you might want dark paint or stain later to boost heat absorption. Budget around $200 to $600 for materials depending on your wall size and whether you choose budget-friendly concrete blocks or premium natural stone.
Safety Considerations Before You Start
Before you start mixing mortar and hauling stones, let’s talk about keeping yourself safe and protecting your pond ecosystem. Building a thermal mass wall is rewarding work, but it involves heavy materials, water hazards, and structural considerations that deserve your full attention.
Lifting and Moving Materials
Stone, brick, and concrete blocks are surprisingly heavy. A single concrete block weighs around 15-20 kilograms, and you’ll be moving dozens of them. Always lift with your legs, not your back, bend at the knees, keep the load close to your body, and never twist while carrying weight. Better yet, use a wheelbarrow or dolly for transporting materials, and don’t hesitate to ask for help with particularly heavy stones. Your back will thank you for years to come.
Working Near Water
Your pond presents unique hazards. Wet ground around the water’s edge can be slippery, especially when you’re carrying materials. Wear boots with good tread, and create stable walkways if needed. Keep your work area organized so tools and materials don’t accidentally tumble into the water. Remember, you’re trying to avoid frozen pipes and temperature swings, not create new problems by disturbing your pond’s ecosystem with construction debris.
Structural Stability Matters
A poorly built wall can topple into your pond, harming fish and damaging your liner. Always ensure your foundation is solid, level, and adequate for the wall’s height. As a general rule, walls over one meter tall need professional assessment. If you’re uncertain about structural requirements, consult with an experienced mason before proceeding.
Planning Your Thermal Mass Wall
Choosing the Right Material for Your Climate
Picking the right material for your thermal mass wall isn’t just about what looks good, it’s about what actually works in your climate. The thermal properties vary significantly, and choosing poorly means you’ll build a wall that barely budges the thermometer.
Stone gives you the best thermal mass per inch. Dense stones like granite or limestone absorb heat slowly and release it even more slowly, making them perfect for climates with dramatic day-night temperature swings. They’re pricey, though, often running $15-30 per square foot depending on your region. The natural look blends beautifully with water gardens, but the irregular shapes mean slower construction.
Brick offers excellent thermal performance at a more manageable cost, typically $8-15 per square foot. Standard clay bricks work wonderfully in moderate climates where you need steady heat retention without extreme storage capacity. They’re uniform, which speeds up building, and they age gracefully near water.
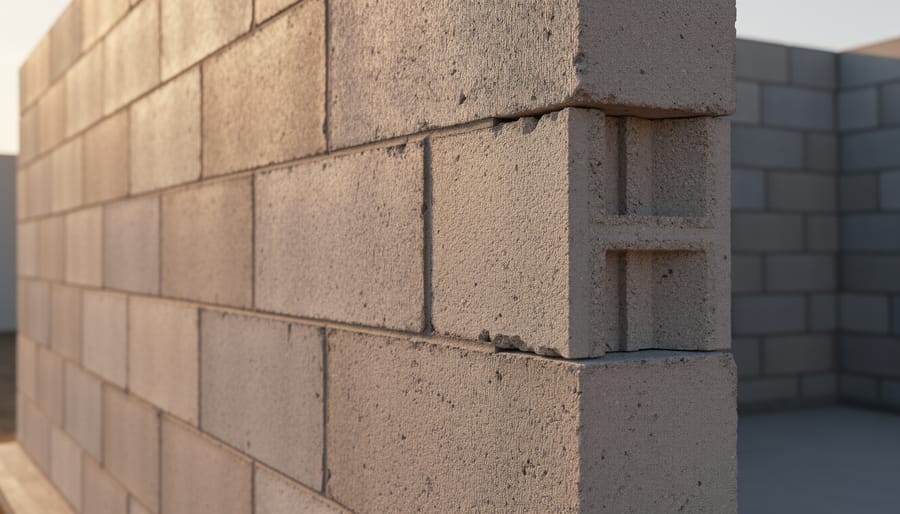
Concrete blocks are your budget champion at $3-8 per square foot. Fill the hollow cores with sand or gravel to boost their thermal mass. They work well in mild climates but don’t store as much heat as solid materials. The industrial look isn’t everyone’s favorite, but you can face them with stone veneer later.
Adobe excels in hot, dry climates but crumbles in wet or freezing conditions. Unless you live in the desert Southwest, skip it for pond applications. Moisture is adobe’s enemy.
Match your material to your weather patterns, and your wall will actually earn its keep.
Step-by-Step: Building Your Thermal Mass Wall
Preparing the Foundation
A thermal mass wall is only as good as its foundation, and this step deserves your full attention. Start by marking out your wall’s footprint with stakes and string, then clear away all grass, weeds, and organic matter within that area. You want to reach firm soil, not the squishy topsoil that compacts unevenly.
Dig down about 6 inches below ground level, creating a trench slightly wider than your wall. Check for level using a long straight board and a spirit level. Aim for a gentle slope away from your pond, about a quarter inch per foot, so water drains away from both the foundation and your water feature.
Fill the trench with crushed gravel or stone dust. Compact it in 2-inch layers using a hand tamper or plate compactor. This isn’t a step to rush. Proper compaction prevents settling that could crack your wall months down the road. The finished base should sit level, feel rock-solid underfoot, and extend at least 2 inches beyond your wall’s edges on all sides.
Laying the First Course
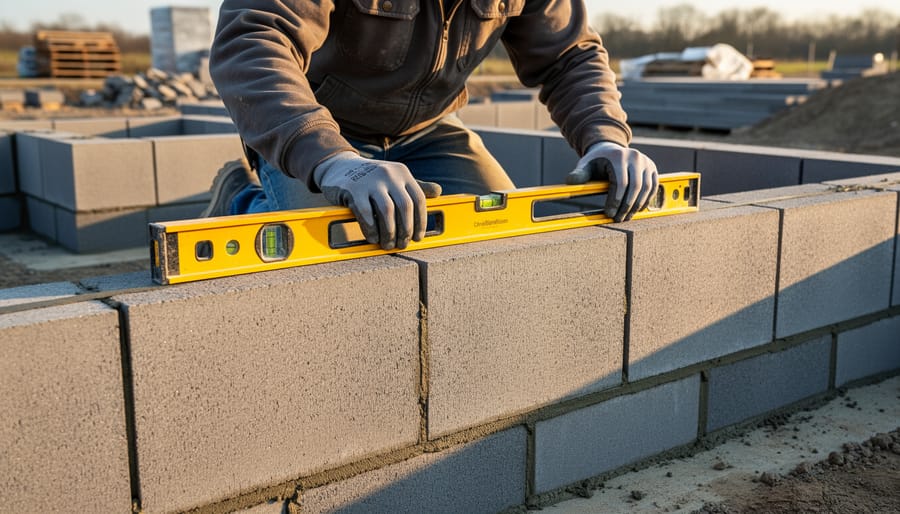
The first course is your wall’s foundation, get this right, and the rest goes smoothly. Start by spreading a half-inch layer of mortar along your prepared base where the first stone or brick will sit. Work in sections of three to four feet so the mortar doesn’t dry before you set your materials.
Place your first stone or brick, pressing firmly into the mortar with a slight twisting motion. Set your level on top and check both lengthwise and across the width. If it’s not level, tap gently with a rubber mallet or lift and add or remove mortar as needed. Every single piece in this first course must be perfectly level, you can’t fix this later without starting over.
Continue placing materials along your planned line, checking level after each addition and keeping consistent spacing for mortar joints, about three-eighths to half an inch. Use a taut string line between corner stakes to keep your first course straight. This tedious precision now saves hours of frustration when you’re five courses up and noticing a lean.
Building Up Your Wall
Once your first course is solid, you’re ready to build upward. Apply a consistent layer of mortar, about half an inch thick, across the top of each course before placing the next material. Too much mortar and your wall becomes unstable; too little and you’ll have weak joints.
Stagger your joints with each layer. Never stack materials directly on top of the joint below, offset them by at least half a unit. This creates a running bond that distributes weight and prevents vertical cracks from forming.
Check your level and plumb constantly. I learned this the hard way when a wall I rushed started leaning toward my pond by the third course. Use your level horizontally across each course and vertically against the face every few layers. Caught early, small deviations are easy to fix with slight adjustments in mortar thickness.
Step back every three or four courses to assess the overall straightness. Sometimes you’re so focused on individual stones that you miss a gradual curve developing. A string line stretched along the wall’s length helps catch these issues before they become serious problems.
Finishing Touches
Once your wall reaches its final height, cap it with flat stones or coping blocks to shed water and prevent frost damage. This protective top layer keeps moisture from seeping into the wall’s core, which could crack your materials during freeze-thaw cycles.
Next, point the mortar joints, use a jointing tool or the back of a trowel to create smooth, slightly recessed joints that direct water away from the surface. This step might seem purely cosmetic, but proper pointing dramatically extends your wall’s lifespan by keeping water out.
Brush away dried mortar with a stiff brush, then wipe the surface with a damp sponge. For extra protection in harsh climates, apply a breathable masonry sealer once the mortar has fully cured (usually 28 days). If you want your wall to absorb maximum heat, paint it a dark color, charcoal or deep brown work beautifully while enhancing thermal performance.
Testing and Verification: Making Sure Your Wall Works
After you’ve built your thermal mass wall, the real question is: does it actually work? The best way to find out is through simple temperature monitoring over the course of a week or two.
Start by placing a reliable aquarium or pond thermometer in the water near your new wall, and position another thermometer in a section of your pond that doesn’t benefit from the thermal mass (ideally a shaded or unprotected area). Take readings twice daily, once in the early morning before sunrise when temperatures are lowest, and again in late afternoon when they peak. Record these numbers in a notebook or your phone. After several days, you’ll see clear patterns emerge. The area near your thermal mass wall should show smaller temperature swings, staying warmer overnight and not heating up as dramatically during the day.
Beyond temperature data, check your wall’s structural integrity every few weeks during the first season. Walk around it and look for cracks in mortar, leaning sections, or any materials that have shifted. Gently push against the wall at different points, it should feel solid and immovable. If you notice any wobbling or concerning movement, address it immediately before it becomes a safety issue.
Pay close attention to your fish and plants, too. They’re excellent indicators of whether conditions have improved. Fish should appear more active and consistent in their behavior rather than sluggish during cold snaps or stressed during heat waves. Aquatic plants may show extended blooming periods or healthier foliage growth. If you notice algae blooms or stressed fish near the wall, the water might be getting too warm, you may need to adjust by adding some shade or reducing the wall’s sun exposure.
Don’t expect perfection right away. Sometimes you’ll need to make small adjustments, like adding a darker paint color to absorb more heat in cooler climates, or introducing a small amount of shade in hotter regions. The beauty of this project is that it’s forgiving, you can tweak and improve as you go.
Maximizing Your Thermal Mass Wall’s Effectiveness
Your thermal mass wall is up, but there’s plenty you can do to squeeze even more performance out of it. These tweaks and adjustments can significantly boost heat absorption and temperature stabilization around your pond.
Start with color. A dark-painted surface absorbs far more solar radiation than bare stone or light-colored materials. Charcoal gray, deep brown, or matte black work beautifully and blend naturally with most garden designs. Just use non-toxic, water-safe paint, you don’t want chemicals leaching into your pond ecosystem.
Consider these additional optimization strategies:
- Position reflective mulch or light-colored gravel on the sunny side of your wall to bounce extra light and heat onto the surface
- Install a simple drip irrigation line along the top during extreme heat to cool the wall gradually and prevent algae buildup
- Add vertical planting pockets on the non-sun-facing side for herbs or trailing plants that won’t block critical sunlight
- Combine your thermal mass wall with floating pond covers at night during cold snaps to trap the released heat
- Place smooth river rocks in a dark color along the water’s edge as supplementary thermal mass
Seasonal adjustments matter too. In spring and fall, keep the wall’s surface clean and unobstructed. Come winter, you might add temporary windbreaks to reduce heat loss, and in summer, strategic shading from a pergola or umbrella can prevent overheating, though this depends on your climate and fish species.
Don’t forget that thermal mass walls work best as part of a broader strategy. Pairing your wall with proper pond depth, adequate aeration, and year-round seasonal pest solutions creates a truly resilient water garden that thrives in any conditions.
Common Mistakes and How to Avoid Them
I’ve built my share of thermal mass walls over the years, and I’ve learned most of these lessons the hard way. Let me save you some trouble.
Building Too Close to the Water
Your first instinct might be to build right at the pond’s edge for maximum effect, but resist that urge. If your wall sits too close, erosion becomes a real problem. Rainwater running down the wall can wash soil into the pond, and worse, an unstable wall could topple directly into the water. Keep at least 18 inches between your wall and the water’s edge. This buffer zone protects both structures and gives you room to work for maintenance.
Choosing the Wrong Materials
Not all stone and masonry absorb heat equally. I once used lightweight concrete blocks that looked great but barely held any warmth. Dense materials work best, solid concrete, natural stone, or traditional clay brick. If your blocks feel unusually light for their size, they probably won’t perform well as thermal mass.
Creating an Accidental Shade Problem
A thermal mass wall needs sun exposure to work, but it can also cast shade on your pond. Before building, track the sun’s path across your yard throughout the day. Position your wall so it absorbs maximum sunlight without blocking the pond itself, especially during morning hours when that warmth matters most for fish activity.
Skimping on the Foundation
A wobbly wall won’t just perform poorly, it’s dangerous. That compacted gravel base I mentioned earlier isn’t optional. Take the extra time to dig down, level properly, and create a solid foundation. Your wall will last decades instead of seasons.
Frequently Asked Questions
How much does it cost to build a thermal mass wall?
Costs vary widely based on your material choice and wall size. A simple brick or concrete block wall might run $200-500 for a small to medium pond, while natural stone can cost $500-1,500 or more depending on availability in your area. The good news is you can build in stages and even use reclaimed materials to keep costs down.
How long does construction typically take?
Most DIYers complete a thermal mass wall over a long weekend or two. Foundation prep takes 2-4 hours, and the actual wall building might require 6-10 hours depending on size and your experience with masonry. Factor in drying time for mortar between sessions.
Do thermal mass walls work in cold climates?
Yes, but with realistic expectations. They work best in climates with sunny days and cool nights. In extremely cold regions, a thermal mass wall helps moderate daily temperature swings but won’t keep your pond from freezing. Think of it as one tool in your winter pond care strategy rather than a complete solution.
Will my wall damage or interfere with my pond liner?
Not if you plan properly. Keep the wall foundation at least 12-18 inches from your pond’s edge to avoid disturbing the liner or causing settlement issues. Never build directly on top of or against a flexible liner, as the weight and sharp edges can cause punctures.
What maintenance does a thermal mass wall need?
Very little, which is part of their appeal. Check annually for loose mortar joints and repoint as needed. Clean off algae or debris that might accumulate on the surface. In freeze-thaw climates, inspect for cracks each spring and seal them promptly to prevent water infiltration.
Beyond these basics, you might wonder about effectiveness timing. Most water gardeners notice temperature stabilization within the first week of sunny weather as the wall absorbs and stores heat. Your fish will appreciate the buffer during those unpredictable spring and fall temperature swings. If you’re not seeing results, double-check that the wall gets at least six hours of direct sunlight and hasn’t been shaded by overgrown plants or new landscaping.
Step-by-step process
1. Plan Your Wall Location
Choose a south or west-facing spot near your pond where the wall will receive maximum sunlight. Measure and mark the area, ensuring it’s at least 2-3 feet from the water’s edge.
2. Prepare the Foundation
Clear vegetation and debris. Excavate 4-6 inches deep, fill with compacted gravel, and level thoroughly. This prevents settling and keeps your wall stable.
3. Lay the First Course
Set your first layer of stone, brick, or concrete blocks on a bed of mortar. Use a level constantly. Getting this base perfectly level and straight makes everything else easier.
4. Build Upward
Stack subsequent layers, staggering joints like brickwork. Apply mortar between each course. Check level and plumb every few rows. Aim for 3-4 feet height for best thermal performance.
5. Finish and Seal
Cap the top row, smooth mortar joints, and clean excess material. Let cure for 48 hours, then optionally paint dark colors or apply weatherproof sealant.
6. Monitor Performance
Track pond temperature for two weeks, comparing day and night readings to verify the wall is moderating temperature swings effectively.
Building a thermal mass wall for your water garden is more than just another weekend project, it’s an investment in the long-term health and beauty of your aquatic ecosystem. If you’ve made it this far, you already have everything you need to succeed: the knowledge, the plan, and hopefully some excitement about getting started.
The beauty of this project is that it doesn’t require expert masonry skills or a huge budget. With basic tools, readily available materials, and a willingness to work methodically through each step, you can create a structure that will serve your pond for years to come. I’ve seen countless DIYers complete their first thermal mass wall and wonder why they waited so long to tackle it.
Remember what you’re gaining: steadier water temperatures that protect your fish from stressful swings, extended growing seasons for your plants, and a handsome landscape feature that adds visual interest to your garden. These walls work quietly in the background, absorbing heat during sunny days and releasing it gently when temperatures drop. Your koi will thank you, your water lilies will bloom longer, and you’ll spend less time worrying about weather fluctuations.