
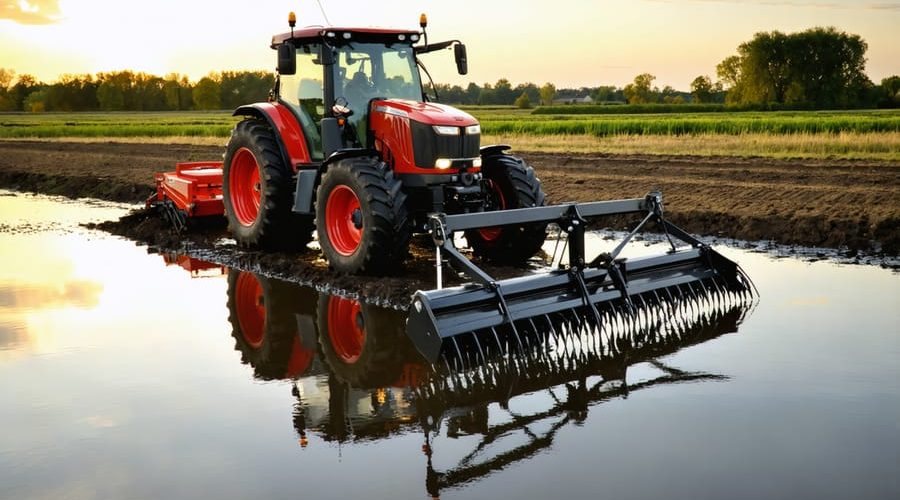
Build Your Own Heavy-Duty Pond Rake: A Tractor Attachment That Actually Works
Transform your tractor into a powerful pond cleaning machine with a custom-built rake that tackles aquatic weeds, debris, and bottom muck effectively. Building your own pond rake attachment saves hundreds of dollars while delivering professional-grade pond maintenance tips results. This heavy-duty DIY solution combines readily available materials like steel tubing, reinforced tines, and secure mounting brackets to create a durable implement that hooks directly to your tractor’s three-point hitch system. Whether managing a small farm pond or large water feature, a custom-built pond rake streamlines maintenance tasks while providing complete control over rake depth, angle, and cleaning intensity. Follow our tested design that’s been field-proven by hundreds of pond owners to effectively clear underwater vegetation and accumulated sediment without damaging pond liners or existing ecosystems.
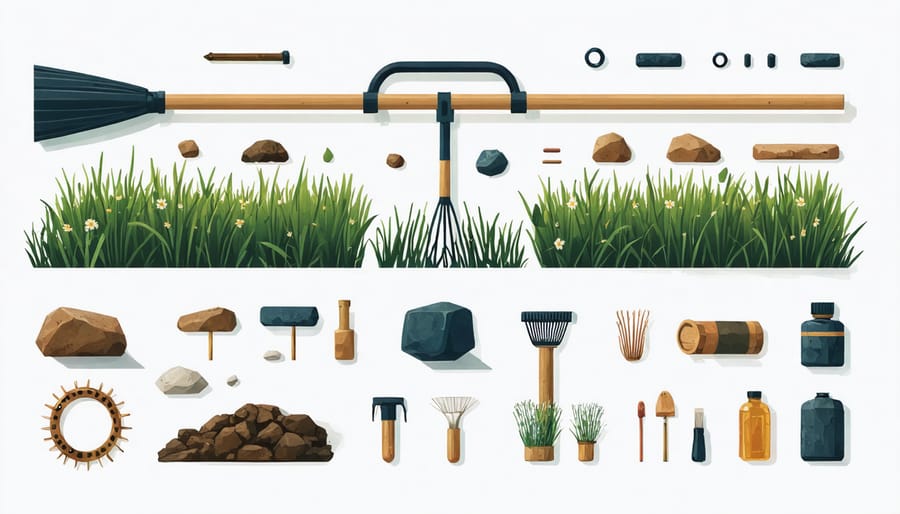
Materials and Tools Needed
Core Components
To build a reliable pond rake for your tractor, you’ll need several key materials that are both sturdy and readily available. Start with a 6-8 foot steel pipe or tube for the main beam, which will serve as the rake’s backbone. You’ll also need 12-15 steel tines (approximately 24 inches long) that will do the actual raking work. Include two support arms made from angle iron or heavy-duty steel bars to connect the rake to your tractor’s three-point hitch system. Don’t forget mounting brackets, bolts, and nuts (at least grade 5) for secure assembly. You might also want to add a steel mesh or chain link section between the tines to catch smaller debris. For safety and durability, all materials should be rust-resistant or treated with a protective coating.
Mounting Hardware
To attach your DIY pond rake to your tractor, you’ll need a few essential mounting pieces. The main connection point requires a 3-point hitch adapter, which you can find at most farm supply stores. You’ll also need two heavy-duty mounting brackets, four grade-8 bolts (½-inch diameter), lock washers, and corresponding nuts. For added stability, include reinforcement plates on both sides of the connection points. Make sure to use galvanized or stainless-steel hardware to prevent rust, since your rake will be frequently exposed to water. Consider adding quick-release pins for easier attachment and removal, especially if you’ll be using the rake regularly. A safety chain is also recommended as a backup connection point for added security during operation.
Building Your Pond Rake
Creating the Rake Head
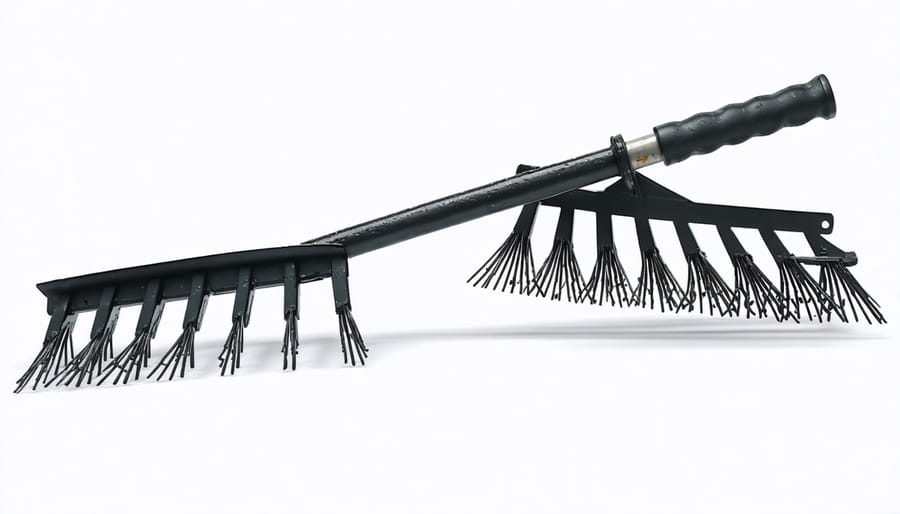
Start by laying out your 6-foot length of heavy-duty steel mesh on a flat work surface. You’ll want the mesh to be about 3 feet wide for optimal pond cleaning coverage. Using your angle grinder with a metal cutting wheel, carefully trim the mesh to size, making sure to remove any sharp edges that could snag or cause injury.
Next, create a sturdy frame for your rake head using the 1-inch square tubing. Cut two 6-foot lengths for the sides and two 3-foot pieces for the front and back. Weld these pieces together to form a rectangular frame, double-checking that your corners are square before making permanent connections.
Position the steel mesh inside your frame and secure it by welding at 6-inch intervals around the perimeter. For extra strength, add three support bars running lengthwise across the mesh, spaced evenly apart. These supports prevent the mesh from sagging under heavy loads of pond debris.
At the back of the frame, weld on three vertical mounting brackets made from the same square tubing. These brackets should be about 8 inches tall and will serve as attachment points for your tractor’s three-point hitch system. Make sure they’re evenly spaced and perfectly vertical to ensure proper balance when mounted.
Remember to spray paint all metal surfaces with rust-resistant paint to extend the life of your rake, especially since it’ll be frequently exposed to water.
Designing the Mounting System
The mounting system is where your DIY pond rake connects to your tractor, so it needs to be both sturdy and properly sized. Start by measuring your tractor’s three-point hitch system – this is crucial for ensuring a proper fit. For most standard tractors, you’ll want to create a mounting frame using 2-inch square steel tubing with a 1/4-inch wall thickness.
Cut two vertical supports about 24 inches long and one horizontal cross-member that’s roughly 30 inches wide. These pieces will form an H-shaped frame. Weld the pieces together, making sure your joints are strong and properly reinforced. Add gussets at the corners for extra stability – these triangular pieces of steel will prevent the frame from twisting under load.
Next, attach your category 1 or category 2 hitch pins (depending on your tractor’s size) to the vertical supports. Position them according to your tractor’s specifications, typically with the bottom pins about 18 inches apart. The top link connection point should be centered on your cross-member.
Before final assembly, test-fit the mounting frame to your tractor. Make any necessary adjustments to ensure it sits level when attached. Remember to paint all metal surfaces with rust-resistant paint to extend the life of your rake. Double-check all welds and connections before putting the rake into service.
Assembly and Reinforcement
Now comes the exciting part where we bring all the pieces together to create a sturdy pond rake that’ll serve you well for years to come. Start by welding the tines to your crossbar, spacing them evenly about 6 inches apart. Make sure each tine is perfectly straight and aligned with its neighbors – this will ensure smooth raking action later.
Next, reinforce the connection points between the tines and crossbar with additional weld beads on both sides. This double-welding technique prevents the tines from breaking off under heavy loads. For extra stability, weld small triangular gussets between each tine and the crossbar.
Attach your mounting brackets to the crossbar using heavy-duty bolts and lock washers. These brackets need to match your tractor’s quick-attach system perfectly, so take extra care with measurements here. Add reinforcement plates at these connection points – they’ll distribute the stress more evenly across the rake’s frame.
Once everything’s assembled, give all your welds a thorough inspection. Look for any gaps or weak spots that might need touch-up work. Finally, apply two coats of rust-resistant paint to protect your creation from constant water exposure. Let each coat dry completely before moving on to the next step.
Remember to test all connections by giving the rake a few gentle tugs before putting it to work in your pond.
Using Your DIY Pond Rake
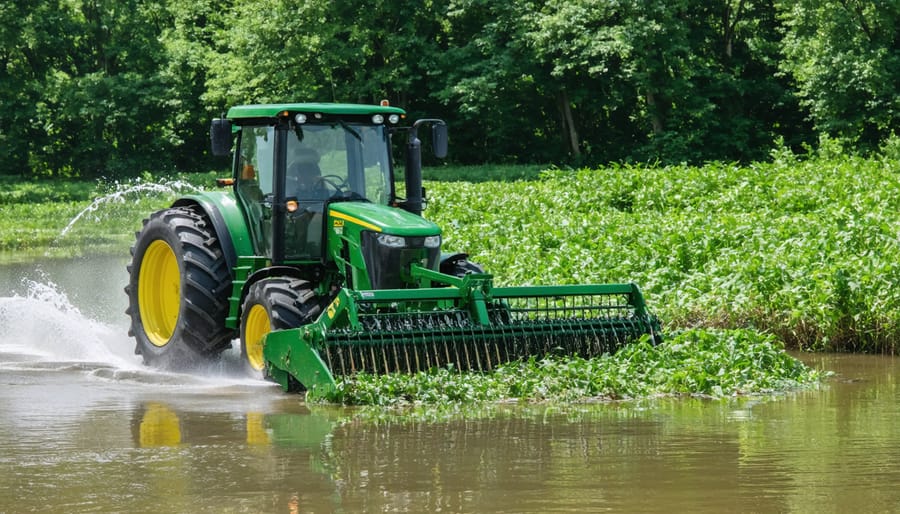
Operation Tips
To get the most out of your DIY pond rake, start by testing it at a slow speed to get comfortable with the operation. Always approach pond debris at a steady pace, allowing the rake to grab material without creating excessive turbulence. When maintaining pond edges, keep the tractor on stable ground and avoid steep angles that could strain your equipment.
For the best results, work in sections and make multiple passes if necessary. This methodical approach prevents overloading the rake and ensures thorough cleanup. Keep the rake slightly angled upward when pulling debris to prevent it from sinking back into the water. If you encounter heavy vegetation, lift the rake periodically to prevent jamming.
Remember to clean the rake after each use and inspect the tines for damage or bending. Store your rake in a covered area to protect it from the elements when not in use. For deeper pond areas, consider adding flotation devices to the rake’s sides to maintain optimal working depth.
Safety tip: Always scan the area for underwater obstacles before raking, and never operate the rake when people or pets are in the water. If the rake catches on something, stop immediately and assess the situation before proceeding.
Maintenance and Storage
Keeping your DIY pond rake in good condition doesn’t take much effort, but regular maintenance will significantly extend its lifespan. After each use, rinse off any mud, weeds, or debris with a garden hose. Pay special attention to the tines and attachment points, as these areas tend to collect the most gunk. Once clean, let the rake dry completely before storing it.
Apply a light coat of rust-resistant spray or oil to metal parts every few months, especially if you live in a humid climate. This simple step prevents rust and keeps the moving parts working smoothly. Check the tines regularly for any bending or damage, and straighten them if needed using pliers or a hammer.
Store your pond rake in a covered area, like a garage or shed, to protect it from the elements. If possible, hang it on a wall using heavy-duty hooks rather than leaving it on the ground. This prevents unnecessary stress on the tines and keeps the rake from getting damaged by other equipment.
Before each use, inspect all bolts and connection points to ensure they’re tight. Look for any signs of wear on the attachment mechanism where it connects to your tractor. If you notice any loose parts or excessive wear, address these issues before using the rake to prevent accidents and ensure optimal performance.
Building your own tractor-mounted pond rake is not just a rewarding DIY project – it’s a smart investment in efficient backyard pond management. By following the steps outlined in this guide, you can create a durable and effective tool that will save you countless hours of manual labor while keeping your pond pristine. The best part? You’ll spend a fraction of what commercial alternatives cost.
Remember, maintaining a healthy pond doesn’t have to be back-breaking work or expensive. With your custom-built pond rake, you’ll have the satisfaction of using a tool you created yourself, perfectly suited to your specific needs. The materials are readily available, the construction process is straightforward, and the results are truly worth the effort.
So why wait? Gather your materials, fire up that welder, and get started on your pond rake project this weekend. Your pond – and your back – will thank you for it. Happy building, and here’s to clearer, healthier ponds!