
Transform Your Pond Into a Living Masterpiece With Strategic View Framing
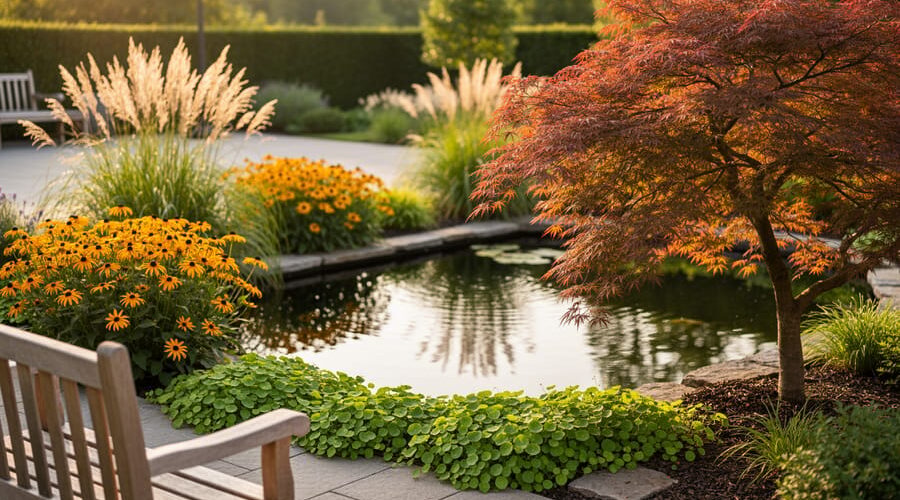
Position your favorite garden bench or sitting area where morning light hits the water’s surface at an angle—this creates the most dramatic reflections and transforms an ordinary pond into a living mirror. Walk around your entire property with your morning coffee and identify three distinct viewing points: the spot where you first glimpse the pond, your main relaxation area, and an unexpected angle that guests will discover. Each viewpoint deserves its own carefully composed scene.
Frame your pond like a professional photographer frames a shot. Use layered plantings at different heights to create depth—tall ornamental grasses or Joe Pye weed at the back, medium-height black-eyed Susans or cardinal flowers in the middle, and low creeping jenny or sweet flag at the water’s edge. This three-tier approach guides the eye naturally toward the water and makes even a modest pond feel expansive and intentional.
Create a focal point that draws attention across the water. A carefully placed boulder with interesting texture, a simple fountain feature, or a striking specimen plant like a weeping willow or Japanese maple gives viewers somewhere to rest their gaze. Without this anchor, eyes wander aimlessly across the water’s surface. The focal point should occupy roughly one-third of your primary view and be positioned using the classic rule of thirds—never dead center.
Clear sightlines matter more than you think. Remove low-hanging branches, relocate overgrown shrubs, and trim back anything blocking your carefully planned views. I learned this lesson after spending months perfecting my pond’s edge plantings, only to realize my patio furniture faced a wall of untrimmed forsythia instead of the water. Sometimes the best design move is subtraction, not addition.
What View Framing Really Means for Your Pond
Think about your favorite photograph hanging on your wall. Now imagine it without its frame—just the picture itself taped up there. Something’s missing, right? The frame doesn’t just hold the photo in place; it draws your eye to what matters most and makes the whole thing feel intentional and complete.
That’s exactly what view framing does for your pond.
View framing is simply the art of controlling what people see when they look at your pond and from where they see it. Just like a picture frame focuses attention on the photograph inside, landscape elements around your pond—plants, rocks, pathways, and structures—guide the viewer’s eye to the most beautiful aspects of your water feature.
I learned this lesson the hard way with my first backyard pond. I was so excited about the water itself that I didn’t think about the view. My gorgeous pond sat there surrounded by a chain-link fence, the neighbor’s air conditioning unit visible in the background, and a jumble of mismatched plants scattered randomly around the edges. The pond was lovely, but the overall picture? Not so much.
Here’s the basic principle: you want to create deliberate sightlines that highlight your pond’s best features while minimizing or hiding less attractive elements. This means thinking about where people will stand or sit when they’re enjoying your pond—from the patio, the kitchen window, the garden bench—and designing the landscape to make those views spectacular.
When done right, view framing transforms your pond from just a water feature into a captivating focal point that feels like it belongs exactly where it is. It’s about being intentional with placement, choosing the right plants for the right spots, and creating natural boundaries that say “look here” without feeling forced or overly manicured.
The beauty of this approach? You don’t need expensive materials or professional help—just a thoughtful eye and willingness to plan before you plant.
Finding Your Pond’s Best Angles
The Three Most Important Viewing Spots
When I designed my first pond, I made the classic mistake of only thinking about how it looked from one spot—my kitchen window. Later, I realized my guests sitting on the deck couldn’t even see it! That’s when I learned to plan for three distinct viewing experiences.
Your primary view is typically from inside your home, where you’ll enjoy the pond most frequently. This might be your living room window, kitchen sink, or home office. From this spot, you want to see the pond’s most dramatic features. I always position my best water lilies and focal point rocks where they catch the morning light from my favorite armchair. Think about what you’ll see while having your coffee or unwinding after work.
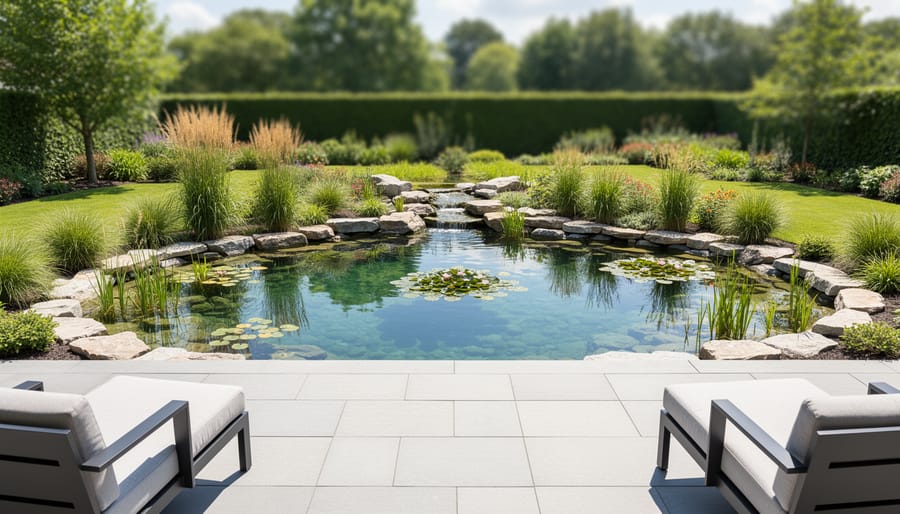
Secondary views come from outdoor living spaces like patios, decks, or outdoor dining areas. These spots deserve special attention because they’re where you’ll entertain and relax. When I added a bench near my fire pit, I realized I needed to create a beautiful sightline from that angle too. Consider placing colorful marginal plants or a small waterfall feature where they’ll frame the view from these gathering spots.
Discovery views are my favorite—these are the delightful surprises you encounter while walking through your garden. A glimpse of water through ornamental grasses, or a hidden lily pad tucked behind a boulder as you round the corner. These unexpected moments make your landscape feel larger and more enchanting. Position stepping stones or garden paths to reveal new perspectives of your pond as visitors explore your outdoor space.
Seasonal Consideration for Sightlines
Your pond’s appearance transforms dramatically throughout the year, and understanding these seasonal pond changes is essential for creating sightlines that work year-round. I learned this lesson the hard way when my beautifully framed summer pond view became completely obscured by overgrown ornamental grasses in autumn!
Winter presents your pond in its most revealing state. With deciduous trees bare and perennials cut back, you’ll see exactly what your hardscape and evergreen elements contribute to the view. This is actually the perfect time to evaluate your sightlines. Walk around your property and take photos from different angles. You might discover that a winter view feels stark and needs more evergreen shrubs for year-round interest, or perhaps you’ll find a surprising new perspective that works beautifully with the minimal foliage.
Summer brings lush growth that can completely change your carefully planned views. That small Japanese maple might grow dense enough to block your favorite angle, while flowering perennials add pops of color that draw the eye in new directions. Plan for this fullness by positioning taller plants strategically and leaving extra space around key viewing corridors. Consider creating multiple seasonal focal points so your pond landscape remains engaging throughout the year.
Natural Frames: Using Plants to Direct the Eye
Tall Backdrop Plants That Create Depth
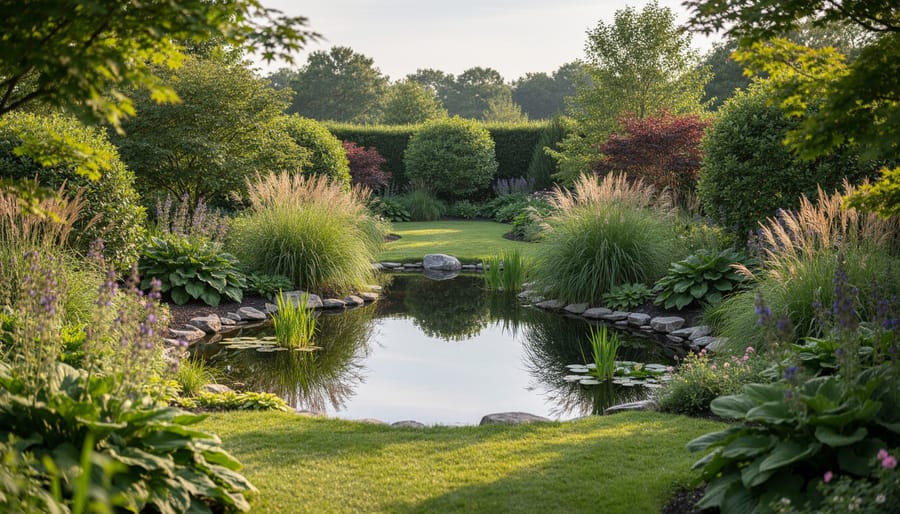
Creating a stunning backdrop behind your pond transforms it from a simple water feature into a captivating focal point. Think of tall plants as the frame around a beautiful painting—they add dimension, draw the eye, and make your pond feel like a natural oasis rather than an isolated element.
I’ve learned through my own pond projects that layering heights is key. Start with weeping willows or river birches if you have space—these trees love moisture and create gorgeous reflections in the water. Their graceful branches seem to embrace the pond, making the whole scene feel cohesive. For smaller yards, consider Japanese maples or dwarf conifers, which provide height without overwhelming the space.
Ornamental grasses are absolute game-changers for pond backdrops. Maiden grass and feather reed grass create movement and texture, swaying beautifully in the breeze. They’re also incredibly forgiving and thrive in the naturally moist conditions around ponds. Place them in clusters rather than single plants for more visual impact.
Don’t forget about flowering shrubs like hydrangeas or butterfly bush, which add seasonal color while attracting beneficial wildlife to your pond area. These smart planting strategies create depth by establishing clear foreground, middle ground, and background zones. Position your tallest plants at the back, medium-height shrubs in the middle, and save shorter plantings for the pond’s edge. This layered approach guides visitors’ eyes through your landscape, making even modest ponds feel expansive and professionally designed.
Foreground Framing With Low-Growing Plants
Low-growing plants are your secret weapon for framing pond views without creating visual barriers. Think of them as the welcoming edge of your composition, drawing the eye naturally toward the water while adding texture and color at ground level.
Start with plants that stay under 12 inches tall. Creeping Jenny is one of my personal favorites—its golden-green foliage cascades beautifully along pond edges and looks stunning when it catches morning light. For sunnier spots, try creeping thyme or sedum varieties that hug the ground and won’t shoot up unexpectedly during growing season.
Position these groundcovers in gentle sweeps rather than straight lines. I learned this the hard way when my first attempt looked like a green ruler bordering my pond! Natural curves feel more inviting and guide visitors’ eyes smoothly across the scene.
Mix different textures for visual interest. Pair soft, mossy plants like Irish moss with broader-leaved options like ajuga. This creates depth even at the lowest layer of your landscape. Leave some gaps between plantings too—you don’t want a continuous carpet that feels too manicured.
Remember, foreground plants should complement, not compete with, your pond. Choose colors that harmonize with your water rather than clash, and always consider mature size before planting.
Side Borders That Channel Your Gaze
Think of side borders as gentle guides that lead your eye exactly where you want it to go—straight to your beautiful pond. When I first planned my backyard pond, I planted tall ornamental grasses randomly around the space. The view felt scattered and unfocused. Once I repositioned them along the sides of my main viewing path, everything changed. Suddenly, the pond became the star of the show.
To create this corridor effect, place taller elements like bamboo, evergreen shrubs, or columnar trees on both sides of your primary sightline. These vertical anchors don’t need to be perfectly symmetrical—nature rarely is! The key is keeping the center relatively open while building height gradually on the edges. This naturally funnels your gaze forward toward the water.
For a softer approach, try layering different heights. Start with low groundcovers at the path edge, transition to medium perennials, then finish with taller grasses or shrubs. This creates depth while maintaining that welcoming corridor feeling. The gradual height increase feels inviting rather than confined, perfect for making your pond the focal point without feeling boxed in.
Hardscape Elements as Frame Builders
Strategic Stone and Rock Placement
Positioning rocks around your pond is like arranging furniture in a room—placement matters enormously! I learned this the hard way when I first clustered all my boulders along one side, creating an unnatural-looking wall rather than a flowing landscape.
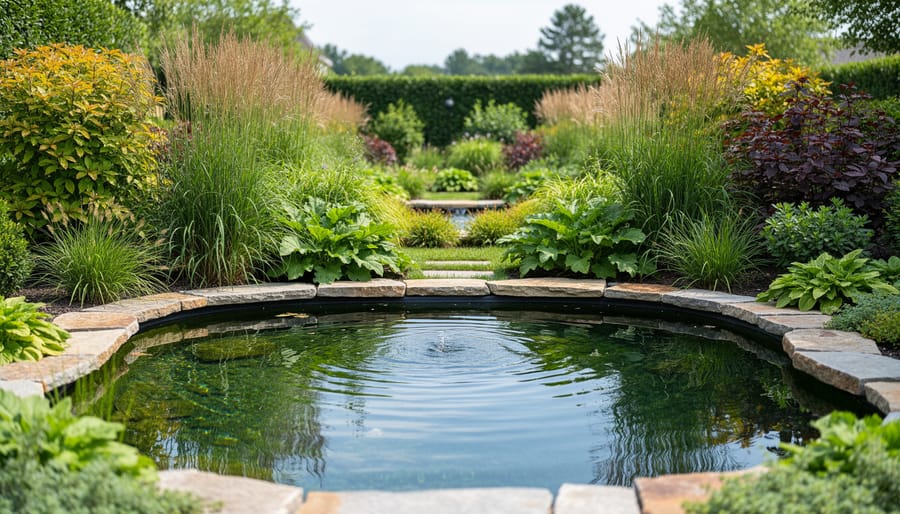
Start by placing your largest boulders first, positioning them at key viewing points where you’ll most often admire your pond. These anchor stones should sit partially buried (about one-third underground) to look like they’ve always been there. Think of them as sculptural elements that guide the eye naturally around your water feature.
Create groupings in odd numbers—three or five rocks clustered together looks more organic than pairs. Vary their sizes within each group, with the largest stone slightly off-center. This asymmetry mimics how nature actually deposits rocks.
Use medium-sized stones to frame viewing corridors—those sight lines from your deck, patio, or favorite garden bench. Position them to direct attention toward focal points like waterfalls or blooming plants without completely blocking views.
Fill gaps with smaller rocks, but avoid creating uniform lines. Instead, scatter them irregularly, leaving some areas open for planting pockets. This creates natural boundaries while maintaining visual flow. Remember, less structured always looks more authentic in pond landscaping!
Overhead Frames: Arbors and Pergolas
Overhead structures like arbors and pergolas work beautifully to create natural picture frames for your pond. I discovered this technique by accident when I installed a simple wooden arbor along my garden path, and suddenly my pond looked like it belonged in a magazine! The structure draws your eye directly to the water feature while creating inviting shade for viewing.
Position your arbor or pergola where you naturally pause to admire the pond, whether that’s along a curved pathway or just before reaching a seating area. The overhead beams create a defined viewing window that eliminates visual distractions and focuses attention on your water garden.
For a living frame effect, train climbing vines like clematis or honeysuckle up the posts. These soften the structure while maintaining clear sightlines to the pond below. Keep the central opening relatively open though, you want to frame the view, not obscure it.
A simple DIY arbor can be built in a weekend using treated lumber and basic tools. Even a modest structure makes a dramatic difference in how visitors experience your pond, transforming a casual walk into an intentional moment of discovery and appreciation.

Paths That Lead the Journey
The path you create to your pond can completely transform how visitors experience it. I love designing walkways that build anticipation—imagine a gentle curve through ornamental grasses that hides the water until the last moment, then suddenly opens to reveal the entire pond. It’s like unwrapping a gift!
For a dramatic reveal, use taller screening plants like bamboo or tall fountain grass along a winding path. As people round the final bend, the pond appears all at once—truly magical. Alternatively, create a gradual discovery by positioning your path to offer glimpses through strategic gaps in plantings. A peek of sparkling water through flowers makes people naturally want to keep walking forward.
Consider the path material too. Stepping stones encourage a slower pace, giving viewers time to notice details. Gravel paths provide a pleasant crunching sound that adds to the sensory journey. I’ve found that the best paths naturally draw the eye forward while occasionally offering side views of the pond through carefully placed openings in your landscape.
Creating Depth and Layers in Your Pond Landscape
One of the secrets I learned after creating my first rather flat-looking pond was that the magic happens when you think in layers. Creating depth in your pond landscape isn’t about having a massive space—it’s about smart arrangement that draws the eye through different visual zones. Even a small pond can look absolutely stunning when you master the art of layering.
Think of your pond view like a stage production. The foreground is your front row, the midground is center stage, and the background provides the backdrop. Each layer plays a specific role in creating that “wow, this looks professional” effect.
The foreground is where you’ll place your lowest, most detailed elements. This is prime real estate for ground-hugging plants like creeping Jenny, small ornamental grasses, or clusters of river rocks. I like to position a few carefully selected stones right at the water’s edge here—they create an immediate connection between land and water. Keep this area relatively open so it doesn’t block the view of what’s behind it.
Your midground is the star of the show—typically the pond itself and its immediate surroundings. This is where you’ll position medium-height plants like irises, hostas, or decorative grasses around 18-36 inches tall. If you’re incorporating organic pond design elements, the midground is perfect for showcasing those natural, flowing curves. Consider placing a fountain, sculpture, or striking plant specimen here as a focal point.
The background provides height and frames everything in front of it. Taller shrubs, bamboo, ornamental grasses reaching 4-6 feet, or even small trees work beautifully here. Many Japanese design principles emphasize using evergreens in the background to provide year-round structure.
Here’s a simple trick I use: stand at your primary viewing spot and imagine drawing three horizontal bands across your view. Each band should have progressively taller elements. This creates natural depth and guides the eye smoothly through the entire scene, making your pond feel more expansive and thoughtfully designed than it actually is.
Common Framing Mistakes (And How to Fix Them)
Even experienced pond builders fall into some classic framing pitfalls. The good news? Most are surprisingly easy to fix once you know what to look for.
The most common mistake I see is overcrowding the pond edges with too many plants or decorations. I learned this the hard way when I enthusiastically planted everything I loved around my first pond. Within months, I couldn’t even see the water from my patio! The solution is simple: embrace negative space. Leave open areas between plantings so the eye can rest and the water remains the star. Aim for about 40-60% coverage around your pond’s perimeter, not 100%.
Another frequent error is unintentionally blocking your best views. You might plant a gorgeous ornamental grass that grows taller than expected, or place a large boulder that seemed perfect at installation but now hides half your waterfall. Before planting or placing hardscape, research mature sizes and imagine the view in three years, not just today. If you’ve already blocked a view, don’t despair. Simply relocate the offending element to a side area where height won’t matter, or replace it with a lower-growing alternative.
Dead zones happen when certain angles of your pond offer nothing interesting to look at. Walk completely around your pond and identify any boring stretches. These spots need focal points like a cluster of colorful plants, an interesting rock formation, or a floating water lily.
Scale mismatches create awkward compositions. Tiny ponds overwhelmed by massive boulders look unnatural, while large ponds surrounded by delicate miniature plants feel incomplete. Match your feature sizes to your pond’s proportions. A simple guideline: your largest hardscape element should be roughly one-tenth to one-fifth of your pond’s surface area.
The beauty of pond landscaping is that nothing is permanent. If something isn’t working, you can always adjust, move, or replace it until the view feels just right.
Bringing It All Together: A Step-by-Step Framing Plan
Ready to transform how your pond looks from your favorite viewing spots? Let’s walk through a simple, doable plan that won’t overwhelm you. I promise, you don’t need to tackle everything at once!
Start with what I call the “coffee mug walk.” Grab your favorite morning beverage and stroll to each spot where you naturally pause to look at your pond. Maybe it’s your kitchen window, the back patio, or that comfy bench under the oak tree. Stand there for a full minute and really look. What catches your eye first? What feels cluttered or empty? Snap a quick photo from each spot. These pictures become your “before” reference and help you see things more objectively than your eye alone.
Next, do a quick sketch. Don’t worry, I can barely draw stick figures myself! Just use a simple piece of paper and mark where your pond sits, where you’re viewing from, and roughly where plants and hardscape elements are now. Circle anything blocking a good view or creating awkward gaps in the scene.
Here’s where it gets fun. On a copy of that sketch or using tracing paper over your photos, doodle in potential improvements. Could a tall ornamental grass on the left side create a natural frame? Would moving that garden gnome stop interrupting the water view? Play with ideas without commitment.
I learned this gradual approach the hard way. Three years ago, I got so excited about framing my own pond that I bought seventeen plants in one weekend and stuck them everywhere. The result? Visual chaos and a sore back! When I slowed down and worked through one viewing angle per month, everything clicked. I started with the kitchen window view since I saw it most often. I added three Japanese irises on the right bank and repositioned two existing boulders. That simple change made my morning coffee routine so much more enjoyable that I got motivated to tackle the patio view next.
Your action checklist: identify your primary viewing spot this week, take photos and sketches, then choose just one improvement to make this month. Maybe it’s adding a single framing plant, moving a rock, or trimming back something that blocks the view. Small wins build momentum and help you understand what works before you invest serious time and money. Your pond’s beauty is already there, you’re just learning to showcase it better from the spots that matter most to you.
Your pond isn’t just a hole filled with water—it’s a canvas waiting to become a living masterpiece. By thoughtfully framing your views, you transform an ordinary water feature into something that makes you pause every time you look outside. The reflection of morning light, the gentle movement of fish beneath lily pads, the way ornamental grasses sway beside the water’s edge—these moments become part of your daily experience when you design with intention.
The beauty of view framing is that you don’t need to tackle everything at once. Start with one primary viewpoint, perhaps the window where you drink your morning coffee or the patio where you unwind after work. Get that view right, and you’ll already feel the difference. As you observe how light changes throughout the day and seasons shift, you’ll naturally spot opportunities to enhance other sightlines.
Remember, every spectacular pond you’ve admired started exactly where you are now—with someone imagining something better. I’ve watched my own pond evolve over the years, and the joy hasn’t been in achieving perfection, but in the journey of discovery. Each plant added, each stone repositioned, each new vantage point considered has deepened my connection to the space.
So grab your garden gloves and start framing those views. Your personal oasis is waiting to emerge, and the best time to begin creating your own living masterpiece is today.