
Transform Your Backyard Into a Paradise: Building a DIY Pond That Wows
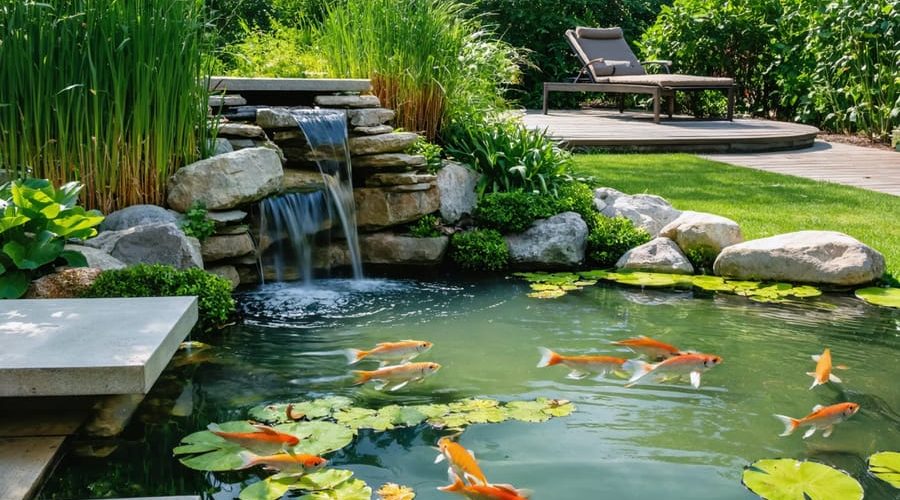
Transform your backyard into a tranquil oasis by creating your own DIY pond – a rewarding project that combines creative design with natural beauty. Whether you envision a small meditation pool or a thriving ecosystem for fish and aquatic plants, building a pond offers endless backyard pond ideas to enhance your outdoor space.
The gentle sound of flowing water, the flash of ornamental fish, and the sight of water lilies swaying in the breeze can turn any ordinary garden into an extraordinary retreat. With proper planning and basic DIY skills, you can construct a professional-looking water feature that adds both value and serenity to your property.
This comprehensive guide walks you through the essential steps of pond construction, from selecting the perfect location and calculating dimensions to choosing the right materials and installing crucial filtration systems. We’ll cover everything you need to know about creating a sustainable aquatic environment that requires minimal maintenance while providing maximum enjoyment for years to come.
Planning Your Perfect Pond
Choosing the Ideal Location
Selecting the perfect spot for your backyard pond is crucial for its long-term success. Start by observing your yard throughout the day to identify areas that receive 4-6 hours of sunlight – this balance helps prevent excessive algae growth while keeping aquatic plants healthy. Avoid placing your pond under trees if possible, as falling leaves can create maintenance headaches.
Consider the natural drainage patterns in your yard. Your pond should be positioned where water naturally flows away from your house’s foundation. A slight slope can be beneficial, but too steep an incline might cause problems during heavy rains.
Before breaking ground, contact your local utilities company to mark underground lines. This essential safety step prevents accidents and costly repairs. Also, check your property’s setback requirements and local building codes to ensure compliance.
Choose a location that’s visible from your favorite outdoor relaxation spots, like a patio or deck. This placement maximizes your enjoyment of the water feature. Additionally, ensure you have easy access to electrical outlets for pumps and filters, and consider proximity to a water source for convenient maintenance.

Size and Depth Considerations
When planning your backyard pond, size and depth are crucial factors that will impact everything from maintenance to the types of fish and plants you can keep. For most residential spaces, a pond between 50 to 150 square feet provides a good balance between visual impact and manageability. Start by marking out your desired shape with a garden hose to visualize the footprint.
Depth requirements vary based on your goals. If you’re planning to keep fish, aim for at least 2 feet deep, with a deeper section of 3-4 feet for overwintering in cold climates. For a decorative pond with just plants, 18-24 inches is typically sufficient. Remember that deeper ponds are more stable temperature-wise and require less maintenance.
Consider your yard’s size when deciding dimensions – your pond should occupy no more than 15-20% of your available space to maintain proper landscaping balance. Also factor in local building codes and permits, as some areas have restrictions on water feature depths and sizes. Always include a shallow shelf around the perimeter (6-12 inches deep) for marginal plants and safety.
Essential Materials and Tools
To build your backyard pond, you’ll need several essential tools and materials. For excavation, gather a shovel, wheelbarrow, measuring tape, and marking spray paint. The pond structure requires a heavy-duty rubber liner (EPDL or PVC), underlayment fabric, and rocks of various sizes for edging and decoration.
For the water system, you’ll need a pond pump, filter, flexible tubing, and necessary plumbing fittings. Don’t forget basic tools like a utility knife, level, garden rake, and heavy-duty scissors. If adding a waterfall, include foam sealant and waterfall foam.
Safety equipment is crucial: work gloves, safety goggles, and sturdy boots. Additional materials include sand for cushioning, landscape fabric for weed prevention, and a skimmer box for debris collection. For electrical work, you’ll need outdoor-rated electrical cable and a GFCI outlet.
Step-by-Step Construction Process
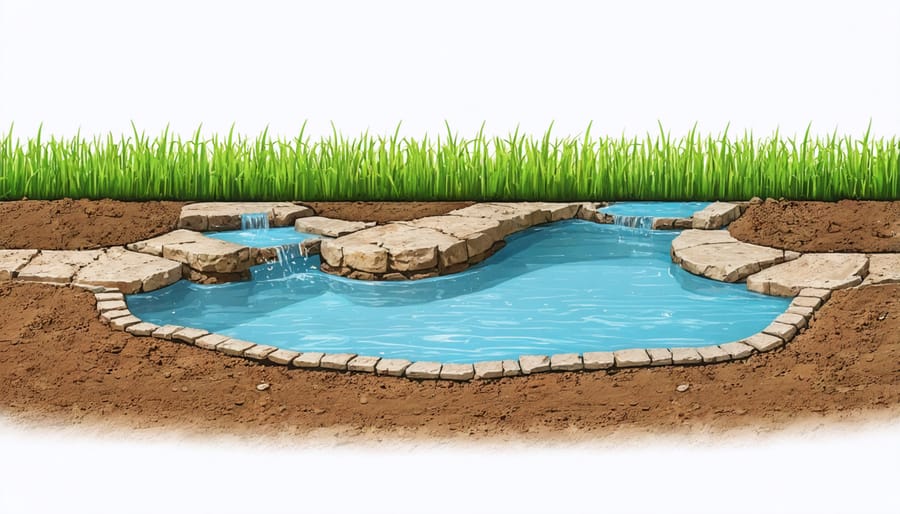
Excavation and Base Preparation
Proper excavation is the foundation of a successful pond project. Start by marking your pond’s outline using rope or spray paint, considering both the planned shape and depth variations. For a natural look, avoid perfect circles or squares – opt for gentle curves that mimic nature.
Before digging, call your local utilities company to check for underground cables or pipes. Once cleared, begin excavating in layers, working from the outside edge inward. Create shelves or terraces at different depths – typically 4-6 inches for marginal plants, 12-18 inches for water lilies, and a deeper zone of 24-30 inches for fish.
Remove all rocks, roots, and sharp objects that could puncture your liner. Level each shelf carefully using a spirit level, and compact the soil firmly with a hand tamper. For stability, slope the sides at approximately 20-30 degrees – this prevents soil collapse while maintaining a natural appearance.
Once excavated, lay a 2-inch layer of sand or underlayment material across the entire pond surface. This crucial cushioning layer protects your liner from punctures. In areas with rocky soil, consider adding an extra layer of old carpet or geotextile fabric for additional protection.
Finally, check your levels one last time and remove any remaining debris. A well-prepared base will ensure your pond remains stable and leak-free for years to come.
Installing the Liner and Edging
Now comes one of the most crucial steps in building your pond – installing the liner and edging. Start by removing any sharp rocks or roots from the excavated area, then lay down a protective underlayment fabric. This cushioning layer helps prevent punctures in your main liner.
Carefully unfold your pond liner and center it over the excavated area. Let it settle naturally into the hole, avoiding stretching or pulling. You’ll want plenty of excess material around the edges – it’s better to have too much than too little! As you work the liner into place, create smooth folds in the corners rather than sharp pleats. Think of it like making a bed with fitted sheets, but on a larger scale.
Begin filling the pond with a few inches of water. The weight will help press the liner into all the contours of your excavation. As the water level rises, continue smoothing out the liner against the sides and shelves. Work gradually from the bottom up, removing air pockets and wrinkles as you go.
Once your pond is about halfway full, it’s time to tackle the edging. Leave at least 12 inches of excess liner extending beyond the pond’s edge. Create a shallow trench around the perimeter, about 2-3 inches deep. Fold the excess liner into this trench, creating a clean edge. You can secure it with landscape staples if needed.
For a natural look, overlap flat stones along the edge, hiding the liner underneath. Make sure the stones extend slightly over the water. This not only looks attractive but also protects the liner from UV damage. Between the stones, add smaller rocks or gravel to create a seamless transition from your pond to the surrounding landscape.
Remember to take your time with this step – proper liner installation and edging will ensure your pond remains watertight and looks beautiful for years to come.
Setting Up the Filtration System
A reliable filtration system is the heart of any healthy backyard pond. To keep your water crystal clear and your aquatic life thriving, you’ll need to set up proper pond filtration systems that include both mechanical and biological filtration components.
Start by positioning your submersible pump at the deepest part of your pond. This placement ensures optimal water circulation and prevents dead zones where debris can accumulate. Choose a pump that can circulate your pond’s entire water volume at least once every two hours – for example, a 1,000-gallon pond needs a pump rated at minimum 500 gallons per hour.
Connect your pump to the filter using flexible tubing, securing all connections with hose clamps to prevent leaks. For most backyard ponds, a three-stage filtration system works best: mechanical filtration to remove debris, biological filtration to process waste, and UV clarification to control algae growth.
Install your filter box slightly above pond level on solid, level ground. This positioning makes maintenance easier and allows for gravity-fed water return. If you’re using a pressurized filter, ensure it’s properly buried according to manufacturer instructions, with only the lid visible for easy access.
Don’t forget to add a skimmer box at the pond’s surface to catch floating debris before it sinks. Position it opposite to your waterfall or return flow to create a proper circulation pattern. This setup helps maintain optimal water movement throughout your pond.
Remember to conceal your filtration equipment with strategic landscaping – rocks, plants, or a custom-built cover can help maintain your pond’s natural appearance while keeping everything accessible for maintenance. Test your system thoroughly before adding fish or plants, adjusting the flow rate as needed for optimal performance.
Creating the Perfect Pond Landscape
Selecting and Placing Plants
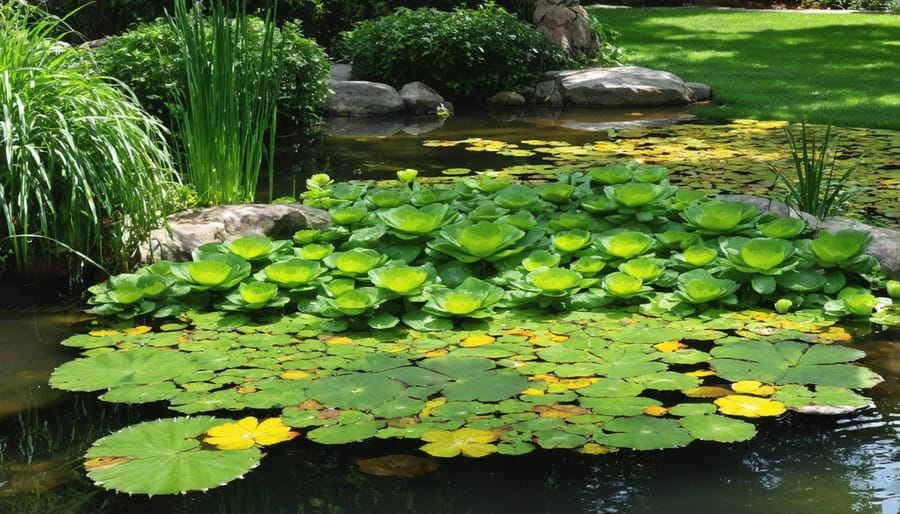
Selecting the right plants is crucial for successful pond plant integration and creates a balanced ecosystem in your backyard oasis. Think of your pond as having different “zones” – deep water, shallow margins, and bog areas – each suitable for specific types of plants.
For deep water zones (2-3 feet), water lilies are perfect centerpieces. Choose between hardy varieties for cooler climates or tropical ones for warmer regions. Floating plants like lotus and water hyacinth help shade the water and control algae growth.
In shallow margins (6-12 inches), plant marsh marigolds, iris, and rushes. These plants not only look beautiful but also provide natural filtration. For the transitional zones between water and land, cattails and sweet flag create wonderful vertical interest while helping stabilize the pond edges.
Don’t forget the bog area! This moist soil region around your pond’s perimeter is perfect for cardinal flowers, Japanese iris, and creeping Jenny. These plants help blend your pond naturally into the surrounding landscape.
When placing plants, start from the bottom up. Position deep-water plants first, then work your way to the margins. Group similar plants together for visual impact, but leave enough space between them for growth. Remember to place taller plants toward the back or center, with shorter varieties in front for the best view.
For the most natural look, avoid perfectly symmetrical arrangements. Instead, create irregular groupings that mimic nature’s spontaneous design. Start with a few key plants and add more as your pond matures.
Adding Rocks and Features
Once your pond’s basic structure is in place, it’s time to add character with rocks and decorative features. Start by placing larger stones around the pond’s edge to hide the liner and create a natural-looking border. Choose a mix of flat and round stones in varying sizes, positioning them so they slightly overlap the water’s edge.
For a more dynamic look, create different levels within your pond using stacked rocks. Build small ledges where you can later place potted aquatic plants. When stacking rocks, always ensure they’re stable and won’t collapse into the water. Use smaller stones to fill gaps between larger rocks, creating a seamless appearance.
If you’re adding a waterfall, begin at the highest point and work your way down. Layer flat stones to create natural-looking cascades, ensuring water flows smoothly from one level to the next. Test the water flow with a garden hose before connecting your pump to avoid any dry spots or splashing outside the pond.
Consider incorporating these decorative elements:
– Partially submerged driftwood for a rustic touch
– Underwater lighting to illuminate your pond at night
– Stone bridges or stepping stones across narrow sections
– Ceramic or stone statues for personality
– Small cave-like structures for fish to hide in
Remember to rinse all rocks thoroughly before placing them in your pond to remove dirt and debris. Position larger features first, then add smaller decorative elements to fill in spaces naturally. Take your time with this step – the placement of rocks and features will define your pond’s final appearance and create the peaceful atmosphere you’re aiming for.
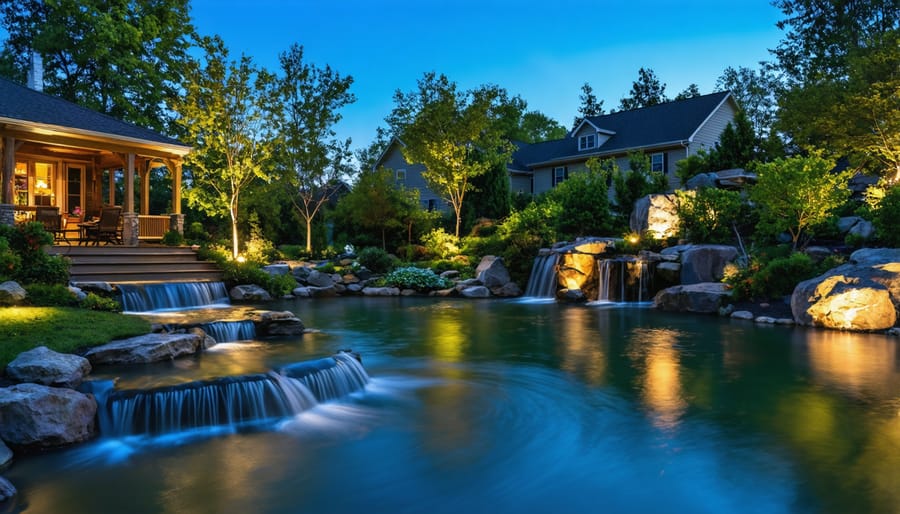
Lighting Your Pond
Proper lighting can transform your backyard pond from a daytime feature into a magical nighttime display. To create the perfect ambiance, consider a combination of underwater and surrounding lights that highlight your pond’s best features.
For underwater illumination, LED pond lights are energy-efficient and long-lasting. Place them strategically to illuminate special features like waterfalls or to create mysterious depths in deeper areas. Submersible spotlights work great for highlighting specific plants or decorative elements, while strip lights can create a subtle glow along the pond’s edge.
Don’t overlook the importance of surrounding lighting. Path lights around your pond ensure safe nighttime viewing and add a welcoming touch. For an eco-friendly approach, explore solar pond lighting options that charge during the day and automatically illuminate your water feature at night.
Consider installing a mix of lighting types: some for functionality (like safety lighting near steps) and others purely for aesthetics (such as floating lights or illuminated fountains). Remember to use waterproof fixtures rated for outdoor use, and consider installing a timer to automate your lighting schedule. This not only saves energy but also ensures your pond always looks its best when you want to enjoy it after dark.
Maintenance Tips for Long-Term Success
Regular maintenance is key to keeping your backyard pond looking beautiful and functioning properly. By following these essential care tips for maintaining your water feature, you’ll ensure years of enjoyment from your outdoor oasis.
Monitor water quality weekly by checking pH levels and ensuring proper circulation. Clean your pump filters monthly to prevent clogging and maintain optimal water flow. Remove fallen leaves and debris regularly using a net skimmer – this simple task prevents excess organic matter from decomposing in your pond and affecting water quality.
Trim aquatic plants as needed during the growing season, removing dead or yellowing foliage. Keep an eye on water levels, especially during hot summer months, and top up when necessary. Consider adding beneficial bacteria products monthly to help break down organic waste and maintain the pond’s natural balance.
In spring, perform a thorough cleanup by removing accumulated debris and checking equipment. Fall preparation is equally important – install a pond net before leaves start falling to make cleanup easier. During winter, keep a small area free of ice using a floating de-icer if you have fish.
Watch for signs of algae growth and address it promptly using appropriate treatments or natural solutions like adding more shade plants. Regular fish observation helps detect potential health issues early. If you notice cloudy water or unusual odors, test water parameters immediately and adjust as needed.
Remember to inspect your pond liner annually for damage and check electrical equipment for wear and tear. Keep surrounding plants well-maintained to prevent overgrowth that could compromise the pond’s structure. With consistent care and attention to these maintenance tasks, your DIY pond will remain a thriving ecosystem and stunning focal point in your backyard.
Creating your own backyard pond is a rewarding project that transforms your outdoor space into a tranquil oasis. By following proper planning, excavation, and installation steps, you can build a beautiful water feature that adds value and charm to your property. Remember to carefully consider location, size, and depth while ensuring proper liner installation and equipment setup. With regular maintenance and the right selection of plants and fish, your pond will flourish and provide years of enjoyment. Whether you’re an experienced DIY enthusiast or a beginner, the satisfaction of building your own pond is unmatched. Don’t be intimidated by the process – take it step by step, and before you know it, you’ll be relaxing beside your very own backyard paradise. Start your pond project today and join the wonderful world of water gardening!