
Keep Your Pond Perfect: Simple Solutions for Effective Drainage
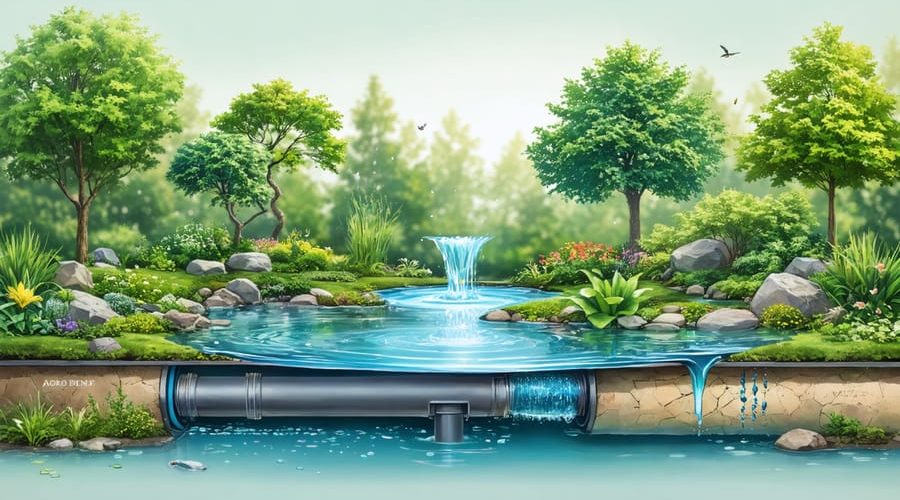
A well-designed pond drainage system transforms your water feature from a potential maintenance nightmare into a self-regulating ecosystem. Whether you’re building a new pond or upgrading an existing one, proper drainage prevents flooding, maintains optimal water levels, and protects surrounding landscapes from water damage. Modern pond drainage solutions combine traditional gravity-fed bottom drains with innovative overflow systems, creating a robust water management approach that works year-round.
Understanding your pond’s specific drainage needs starts with three essential factors: pond size, local rainfall patterns, and surrounding terrain. Small garden ponds might only require a simple overflow pipe, while larger installations demand comprehensive systems with multiple drainage points, skimmers, and emergency overflow capabilities. The right setup not only preserves your pond’s health but also simplifies maintenance routines and extends the lifespan of your water feature.
This guide explores everything from basic drainage principles to advanced installation techniques, helping you create a reliable system that keeps your pond functioning perfectly through every season. Whether you’re a DIY enthusiast or working with professionals, you’ll discover practical solutions that match your pond’s unique requirements and your technical comfort level.
Why Your Pond Needs a Reliable Drainage System
Protecting Against Flooding
A well-designed pond drainage system is your first line of defense against flooding and potential property damage. By implementing proper overflow protection solutions, you can maintain safe water levels even during heavy rainfall. The system works by directing excess water away from your pond through overflow pipes and drainage channels, preventing water from spilling over the edges and potentially damaging your landscape or nearby structures.
Strategic placement of drainage components helps manage water flow during storms, while skimmers and bottom drains prevent debris accumulation that could block water movement. Including a backup drainage system, such as a secondary overflow pipe or emergency spillway, provides extra protection during extreme weather events.
Remember to position your drainage outlet away from building foundations and ensure the discharged water flows toward a proper drainage area. This thoughtful approach to pond drainage will protect both your water feature and surrounding property for years to come.
Maintaining Water Quality
A well-designed drainage system plays a crucial role in maintaining crystal-clear pond water. By regularly cycling and filtering water, proper drainage prevents the buildup of harmful substances like excess nutrients, debris, and toxic gases. This continuous water movement helps maintain optimal oxygen levels, which is essential for fish health and prevents algae overgrowth.
The bottom drain, in particular, removes settled waste before it can decompose and affect water quality. When combined with a skimmer, the system creates a complete circulation pattern that keeps water moving and filtered from both top and bottom layers. This dual-action approach is especially effective at maintaining balanced water chemistry and preventing stagnant zones where problems typically develop.
Regular water testing and adjusting the drainage flow rate according to seasonal changes will help you maintain ideal conditions year-round. Remember that clear water isn’t just about aesthetics – it’s fundamental to creating a healthy ecosystem for all your pond inhabitants.
Essential Components of a Pond Drainage System
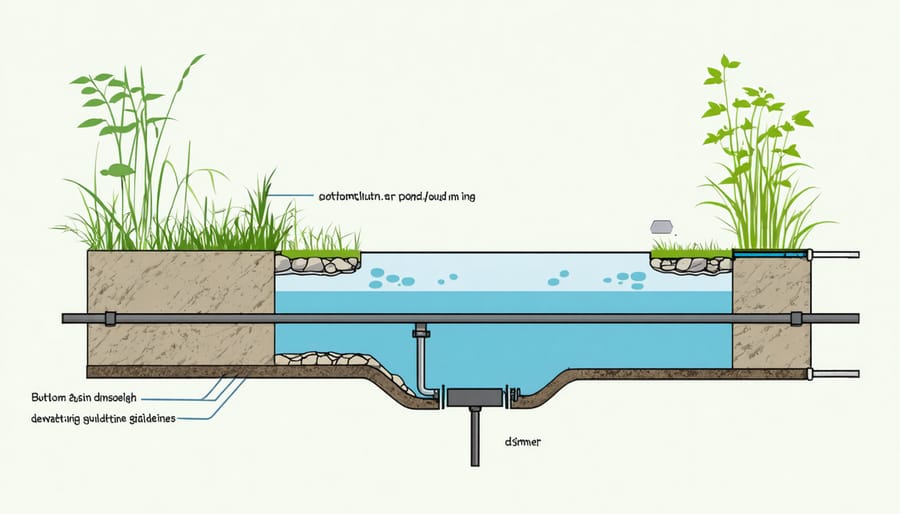
Bottom Drains
Bottom drains are essential components of a pond drainage system, acting like bathtub drains for your pond. They’re typically installed at the lowest point of the pond during construction and help remove debris and maintain water quality. The two most common types are dome-style and flat-plate drains.
Dome-style drains feature a raised cover with slots or holes that prevent larger debris from entering while allowing water and fine particles to pass through. These are excellent for koi ponds as they help maintain cleaner water conditions. Flat-plate drains sit flush with the pond bottom and work well in smaller ponds or those with fewer fish.
When installing a bottom drain, it’s crucial to use proper plumbing connections and ensure a slight slope toward the drain. Most bottom drains connect to a 3- or 4-inch pipe that leads to your filtration system. For the best results, consider installing an aeration system near the drain to help move debris toward it.
For ponds larger than 1,000 gallons, multiple bottom drains might be necessary to ensure efficient water circulation and debris removal. Regular maintenance includes checking for clogs and cleaning the drain covers every few months.
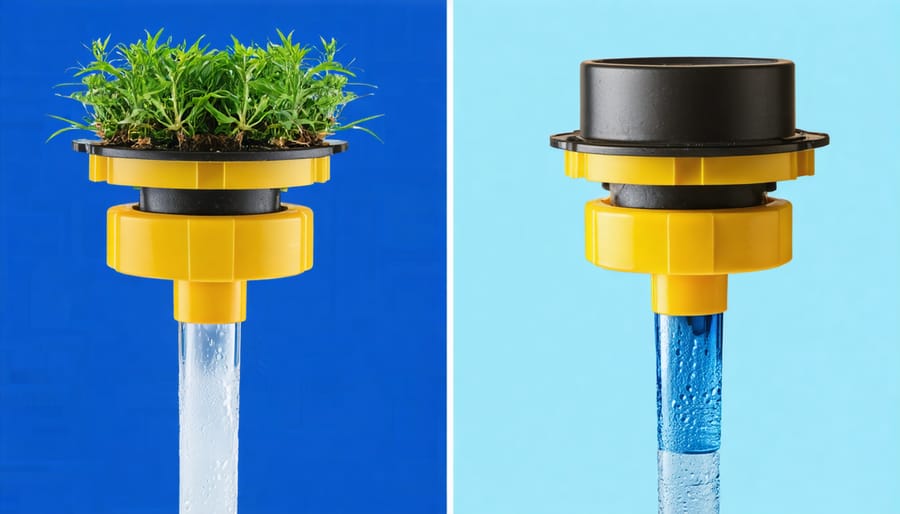
Overflow Pipes
Overflow pipes are essential safety features that prevent your pond from flooding during heavy rainfall or when water levels rise too high. Typically installed near the top of the pond, these pipes act as emergency drains that automatically remove excess water once it reaches a certain level.
The most common overflow pipe setup involves a vertical pipe connected to your main drainage system. You can choose between various materials, with PVC being the most popular due to its durability and affordability. For smaller ponds, a 1.5-inch diameter pipe usually suffices, while larger ponds might need 2-inch or wider pipes.
Placement is crucial for effective overflow management. Position the pipe slightly below the desired maximum water level, usually about 2-3 inches below the pond’s edge. Consider installing a protective cage or screen around the pipe’s opening to prevent debris and fish from entering.
For added flexibility, some pond owners opt for adjustable overflow pipes that can be rotated to different heights, allowing for seasonal water level adjustments. This feature is particularly useful during winter months when you might want to lower the water level.
Skimmers and Filters
Skimmers and filters play a crucial role in maintaining a healthy pond drainage system by removing debris and purifying water. Pond skimmers work like pool skimmers, drawing water from the surface to catch floating leaves, twigs, and other debris before they sink and decay. These devices are typically installed at the pond’s edge, working seamlessly with pond filtration systems to keep water clean and clear.
The skimmer’s intake draws surface water through a basket or net, trapping larger debris while allowing water to flow through to the filter chamber. This pre-filtering step is essential for protecting your pump and reducing the workload on your main filtration system. Most modern skimmers include features like adjustable weirs that maintain consistent water flow regardless of water level fluctuations.
For optimal performance, position your skimmer opposite to your waterfall or return flow, creating a natural circulation pattern across your pond. This placement ensures maximum surface coverage and debris collection. Remember to choose a skimmer sized appropriately for your pond’s surface area and pump capacity – a common rule of thumb is that your skimmer should be able to process your pond’s entire water volume every two hours.
Regular maintenance of your skimmer basket and filter media will prevent clogs and ensure your drainage system operates efficiently year-round.
Installing Your Pond Drainage System
Planning and Layout
Before diving into installation, proper planning of your pond drainage system is crucial for long-term success. Start by studying your backyard pond design and identifying the lowest points where water naturally collects. These areas are ideal for drain placement.
Using graph paper, sketch your pond’s layout and mark potential drain locations. Consider installing multiple drains for larger ponds – a good rule of thumb is one drain for every 200 square feet of surface area. Factor in the surrounding landscape’s slope and ensure the drainage path leads away from structures and neighboring properties.
Choose drain locations that allow easy access for maintenance while remaining discreet enough not to disrupt your pond’s aesthetic appeal. Mark underground utilities before finalizing drain positions – this step is absolutely essential for safety and compliance with local regulations.
Plan your drainage pipe routes carefully, maintaining a minimum slope of 1/8 inch per foot to ensure proper water flow. Consider installing clean-outs at key points for easier maintenance access. If your property has clay soil or poor natural drainage, you might need to incorporate a dry well or French drain system into your plan.
Remember to check local building codes and obtain necessary permits before starting your installation. Some areas have specific requirements for water drainage and environmental protection that you’ll need to follow.
Installation Steps
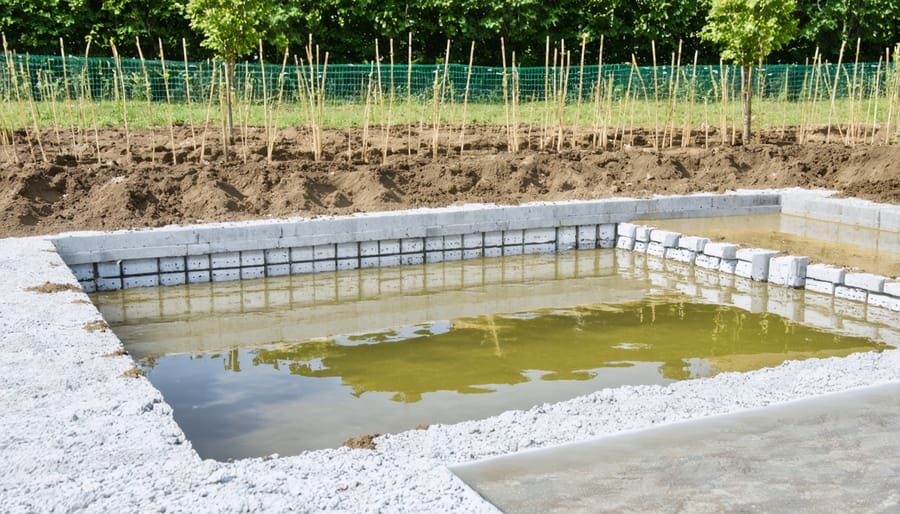
Installing a pond drainage system might seem daunting, but with the right approach, it’s a manageable DIY project. Let’s break it down into simple steps that you can follow over a weekend.
Start by marking your drainage path with marking paint or stakes. This path should follow the natural slope of your land, leading away from the pond. Next, dig a trench about 12-18 inches deep, maintaining a slight downward slope (roughly 1 inch drop per 8 feet) to ensure proper water flow.
Place a layer of gravel at the bottom of the trench, about 2 inches deep. This creates a stable base for your drainage pipe. Install your main drainage pipe, typically a 4-inch PVC pipe, starting from the pond’s bottom drain location. Make sure all pipe connections are properly sealed with PVC cement.
At the pond end, install a bottom drain with a protective cover to prevent debris and fish from entering the system. Connect this to your main pipe using appropriate fittings. If you’re including a skimmer, now’s the time to connect it to your drainage system.
Create a few cleanout access points along the pipe run by installing T-joints with removable caps. This will make future maintenance much easier. At the outlet end, install a drainage grate or create a small gravel pit to prevent erosion.
Before covering everything up, perform a water test to check for leaks and proper flow. Once satisfied, carefully backfill the trench with soil, compacting it gently as you go. Finally, lay sod or plant grass seed over the filled trench to restore your landscape.
Remember to wait at least 24 hours after cementing any PVC connections before running water through the system.
Common Installation Mistakes
When installing your pond drainage system, avoid these common pitfalls that can lead to future headaches. First, never undersize your drainage pipes – while it might seem cost-effective initially, smaller pipes can easily clog and won’t handle heavy rainfall. A frequent mistake is placing the drain at the wrong level; it should be at the pond’s lowest point to ensure complete drainage when needed.
Another crucial error is failing to create proper slope in the drainage pipes. Without adequate gradient (at least 1/4 inch per foot), water won’t flow effectively and may even back up into your pond. Many DIY enthusiasts also forget to install cleanouts, making future maintenance nearly impossible.
Watch out for improper sealing at pipe joints – even tiny leaks can cause significant water loss over time. Also, avoid using regular PVC cement in areas exposed to sunlight, as it can degrade quickly. Finally, don’t skip installing a pre-filter or debris cage at the drain entrance – this simple step prevents leaves and debris from clogging your entire system.
Remember to test your drainage system thoroughly before completing your pond project, as fixing issues later can be much more challenging and expensive.
Maintenance and Troubleshooting
Regular Maintenance Tasks
To keep your pond drainage system working efficiently, establish a regular water feature maintenance schedule. Check and clean skimmer baskets weekly, removing debris and leaves that could cause blockages. Monthly tasks should include inspecting drain covers, overflow pipes, and filtration components for any signs of damage or wear.
Every three months, flush the drainage pipes with clean water to prevent sediment buildup. Pay special attention to bottom drains and ensure they’re free from sludge accumulation. During spring and fall, thoroughly clean the entire system, including pumps and filters.
Watch for warning signs like slow drainage, unusual sounds, or water backup. These could indicate developing problems that need immediate attention. Keep a maintenance log to track cleaning dates and any issues you notice – this helps establish patterns and prevent major problems before they occur.
Remember to check drainage components before winter and after heavy storms for optimal performance year-round.
Solving Common Problems
When your pond faces drainage issues, don’t worry – most problems have straightforward solutions. If you notice slow drainage, start by checking for debris blocking the overflow pipe or skimmer. A quick cleaning usually does the trick. For ponds that overflow during heavy rain, consider adding a larger overflow pipe or installing a secondary drainage route.
Dealing with soggy areas around your pond? Create a French drain by digging a trench, filling it with gravel, and adding a perforated pipe to direct excess water away. If your pond level drops too quickly, check for leaks in the liner and repair any holes with a pond patch kit.
For winter concerns, install a floating de-icer to prevent complete freezing and maintain a small opening for gas exchange. Remember to clear snow from overflow areas to prevent backup when it melts. Most drainage problems can be solved with these simple fixes and regular maintenance.
A well-designed pond drainage system is essential for maintaining a healthy and beautiful water feature in your garden. Throughout this guide, we’ve explored the various components, installation methods, and maintenance requirements that contribute to an effective drainage solution. Remember that proper drainage not only prevents flooding and water stagnation but also helps maintain optimal water quality for your aquatic plants and fish.
By implementing the strategies we’ve discussed, such as installing bottom drains, skimmers, and overflow systems, you can create a self-sustaining ecosystem that requires minimal intervention. Regular maintenance checks and seasonal cleaning will ensure your drainage system continues to function efficiently for years to come.
Don’t be intimidated by the initial setup process – with careful planning and attention to detail, installing a pond drainage system is a rewarding DIY project that will enhance your outdoor space. Start small if you’re new to pond keeping, and gradually upgrade your system as you gain confidence and experience.
Remember to consider your local climate, pond size, and specific needs when designing your drainage solution. Whether you’re a beginner or an experienced pond enthusiast, investing time and effort in a proper drainage system will pay dividends in the long run, providing you with a beautiful and healthy pond that you can enjoy throughout the seasons.
Take action today to improve or install your pond’s drainage system – your future self (and your pond inhabitants) will thank you!