
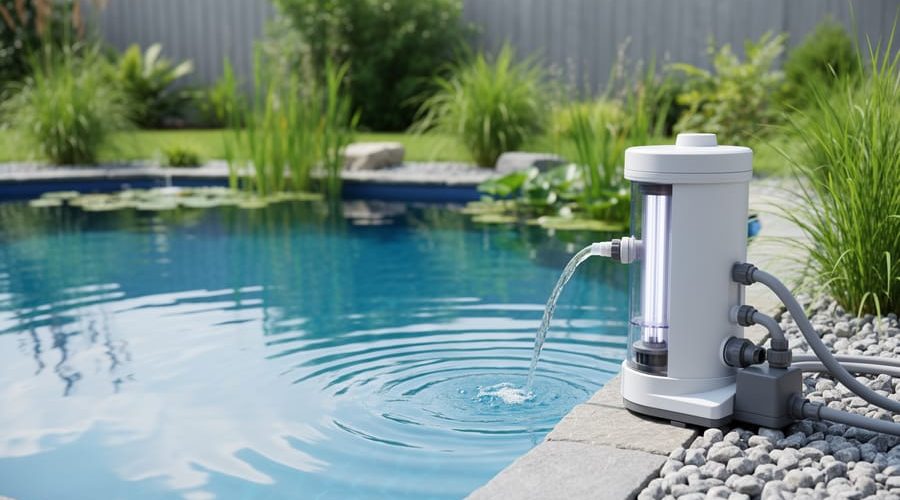
How to Install and Set Up a UV Pond Filter and Pump System
Installing a UV pond filter and pump transforms murky, algae-filled water into a crystal-clear haven for fish and plants by combining mechanical filtration with ultraviolet light sterilization. This dual-action system pulls pond water through a filter media chamber to trap debris, then exposes it to UV rays that destroy green algae cells and harmful pathogens before returning clean water to your pond. Most DIY-friendly setups take about two to four hours to install and require only basic tools you likely already own.
The magic happens inside the UV chamber, where a specialized bulb emits light at 254 nanometers, the wavelength that disrupts algae DNA and prevents reproduction. Within days of proper operation, you’ll notice the green tint fading from your pond as suspended algae particles clump together and get filtered out. Fish become more visible, plants receive better light penetration, and your pond ecosystem finds balance.
Choosing the right combination means matching pump flow rate to both pond volume and UV wattage. A 1,000-gallon pond typically needs a pump pushing 500 gallons per hour paired with a 15-watt UV clarifier, though your specific requirements depend on fish load, sun exposure, and how quickly you want results. Too much flow rushes water past the UV light before sterilization completes; too little creates dead zones where algae thrives unchecked.
This guide walks you through selecting compatible equipment, positioning your setup for maximum efficiency, connecting components safely, and verifying everything runs correctly. You’ll also learn the maintenance schedule that keeps your system performing year after year.
Understanding How UV Pond Filters Work with Pumps
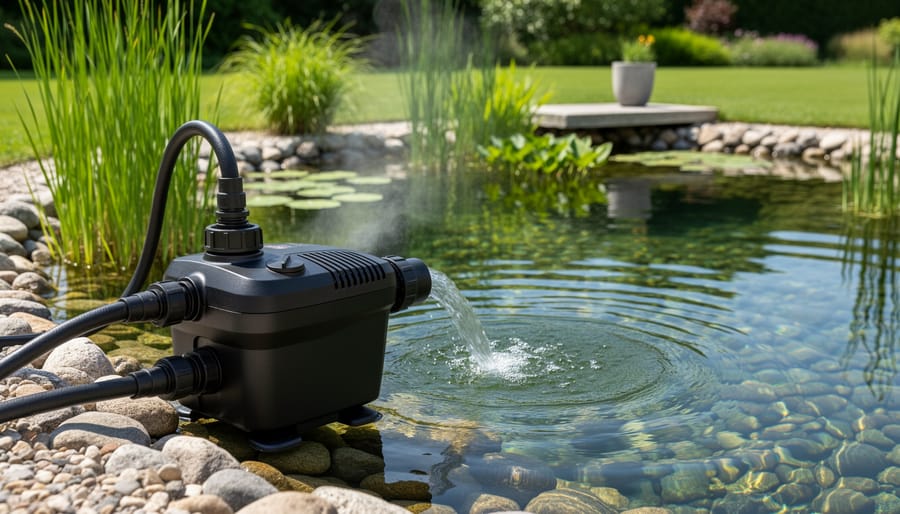
Think of your UV pond filter and pump as a tag team working together to keep your water sparkling. The pump does the heavy lifting, it pulls water from your pond and pushes it through a tube into the UV filter unit. Inside that unit sits a special UV-C bulb encased in a protective quartz sleeve, and this is where the magic happens.
As water flows past the UV-C bulb, it gets zapped with ultraviolet light. This isn’t the same UV light you get from the sun; it’s a specific wavelength (UV-C) that’s incredibly effective at breaking down microscopic troublemakers. When algae cells pass through this chamber, the UV light penetrates their cell walls and scrambles their DNA, preventing them from reproducing. Those pesky green water algae that turn your pond into pea soup? They can’t survive this process. The same goes for harmful bacteria, viruses, and parasites, the UV light damages their genetic material so they can’t multiply or cause problems for your fish.
What makes this system so effective is the continuous circulation. Your pump keeps moving water through the UV chamber over and over, treating your entire pond volume multiple times per day. The result is water that goes from murky green to clear within days, and it stays that way. You’re not adding harsh chemicals or disrupting your pond’s natural balance, you’re simply using light to neutralize the microscopic organisms that cloud your water. It’s gentle on your beneficial bacteria and fish while being tough on the stuff you don’t want.
What You’ll Need: Tools and Materials
Before you start your installation, gather everything you’ll need to avoid frustrating mid-project trips to the hardware store. Having the right equipment on hand makes the process smoother and helps you complete the setup in one afternoon.
Essential Equipment and Materials:
- UV filter unit (sized for your pond’s gallons, typically 1.5x pond volume for adequate clarification)
- Pond pump (calculate GPH based on pond volume divided by desired turnover rate, usually 1-2 hours)
- Flexible pond tubing or hose (diameter matching your pump outlet and UV filter inlet, typically 1-2 inches)
- Hose clamps (stainless steel preferred, at least 2 per connection point)
- GFCI outdoor electrical outlet or extension cord rated for outdoor use
- Weatherproof electrical box or cover for connections
- Teflon tape or pipe sealant for threaded connections
- Cable ties for securing loose wiring
- Level (small torpedo level works fine)
- Adjustable wrench or pliers
- Screwdriver set
- Measuring tape
Choosing the Right Pump Size:
This part trips up many first-timers, but it’s straightforward once you know the math. Calculate your pond’s volume in gallons, then aim for a complete water turnover every one to two hours. For a 1,000-gallon pond, you’ll want a pump rated between 500-1,000 GPH (gallons per hour). Keep in mind that head height, the vertical distance the pump needs to push water, reduces flow rate, so check the pump’s performance curve chart and add 20-25% capacity as a buffer.
Optional But Helpful Items:
A pond thermometer helps you monitor water temperature for optimal UV efficiency. A flow meter lets you verify your system is moving water at the intended rate. Some installers also appreciate having silicone lubricant on hand to ease hose connections, and a bucket for catching water during final hookups. These aren’t strictly necessary, but they make the job easier and help you dial in performance from day one.
Safety First: Important Precautions
Before you start connecting hoses and flipping switches, let’s talk about keeping yourself safe. Working with electricity near water isn’t something to rush through, and UV light carries its own hazards that deserve your attention.
First, the electrical side. Your UV filter and pump must plug into a ground fault circuit interrupter (GFCI) outlet. This device cuts power instantly if it detects any current leakage, which can happen if water gets where it shouldn’t. If your outdoor outlets aren’t GFCI-protected, hire a licensed electrician to install one. It’s not expensive, and it could save your life. Similarly, all connections should use weatherproof covers rated for outdoor use, and cords should never run through standing water or puddles.
Here’s something many first-timers don’t realize: UV units must never run dry. Operating the bulb without water flowing through the chamber will cause it to overheat and crack within minutes, ruining the quartz sleeve and possibly the bulb itself. Always verify water is flowing before you power up the UV unit.
When it comes to the UV light itself, don’t peek inside while it’s running. UV-C wavelengths are invisible to our eyes but extremely harmful to skin and vision, even with brief exposure. If you need to inspect or replace the bulb, shut off and unplug the unit first, then wait a few minutes for the bulb to cool.
If you’re uncomfortable working with outdoor electrical installations, there’s no shame in calling a professional for that part. You can handle the plumbing connections yourself and have an electrician set up the power supply safely.
Step-by-Step Installation Process
Choosing the Right Location
Location matters more than most beginners realize, choose poorly and you’ll be fighting leaks, algae blooms, and frustrating maintenance visits. Place your UV filter and pump close to the pond’s edge but on stable, level ground where you won’t trip over them during routine checks. I always position mine within easy arm’s reach of the pond so I can clean the quartz sleeve without wrestling with hoses, yet protected under an overhang or waterproof housing to shield the electrical components from rain.
Here’s the crucial bit: keep the UV unit out of direct sunlight. Sounds counterintuitive for a device that uses light, but UV exposure from the sun degrades the bulb’s effectiveness and shortens its lifespan dramatically, you’ll replace bulbs twice as often if you skip this step. If you’re setting up an external system, review external filter basics to understand how placement affects overall filtration flow.
Finally, ensure you can access the power outlet safely; the GFCI-protected socket should be within cord length without extension leads stretched across pathways. Good placement now saves hours of frustration later.
Connecting the Pump to the UV Filter
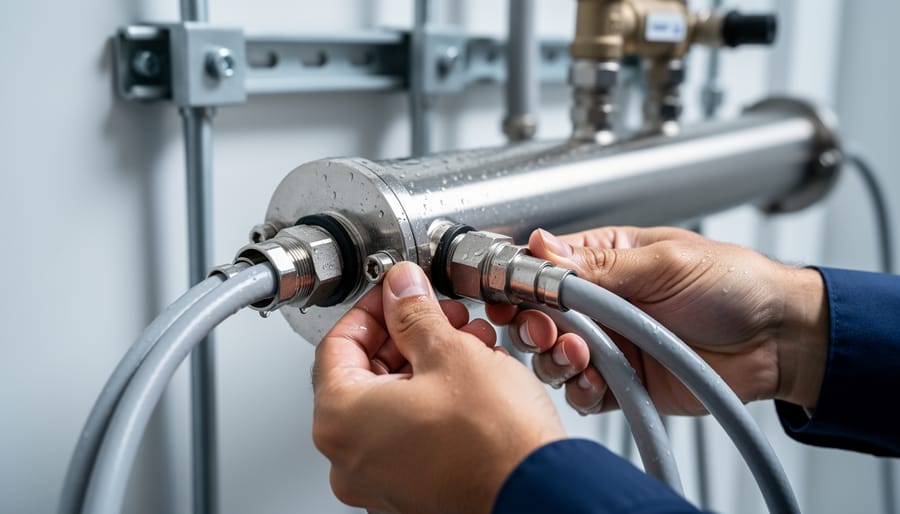
Turn off both your pump and UV filter before you begin connecting anything. This might sound obvious, but it’s worth mentioning because working on a running system can lead to messy surprises.
Start by identifying the inlet and outlet ports on your UV filter. Most units have arrows molded into the housing showing water flow direction, the water should enter the bottom and exit the top. If you reverse this, the UV chamber won’t fill properly and your system won’t work effectively.
Slide your hose onto the pump’s outlet port first. Push it on firmly until it reaches the internal ridge inside the fitting, usually about two inches deep. Secure this connection with a stainless steel hose clamp positioned about half an inch from the hose end. Tighten the clamp until snug but not overtightened, you want to compress the hose evenly without crushing it.
Connect the other end of this hose to the UV filter’s inlet port using the same technique. Make sure there are no kinks or sharp bends in the hose between the pump and filter, as these restrict flow and reduce efficiency.
Attach a second length of hose to the UV filter’s outlet port to return water to your pond. Again, secure both ends with clamps. I always give each connection a gentle tug after tightening to verify it won’t separate under water pressure.
Setting Up the Electrical Connection
Before you plug anything in, let’s talk about electrical safety near water, this is absolutely critical. UV pond filters require power, and mixing electricity with pond water demands strict precautions.
First, your UV filter must plug into a GFCI (ground fault circuit interrupter) outlet. This device cuts power instantly if it detects any electrical fault, potentially saving your life. If you don’t have an outdoor GFCI outlet within reach, install one now or hire a licensed electrician. Never use extension cords as a permanent solution or run regular indoor cords outside.
Use weatherproof outlet covers designed for outdoor use, even if the outlet seems protected. Water finds ways to seep in during heavy rain or splashing. Make sure all connections stay dry and elevated above potential flood levels.
Once everything is connected, test the GFCI by pressing its test button, the reset button should pop out. Press reset to restore power. Now plug in your pump first, then the UV unit. You should see an indicator light confirming the UV bulb is operating.
If you’re unsure about any electrical work, don’t guess. Hire a professional electrician familiar with outdoor water feature installations. It’s worth the investment.
Priming and Starting Your System
Starting your UV pond filter system for the first time requires a careful, step-by-step approach to protect the equipment and ensure smooth operation.
Before you flip any switches, make sure water fills the entire system. Open the pump’s inlet valve fully and allow water to flow through the UV chamber naturally. You’ll hear gurgling sounds, that’s completely normal as air escapes. Watch the outlet hose until you see a steady stream of water emerging without sputtering. This usually takes two to four minutes depending on your system size.
Air pockets are the enemy of UV bulbs. If the bulb fires up while surrounded by air instead of water, it can overheat and fail within seconds. That’s an expensive mistake you’ll only make once. To remove stubborn air pockets, gently rock the UV unit back and forth while water flows through it. You can also disconnect the outlet hose briefly to let air escape, then reconnect it once water flows freely.
Now you’re ready to start the pump. Turn it on at a low setting if your model has variable speed control. Listen for smooth, consistent operation, no grinding, rattling, or unusual vibrations. Check the manufacturer’s recommended flow rate for your UV unit, typically measured in gallons per hour. Too fast and the UV light won’t have enough contact time with the water; too slow and you’re not maximizing the system’s potential.
Give the system fifteen minutes to stabilize, then verify the UV indicator light is glowing. If everything looks good, you’re officially up and running.
Testing and Verifying Your Setup
Once your UV pond filter and pump system is up and running, you’ll want to confirm everything’s working as it should. Start by walking around the entire setup and checking every connection point for leaks, even a small drip can become a bigger problem down the line. Run your hand along hoses and fittings while the pump is operating; you should feel consistent water flow without any soft spots or bulges that might indicate a weak connection.
Next, verify that your UV light indicator is glowing. Most units have a small viewing window or LED that confirms the bulb is active. If you don’t see this indicator light up within a minute of powering on, switch off the system immediately and check that the bulb is properly seated and the quartz sleeve is clean and correctly installed.
Now measure your flow rate to ensure water is moving through the UV chamber at the manufacturer’s recommended speed. You can do this by timing how long it takes to fill a bucket of known volume from your return line. Too fast and the UV exposure time isn’t sufficient; too slow and you’re not circulating enough water through your pond.
During the first 24-48 hours, keep an eye on the system every few hours. Listen for any unusual sounds from the pump, grinding or rattling isn’t normal. Watch your pond’s water level to make sure you’re not losing water to an unnoticed leak. If you notice low flow, check for clogged pre-filters or kinked hoses. No UV indicator light after confirming proper connections? The bulb may need reseating or replacement, though brand-new bulbs rarely fail.
If everything checks out and you’re seeing steady flow with an active UV indicator, you’ve successfully installed your system. The UV light will work alongside whatever biological filtration you have, and if you’re looking to optimize further, you can choose filter media that complements your UV setup for even better long-term water quality.
Next Steps: Maintenance and Optimization
Your UV system is up and running, now let’s keep it that way. The good news? Maintenance is straightforward and won’t eat up your weekends.
Mark your calendar for an annual UV bulb replacement. Even if the light still glows, UV-C output drops significantly after 12 months of continuous use, losing its algae-fighting punch. While you’re swapping bulbs, clean the quartz sleeve that surrounds it. Mineral buildup blocks UV rays, so a gentle wipe with white vinegar restores full effectiveness. I check mine every spring and fall, wiping away any film that’s accumulated.
Give your pump a quick inspection every few weeks during peak season. Listen for unusual sounds, check that water flow stays strong, and clear any debris from the intake. If flow drops noticeably, it’s time to clean the impeller, a five-minute job that prevents bigger headaches.
Seasonal shifts matter. In colder climates, drain and store your UV unit before freezing temperatures hit. Most pumps can overwinter at the pond bottom, but check your manufacturer’s guidelines.
Remember, your UV filter works best as part of a team. Pair it with biological filtration to handle fish waste and mechanical filtration to catch larger particles. Regular pond water testing helps you spot issues early, and if algae persists despite UV treatment, explore these stubborn algae fixes.
This layered approach keeps your water crystal-clear year-round.
Common Questions About UV Pond Filters and Pumps
After you’ve successfully installed your UV pond filter and pump system, a few common questions often come up. Let’s address the most frequent concerns so you can operate your setup with confidence.
Will the UV filter kill my beneficial bacteria?
No, UV light only affects organisms passing directly through the chamber. Your beneficial bacteria live in biofilms on rocks, gravel, and filter media where UV light can’t reach them, so they remain completely safe and active.
How long until I see clearer water?
You’ll typically notice a significant improvement within 3-5 days as the UV light eliminates free-floating algae. For complete clarity, give it 7-10 days, especially if you’re also working on overall pond water balance.
Should I run the system 24/7?
Yes, continuous operation gives the best results. Every drop of pond water needs to pass through the UV chamber multiple times daily, and shutting the system off allows algae to rebound quickly.
What if my pond is larger than the UV filter’s rated capacity?
Always size up rather than down. If your pond is between sizes, choose the next larger unit to ensure adequate exposure time for all the water passing through the chamber.
Remember that UV filtration works best as part of a complete filtration strategy. While it handles algae and pathogens brilliantly, you’ll still need mechanical and biological filtration to remove debris and process fish waste. Think of your UV system as one powerful tool in your overall pond care toolkit.