
How to Use Deep Watering Techniques for Pond and Water Garden Plants
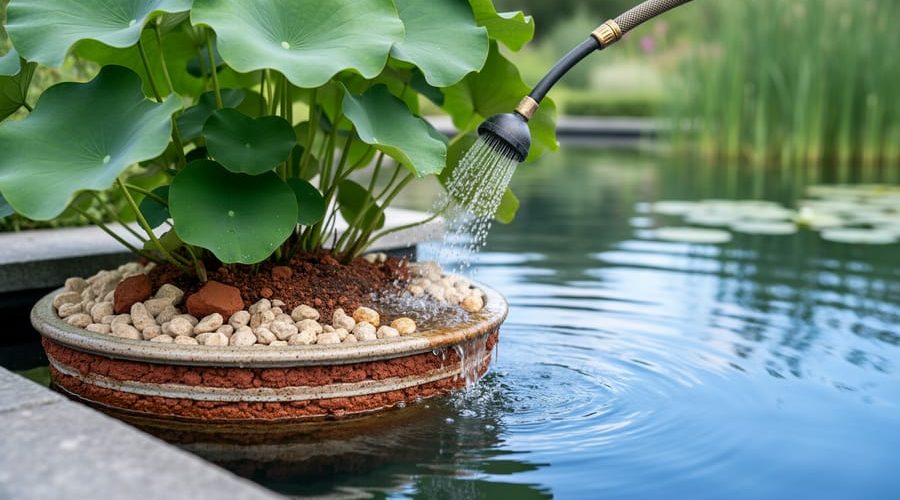
Deep watering is the practice of slowly saturating the root zones of aquatic plants to encourage stronger, deeper root systems and healthier overall growth. Unlike surface watering that barely penetrates the planting media, this technique delivers moisture and nutrients where your plants need them most, creating robust anchoring and more resilient pond greenery. The method takes about 15 to 20 minutes per plant basket and requires no special equipment beyond a watering wand or gentle hose nozzle.
I first tried deep watering after noticing my water lilies kept floating out of their containers during windy days. The roots were shallow and weak, clinging only to the top inch of soil. Once I started watering more slowly and deliberately, letting the water truly soak down through the layers of clay and gravel, the difference was remarkable. Within a few weeks, the plants anchored themselves firmly and sent out fresh new growth.
The principle is simple but transformative. When you water too quickly, moisture runs off the surface or channels down the sides of the basket, never reaching the lower root zone. Your plants respond by keeping their roots near the surface, making them vulnerable to disturbance and nutrient deficiency. Deep watering forces roots to grow downward in search of moisture, building a foundation that supports vigorous top growth and better flowering.
This guide walks you through the exact steps to deep water your pond plants safely, includes tips for different container types, and shows you how to verify the technique is working without disturbing your aquatic ecosystem.
Why Deep Watering Matters in Water Gardens
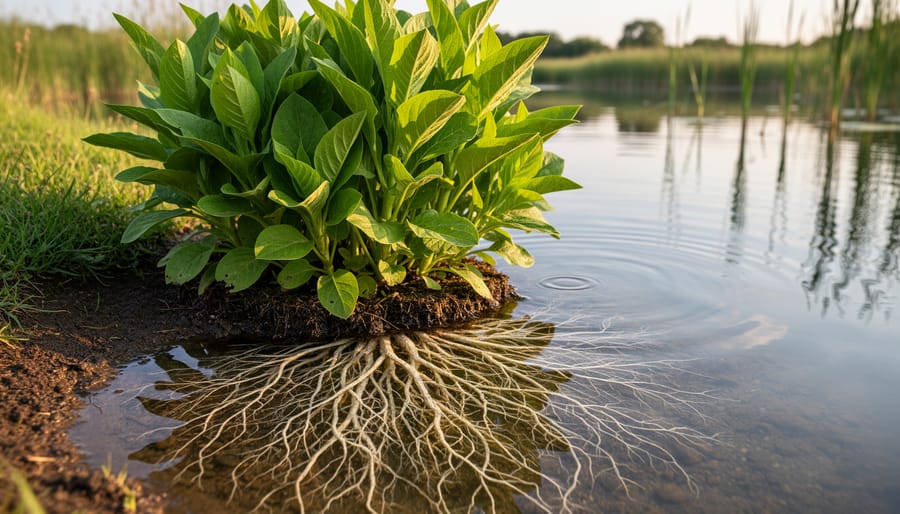
Deep watering isn’t just about keeping aquatic plants alive, it’s about building a healthier, more resilient pond ecosystem from the roots up. When you direct water slowly into the substrate rather than letting it disperse at the surface, you encourage roots to grow downward, anchoring plants firmly in gravel or soil. This deeper root system gives marginals and deep-water aquatics better access to nutrients stored below, reducing their dependence on the water column for feeding. The result? Sturdier stems, fuller foliage, and plants that can withstand wind and water movement without floating loose.
There’s a bonus for pond clarity, too. By drawing nutrients down into the substrate, you leave less dissolved nitrogen and phosphorus floating near the surface where algae thrive. This won’t replace proper greenwater treatment if you’re already dealing with an algae bloom, but it’s a smart preventive measure that supports clearer water over time. Marginal plants especially benefit from this approach during late summer or early autumn when pond levels drop naturally. A shallow-rooted iris or rush might struggle when water recedes, but a plant with roots established six inches deep will tap into moisture reserves and keep growing strong. I’ve watched my own cattails bounce back from a dry spell precisely because they’d developed that deeper root structure through consistent deep watering the previous spring.
What You’ll Need: Tools and Materials for Deep Watering
You don’t need specialized equipment to deep water your pond plants effectively. Most of what you’ll use is either already in your gardening toolkit or simple to find at any garden center. The key is choosing tools that let you deliver water slowly and precisely at the substrate level without stirring up sediment or startling your fish.
Here’s what to gather before you start:
- Slow-release watering wand or hose with adjustable nozzle, controls flow rate and directs water exactly where roots need it
- Measuring stick or depth gauge, helps you check substrate depth and monitor how far water is penetrating
- Aquatic plant fertilizer spikes (optional), boosts nutrient delivery deep in the root zone if plants show slow growth
- Garden gloves, protects your hands from algae, sharp pond edges, and fertilizer residue
- Timer or watch, ensures you water each plant for the full 3-5 minutes without rushing or overdoing it
The watering wand is your most important tool. Look for one with a gentle shower or mist setting rather than a forceful jet. This matters because a strong stream will blast through your substrate, cloud the water, and potentially harm roots or fish. An adjustable nozzle on a standard garden hose works just as well if you can dial it down to a slow, steady trickle.
The measuring stick serves double duty. Use it to gauge how deep your substrate is before you start, then insert it gently after watering to see if moisture has reached the lower layers. You’ll feel the difference between dry, loose gravel and saturated substrate. If you’re adding fertilizer spikes, push them in at the same depth you’re watering to, so nutrients travel down with the water rather than floating up to feed algae.
Safety and Precautions Before You Start
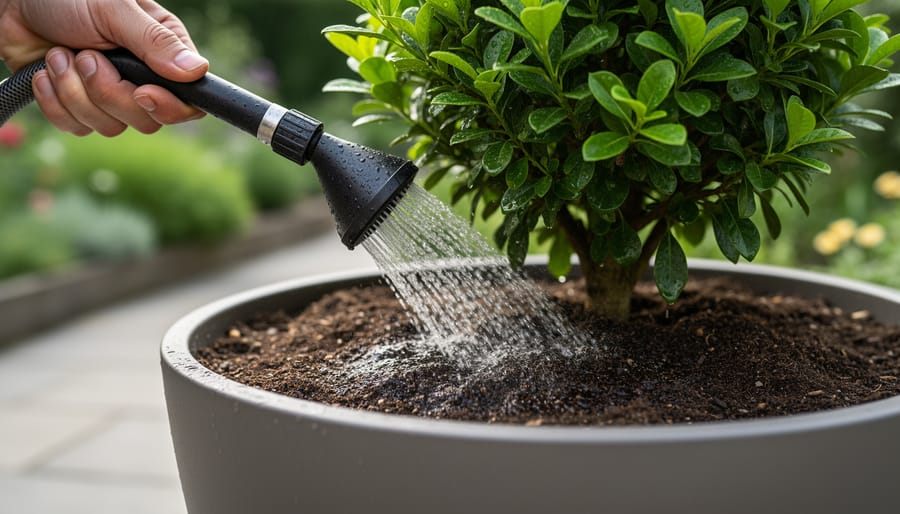
Deep watering can transform your pond plants, but a few safety measures ensure you protect both your greenery and your aquatic ecosystem. Before you start, understand that this technique relies on slow, controlled water delivery, rushing the process can undo its benefits and harm your pond.
First, watch your water volume carefully. Overwatering can displace substrate, clouding your pond and stressing fish. It can also raise water levels unexpectedly, especially in smaller ponds or container water gardens. If you notice substrate floating or water approaching the pond edge, stop immediately and let things settle. The goal is to saturate the root zone, not flood the entire planting bed.
Even with aquatic fertilizers, apply them sparingly and follow package directions to the letter. Excess nutrients can trigger algae blooms, turning your clear pond into a green soup within days.
Monitor your water clarity and chemistry during the first few sessions. If you see persistent cloudiness, ammonia spikes, or pH swings, you’re likely watering too aggressively or disturbing anaerobic pockets in the substrate. Scale back your flow rate and let the pond stabilize before continuing.
Finally, keep an eye on your plants themselves. Deep watering should invigorate growth, not drown roots. If you notice yellowing leaves, mushy stems, or a sour smell from the substrate, you may be creating waterlogged, oxygen-poor conditions. Root rot thrives in stagnant, oversaturated soil. Adjust your technique, shorter sessions, longer intervals, and give plants time to respond. Patience here prevents problems later.
Step-by-Step: How to Deep Water Your Pond Plants
Step 1: Assess Your Plant and Substrate Depth
Start by checking the water level above your plant’s substrate. Use a measuring stick or ruler to gauge the distance from the water surface down to the substrate top, most marginal plants sit in 2-6 inches of water, while deep-water aquatics like water lilies thrive in 12-24 inches. Next, probe gently into the substrate with your finger or a thin stick to estimate its depth; you’re looking for at least 4-6 inches of soil or gravel to support deep root growth.
Pay attention to the plant’s current root zone. If you can see roots spreading horizontally near the substrate surface rather than diving downward, that’s a sign the plant needs deep watering. Marginal plants like pickerelweed and arrowhead benefit most from this technique since they naturally develop extensive root systems when water reaches deeper layers. Deep-water aquatics also respond well, especially if they’ve been recently transplanted and haven’t established roots yet.
Watch for visual cues that indicate shallow rooting: weak or floppy stems that can’t support foliage, slow growth despite good light, and leaves that yellow prematurely. These symptoms often mean the roots aren’t accessing nutrients stored lower in the substrate, making deep watering a practical solution.
Step 2: Position Your Watering Tool at the Base
Gently lower your watering wand or hose nozzle until it rests just above the substrate surface, about one to two inches from the plant’s base. Angle the nozzle slightly downward, roughly 30 to 45 degrees, so the water flow can penetrate the top layer of gravel or soil without blasting it apart. You want the stream to sink into the substrate, not scatter it across your pond.
If you have fish nearby, move slowly. Sudden motions or splashing will startle them and stir up sediment. Keep the nozzle tip submerged to minimize surface disturbance and sound.
For plants with exposed root crowns, like young pickerelweed or iris, position the nozzle a few inches to the side rather than directly over the crown. This protects fragile tissue from the water pressure while still delivering moisture deep into the root zone. You’re aiming for steady infiltration, not force.
Step 3: Water Slowly and Steadily
Turn on the water and adjust your nozzle to produce a gentle, steady stream, think of it as a slow trickle rather than a forceful spray. You want the water to sink gradually into the substrate without stirbing up sediment or creating visible currents that might stress nearby fish.
Maintain this flow for three to five minutes per plant. Set a timer if you’re working with multiple specimens; it’s easy to lose track when you’re moving between plants. The key is patience. Rushing defeats the purpose, since water needs time to work its way down through layers of gravel or soil.
Watch for these positive signs: tiny bubbles rising from the substrate, water remaining clear, and a subtle settling of the planting media. If you notice clouding, reduce the flow immediately. The water should penetrate downward, not spread outward across the surface.
For larger plants or deeper containers, lean toward the full five minutes. Smaller marginals may only need three.
Step 4: Observe Substrate Response
As you water, keep a close eye on the substrate itself. You’ll want to see gentle settling, small particles compacting slightly as water fills air pockets between grains, but no dramatic upheaval. The water column should remain clear or only slightly hazy; if you notice clouds of sediment billowing up, you’re applying too much pressure.
Watch for gravel or soil shifting away from the plant base. A few pebbles rolling is normal, but if you see a depression forming or substrate sliding downhill, stop immediately. Lift the wand slightly higher or reduce your flow rate until the disturbance settles.
If clouding persists for more than a few seconds after you adjust, pause completely. Wait until visibility returns before resuming at a gentler pace. The goal is infiltration, not excavation, your substrate should look barely disturbed when you finish, with the plant sitting firmly in place and the surrounding area intact.
Step 5: Repeat Weekly or as Needed
Deep watering isn’t a one-and-done task. Most pond plants thrive with weekly sessions during their active growing season, but the exact frequency depends on what you’re growing and what time of year it is.
In spring and summer, when your marginals and aquatics are putting out new leaves and flowers, stick to a consistent weekly schedule. Warmer water temperatures speed up root growth, so plants absorb moisture and nutrients faster. If you notice rapid growth or your pond water level drops frequently due to evaporation, you might bump it up to twice a week for heavy feeders like lotus or water cannas.
Come fall and winter, dial it back significantly. Most pond plants enter dormancy when temperatures drop, and their water needs plummet. Switch to every two to three weeks, or skip deep watering entirely for hardy plants that naturally slow down. Overwatering dormant roots can lead to rot since they’re not actively taking up moisture.
Always let the plant guide you. Yellowing lower leaves or slow growth might mean you need more frequent sessions, while mushy stems or cloudy substrate suggest you’re overdoing it.
How to Tell If It’s Working: Verification and Signs of Success
You’ll know your deep watering technique is working when your plants show visible improvements within two to four weeks. The clearest early sign is new growth emerging from the base of the plant, often appearing as fresh shoots or young leaves pushing up from the crown. These new stems typically feel firmer and stand more upright than older growth, indicating stronger vascular development.
Watch for these positive changes in your aquatic plants:
- Deeper green foliage with richer pigmentation and less yellowing at leaf margins
- Stronger, more rigid stems that resist bending or collapsing in water currents
- New root tips visible at the substrate surface or along exposed root zones
- Increased leaf size on new growth compared to older leaves
- Faster recovery after pruning or seasonal die-back
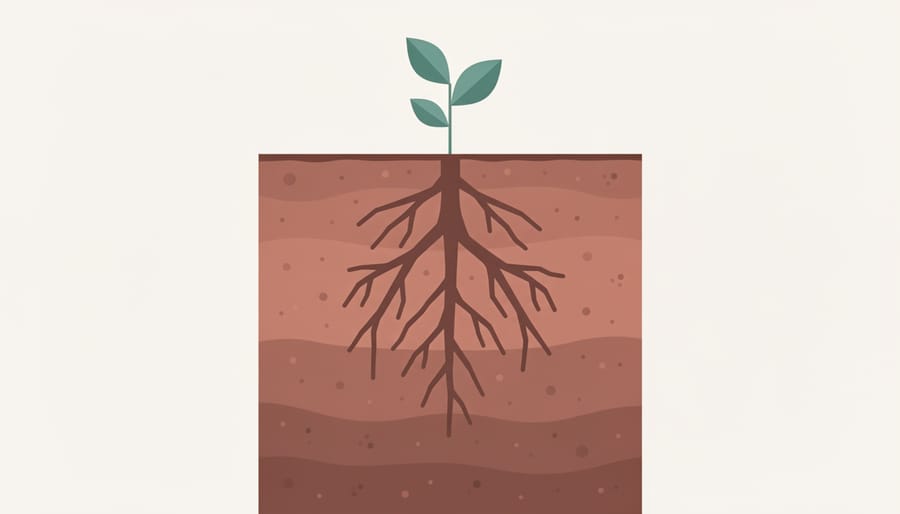
If your substrate is partially visible through clear water, check for white or pale tan root tips extending deeper into the gravel or soil. This root expansion is the primary goal of deep watering and signals that your plants are accessing nutrients below the surface layer.
When plants show no improvement after three weeks, troubleshoot systematically. First, increase your watering depth by extending the duration to seven minutes per session, ensuring water reaches the lower root zone. Next, inspect leaves and stems for pests like aphids or snails that might be stunting growth. Finally, test your pond’s pH and ammonia levels; poor water quality can block nutrient uptake even with proper watering. If water clarity is poor, you may need to fix murky water before plants can respond fully to the technique.
Common Mistakes and How to Avoid Them
Even when you understand the deep watering method, a few common errors can undermine your results or harm your pond ecosystem. The good news: these mistakes are easy to spot and fix once you know what to look for.
Watering Too Quickly is the most frequent pitfall. If you rush the process with a high-pressure stream, you’ll stir up substrate, cloud the water, and potentially expose plant roots. The fix is simple: adjust your nozzle to the slowest setting and aim for a gentle trickle rather than a forceful jet. Think of it like filling a glass from the bottom, you want water to seep in, not splash around.
Overwatering creates anaerobic pockets in the substrate where oxygen can’t reach, leading to root rot and foul-smelling buildup. Stick to your weekly schedule and watch for warning signs like blackened substrate or a rotten-egg smell near the plant base. If you notice these, skip a watering session and gently aerate the top layer of substrate with a chopstick or your finger.
Many pond owners forget to adjust for seasonal changes. Plants need less frequent deep watering during dormancy in fall and winter when growth slows. Cut back to every two weeks or monthly during cooler months, then resume weekly watering when you see new growth in spring.
Finally, using untreated tap water straight from the hose introduces chemicals that stress both plants and fish. Keep a watering can of treated water ready, or attach an inline dechlorinator to your hose. Your pond’s microbiome will thank you, and your plants will respond with stronger, healthier growth.
Frequently Asked Questions About Deep Watering
Can I deep water submerged plants?
No, submerged plants like hornwort and anacharis already grow entirely underwater and absorb nutrients directly through their leaves and stems. Deep watering is designed for marginal and deep-water plants that have roots anchored in substrate and benefit from targeted water delivery to the root zone.
How does this differ from top watering in container ponds?
Top watering in container ponds typically adds water across the entire surface, which can disturb substrate and create uneven moisture distribution. Deep watering directs a slow, controlled stream directly to the plant’s base, ensuring water penetrates the substrate without clouding the pond or displacing gravel.
Is deep watering necessary for floating plants?
No, floating plants like water lettuce and duckweed derive all their moisture and nutrients from the pond water itself, with roots dangling freely. They don’t have substrate-anchored root systems, so deep watering offers no benefit.
What if my pond has a liner, will deep watering damage it?
Deep watering won’t damage a properly installed liner. The technique focuses on delivering water to the substrate layer above the liner, not penetrating through it. Just ensure your watering tool doesn’t have sharp edges that could puncture the liner if accidentally pressed against it.
If you’re troubleshooting persistent issues with water quality affecting your plants, you might also want to explore hard water fixes or consider how smart pond filters can help maintain stable conditions that support healthy root development. Deep watering works best when your pond’s baseline water chemistry and filtration are already dialed in, allowing plants to make full use of the moisture you’re delivering to their root zones.
Deep watering is one of those techniques that sounds more complicated than it actually is. Once you’ve tried it a few times, you’ll notice how naturally it fits into your regular pond care routine. The beauty of this method is its simplicity, slow, steady watering that reaches down to where it really counts, supporting stronger roots and healthier plants without any special equipment or expertise.
Start with just one or two plants this week. Watch how they respond over the next month. You’ll likely see sturdier stems, deeper color, and more vigorous growth. As you get comfortable with the rhythm, adjust the frequency to match your pond’s unique conditions and seasonal changes.
Beyond deep watering, consider how other maintenance practices work together, things like pond water barriers and seasonal substrate refresh can complement this technique beautifully. Your pond plants will reward your attention with lush growth and resilience. Give it a try, and enjoy the process of nurturing a thriving water garden.