
How to Winter Garden in Zone 6: Protecting Your Water Garden Through the Cold Months
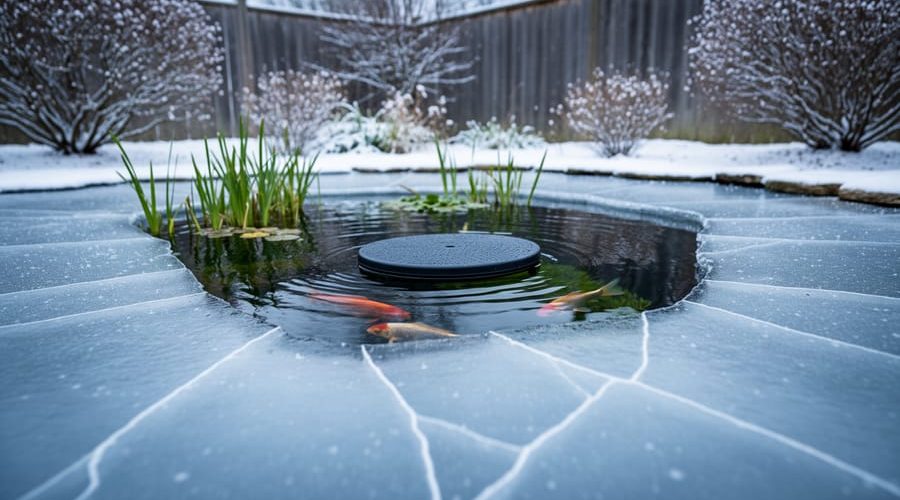
Winter gardening in Zone 6 means protecting your water garden through moderate freezes without the extreme measures needed in colder climates or the minimal prep of warmer zones. Your pond will face temperatures that dip to minus 10°F, enough to freeze shallow water solid but manageable with the right October-to-November preparation routine. The key is keeping fish safe below the ice, preventing equipment damage from freeze-thaw cycles, and ensuring hardy plants survive dormancy to bounce back in spring.
This zone sits in the sweet spot where you can overwinter many aquatic plants and goldfish right in the pond, but only if you winterize correctly. Skip a critical step, and you’ll lose fish to oxygen depletion or watch expensive pumps crack from trapped ice. Rush the process too early while temps are still mild, and you’ll create stagnant conditions that breed algae and harm your ecosystem.
The good news? Zone 6 winter prep is straightforward once you know the sequence. You’ll need about four to six hours spread across a few weekends, basic tools you likely already own, and a clear understanding of what stays in, what comes out, and what gets dialed back. I learned this the hard way after my first winter left me with a cracked pump and two missing koi, but the system I’ll walk you through has kept my pond thriving through eight seasons since.
Understanding Zone 6 Winter Conditions for Water Gardens
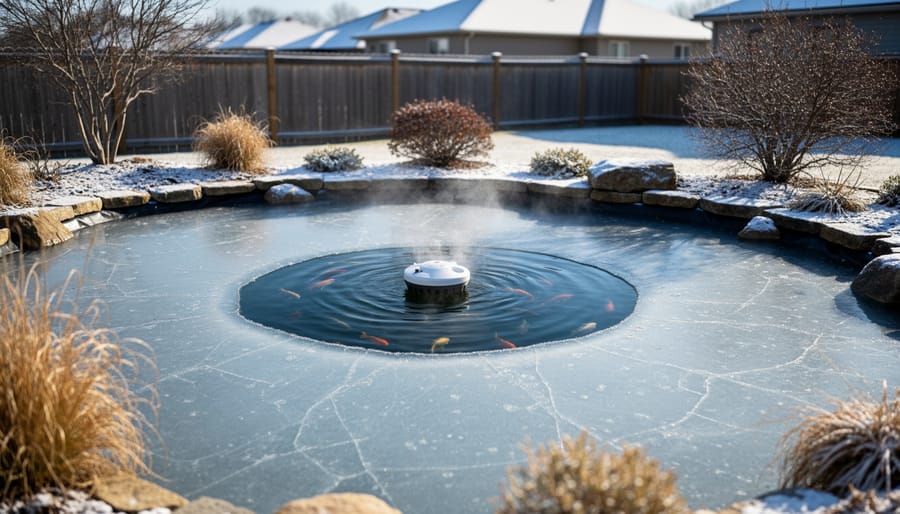
Zone 6 sits in a sweet spot for water gardeners, not as brutal as northern zones, but cold enough to demand real preparation. The USDA zone 6 hardiness classification means your area experiences average minimum winter temperatures between 0°F and -10°F, typically spanning from parts of the mid-Atlantic through the Midwest and into the Pacific Northwest. This creates a unique winterization challenge: your pond will freeze, but usually not solid to the bottom.
Unlike Zone 3 or 4 ponds that freeze hard and stay frozen, your Zone 6 water garden experiences something trickier: freeze-thaw cycles. A week of bitter cold locks your pond under ice, then a mild spell partially melts it, then it refreezes. These cycles stress fish, create pressure on pond structures, and make gas exchange unpredictable. Southern gardeners in Zones 8 or 9 barely deal with ice, but you’ll see surface freezing most winters, thick enough to be dangerous, but rarely deep enough to freeze a properly sized pond solid.
The biggest challenge? Maintaining gas exchange. When ice covers your pond, toxic gases from decomposing organic matter can’t escape, and oxygen can’t get in. Zone 6’s partial ice coverage means you need active solutions like de-icers or aerators, not just hoping for quick thaws. Your fish will survive in dormancy at the pond bottom if the water stays at least 18-24 inches deep, but only if you’ve created safe conditions before that first hard freeze arrives.
What You’ll Need to Winterize Your Water Garden
Gathering your supplies ahead of time makes winterization smoother and less stressful. You won’t need anything exotic, most items are readily available at pond supply stores or online, and a few you probably already have in your garage or shed.
Essential Equipment:
- Pond net with a long handle for leaf removal and skimming debris
- Water testing kit (measures pH, ammonia, and nitrite levels)
- Pond de-icer or floating heater (keeps a hole in the ice for gas exchange)
- Cold-water air pump with tubing and air stone (maintains oxygen levels under ice)
- Pond-safe cleaning brush or scrubber for walls and rocks
- Sharp pruning shears or scissors for trimming plants
- Waterproof thermometer to monitor temperature changes
Optional But Helpful:
- Floating balls or pool noodles (absorb ice expansion pressure)
- Pond netting cover (keeps out falling leaves and debris)
- Extension cords rated for outdoor winter use
- Large plastic storage bins (for bringing tropical plants indoors)
Items You Probably Have:
- Bucket for collecting debris and moving plants
- Garden gloves to protect your hands
- Old towels for cleaning equipment
The de-icer is your most critical purchase if you don’t already own one. It’s not about heating the entire pond, that would be expensive and unnecessary. Instead, it maintains a small opening in the ice so toxic gases can escape and oxygen can enter. Without it, your fish could suffocate under a solid ice layer. Air pumps serve a similar purpose and use less electricity, though many Zone 6 gardeners run both for extra insurance during particularly harsh stretches.
Safety Warnings and Important Considerations
Before you start winterizing, understand these critical safety points to protect yourself, your fish, and your equipment.
Electricity and water are a dangerous combination. Always unplug equipment before handling it, keep extension cords away from the water’s edge, and check all cords for damage before winter. If you’re installing a de-icer or aerator, use outdoor-rated, grounded outlets only.
Never walk on pond ice, even if it looks thick. Zone 6 ice is often deceptive, thin spots hide under snow or near aerators. If you need to reach the pond’s center, use a long-handled tool from the edge.
Handle pond equipment gently during transitions. Pumps and filters can crack if drained improperly or stored with residual water that freezes. Fish are especially vulnerable during winterization, work quickly, avoid netting them unless absolutely necessary, and never make sudden temperature changes.
Timing matters enormously. Start your smart autumn prep in mid-to-late October in Zone 6, when water temperatures consistently stay below 60°F but before the first hard freeze. Waiting too long means working in freezing conditions and stressing dormant fish. Starting too early disrupts the natural transition period your ecosystem needs.
Avoid draining your pond in Zone 6 unless you have a serious problem, the water mass actually insulates fish and protects the liner from freeze-thaw damage.
Step-by-Step: Preparing Your Zone 6 Water Garden for Winter
Step 1: Remove Debris and Do a Final Cleaning
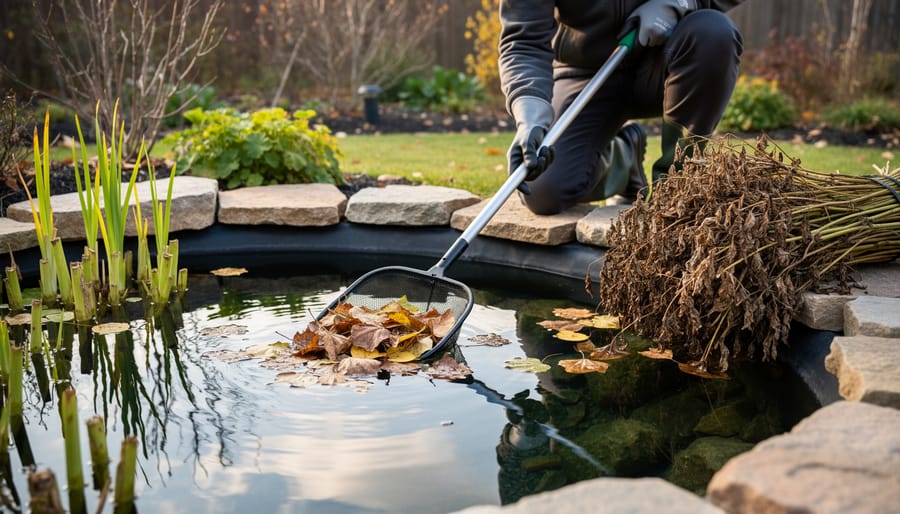
Start by skimming the pond surface with a fine-mesh net, working in overlapping passes to catch floating leaves, dead plant material, and any debris that’s accumulated since fall began. Pay close attention to corners and behind rocks where organic matter tends to collect, I’ve found a smaller hand net works better than a large skimmer in tight spots.
Next, wade in or use a pond vacuum to remove muck from the bottom. This decaying layer becomes a real problem under ice because it releases toxic hydrogen sulfide and ammonia gases that can’t escape when the surface freezes. Even a half-inch layer of sludge is worth removing.
Trim back dying marginal plants to just above the water line. Cut stems of cattails, iris, and rushes about two inches above the crown. Don’t cut all the way down, those hollow stems act as natural gas vents through winter ice, giving toxic gases an escape route.
For submerged plants, pull out any that have turned brown or mushy. Healthy specimens can stay, but decaying vegetation is your enemy right now.
Finally, use a long-handled brush to scrub algae off rocks and waterfall surfaces where you can safely reach.
Step 2: Test and Balance Your Water
Before your pond goes dormant, you need to know what’s happening below the surface. Grab your water testing kit and check three critical parameters: pH (aim for 7.0-8.0), ammonia (should be 0 ppm), and nitrite (also 0 ppm). These numbers matter more in winter than you might think, fish metabolism slows down, but they still produce waste, and cold water holds toxins longer than warm water does.
If your readings are off, make small adjustments over several days rather than drastic changes. High pH? Add a pond buffer gradually. Detecting ammonia or nitrite? Do a partial water change now, before temperatures drop further. Stable chemistry means your fish can settle into dormancy without fighting stress from poor water quality. I learned this the hard way one November when I skipped testing and lost two goldfish to an ammonia spike that built up silently under early ice. Don’t skip this step, it’s your baseline for a healthy winter.
Step 3: Prepare Your Pond Plants
Your pond plants need different treatment based on their cold tolerance. Hardy plants can overwinter in the pond, while tropicals won’t survive Zone 6 freezing temperatures.
Start with hardy water lilies. Cut back any dying foliage to about two inches above the crown, then sink the pot to the deepest part of your pond, at least 18 inches below the surface. This depth stays above freezing all winter, protecting the rhizome. Don’t worry about new growth now; the plant is going dormant.
Tropical water lilies, cannas, and taro won’t make it through winter outdoors. Lift these plants before the first hard freeze, trim them back, and store the tubers in damp sand in a cool (50-55°F) basement. Alternatively, keep them as houseplants in a sunny window if you have space.
For marginal plants like cattails, iris, and rush, trim dead foliage to just above the water line. Leave some stem hollow, it acts as a natural snorkel for gas exchange under ice. Hardy marginals can stay at their current depth.
Remove any floating plants like water lettuce entirely. They’ll die anyway and create mess under the ice.
Step 4: Adjust Fish Feeding and Care
As water temperatures drop below 50°F, your fish’s metabolism slows dramatically and they can no longer digest protein-rich foods. Stop feeding completely once temps consistently stay below this threshold, usually late October in Zone 6. Between 50-60°F, switch to wheat-germ-based food, which is easier to digest in cool water. Feed sparingly, only what they consume in five minutes.
Watch your fish closely during this transition. Healthy fish will become less active and gradually settle toward the bottom as winter approaches. They should look calm and slow-moving, not gasping at the surface or frantically swimming. These behaviors signal oxygen or water quality problems that need immediate attention.
Pond depth is critical for winter survival. Goldfish and koi need at least 18-24 inches of water to reach the warmer layer below the ice where they’ll spend winter in a dormant state. Shallow areas freeze solid, if your pond has only 12 inches depth, you’ll need to move fish indoors or to a deeper section before the first hard freeze.
Step 5: Handle Pumps, Filters, and Equipment
Zone 6 presents a unique decision point with pumps and filters, you’re right on the borderline where either approach can work, depending on your specific setup and local microclimate.
For pumps, you have two solid options. If your pond is deeper than two feet and you want continuous circulation, you can keep the pump running at a reduced flow rate, positioned mid-depth rather than at the bottom (you don’t want to disturb the warmer water layer where fish rest). Alternatively, you can remove the pump entirely once water temps drop below 50°F, clean it thoroughly, and store it in a bucket of water in your garage or basement to keep seals from drying out.
I learned this the hard way my second winter when I left my external filter running. A sudden cold snap hit in early November, and ice formed inside the filter housing overnight, cracking the plastic casing. That was an expensive mistake that could’ve been avoided by simply bringing the filter indoors.
External filters should absolutely be winterized in Zone 6. Drain them completely, remove all media, rinse everything clean, and store components where they won’t freeze. Any plumbing exposed above ground needs to be drained and disconnected, even a small amount of trapped water can expand and crack pipes or fittings.
Step 6: Install a De-Icer or Pond Heater
A floating de-icer is your pond’s insurance policy against complete ice-over. Place it near the surface, most units float automatically, but position it away from where fish typically rest. You want that hole in the ice for gas exchange, not to disturb the warmer water layer below where your fish are hibernating.
Complete ice coverage traps toxic gases (ammonia, methane) that build up from decomposing organic matter. Your fish essentially suffocate under a solid ice sheet. A six-to-eight-inch opening is typically enough for proper gas exchange in most backyard ponds.
Choose a de-icer rated for your pond size. A 250-watt unit handles most Zone 6 residential ponds, running about $1.50 per day during cold snaps. Use a GFCI outlet and secure the cord so it doesn’t become a tripping hazard. Some models include built-in thermostats that cycle on only when needed, saving electricity.
Position your de-icer near, but not touching, your aerator if you’re running both. Together, they create a reliable open-water zone throughout winter.
Step 7: Add Aeration If Needed
If your pond tends to freeze over completely or you’re skipping the de-icer, a cold-water air pump becomes essential for keeping oxygen levels stable. Set up an air stone at mid-depth, roughly 12 to 18 inches below the surface, rather than at the bottom. Placing it too deep disrupts the warmer water layer where your fish are resting in their torpor state, forcing them to burn precious energy reserves.
The gentle bubbling action serves two purposes: it pushes oxygen-rich water throughout the pond and creates just enough surface movement to maintain a small opening in the ice. This opening allows toxic gases like ammonia and carbon dioxide to escape, which is critical since decomposition doesn’t stop completely in winter. I run mine on a timer for 15 minutes every few hours rather than continuously, which saves electricity while still doing the job. Check that your air pump is rated for cold temperatures, regular aquarium pumps sometimes struggle below freezing.
Step 8: Protect Pond Edges and Surroundings
Your pond’s edges take a beating during Zone 6 winters. Freeze-thaw cycles cause ice to expand and contract, which can stress liner edges and crack rigid pond materials. One simple trick: toss a few floating balls or pool noodles into the water. They compress as ice forms, absorbing some of that expansion pressure and protecting your pond walls.
If your pond sits under trees, consider laying boards across part of the surface or stretching pond netting above it. This catches falling debris before it sinks and decomposes under the ice. Just leave plenty of open water for gas exchange, don’t cover the entire pond.
Check your liner edges too. Make sure rocks or edging stones are secure and the liner isn’t exposed to direct freeze-thaw action, which can make it brittle and crack over time.
How to Verify Your Winterization Is Working
Once you’ve completed your winterization steps, the real test is confirming everything’s working as it should. Regular winter checks take only a few minutes but can prevent serious problems.
Start by checking your de-icer or aerator hole every few days. You should see a consistent opening in the ice, typically six to twelve inches across, with gentle water movement. If the hole has frozen over, your equipment may have failed or lost power. This opening is critical for gas exchange, so address any closure immediately to keep your pond from freezing completely.
Watch your fish behavior during warmer winter days when they’re visible. Healthy, properly winterized fish rest near the bottom in a dormant state, moving very little. They shouldn’t be gasping at the surface or swimming frantically, both signs of oxygen problems or water quality issues. You might not see them for weeks at a time in deep ponds, and that’s perfectly normal.
Lean close to the de-icer hole and smell the air rising from your pond. You shouldn’t detect strong, foul odors. A rotten-egg smell or heavy ammonia scent indicates toxic gas buildup from decomposing organic matter, which means your fall cleaning wasn’t thorough enough or something died under the ice.
Here’s a quick winter verification checklist:
- De-icer hole remains open and equipment runs continuously
- Fish are sluggish or hidden at bottom, not gasping at surface
- No foul odors coming from the open water
- Electrical connections stay dry and protected from weather
- Ice formation appears even without cracks radiating from edges
- Water level remains stable without dramatic drops
Check your equipment’s power consumption too. A sudden spike in your electricity bill might indicate a struggling de-icer working overtime, which could mean you need better placement or additional insulation secret techniques around your pond edges.
If you notice ice expanding toward your plumbing or filter housing, add protection immediately to avoid frozen pipes that can crack and cause expensive spring repairs. Normal ice should form evenly across the surface while your de-icer maintains its opening, any unusual patterns or sudden complete freeze-overs warrant investigation.
What to Do During Winter and Early Spring
Once you’ve completed your winterization steps, your main job through winter is to leave your pond alone as much as possible. Your fish are dormant at the pond’s bottom, conserving energy, and they don’t need your help unless something goes wrong.
Check your de-icer or aerator every few days to confirm it’s keeping that crucial gas-exchange hole open. If ice forms over it, never smash the ice with a hammer or stick, the shock waves can seriously stress or even kill fish. Instead, melt a hole by setting a pot of hot water on the ice surface.
Resist the urge to feed fish or test water parameters unless you notice distress (fish gasping at the surface, foul odors). The less you disturb the pond, the better.
As late March or early April arrives in Zone 6, start monitoring water temperature. When it consistently stays above 50°F for several days, your ecosystem is waking up. This is when you can remove the de-icer, restart your pump and filter gradually, and begin very light feeding with wheat-germ food.
Don’t rush spring cleanup. Wait until temperatures are reliably stable before trimming plants, cleaning filters thoroughly, or making major water changes. A slow, gentle transition protects your fish from temperature shock and gives beneficial bacteria time to reactivate in your filter.
Common Zone 6 Winterization Questions
Zone 6 water gardeners often have similar concerns when winterizing their ponds for the first time. Here are the most common questions I hear, along with straightforward answers to help you winterize with confidence.
Should I drain my pond for winter in Zone 6?
No, keep your pond filled. Draining exposes the liner to freeze-thaw damage and eliminates the insulating water layer that protects fish and beneficial bacteria. The water mass actually helps moderate temperature swings.
How deep does my pond need to be for fish to survive Zone 6 winters?
At least 18 inches for goldfish, and 24-36 inches is better for koi. This ensures a non-freezing zone at the bottom where fish can rest dormant below the ice layer.
What should I do if we get an unexpected cold snap?
Check that your de-icer is working and maintaining an open hole. Add an extra aerator if needed, but avoid breaking ice by force, which can shock fish with pressure waves.
Does it matter where in Zone 6 I live?
Yes, southern Zone 6 areas may experience milder winters with less consistent ice, while northern edges near Zone 5 get colder. Adjust your de-icer timing and check it more frequently if you’re in a borderline area.
Remember that Zone 6 sits in a sweet spot where you don’t need extreme winterization measures, but you can’t skip preparation entirely. Most issues come from either doing too much (like draining the pond) or too little (no gas exchange plan). If you’ve followed the steps outlined earlier and your pond has adequate depth, your setup should handle typical Zone 6 winters without drama. Trust the process, check your de-icer weekly, and your fish will be waiting for you when spring arrives.
Winterizing your Zone 6 water garden might seem daunting at first, but you’ve now got a complete roadmap to protect your pond through the cold months. The steps we’ve covered aren’t complicated, they just require attention to timing and a bit of preparation. I’ve watched countless water gardens bounce back beautifully each spring because their owners took these precautions in fall.
Your fish will rest comfortably at the bottom, your plants will return when temperatures rise, and your equipment will be ready to go when you need it. That’s the beauty of water gardening: each season brings its own rhythm, and winter’s quiet pause makes spring’s revival even more satisfying. You’re not just maintaining a pond, you’re stewarding a living ecosystem through its natural cycle.