
How to Build a Concrete Pond Spillway That Blends Into Your Landscape
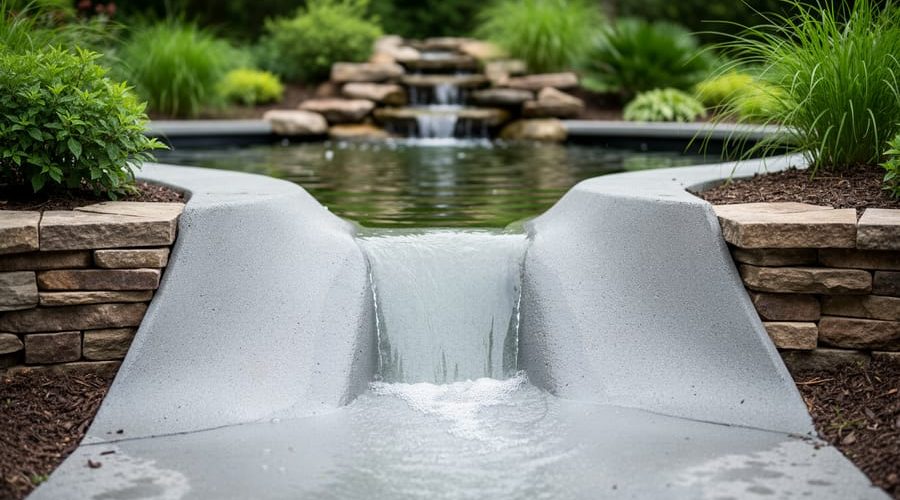
A concrete pond spillway controls overflow by channeling excess water away from your pond through a sloped, waterproofed channel that activates during heavy rain or when water levels rise above your desired mark. This permanent solution takes about two weekends to complete and prevents erosion, flooding, and damage to your pond liner while keeping your water feature looking natural and intentional.
Most pond owners discover they need a spillway the hard way: after a storm sends water cascading over the edge, washing away soil and creating muddy channels that scar the landscape. A properly built concrete spillway solves this by giving water a designated exit path that you control. The concrete provides durability that stones alone can’t match, staying firmly in place through years of spring thaws and summer downpours.
The beauty of a concrete spillway lies in its versatility. You can tuck it behind a waterfall, disguise it as a rocky stream bed, or incorporate it into a retaining wall. I built my first spillway in 2019, convinced it would look industrial and out of place. Within one season, moss had softened the edges and creeping jenny spilled over the sides. Now visitors ask if that “natural stream” has always been there.
Building one requires more planning than muscle. You’ll need to calculate your pond’s overflow point, determine the right slope for your property, and decide whether you want the spillway visible as a design feature or hidden behind plantings. The concrete work itself is straightforward, but getting the grade and waterproofing right matters more than perfect finishing work.
Planning Your Spillway Location and Design
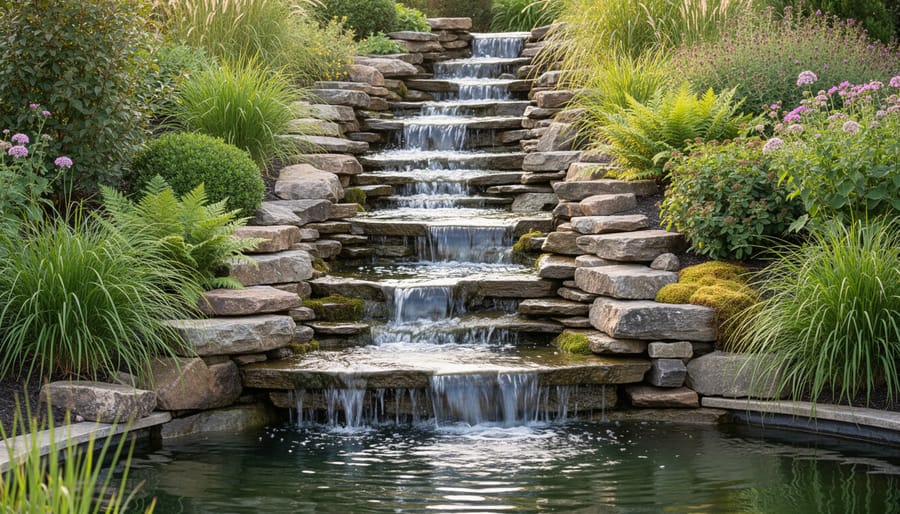
Choosing the right spot for your spillway makes all the difference between a feature that works beautifully and one that creates headaches. Start by walking around your pond during a heavy rain (or after watering thoroughly) to see where water naturally wants to go. You’re looking for the lowest point on your pond’s rim where overflow already happens or would happen first, because working with gravity rather than against it will give you better flow and less maintenance down the road.
The location you choose needs to meet several practical requirements before you think about aesthetics. Your spillway should direct water away from your pond and home foundation, ideally toward an existing drainage area or rain garden. It needs to sit at least six feet from any electrical outlets, pumps, or lighting to keep everything safe and code-compliant. Consider these key factors:
- Clear overflow path that won’t flood patios, walkways, or garden beds
- Minimum three-foot clearance from electrical components and wiring
- Access to a natural or created drainage channel for runoff
- Visibility from your main viewing areas so you can enjoy (or hide) the feature
Once you’ve nailed down the functional spot, think about how the spillway will look from your deck, patio, or favorite garden bench. This is where smart overflow solutions turn into landscape art. I learned this the hard way years ago when I built my first spillway in the most convenient spot, which happened to be directly in the sightline from our back door. The result? A gray concrete gutter that screamed “drainage ditch” every time we looked outside.
The fix transformed everything. I faced that plain channel with river stones, embedded flat rocks into the concrete edges to create natural-looking steps, and planted creeping Jenny and dwarf mondo grass along both sides. Within one season, it looked like a miniature waterfall that had always been there. The key was using stones in varying sizes, not uniform ones, and setting them slightly irregular rather than in neat rows.
For effective drainage that looks intentional, plan your spillway with naturalistic curves rather than straight lines if your landscape allows it. A gentle S-curve or a slight bend around a large boulder makes the feature feel organic. Sketch your design on paper first, marking where you’ll add concealment rocks and which plants will soften the edges once construction is complete.
Tools and Materials You’ll Need
Gathering your supplies ahead of time makes the build process smoother and less stressful. Most of these items you can find at any home improvement store, and I’ve learned that having everything within arm’s reach really matters when you’re racing against concrete’s working time.
Here’s what you’ll need to get started:
Essential Tools:
- Large mixing tub or wheelbarrow for blending concrete (a sturdy plastic tub works great and costs less than a dedicated mixer)
- Trowels in various sizes: a pointing trowel for detail work and a finishing trowel for smoothing surfaces
- Builder’s level to ensure proper water flow gradient (even a smartphone level app can work in a pinch)
- Measuring tape and marking spray paint for layout
- Sturdy work gloves, rubber gloves, and safety glasses
- Garden hose with spray nozzle for cleanup and curing
Core Materials:
- Concrete mix: choose a high-strength blend rated for outdoor use (I prefer pre-mixed bags for small projects)
- Rebar pieces or wire mesh for reinforcement, preventing cracks as the ground shifts
- Wood boards or foam forms to shape your spillway channel
- Heavy-duty pond liner protection fabric to cushion between sharp concrete and your existing liner
- Concrete sealant designed for water features, which prevents leaching and extends durability
Optional Aesthetic Elements:
- Flat stones or slate pieces to embed in wet concrete for a natural look
- Texture stamps or brushes to create rock-like patterns
- Concrete stain or dye if you want to adjust the color before sealing
Don’t feel pressured to buy premium versions of everything. I built my first spillway with basic contractor-grade tools borrowed from a neighbor, and it’s still functioning beautifully eight years later. The concrete quality and proper technique matter far more than fancy equipment.
Safety First: Important Precautions

Before you start mixing concrete and shaping your spillway, let’s talk about keeping yourself, and your pond, safe throughout this project. Working with concrete and building a water feature foundation requires some specific precautions that go beyond general DIY safety.
Concrete is highly alkaline and can cause chemical burns if it contacts your skin for extended periods. Always wear waterproof gloves, long sleeves, and eye protection when mixing and pouring. If wet concrete does touch your skin, rinse immediately with clean water. The concrete burn safety guidance emphasizes that even brief exposure can lead to serious injuries if not addressed quickly.
Lifting bags of concrete mix, buckets of wet material, and heavy rocks requires proper technique. Bend at your knees, not your waist, and keep loads close to your body. Don’t try to be a hero, get help moving anything that feels too heavy. I learned this the hard way during my first spillway project and spent a week recovering.
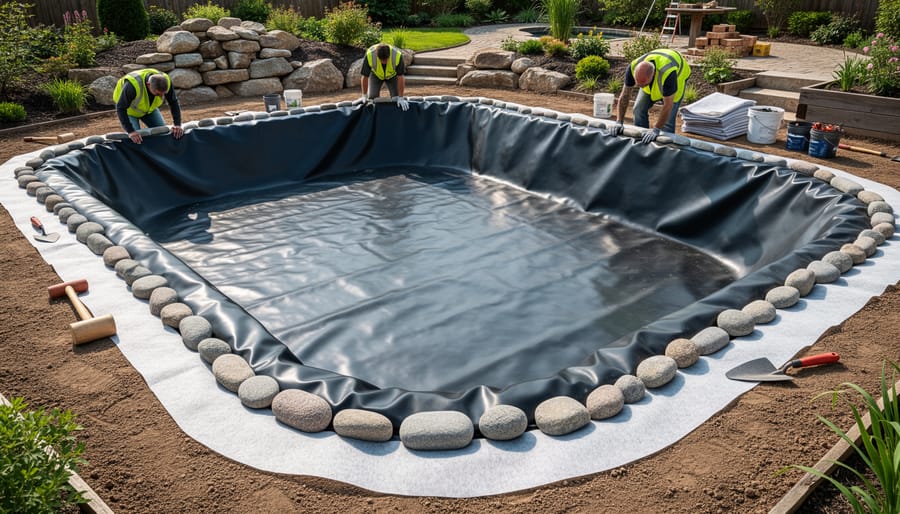
Your existing pond liner is precious. Before you start excavating or pouring, lay down thick protective fabric or old carpet remnants anywhere concrete might contact the liner. Sharp tools, wheelbarrow wheels, and concrete edges can all puncture or tear the liner, turning your project into an expensive repair job.
Keep all electrical equipment, pumps, mixers, extension cords, away from water during construction. Work on stable, level ground, especially when handling heavy materials near the pond edge. Following standard curing time requirements isn’t just about strength; it’s about creating a safe environment for your aquatic life. Patience during the curing phase protects all the living things that make your water garden special.
Step-by-Step: Building Your Concrete Spillway
Preparing the Spillway Channel
Excavating your spillway channel is where theory meets shovel, and getting it right now saves headaches later. Start by marking your path with stakes and string, following the route you chose during planning. A gentle, consistent slope of about 1 to 2 inches per foot works beautifully for most garden ponds, steep enough to keep water moving but not so dramatic that it creates erosion problems or looks like a waterslide.
Dig your channel roughly 8 to 12 inches wide and 4 to 6 inches deep for typical backyard ponds. Smaller ponds can go narrower, while larger installations benefit from extra width to handle bigger overflow volumes. The key is maintaining that steady downward grade throughout. Use a long level or a line level on your string to check frequently as you dig. Even small dips or humps will show up as pooling or splashing once water flows.
Here’s where protecting your pond liner becomes critical. If your spillway starts at the pond edge, lay thick landscape fabric or old carpet scraps over the liner before you start working. One careless shovel slip can puncture what took hours to install properly. I learned this the hard way during my first spillway project when a momentary distraction cost me an afternoon of patch work.
Compact the channel bottom firmly with a hand tamper. Loose soil will settle unevenly under concrete weight, potentially creating cracks. Take your time here, a solid, smooth base is your foundation for everything that follows.
Pouring and Shaping the Concrete
Start mixing your concrete when you’re ready to work without interruption, you’ll have about 45 minutes to an hour before it sets, so have everything positioned and your help lined up. Follow the bag instructions for water ratio (usually around 4 parts concrete to 1 part water), but add water gradually. You want a consistency like thick oatmeal, not soup. Too wet and it’ll slump; too dry and it won’t bond properly.
Pour the concrete into your prepared channel starting at the lowest point and working upward. This prevents air pockets and lets you see how the mixture flows. Use your trowel to push concrete firmly into corners and against your forms, eliminating gaps. Work in sections if your spillway is long, it’s better to pour in manageable chunks than rush through too much at once.
For a smooth finish that water will glide over easily, use a finishing trowel in sweeping motions once the concrete begins to set slightly, usually after 20 minutes. Keep the trowel damp and work with light pressure. If you prefer a textured, natural-rock appearance that hides the concrete better, drag a stiff brush across the surface while it’s still workable, or press a crumpled piece of plastic sheeting into it for random patterns.
Here’s where aesthetic integration really happens: shape the edges with irregular curves rather than straight lines. Scoop out small pockets along the top edges where you’ll later nestle plants, these look infinitely more natural than ruler-straight borders. If you’re planning to face the spillway with stone, roughen the surface by scoring it with a stick or wire brush. This texture gives mortar or adhesive something to grip.
Press larger decorative stones partially into the wet concrete along the edges now if you want them permanently embedded. Once the surface loses its sheen but still accepts a thumbprint (usually 30-45 minutes), that’s your window for final shaping. After that, cover with damp burlap and let it cure undisturbed for at least 48 hours.
Adding Aesthetic Concealment Features
While your concrete is still workable, typically within the first hour after pouring, you have a golden window to transform that industrial slab into something that looks like it’s always belonged there. This is where the magic happens.
Start by pressing flat river stones directly into the surface while the concrete is firm enough to hold them but still malleable. Push each stone about halfway in, leaving the natural top exposed. Vary the sizes and spacing to mimic how stones would naturally settle along a stream bed. I like to cluster smaller stones near the edges and use larger anchor stones strategically where water will flow fastest. These embedded stones instantly break up that telltale gray expanse.
For the edges, use a trowel or gloved hand to create irregular, undulating lines rather than ruler-straight borders. Rake the surface along these edges to create small pockets and crevices, these textured zones will eventually harbor moss and tiny plants. You can also drag a stiff brush across sections to create a rougher finish that mimics weathered rock.
Consider adding shallow depressions or grooves in the concrete surface itself. These aren’t just decorative; they’ll hold moisture and provide footholds for beneficial bacteria and algae growth that naturally age your spillway. Within a season, these intentional imperfections will fill with organic matter and look decades old.
If you want texture without embedding stones, try pressing real leaves, bark, or even crinkled foil into the wet surface. Remove them after an hour or two, and you’ll have natural-looking imprints. Some pond builders dust the wet concrete with sand or soil to dull the bright cement color immediately.
The goal is controlled chaos. Step back frequently and ask yourself: would I notice this was man-made if I stumbled upon it in the woods? If the answer is yes, keep roughing it up.
Testing and Adjusting Your Spillway
Your spillway has cured for at least a week, and now comes the exciting part: seeing it work. Start by running a garden hose into the pond at full flow, positioned to simulate heavy rainfall. Watch the water travel down the spillway channel, checking that it flows smoothly without pooling, backing up, or spilling over the edges. The water should move at a steady pace, not race down so fast it erodes your careful work or crawl so slowly it defeats the overflow purpose.
Look closely for any signs of trouble. Small leaks around the edges usually mean you need to add a bead of waterproof sealant or tuck the liner more securely. If water cuts a channel through soil beside the concrete, build up those edges with compacted earth and stones. Uneven flow often signals a dip or hump in the grade, which you can fix by adding a thin layer of mortar to low spots or carefully grinding down high points with a masonry blade.
Before you celebrate with fish, you must neutralize the concrete’s alkaline pH. Fresh concrete leaches lime into water, which can harm aquatic life. Fill the spillway, let it sit for 24 hours, then drain completely. Repeat this process three times over two weeks. Test the final rinse water with a pond pH kit; it should read between 6.5 and 8.5. Only then is your spillway safe for full integration with your ecosystem.
Once the pH is neutral and water flows exactly where you want it, you’re ready to blend the spillway into your landscape. You can now focus on plant integration around the edges and learning how to hide pond equipment so your beautiful new spillway looks like it’s always belonged there.
Finishing Touches: Blending Into Your Water Garden
With your spillway cured and tested, it’s time for the most rewarding part: transforming that concrete structure into something that looks like it’s always belonged in your water garden. I still remember standing back after planting around my first spillway and thinking, “Wait, where did the concrete go?” That’s exactly what we’re aiming for.
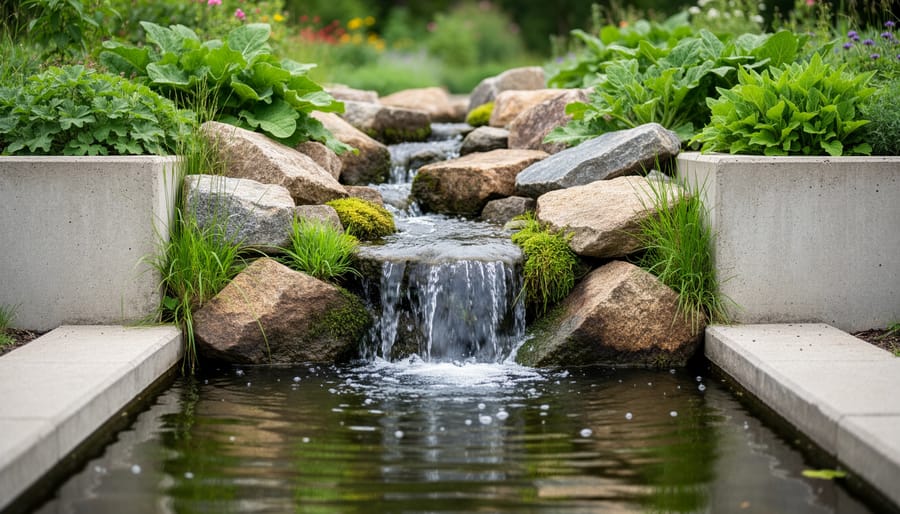
Start by placing larger boulders along the spillway edges, positioning them at slightly different angles so they look like natural rock formations rather than a neat border. River-worn stones with rounded edges work beautifully, and you can nestle smaller rocks in the gaps. Let some stones extend over the concrete edges to break up straight lines. I like to partially bury a few larger rocks so they appear to be emerging from the earth, not just sitting on top.
For plant choices that create seamless integration, consider these proven performers:
- Creeping Jenny, spills over edges with chartreuse foliage that softens hard lines
- Dwarf mondo grass, forms neat, dark green tufts that tuck between rocks
- Native ferns, add height and texture while thriving in spillway moisture
- Stacked flagstone, creates natural-looking steps and pockets for planting
- River-worn boulders, anchor the design with authentic water-weathered character
Plant your marginals in the moist soil alongside the spillway channel, not directly in the concrete. They’ll grow toward the water naturally, creating that “discovered stream” look rather than “built feature” appearance.
At the outlet where water rejoins your pond, create a pebble beach using smooth river stones in graduated sizes. This not only looks gorgeous but prevents erosion and gives the water somewhere interesting to dance. Add a few submerged rocks just below the surface for that authentic babbling brook sound.
If you’re patient, encourage moss growth by brushing the concrete with diluted yogurt or buttermilk. Within weeks, you’ll have that weathered, timeless patina that makes new construction look decades old. The goal isn’t to hide your spillway, it’s to make it the most natural-looking feature in your pond.
Common Questions About Concrete Pond Spillways
You’ve done the hard work of building your spillway, but a few practical questions probably remain. Let’s tackle the most common concerns so you can maintain your creation with confidence.
How long does concrete really need to cure before I can use my spillway?
Wait at least seven days before running water through your spillway, and ideally 28 days for full strength. The surface may feel dry after a day or two, but concrete continues hardening internally for weeks, and rushing this process can lead to cracks or surface degradation.
Can I paint or stain my concrete spillway to make it look more natural?
Yes, once fully cured you can apply concrete stain or waterproof masonry paint in earth tones to help it blend. Choose products specifically rated for underwater or constant-moisture applications, and roughen the surface lightly with a wire brush first for better adhesion.
What should I do if my spillway develops cracks?
Small hairline cracks can be sealed with flexible concrete caulk or hydraulic cement. For larger structural cracks, drain the area, clean out loose material, apply a bonding agent, and patch with fresh concrete or epoxy repair compound designed for wet environments.
Do I need to winterize my spillway in cold climates?
If you live where temperatures drop below freezing, keep water flowing through winter if possible since moving water resists freezing. If you shut down the pond, ensure the spillway drains completely to prevent freeze-thaw damage, which is the main enemy of concrete structures.
Regarding permits, requirements vary widely by location. Most residential pond spillways under a certain size don’t require permits, but if you’re altering drainage patterns, working near property lines, or building a large pond, check with your local building department first. A quick phone call can save headaches later.
The pH question comes up often too. Fresh concrete is highly alkaline and can harm fish, so let your spillway cure completely, then run fresh water through it for several days while testing your pond’s pH. Once readings stabilize in the safe range (around 7.0 to 8.5), your aquatic friends can swim freely without concern.
Don’t stress if your spillway isn’t perfect right away. Concrete projects have a learning curve, and minor adjustments are normal. The beauty of this material is its durability, once you get it right, your spillway will serve your water garden reliably for decades.
Congratulations! You’ve just transformed a crucial piece of pond infrastructure into something that actually enhances your water garden’s beauty. That’s no small achievement. Your concrete spillway will protect your pond from overflow damage while looking like it’s always belonged in your landscape, tucked naturally among rocks and plants where most visitors won’t even realize it’s there.
Over the next few weeks, watch how your spillway settles into its surroundings. You’ll notice moss creeping across the edges, plants filling in around the stones, and the concrete weathering to a softer, more natural appearance. This is exactly what you want. Each rain will test your work, and each season will add character.
I’d love to see how your project turned out! Whether you went for a dramatic cascading stone feature or a subtle, nearly invisible channel, your spillway represents real problem-solving that makes your pond safer and more enjoyable. Take a moment to appreciate what you’ve built. You’ve gained skills and confidence that’ll serve you well in future water gardening adventures.
Now get out there and enjoy that pond. You’ve earned it.