
Transform Your Raised Beds Into Self-Watering Powerhouses With Your Pond
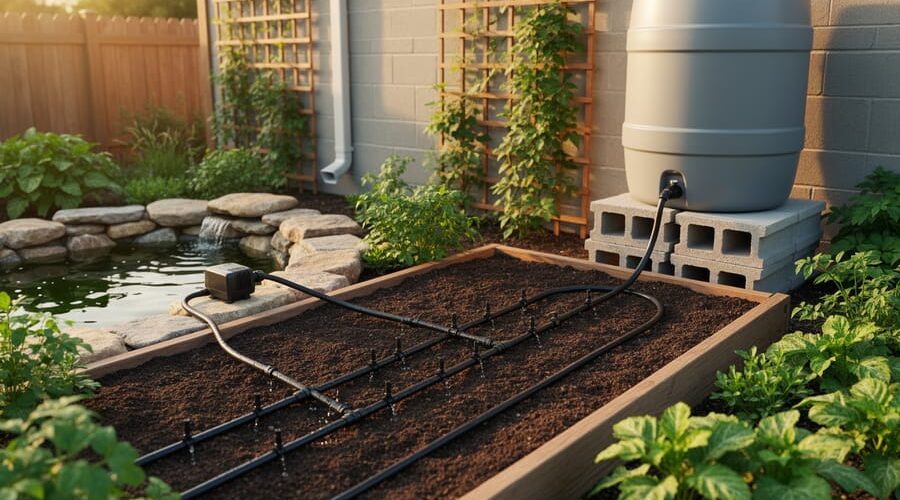
Install a drip irrigation system by running a main supply line along your raised bed perimeter, then branch off with quarter-inch tubing into each bed, positioning emitters every 6-12 inches near plant roots. This gravity-fed or pump-powered approach delivers water exactly where plants need it while reducing evaporation by up to 50% compared to overhead watering.
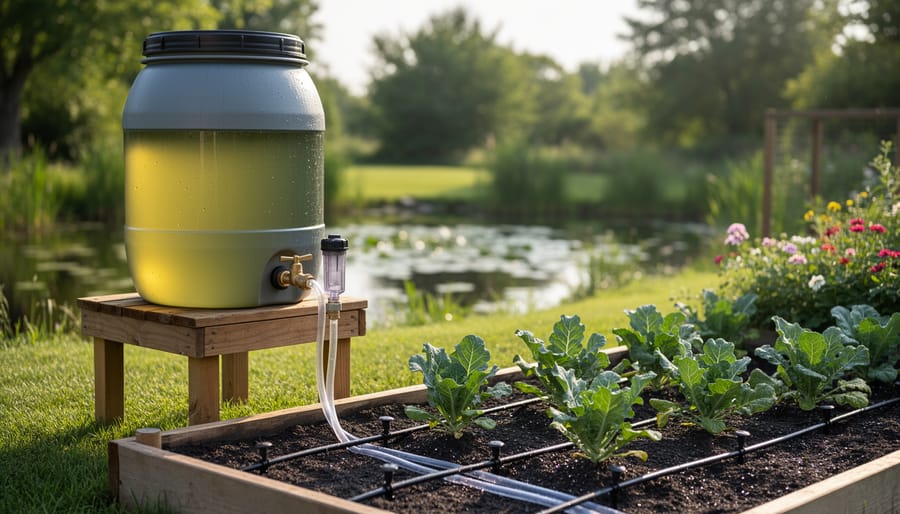
Create a simple rain barrel collection system by placing food-grade 55-gallon barrels at your downspouts, elevating them on cinder blocks for natural water pressure, and connecting them to soaker hoses that weave between your raised beds. You’ll capture thousands of gallons annually while cutting your water bill and giving plants the chlorine-free moisture they prefer.
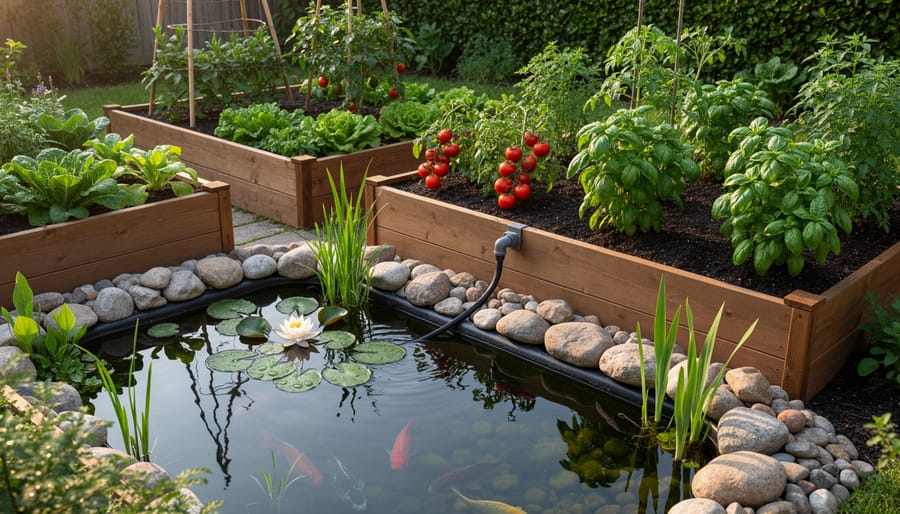
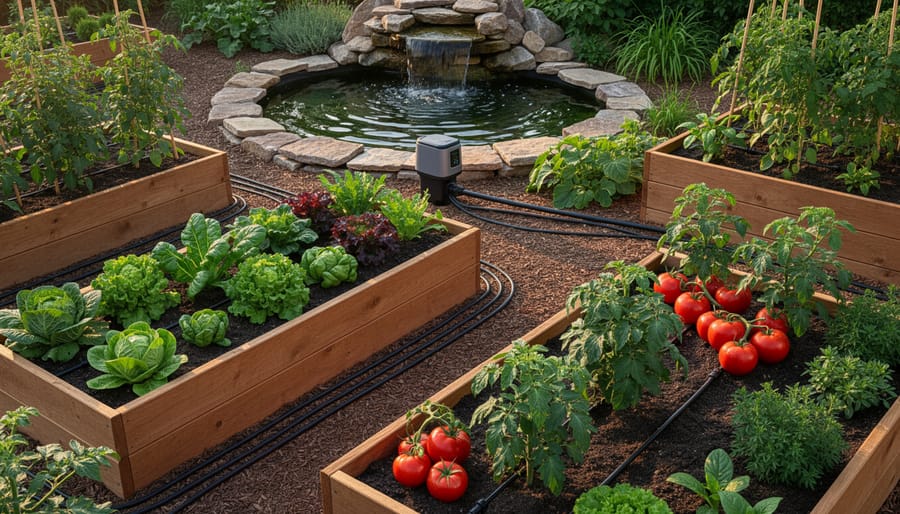
Transform your existing pond into a nutrient-rich water source by installing a small pump that pulls water through a filter and distributes it to your raised beds via connected tubing. The naturally fertilized pond water feeds both your plants and beneficial microorganisms, creating a closed-loop ecosystem that thrives with minimal input.
Building an effective watering system doesn’t require professional skills or expensive equipment. Whether you’re working with a tight budget and basic tools or ready to invest in an automated setup, the right approach matches your garden’s size, your available water source, and how much time you want to spend maintaining it. The most successful systems share three qualities: they deliver consistent moisture directly to root zones, they minimize water waste, and they’re simple enough that you’ll actually use them every day. By choosing materials wisely and planning your layout before you dig, you’ll create a watering solution that keeps your raised beds producing abundantly season after season while freeing you from the daily watering can routine.
Why Your Pond and Raised Beds Make Perfect Partners
If you’ve been maintaining a garden pond and growing vegetables in raised beds separately, you’re about to discover something pretty exciting: these two features are actually meant to work together! Think of it as the ultimate backyard partnership where everyone benefits.
Here’s what makes this combination so brilliant. Every time you clean your pond filter or do routine maintenance, you’re dealing with water that’s absolutely loaded with nutrients. Fish waste, decomposed plant matter, and beneficial bacteria create what’s essentially liquid gold for your vegetables. Instead of dumping this nutrient-rich pond water down the drain, you can redirect it straight to your raised beds. Your tomatoes and lettuce get a natural fertilizer boost, and you’re not wasting a single drop.
I learned this accidentally years ago when I was cleaning my koi pond. Rather than running a hose to the storm drain, I got lazy and drained the water onto my nearby vegetable garden. Within two weeks, those plants absolutely exploded with growth. The difference was so dramatic that my neighbor asked what miracle fertilizer I’d discovered!
Now, let’s address the elephant in the room: is pond water safe for edible plants? Absolutely yes! In fact, it’s better than plain tap water. The organic nutrients are already broken down and ready for plants to absorb immediately. Unlike synthetic fertilizers that can burn roots or build up salts in the soil, pond water provides gentle, consistent feeding. The beneficial bacteria in pond water actually improve soil health too.
The convenience factor is another huge win. Instead of hauling watering cans or dragging hoses around your property, you’re creating a closed-loop system. Your pond naturally filters and enriches the water, then gravity or a simple pump delivers it exactly where it’s needed. Less work, healthier plants, and zero waste. That’s the kind of efficiency every gardener dreams about.
Three Water System Approaches (From Simple to Sophisticated)
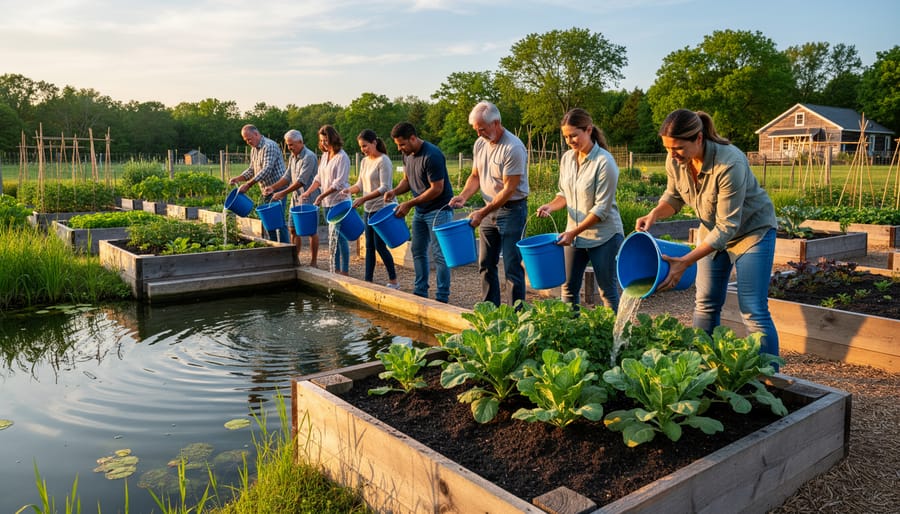
The Bucket Brigade Method: Start Here If You’re Testing the Waters
Let me tell you something I learned the hard way during my first summer of water gardening: you don’t need fancy equipment to make this work! When I started connecting my pond to my raised beds, I used nothing more than a trusty five-gallon bucket and a plastic watering can. Sometimes the simplest approach is exactly what you need, especially when you’re just getting started.
The bucket brigade method is perfect if you’re not ready to invest in pumps or plumbing, or if you only have a few raised beds to water. Think of it as a low-commitment way to test whether this whole pond-to-garden connection makes sense for your setup. Plus, there’s something genuinely satisfying about carrying that nutrient-rich pond water directly to your plants.
Here’s how to get started safely and effectively. First, choose your collection tool. A five-gallon bucket works beautifully for most situations, but make sure it has a sturdy handle. I can’t count the times I’ve seen flimsy handles snap when filled with water. For smaller gardens or if you have mobility concerns, use a two-gallon watering can instead.
Before collecting any pond water, do a quick visual check. You want water that looks relatively clear, not thick with algae blooms or debris. Early morning is typically the best time because the water is coolest and any sediment from the previous day has settled. Dip your bucket slowly beneath the surface, avoiding the very top layer where pollen and floating debris collect, and don’t disturb the bottom where muck accumulates.
Now for the filtering step. You don’t need anything elaborate. Pour your collected water through a simple paint strainer bag or an old piece of window screen positioned over a second bucket. This removes leaves, twigs, and any unwanted visitors. I once skipped this step and ended up introducing a dozen tiny snails to my tomato bed! The plants didn’t mind, but I certainly noticed.
When applying the water, pour gently at the base of your plants rather than overhead. This directs those wonderful nutrients straight to the roots where they’re needed most. The soil naturally provides additional filtration as the water soaks through.
The Gravity-Fed System: Set It and (Mostly) Forget It
Here’s where things get exciting! You’re ready to step up from hand-watering but aren’t quite prepared to install a complex automated system. The gravity-fed approach is your sweet spot—it harnesses the simple power of elevation to deliver consistent water to your plants with minimal ongoing effort.
I’ll never forget the summer I set up my first gravity system. I elevated a 200-liter barrel on some sturdy blocks, connected it to my raised beds, and watched nature do the work. My tomatoes thrived while I enjoyed more time actually relaxing by my pond instead of hauling watering cans!
The beauty of this system is its simplicity. Water flows downhill—always has, always will. By positioning your reservoir above your garden beds, you create natural water pressure without electricity. Combined with water-saving systems, you’re maximizing every drop from your pond.
What You’ll Need:
Start with a food-grade barrel or large container (190-250 litres works well). You’ll need a sturdy platform or stand to elevate it at least 60-90cm above your highest bed—the higher, the better pressure. Grab some drip irrigation tubing or soaker hoses, hose connectors and adapters, a tap or ball valve for the barrel outlet, and a small pump if your pond sits lower than your barrel. Don’t forget basic tools like a drill, Teflon tape, and zip ties for securing hoses.
Setting It Up:
First, build or position your platform near your garden beds but accessible to your pond. Ensure it’s level and can support the weight—water is heavy at about 1kg per liter! Install a tap fitting near the bottom of your barrel using a bulkhead fitting or threaded adapter, sealing everything with Teflon tape.
Next, run your drip lines or soaker hoses from the barrel tap to each bed, using connectors to split the line as needed. Secure everything with stakes and zip ties so nothing shifts. The water will flow whenever you open the valve, so you control the watering schedule manually.
Now for filling your reservoir: If your pond is higher than the barrel, lucky you! A simple gravity siphon works perfectly. Otherwise, a small submersible pump on a timer can transfer water from pond to barrel automatically. I run mine for 15 minutes each morning—just enough to top up the reservoir for the day’s watering needs.
The real magic happens when you adjust your tap to achieve a slow, steady drip. This mimics professional irrigation without the professional price tag. Check your system every few days, adjust flow rates as plants grow, and enjoy the satisfaction of working smarter, not harder.
The Automated Pump System: For the Dedicated Water Gardener
If you’ve caught the water gardening bug and want to take your raised bed watering to the next level, an automated pump system is your best friend. I’ll be honest, when I first set mine up, I felt like a bit of a mad scientist running tubes everywhere. But three years later, I can leave for a week-long vacation without worrying about my tomatoes, and that peace of mind is absolutely priceless.
This system uses a small pond pump connected to a timer that pushes water through irrigation lines directly to your garden beds. It sounds complicated, but if you can assemble furniture from a box, you can absolutely do this.
Choosing the right pump is your foundation. For most backyard setups with two to four raised beds within 20 feet of your water feature, a 200-400 gallon per hour pump works beautifully. The key consideration is vertical lift, which is how high the pump needs to push water. Measure from your water surface to the highest point in your irrigation lines, then add about 20 percent for friction loss. A pump rated for 6 feet of lift will easily handle most raised bed situations where you’re only going up 2-3 feet.
Start by installing a pre-filter on your pump intake. This little mesh cage costs about ten dollars and will save you countless headaches by keeping debris out of your irrigation lines. I learned this the hard way when a single leaf clogged my entire system the first week. Not fun when you discover it two days later.
For tubing, half-inch vinyl or polyethylene tubing makes an excellent mainline from your pump to your garden area. It’s flexible enough to route around obstacles but sturdy enough to maintain water pressure. From there, quarter-inch drip line branches off to each bed. Here’s a helpful tip I wish someone had told me: bury your mainline about 4 inches deep or hide it under mulch. It looks cleaner and you won’t trip over it while carrying a basket of tomatoes.
Setting up zones is easier than it sounds. Each raised bed becomes its own zone with a simple valve that you can adjust independently. This matters because your lettuce bed needs different water than your established squash plants. I use basic ball valves that cost a couple dollars each. During setup, turn them all off, then gradually open each one while the pump runs until you see steady drips from all the emitters in that bed.
Programming your watering schedule requires just a basic outdoor timer, the same kind people use for holiday lights. Start conservative, maybe 15 minutes every morning. Watch your soil moisture for a week and adjust from there. My setup runs 20 minutes at 6 AM during summer and 10 minutes every other day in spring and fall.
Troubleshooting is usually simple. If a bed isn’t getting water, check for kinks in the line first, then look for clogged emitters. A straight pin works perfectly for clearing them. If the whole system has weak flow, your filter probably needs cleaning. I check mine every two weeks during peak season.
One common concern is pump lifespan. Quality matters here. Spend the extra thirty dollars for a pump designed for continuous duty if you’re running it daily. Mine has operated flawlessly for three seasons with just annual cleaning.
The beauty of this system is its expandability. Started with two beds? Adding a third just means running another branch line and adjusting your zones. It grows with your gardening ambitions, and honestly, once you experience the convenience of automated watering, you’ll wonder how you ever managed without it.
Essential Components You’ll Need (And What You Already Have)
Before you rush off to the hardware store, let’s take inventory of what you probably already have sitting around from your existing pond or water garden setup. I can’t tell you how many times I’ve started a new project only to realize I had exactly what I needed gathering dust in my garage!
If you’ve been maintaining a pond, you likely already own a small submersible pump. Good news: that’s the heart of any watering system, and you’re halfway there. Those extra bits of flexible tubing from past projects? Perfect for distribution lines. Even old drip irrigation components can find new life in your raised bed setup.
For a gravity-fed system, here’s your basic shopping list. You’ll need a food-grade barrel or large container (30-55 gallons works beautifully), typically running $20-40 if purchased new, though many folks snag them free from restaurant suppliers. Add a simple spigot or valve ($5-10), basic garden hose or tubing ($10-20), and hose clamps ($5). Total investment: around $40-75, or potentially free if you’re resourceful with repurposed materials.
The pump-powered approach requires a bit more. Your submersible pond pump is the star here, and if you’re buying new, expect $25-60 depending on flow rate. You’ll need half-inch or three-quarter-inch tubing ($15-25 for 50 feet), various connectors and tees ($10-15), a basic hose timer ($15-30), and possibly a simple filter if your water source needs it ($10-20). Budget roughly $75-150 total, less if you’re repurposing existing equipment.
For the automated drip system, add drip emitters or soaker hose ($15-30), a pressure regulator ($10-15), and a programmable timer with multiple zones ($30-60). This premium setup runs $130-250 complete.
Here’s my favorite money-saving tip: check your local buy-nothing groups or gardening forums. I’ve found quality timers and barely-used pumps for a fraction of retail cost, and fellow water gardeners are incredibly generous with extra fittings and connectors they’ll never use.
Setting Up Your System: A Weekend Project Walkthrough
I’ll never forget my first weekend tackling this project. I stood in my backyard with a pile of pipes, fittings scattered everywhere, and my neighbor peering over the fence asking if I was building a rocket launcher. Two days later, I had a fully functioning water system that’s still going strong three years on. If I can do it, trust me, you can too.
Let’s break this down into manageable chunks that won’t eat up your entire weekend.
Start with a site walk-through on Saturday morning. Grab a coffee and really look at your setup. Where’s your pond or water feature in relation to your raised beds? Trace the most direct route between them, keeping an eye out for obstacles like tree roots, existing pathways, or that garden gnome collection you promised to relocate. Take photos from different angles. These will be surprisingly helpful when you’re trying to remember which side of the shed you planned to run the line.
Now for the measuring phase. Walk your chosen route with a measuring tape, adding an extra 10 percent to your measurement. Seriously, that extra bit saves you from those frustrating trips back to the hardware store when you’re three feet short. Note any elevation changes too. Water flows downhill naturally, which can work for or against you depending on your landscape.
Sketch a simple diagram showing your water source, the path to your beds, and where you’ll need connectors, valves, or splitters. Nothing fancy needed here, just something to keep you organized. This is also when you’ll decide if you want above-ground piping that’s easy to adjust or buried lines for a cleaner look.
Sunday morning is installation time. Before you start cutting anything, lay out all your components along the planned route. This dry run prevents rookie mistakes and helps you visualize the finished system. Connect everything loosely first, making sure each piece fits and points the right direction.
Once you’re confident everything lines up, make your connections permanent. If you’re working with PVC, keep a damp cloth handy to wipe joints before applying primer and cement. For flexible tubing, ensure your clamps are snug but not overtightened, which can actually cause leaks.
Here’s where developing your water garden skills really pays off. Testing isn’t just turning on the tap and hoping for the best. Start with low pressure, watching every connection point for drips or sprays. Run the system for at least twenty minutes before cranking up to full flow. Check underneath pipes and around fittings where sneaky leaks like to hide.
Found a leak? No panic needed. Turn off the water, dry the area completely, and remake that connection. Most leaks happen because joints weren’t quite dry or clamps needed one more quarter turn.
The adjustment phase happens over your first week of operation. You might find one bed gets too much water while another barely trickles. That’s normal and exactly why you installed those control valves. Tweak them gradually until each bed receives just the right amount.
Keeping Your Plants Happy (Without Overdoing It)
Here’s the honest truth I’ve learned through a few seasons of trial and error: your beautiful water system is only as good as your watering habits. I once set up an amazing gravity-fed system from my pond, then promptly forgot to check on it for a week during a hot July. Let’s just say my tomatoes were not impressed.
The key to keeping your plants thriving is developing a finger-test habit. Before you turn on any system, stick your finger about two inches deep into the soil. If it feels dry at that depth, it’s watering time. If it’s still moist, hold off. This simple check prevents more problems than any fancy moisture meter I’ve bought.
Different plants have different thirst levels, and your watering schedule needs to reflect that. Lettuce and herbs prefer consistently moist soil, so they might need daily attention during summer. Meanwhile, tomatoes and peppers actually perform better with deeper, less frequent watering that encourages strong root development. I group my raised beds accordingly, which makes managing the water flow from my pond system much easier.
Seasonal adjustments matter tremendously. During spring’s cooler days, I might water every three to four days. Come July, that same bed could need water daily. Pay attention to your plants rather than sticking to a rigid schedule.
Watch for warning signs. Wilting leaves in the morning signal underwatering, while yellowing leaves and soggy soil mean you’re overdoing it. Brown, crispy leaf edges often indicate inconsistent watering, where the soil swings between too wet and too dry.
Managing your pond levels alongside garden needs requires balance. I keep a simple rain barrel as backup for weeks when I’ve drawn too much from the pond. This protects both my fish and my garden, ensuring neither suffers. Monitor your pond’s water level weekly, especially during peak growing season, and scale back garden watering if levels drop significantly.
Watch Out for These Common Mistakes
Let me share the pitfalls I’ve stumbled into over the years so you can skip right past them! Trust me, learning from my mistakes is much easier than making your own.
Clogged lines from algae growth are probably the most frustrating issue you’ll face. When water sits in tubing exposed to sunlight, green gunk builds up faster than you’d think. The quick fix? Use opaque black tubing instead of clear, and add a simple inline filter between your water feature and the garden beds. I flush my lines monthly with a diluted vinegar solution to keep everything flowing smoothly.
Inadequate filtration trips up many first-timers. Your pond filter works great for fish waste, but debris like leaf particles can wreak havoc on drip emitters. Install a secondary mesh filter specifically for your garden system. These cost around fifteen dollars and save you from constantly unclogging emitters.
Pump sizing errors happen when we get excited and don’t do the math. If your pump struggles to push water uphill to raised beds, it’ll burn out quickly. Calculate the total vertical lift plus tubing length, then choose a pump rated for at least 20 percent more than your needs. When in doubt, connect with experts who can help you select the right equipment.
Watering during peak sun is tempting when you’re home at midday, but water droplets magnify sunlight and can scorch leaves. Set timers for early morning or evening watering instead.
Finally, neglecting system maintenance is the biggest rookie mistake. Check connections monthly, clean filters every few weeks, and inspect tubing for cracks before each growing season.
Seasonal Care and Winterizing
I learned this lesson the hard way during my first winter with a raised bed watering system. I thought I could leave everything in place and deal with it in spring. Big mistake! Frozen water expanded in my lines, cracked fittings, and left me with a costly repair bill. Now I’m religious about seasonal maintenance, and I want to save you from the same headache.
As fall approaches and temperatures drop below 40 degrees Fahrenheit consistently, it’s time to winterize. Start by shutting off your water source and opening all drain valves. If your system doesn’t have low-point drains, disconnect sections and let gravity do its work. Remove and store pumps indoors in a bucket of water to prevent seal damage. For drip lines and emitters, disconnect them completely and store them in your garage or shed. Even “freeze-resistant” components can fail in extreme cold.
Take this opportunity to inspect everything. Replace worn washers, clean clogged emitters in a vinegar solution, and make notes about improvements for next season. I keep a little notebook specifically for this purpose.
When spring arrives and nighttime temperatures stay above freezing, reverse the process. Reconnect components, turn on water slowly to check for leaks, and flush lines before reattaching emitters. Run your system for fifteen minutes to ensure everything flows properly. This simple routine has kept my system running smoothly for six seasons now, and yours can do the same.
There’s something genuinely special about watching water flow from your pond through your garden beds, knowing you’ve created this connected ecosystem with your own hands. You’ve transformed your pond from a standalone feature into a hardworking partner that nurtures your vegetables, herbs, and flowers while looking beautiful doing it. That’s the magic of the buddy system in action.
Remember, you don’t need to build the most complex setup right away. Start with something simple, maybe just a gravity-fed drip line or a basic pump system. As you gain confidence and see how your plants respond to nutrient-rich pond water, you can always expand and refine your approach. Every water gardener started somewhere, and there’s no shame in beginning small.
Your pond is now pulling double duty, providing visual serenity while supporting a productive garden. The fish waste feeding your tomatoes, the water you’d normally drain away nourishing your herbs—that’s efficiency and beauty working hand in hand.
We’d love to hear how your own buddy system takes shape. Have you tried a unique setup? Discovered a clever workaround? Found a water gardening mentor who helped you along the way? Your experience might be exactly what inspires another gardener to take the plunge. Happy gardening, and may your pond and beds thrive together!