
Keep Your Water Garden Thriving Through Winter: The Insulation Secret
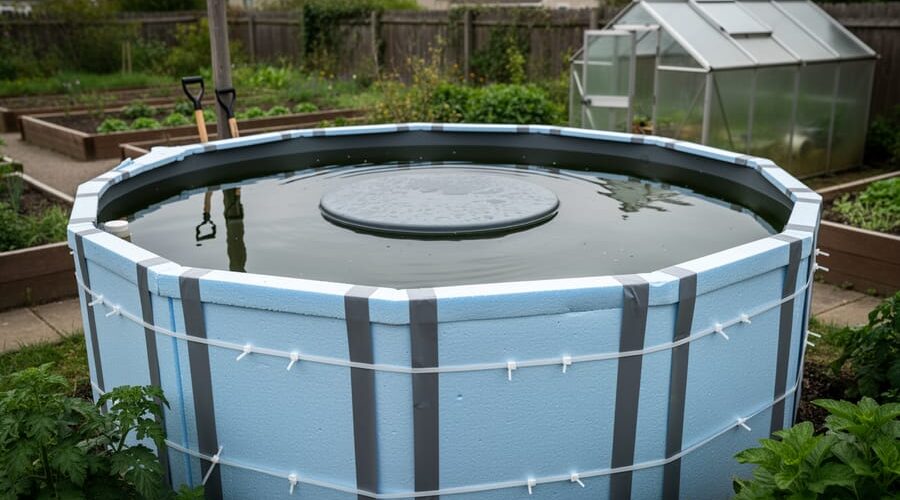
Wrap your water tank with closed-cell foam insulation boards, securing them with waterproof tape or cable ties to create a protective barrier that maintains stable water temperatures year-round. This simple upgrade prevents dramatic temperature swings that stress fish, slows algae growth during hot spells, and reduces ice formation in winter—protecting both your aquatic life and your investment.
Focus insulation efforts on the tank’s sides and top first, as these areas experience the greatest heat transfer. For above-ground tanks, create a complete sleeve using 1-2 inch thick foam boards cut to size, leaving access panels for maintenance. Underground or partially buried tanks benefit most from insulating the exposed portions and adding a floating cover to minimize surface heat loss.
Consider your climate and tank placement when selecting materials. Reflective bubble wrap insulation works brilliantly in moderate climates and costs less than foam boards, while dedicated pond tank blankets offer convenience for those wanting ready-made solutions. In regions with extreme weather protection needs, double-layer insulation or combining multiple materials provides superior results.
The investment pays dividends immediately—you’ll notice fish becoming more active as temperature stability reduces stress, plants thriving without thermal shock, and significantly lower energy costs if you’re running heaters or chillers. Most pond owners complete basic insulation projects in a weekend afternoon using materials from hardware stores, making this one of the most cost-effective improvements you can make to your water garden setup.
Why Your Water Garden Tank Needs Insulation
Temperature Swings and Fish Health
I learned this lesson the hard way one chilly autumn morning when I found my goldfish looking sluggish and disoriented. The temperature had dropped overnight by nearly 10 degrees, and my fish were experiencing thermal shock.
Think of it this way: imagine jumping from a warm bath straight into an icy pool. That jolt to your system is exactly what fish experience during rapid temperature swings. Their bodies are cold-blooded, meaning they can’t regulate their own temperature like we do. When water temperature drops or rises too quickly, their metabolism goes haywire, making it difficult to digest food, fight off diseases, and maintain normal behavior.
Thermal shock is particularly dangerous because it weakens their immune system. Even hardy fish can develop stress-related illnesses when exposed to sudden changes of just 5-7 degrees within a few hours. In severe cases, it can be fatal, especially for delicate species like koi or fancy goldfish.
That’s why winter-proofing your pond with proper insulation is crucial. Insulation creates a buffer, slowing temperature changes and giving your fish time to gradually adjust. This simple step can mean the difference between thriving fish and heartbreaking losses.
Ice Formation and System Damage
When water freezes, it expands by about 9%, creating immense pressure that can crack tank walls, split pipes, and destroy expensive equipment in minutes. I learned this the hard way one winter when my pond filter housing cracked right down the middle, costing me over $200 in replacements plus hours of reinstallation work.
The damage goes beyond just the tank itself. Ice formation can shatter pump housings, crack filter systems, and bend metal fittings beyond repair. Even tiny stress fractures from repeated freeze-thaw cycles weaken structures over time, eventually leading to leaks or complete failure when you least expect it.
Here’s the reality: a quality insulation job costs between $30 and $150 depending on your tank size, while replacing a damaged pump runs $100 to $500, and tank repairs can exceed $1,000. The math is simple. Insulation also helps with managing temperature fluctuations year-round, protecting your fish and plants from stress.
Think of insulation as insurance for your water garden investment. Spending a weekend protecting your system now saves you from emergency repairs in freezing weather.
Choosing the Right Insulation Material for Your Tank
Foam Board Insulation (The DIY Favorite)
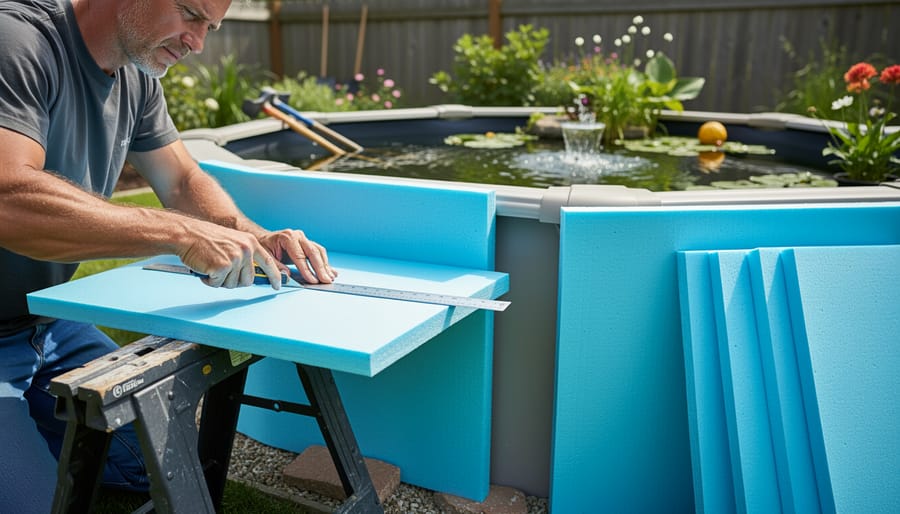
Foam board insulation has become a go-to choice for water tank insulation, and for good reason. These rigid panels, typically made from polystyrene or polyisocyanurate, pack impressive insulating power into lightweight sheets that anyone can handle.
Let’s talk R-values in everyday language. Think of R-value as your insulation’s ability to resist heat flow. The higher the number, the better it protects your tank. Standard foam boards range from R-3 to R-6 per inch of thickness. A common 2-inch foam board gives you around R-10, which works wonderfully for most water garden tanks in moderate climates.
What makes foam boards a DIY favorite? They’re incredibly forgiving. You can cut them with a simple utility knife, no fancy tools required. I remember insulating my first stock tank with foam boards on a Saturday afternoon, armed with nothing more than a measuring tape, knife, and some aluminum tape. The panels simply wrap around your tank and stay in place with minimal fuss.
Cost-wise, foam boards are budget-friendly, typically running between one and two dollars per square foot. They resist moisture beautifully, won’t sag over time, and last for years. You can even reuse them season after season if you store them properly during warmer months.
Bubble Wrap and Reflective Insulation
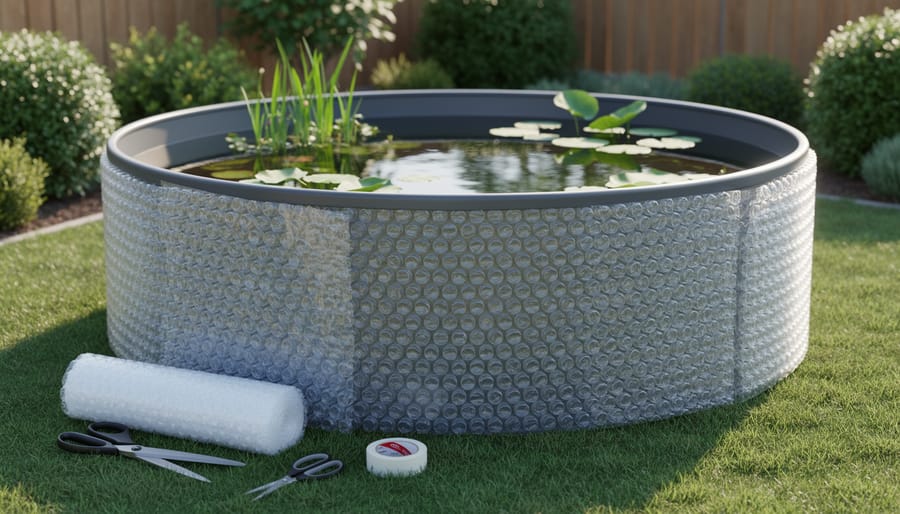
Let me share a money-saving secret that’s helped countless pond keepers through tough winters: bubble wrap! Yes, that same stuff you pop for fun can be a game-changer for insulating your water tank. I’ve personally wrapped several above-ground tanks with regular bubble wrap from the hardware store, and the results genuinely surprised me.
Here’s why it works: those tiny air pockets trap heat incredibly well. Simply wrap your tank in multiple layers of bubble wrap (the larger bubbles work best), securing it with waterproof tape or zip ties. For extra protection, add a layer of reflective insulation on top. This shiny, foil-like material bounces heat back toward your tank and blocks cold winds. You can find rolls at most home improvement stores for under twenty dollars.
This combo is perfect if you’re on a tight budget or need a quick temporary solution before winter hits hard. I’ve seen pond owners reduce temperature swings by several degrees using just these materials. The setup takes maybe thirty minutes, and you can reuse everything next season. Just remember to leave access points for maintenance and check regularly that everything stays secure. While it won’t match professional foam insulation, it’s absolutely worth trying as your first defense against freezing temperatures.
Natural and Eco-Friendly Options
If you’re looking for insulation that doubles as garden decor, natural materials are your best friends! I’ve used straw bales around my above-ground stock tank for years, and they work beautifully while creating a rustic farmhouse look. Simply stack bales around the tank’s perimeter, making sure they’re tight against the sides. They provide excellent insulation and break down slowly, so you can add them to your compost pile come spring.
Earth berming is another fantastic option, especially for partially buried tanks. This involves mounding soil around the tank’s exposed sides. I once helped a neighbor berm their preformed pond, and it transformed the space into a natural-looking hillside feature. Plant low-growing groundcovers or ornamental grasses on the berm for added beauty and erosion control.
Mulch works wonderfully too! Pile wood chips, shredded leaves, or bark mulch around your tank’s base, creating a thick insulating layer. I keep a 6-8 inch deep ring of mulch around my smaller tanks throughout winter. It’s inexpensive, easy to apply, and blends seamlessly into garden beds. These natural methods protect your water temperature while keeping your garden looking intentional and beautiful rather than wrapped in industrial materials.
Step-by-Step: Insulating an Above-Ground Water Tank
What You’ll Need (Materials and Tools)
You’ll need insulation material as your primary supply – foam pipe insulation, reflective bubble wrap insulation, or rigid foam boards all work wonderfully depending on your tank type and budget. Foam board insulation typically costs between $15-30 per sheet and offers excellent protection. Grab some waterproof tape or zip ties to secure everything in place, especially around those tricky curved areas where heat loves to escape.
You’ll also want weatherproof covering like tarp or heavy-duty plastic sheeting to protect your insulation from the elements. This exterior layer keeps moisture out and your insulation working efficiently. Budget around $50-100 total for a standard water tank project.
Don’t forget measuring tape and sharp scissors or a utility knife for cutting insulation to size. If you’re working with a pond heater, having it before insulating helps you plan proper placement. I learned this the hard way during my first winter when I had to redo sections to accommodate my heating system! A pair of work gloves makes handling materials more comfortable too.
Preparing Your Tank Surface
Before you start wrapping your tank in insulation, a little prep work goes a long way. Trust me, I learned this the hard way when my first attempt resulted in insulation that wouldn’t stick because of algae buildup!
Start by giving your tank a thorough cleaning. Use a soft brush or cloth with plain water to remove any dirt, algae, or mineral deposits from the exterior surface. If you’re working with a pond liner or flexible tank, be extra gentle to avoid punctures. For stubborn grime, a mild vinegar solution works wonders without leaving harmful residues.
Once clean, let your tank dry completely. This is crucial because insulation materials won’t adhere properly to damp surfaces, and moisture trapped underneath can lead to mold or reduced effectiveness. I usually wait at least 24 hours on a sunny day, but check by running your hand across the surface to ensure it’s bone dry.
While it’s drying, measure your tank’s dimensions carefully. Note the height, circumference, and any awkward curves or fittings. This helps you buy the right amount of insulation and plan your approach.
Safety-wise, always turn off pumps and electrical equipment before working near water. Wear gloves to protect your hands, and if your tank is tall, use a sturdy ladder with someone nearby to spot you.
Installing the Insulation
Now comes the fun part – actually putting the insulation in place! Start by measuring your tank’s dimensions carefully. When cutting insulation material, use a sharp utility knife and cut slightly larger than needed. You can always trim excess, but you can’t add it back!
For flat surfaces, simply wrap the insulation around your tank like a cozy blanket. Secure it with waterproof tape, working your way around in sections to avoid gaps. I learned the hard way that trying to do it all at once leads to frustrating bunching and air pockets.
Curved surfaces need a bit more patience. Cut the insulation into smaller panels that can overlap slightly as you work around the curves. Think of it like wrapping a gift – small sections work better than one large piece. For stubborn curves on round tanks, make small relief cuts on the inner edge of the insulation so it bends more easily.
Awkward areas like pipe connections and valves require creative problem-solving. Cut custom-shaped pieces to fit snugly around these spots, using smaller scraps to fill gaps. Secure everything with cable ties or straps every 12 inches or so, ensuring the insulation stays put during windy weather. Remember, even imperfect coverage beats no insulation at all!
Weatherproofing and Finishing Touches
Once your insulation is in place, it needs protection from the elements and curious critters. I learned this the hard way when squirrels turned my first insulation job into nesting material!
Start by wrapping everything in a weatherproof jacket. A simple tarp or UV-resistant pond liner works brilliantly as an outer layer. Secure it tightly with waterproof tape or zip ties, making sure water can’t sneak underneath. Moisture is insulation’s worst enemy, turning effective materials into soggy, useless layers.
For a more polished look that blends into your garden, consider decorative options. Wooden lattice panels painted to match your fence create an attractive screen while allowing air circulation. Some folks use bamboo screening or even build a simple decorative stone wall around the tank. I’ve wrapped tanks in willow screening for a natural cottage-garden feel.
Protect vulnerable seams and edges with silicone sealant rated for outdoor use. Check these spots twice yearly, as weather and temperature changes can create gaps.
Finally, add a secure top cover if your tank is open. This prevents debris buildup and stops animals from investigating. A simple plywood lid wrapped in matching material keeps everything neat and functional while completing your weatherproofing effort beautifully.
Insulating In-Ground and Buried Water Tanks
Using Earth as Natural Insulation
Here’s a secret that’s saved me countless dollars on heating costs: Mother Earth is an incredible insulator, and she works for free! When I buried my first water tank, I was amazed at how stable the temperatures remained throughout the year, even during harsh winters.
The ground below the frost line maintains a surprisingly consistent temperature year-round, typically between 50-60°F depending on your location. This natural thermal mass acts like a giant battery, keeping your water from freezing in winter and staying cool in summer. The key is getting your tank deep enough to tap into this benefit.
For most climates, burying your tank at least 18-24 inches below the surface works wonders. In colder regions, aim for 30-36 inches to get below the frost line. I learned this the hard way during my first winter when my tank was only buried 12 inches deep and still had ice forming around the edges.
When backfilling around your buried tank, use the excavated soil mixed with sand for better drainage. Pack it firmly in 6-inch layers to prevent settling and avoid air pockets that can create cold spots. Don’t use gravel directly against the tank, as it doesn’t insulate as well as soil. Think of it like tucking your tank into a cozy earth blanket!
Adding Extra Protection in Cold Climates
When temperatures regularly drop below freezing, buried tanks might need extra backup protection. I learned this the hard way during an unexpectedly harsh winter when my supposedly safe tank developed ice problems despite being underground.
Start with reflective bubble wrap insulation, which is affordable and surprisingly effective. Wrap it around your tank in overlapping layers, securing with waterproof tape. This creates air pockets that trap heat beautifully. For above-ground portions or tanks in extremely cold regions, add rigid foam board insulation over the bubble wrap. Think of it like dressing your tank in a warm winter coat and underlayers.
Don’t forget the lid! Heat escapes upward, so insulate the top with at least two inches of foam board. I cut mine slightly larger than the opening and sealed the edges with weather stripping to prevent drafts.
For the ultimate protection, build an insulated box around your entire tank using plywood lined with foam board. Leave access panels for maintenance, and you’ve essentially created a protective shelter. Some pond enthusiasts even add small aquarium heaters inside for extra security, though this requires careful electrical setup with outdoor-rated equipment.
Remember, multiple thin layers often work better than one thick layer because they trap more insulating air pockets between them.
Don’t Forget These Critical Areas
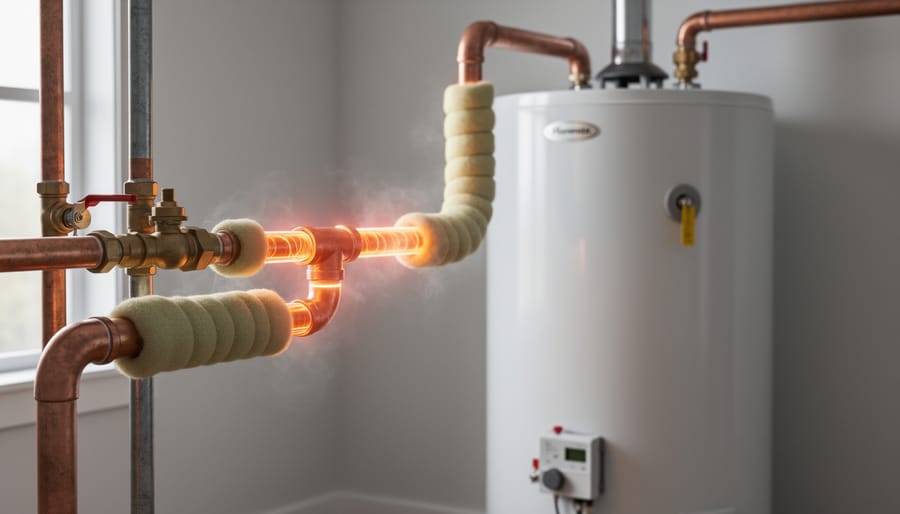
Insulating Pipes and Connections
Don’t forget about the pipes leading to and from your water tank! I learned this lesson the hard way when my first pond’s supply line froze and cracked during an unexpected cold snap. Those connections are actually more vulnerable than the tank itself because they’re often narrower and exposed to airflow.
Start by wrapping all exposed pipes with foam pipe insulation, which you can find at any hardware store. These pre-slit tubes slip right over your pipes and come in various diameters. For outdoor installations, choose waterproof varieties or wrap standard foam with waterproof tape to keep moisture out. Pay special attention to joints, elbows, and valve connections where pipes change direction, as these spots freeze first.
For extreme cold climates, consider heat tape underneath your pipe insulation as an extra layer of protection. Just remember to use outdoor-rated products and follow manufacturer guidelines carefully. Bury underground lines below your frost line whenever possible, typically 18 to 24 inches deep depending on your region.
Preventing frozen pipes means wrapping right up to where pipes enter the tank, leaving no gaps. Secure everything with UV-resistant zip ties or weatherproof tape. Your fish and plants will thank you when winter arrives!
The Tank Lid and Surface Area
Here’s something I learned the hard way during my first winter with a pond: most of your heat loss happens right at the surface. Think about it like leaving a window open in your house. The water surface is where warmth meets cold air, and that’s where the real heat escape happens.
The good news? Covering your tank is one of the most effective insulation steps you can take. But here’s the catch for those of us with fish: they need oxygen exchange at the surface. A completely sealed lid would be disastrous.
Your best bet is creating a semi-permeable cover. I’ve had great success using a sheet of rigid foam insulation that sits on top of the water, leaving about 10-15% of the surface open. You can cut notches or holes in strategic spots, or simply size the foam board to fit most of the tank while leaving gaps around the edges. For rectangular tanks, I cut the foam slightly smaller than the tank dimensions, creating a natural border for gas exchange.
Another option is using bubble wrap weighted down with pool noodles around the perimeter. The bubbles trap air for insulation while still allowing some oxygen flow. Just make sure whatever material you choose is non-toxic and won’t leach chemicals into your water.
Seasonal Adjustments and Maintenance Tips
Summer Cooling Strategies
Here’s something I learned the hard way during my first scorching summer with my pond: insulation isn’t just for winter! When temperatures soar, you’ll want to prevent your water tank from turning into fish soup. The trick is finding the right balance.
During hot months, consider temporarily removing some insulation layers, especially from the top and sides that receive direct sunlight. I typically remove about half my foam board insulation in late spring, keeping just enough to prevent rapid temperature swings without creating a heat trap.
Shading is your best friend when combined with insulation. Install a shade cloth above your tank, creating an air gap of at least six inches between the cloth and any remaining insulation. This allows heat to escape while blocking harsh sun rays. I use 50-70% shade cloth, which filters light beautifully without making things too dark.
Position potted plants or a simple pergola structure around your tank for natural cooling. The combination of light insulation with strategic shading keeps water temperatures stable without overheating, creating a comfortable environment for your aquatic friends throughout summer.
Checking and Refreshing Your Insulation
Just like your pond’s filter needs regular cleaning, your tank insulation deserves an annual checkup! I make it part of my autumn preparation routine, and it takes less than 15 minutes.
Start by examining your insulation for these telltale signs of wear: water stains, mold growth, tears or gaps, or sections that feel damp to touch. If you notice any of these, it’s time for replacement. Even high-quality insulation typically needs refreshing every 3-5 years, depending on your climate.
During your inspection, press gently on the insulation. Does it spring back? Great! If it stays compressed or feels brittle, the material has degraded and lost its insulating properties. Check the waterproof covering too – any punctures or UV damage means moisture can sneak in and ruin everything underneath.
Pro tip: Keep a simple log noting when you installed your insulation. This helps you track its lifespan and plan replacements before problems arise, keeping your aquatic friends comfortable year-round.
Common Mistakes to Avoid
Trapping Moisture Against the Tank
Here’s the thing about trapped moisture – it’s sneaky and surprisingly destructive! When insulation sits directly against your tank without proper breathing room, condensation forms between the two surfaces. Think of it like wearing a rain jacket without a base layer – you end up just as wet from your own moisture as you would from the rain.
This trapped moisture creates the perfect environment for mold, mildew, and even corrosion if you’re working with metal components. I learned this the hard way when I wrapped my first stock tank too tightly and found a nasty green surprise underneath come spring!
The solution is surprisingly simple: always leave a small air gap or use a vapor barrier between the insulation and tank surface. You can achieve this with waterproof house wrap, plastic sheeting, or even spacing materials like furring strips. Make sure your insulation system allows air to circulate at the top and bottom – just small gaps will do. This lets any moisture evaporate naturally rather than sitting against your tank, keeping everything dry and damage-free throughout the season.
Over-Insulating in Mild Climates
Here’s something I learned the hard way during my first winter protecting my pond: more insulation isn’t always better, especially if you live in a mild climate. I went overboard wrapping my stock tank in San Diego, and ended up trapping moisture that led to algae blooms and funky water quality.
If your area rarely dips below 40°F, heavy insulation can actually work against you. It prevents natural temperature regulation and can create a stagnant environment where harmful bacteria thrive. Your fish and plants need some temperature variation to stay healthy through their natural cycles.
The key is knowing your climate zone. Check your average winter lows and only insulate when temperatures consistently drop below freezing. In mild regions, focus on wind protection rather than heavy wrapping. A simple windbreak or partial covering on the coldest nights usually does the trick.
Think of it like dressing for the weather. You wouldn’t wear a winter parka in spring, right? Your water tank deserves the same consideration. Start with minimal insulation and add more only if you notice ice forming or your thermometer shows concerning drops.
You’ve made it! After reading through all the options and techniques, you now have everything you need to properly insulate your water tank and protect your aquatic friends through every season. Here’s the beautiful truth: this isn’t rocket science. It’s a straightforward weekend project that will pay dividends for years to come.
Think about it this way. You’ve already invested time, money, and plenty of heart into creating your water garden oasis. You’ve chosen the perfect plants, maybe added some colorful koi or goldfish, and spent countless evenings enjoying the peaceful sound of water. Proper insulation is simply the protective shield that keeps all that effort safe from temperature swings, ice damage, and energy waste.
The best part? Once you’ve wrapped that tank, you’re done. Unlike many home improvement projects that require constant maintenance, insulation works quietly in the background, keeping your water temperature stable while you go about your life. Your fish will thank you with their continued health and vitality, and your plants will thrive instead of just surviving.
Whether you chose foam board, bubble wrap, or reflective barriers, you’ve taken a meaningful step toward becoming a more confident water gardener. Don’t second-guess yourself. Grab your materials this weekend, follow the steps we’ve covered, and give your water tank the protection it deserves. Your future self, standing by a healthy pond next spring, will be glad you did.