
Transform Your Pond Into a Nighttime Masterpiece With Strategic Lighting
Your pond doesn’t have to disappear when the sun sets. The right lighting transforms still water into a glowing focal point that draws the eye across your entire yard, turning an ordinary backyard feature into an enchanting evening destination. Think about the last time you saw water dancing with light, whether it was moonlight shimmering across a lake or streetlights reflecting in puddles after rain. That same magic is entirely within your reach, and you don’t need an expensive landscape designer to make it happen.
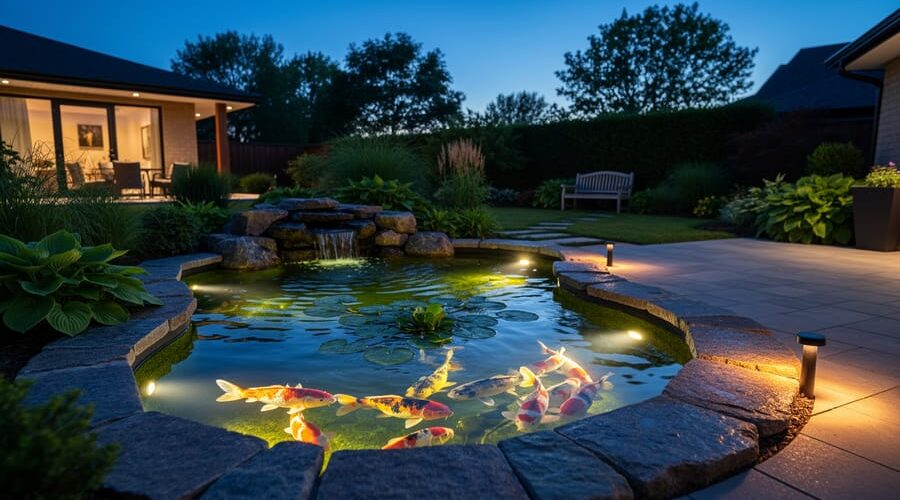
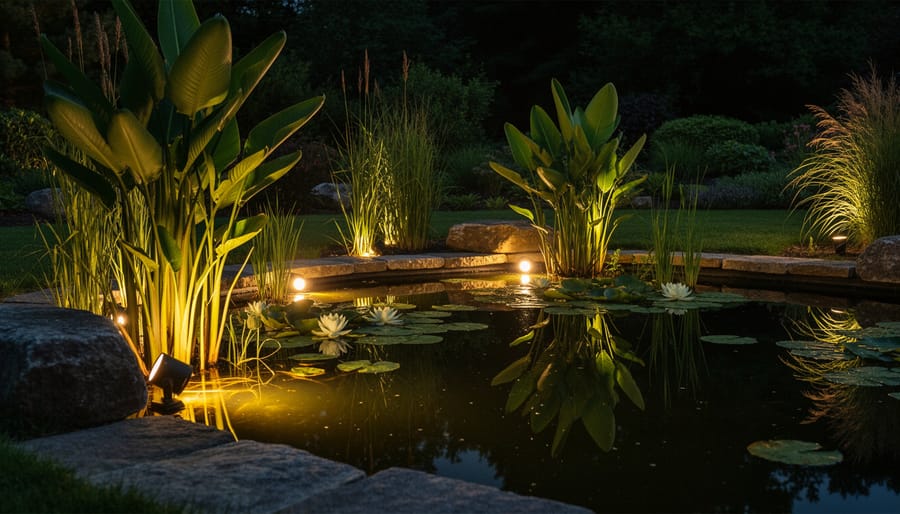
Lighting a pond involves more than just spotlighting the water’s surface. Strategic illumination reveals the layered beauty you’ve worked so hard to create: the gentle movement of koi gliding beneath lily pads, the texture of surrounding rocks and plants, and the interplay between shadows and reflections that changes throughout the evening. When done thoughtfully, pond lighting extends your outdoor living hours, creates safe pathways around your water feature, and adds genuine value to your property.
The journey from a basic pond to a stunning nighttime landscape starts with understanding three essential elements: where to place lights for maximum impact, which types of fixtures work best in wet environments, and how to balance illumination without overwhelming the natural tranquility that drew you to water gardening in the first place. With some planning and the right approach, you’ll create an after-dark oasis that rivals anything the professionals install.
Why Lighting Matters for Your Pond Landscape
I remember the first time I saw my pond after sunset—without lighting, it basically disappeared into darkness! All that effort creating a beautiful water feature, and I could only enjoy it during daylight hours. That’s when I realized proper lighting isn’t just a luxury; it’s what transforms your pond from a daytime attraction into a 24/7 showcase.
Let’s talk about why lighting matters so much for your pond landscape. First and foremost, it extends your enjoyment time. After a long workday, you’ll finally get to relax beside your pond during those precious evening hours. There’s something magical about watching koi glide through illuminated water while sipping your coffee on a cool morning or unwinding with friends on a summer night.
Safety is another huge consideration that often gets overlooked. Strategic lighting prevents accidents by clearly marking pond edges, steps, and pathways. If you have kids or pets, this becomes even more important. Nobody wants a midnight tumble into the water!
Beyond practicality, lighting lets you spotlight your pond’s best features. That stunning waterfall you worked so hard on? Underwater lights make it look absolutely spectacular. Unique rock formations, prized plants, or elements of artistic pond design deserve their moment to shine—literally.
The ambiance factor can’t be overstated either. Soft, warm lighting creates an inviting outdoor room that extends your living space. It sets the mood for entertaining or provides a peaceful retreat for meditation and reflection.
Here’s the bonus: well-designed pond lighting significantly increases your property value. It demonstrates thoughtful landscaping and creates that coveted curb appeal that makes buyers take notice. Your entire garden becomes a living art gallery.
Understanding Different Types of Pond Lighting
Submersible and Underwater Lights
There’s something absolutely magical about watching light dance beneath the water’s surface! Submersible lights transform your pond into a glowing wonderland, and they’re easier to install than you might think.
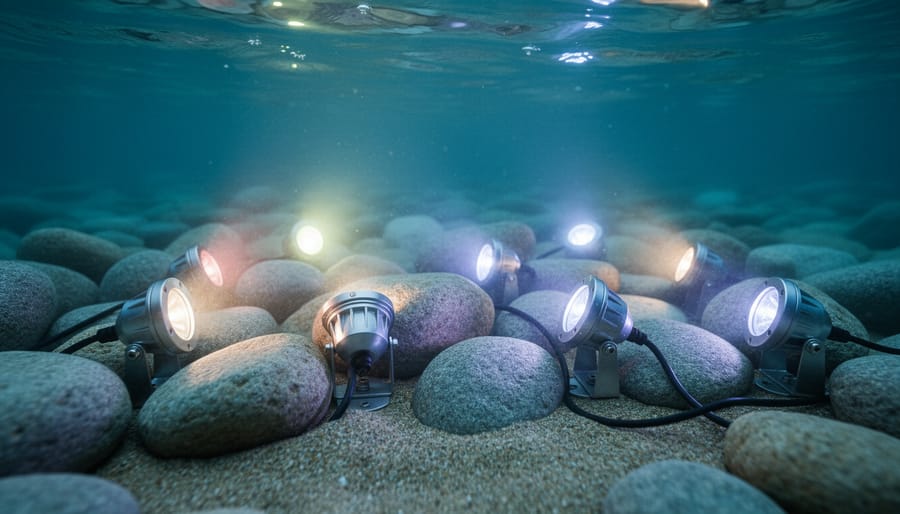
When choosing submersible lights, waterproof ratings are your best friend. Look for lights rated IP68—this means they’re completely sealed against dust and can handle continuous underwater submersion. I learned this the hard way when a cheaper IP65 light failed after just two months! Trust me, spending a bit more upfront saves headaches later.
These underwater beauties work wonders for highlighting fish and creating depth. Position them at the base of waterfalls or fountains to make the water sparkle as it cascades. Angling lights upward through the water column creates stunning beams that illuminate your koi or goldfish as they swim by—it’s like having a living light show!
For placement, think about what you want to showcase. Submersible spotlights work perfectly when aimed at underwater plants or interesting rock formations. I like tucking them behind larger stones so the light source stays hidden while the glow appears mysterious and natural.
Here’s a pro tip: colored lenses can dramatically change your pond’s mood. Blue creates a moonlit effect, while amber gives a warm, sunset-like glow. Start with white lights first to see what you’re working with, then experiment with colors.
Installation is straightforward—most submersible lights come with weighted bases or suction cups. Just remember to keep cords organized and secured away from where fish might get tangled.
Above-Water Accent and Spotlights
Above-water lighting creates drama and dimension around your pond, transforming it into a nighttime focal point you’ll never tire of admiring. I’ll never forget the first time I added a simple spotlight to my small waterfall—suddenly, my backyard felt like a retreat instead of just a yard with water in it!
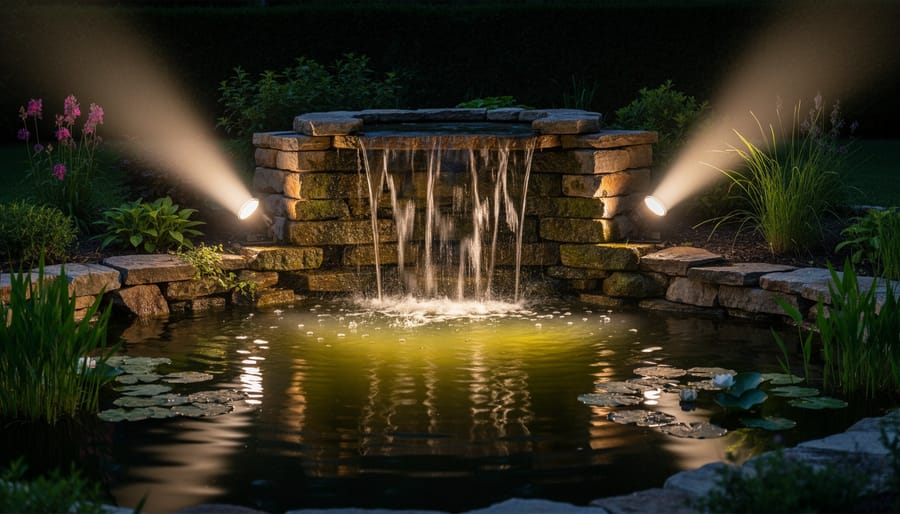
Spotlights are your best friends for highlighting moving water. Position them at the base of waterfalls or fountains, angling upward to catch the cascading water. The interplay of light and motion creates mesmerizing effects that draw the eye and make your feature the star of the garden. Adjustable spotlights give you flexibility to experiment with angles until you find that perfect glow.
Path lights serve double duty around pond perimeters. They provide safety for evening strolls while defining your pond’s shape and creating a welcoming boundary. Space them evenly, about six to eight feet apart, keeping them low to avoid glare. You want gentle illumination, not a runway!
Uplighting brings landscaping to life after dark. Tuck small fixtures at the base of ornamental grasses, behind rocks, or beneath specimen plants to create depth and shadows. This layered approach makes your pond feel integrated into the landscape rather than sitting in isolation. Start with fewer lights than you think you need—you can always add more.
Floating and Surface Lights
If you want lighting that’s easy to move around as your pond evolves, floating and surface lights are absolute game-changers! These delightful additions literally drift across your water’s surface, creating magical patterns that shift with gentle breezes and water movement.
Floating solar lights are my personal favorite for pond beginners. They charge during the day and automatically illuminate at dusk, requiring zero wiring or electrical expertise. I remember placing my first set of solar orbs in my pond and being amazed at how they gently bobbed around, creating this dreamy, ever-changing light show. The best part? You can reposition them anytime without draining your pond or getting your feet wet.
Lily pad lights are another charming option that blend seamlessly with your aquatic plants. These realistic-looking floaters mimic natural water lilies while housing LED lights underneath. They’re perfect if you want illumination without disrupting your pond’s natural aesthetic.
For added whimsy, consider color-changing floating spheres or flower-shaped lights that open and close with light sensors. These work beautifully for special occasions or when you want to create different moods throughout the seasons. Just remember to bring solar floaters indoors during winter in colder climates, and clean them periodically to maintain their charging efficiency and brightness.
Planning Your Pond Lightscape Design
Identifying Your Focal Points
Walking around your pond at different times of day will reveal its natural stars. Start by noticing what already catches your eye—maybe it’s that cascading waterfall you worked so hard to perfect, or the striking hostas that frame the water’s edge. These are your potential lighting candidates.
I remember standing by my own pond one evening and realizing the waterfall looked completely different when moonlight hit it. That’s when I knew it needed dedicated lighting. Your focal points should create visual interest and draw people’s gaze around the pond’s perimeter, not just illuminate everything equally.
Consider which features you want visitors to notice first. Waterfalls are natural attention-getters because of their movement and sound. Specimen plants like Japanese maples or ornamental grasses add texture and seasonal color. Interesting rock formations create dramatic shadows and depth. If you keep koi, you’ll definitely want to highlight viewing areas where their colors shine.
Choose three to five focal points maximum—too many competing elements will dilute the overall impact. Think of your lighting design like composing a photograph: you want a clear subject with supporting elements, not visual chaos.
Creating Depth and Layers With Light
Think of your pond lighting like a stage production – the magic happens when you work with different levels. A single spotlight creates flatness, but multiple lights at varying heights transform your water feature into something extraordinary.
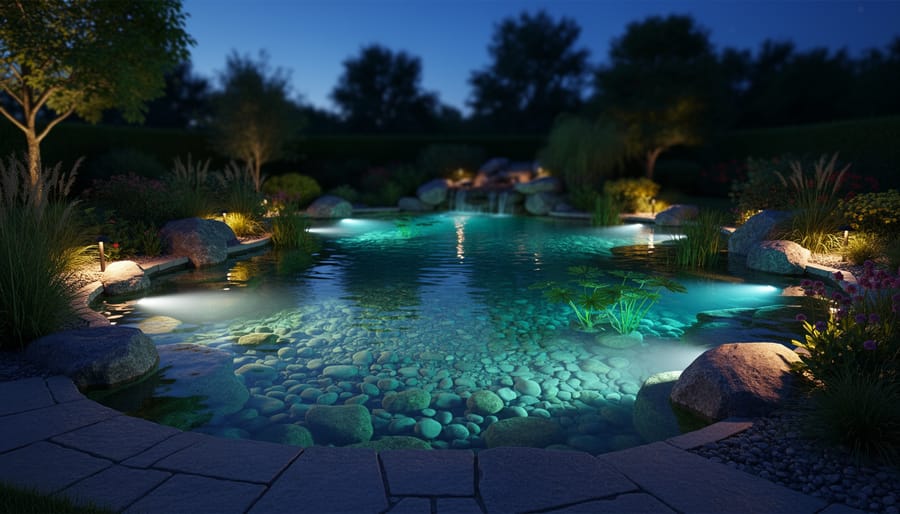
Start by establishing your foundation layer with submersible lights placed at different depths. Position one fixture near the bottom to illuminate from below, creating an ethereal glow through the water. Place another mid-depth to highlight specific features like rocks or plants. This layered approach mimics natural light behavior and adds incredible dimension.
Next, add your mid-level lighting around the pond’s edge. These fixtures should sit just above the waterline, casting light across the surface while creating visual depth through shadows and reflections. I learned this technique after years of struggling with flat-looking pond scenes – the difference is remarkable.
Finally, incorporate elevated accent lights positioned in surrounding plantings or mounted on nearby structures. These overhead sources create dramatic downward beams that interact beautifully with your underwater lighting, producing captivating light patterns on the water’s surface.
The key is avoiding uniform brightness. Vary your light intensities and angles to build mystery and interest. When done thoughtfully, this multi-layered approach transforms your pond from a simple water feature into a mesmerizing focal point that draws the eye and invites exploration.
Choosing the Right Color Temperature
Color temperature makes a huge difference in how your pond looks at night, and honestly, it’s one of my favorite things to experiment with! Think of it this way: warm white lights (around 2700-3000K) give off that cozy, golden glow that makes evening gatherings feel intimate and welcoming. They’re perfect for highlighting warmer stone features and creating that magical sunset effect on your water.
Cool white lights (5000-6500K) produce a crisp, bluish tone that mimics moonlight beautifully. I love using these to make water appear crystal clear and to give modern pond designs that sleek, sophisticated look. They also make green plants pop with incredible vibrancy.
Natural white (around 4000K) sits right in the middle and works wonderfully if you can’t decide. It gives you balanced, true-to-life colors without being too yellow or too blue.
Now, colored lights are where things get really fun! Use them sparingly as accent pieces rather than your main lighting. A soft blue can create depth in deeper areas, while amber adds warmth to waterfalls. I’ve seen purple used to dramatic effect around ornamental grasses.
Here’s my advice: start with warm or natural white as your foundation, then experiment with one or two colored accents. You can always adjust, and that’s part of the joy of creating your perfect nighttime oasis!
Power and Safety Considerations
Low-Voltage vs. Solar Lighting Systems
When you’re choosing lighting for your pond, you’ll likely face the big decision: low-voltage or solar? I’ve used both in my own water gardens, and each has its sweet spot.
Low-voltage systems run on 12V, making them super safe around water. They deliver consistent, reliable brightness that doesn’t depend on weather conditions. If you want dramatic uplighting on a waterfall or need bright path lighting year-round, low-voltage is your friend. The downside? You’ll need to run electrical cable from a transformer to each fixture, which means digging trenches or hiding wires. Installation takes more effort, and there’s a small ongoing cost for electricity.
Solar lights are the ultimate in easy installation. Just stake them in the ground where they’ll get decent sun exposure, and you’re done! No wiring, no electrician needed, and zero energy costs. They’re perfect for accent lighting along pathways or highlighting garden beds near your pond. However, they’re generally dimmer than low-voltage options and won’t work well in shady spots. During winter or cloudy stretches, their performance drops noticeably.
My recommendation? Use low-voltage for your main feature lighting where you need reliability and brightness, like illuminating your pond’s focal points or waterfalls. Then supplement with solar fixtures for peripheral areas, walkways, and garden accents. This combo gives you the best of both worlds without breaking the budget or your back during installation!
Working Safely With Water and Electricity
Water and electricity can be a dangerous combination, but with the right precautions, your pond lighting system will be both beautiful and safe. Let me walk you through the essential safety measures that’ll give you peace of mind while you enjoy those gorgeous nighttime reflections.
First things first: every outdoor electrical outlet near your pond must have a Ground Fault Circuit Interrupter, or GFCI. Think of it as your safety guardian that instantly cuts power if it detects any electrical irregularity. I learned this the hard way when a regular outlet near my first pond kept tripping my circuit breaker. A GFCI would have caught that issue immediately and prevented potential hazards.
When burying electrical cables, go deep. You’ll want them at least 18 inches underground when using conduit, or 24 inches for direct burial cables. This protects them from accidental damage when you’re digging around your garden beds later. Always use outdoor-rated, waterproof connections and junction boxes specifically designed for wet locations.
Here’s my golden rule: if you’re unsure about anything electrical, call a licensed electrician. Running new circuits, installing outdoor outlets, or working with your main electrical panel aren’t DIY projects. The investment in professional help is tiny compared to the safety of your family and home. Many electricians are happy to do the technical work while you handle the creative placement of lights, giving you the best of both worlds.
Installation Tips for Different Pond Features
Lighting Waterfalls and Streams
The magic of moving water truly comes alive when you light it properly! I’ll never forget the first time I positioned a light behind my small waterfall – suddenly, it transformed from a simple trickle into this glowing, ethereal curtain of light. You can achieve this same effect with some thoughtful placement.
For the most dramatic impact, try positioning submersible lights directly behind or underneath your waterfall. This creates that gorgeous backlit glow that makes the water appear to sparkle from within. Aim the light upward through the falling water – it’s like nature’s own fiber optics! Just make sure your light is powerful enough to penetrate the water flow without getting completely washed out.
Don’t overlook front lighting either. Placing lights at the base of your cascade, angled upward, catches all those beautiful droplets and creates dancing reflections. For streams, position lights along the edges rather than dead center. This technique highlights the ripples and movement without creating harsh glare.
A pro tip I learned the hard way: use multiple smaller lights rather than one powerful spotlight. This creates depth and prevents that “floodlight” effect. Experiment with angles before permanently installing – sometimes just a few inches makes all the difference in capturing that perfect shimmer!
Illuminating Aquatic Plants and Landscaping
Showcasing your pond plants through strategic lighting transforms your water garden into an evening masterpiece! I learned this trick after struggling for months with flat, uninspiring nighttime views—proper plant lighting completely changed everything.
Uplighting works wonders for tall vertical plants like papyrus, iris, and cattails. Position submersible or landscape lights at the base, angling upward to cast dramatic shadows and emphasize their graceful height. The light travels through stems and leaves, creating a stunning glow that catches water droplets beautifully.
Backlighting creates those gorgeous silhouettes you see in professional displays. Place lights behind feature plants like ornamental grasses or lotus leaves so they’re positioned between the light source and your main viewing area. This technique highlights leaf shapes and creates depth, especially when combined with a light mist rising from the water.
For textured plants like elephant ears or water lilies, try side lighting at a low angle. This grazing light catches every ridge and vein, turning simple foliage into living sculpture. Use warm white LEDs to enhance natural green tones, or experiment with subtle amber hues for a magical woodland feel.
Remember to start with just a few well-placed lights—you can always add more. The goal is highlighting nature’s beauty, not overwhelming it!
Showcasing Your Fish
There’s something magical about watching your koi glide through illuminated water, their colors dancing in the gentle glow. The key is creating that enchanting view while keeping your finned friends happy and stress-free.
Start by choosing submersible LED lights designed specifically for underwater use. These run cooler than traditional bulbs, which matters because fish are sensitive to temperature changes. Position lights at a 45-degree angle rather than pointing straight up – this creates beautiful ambient illumination without creating harsh beams that can startle fish.
Place your lights strategically near viewing areas, but avoid over-lighting. Too much brightness mimics daylight and disrupts your fish’s natural day-night cycle, causing stress and behavioral issues. I learned this the hard way when my koi became skittish from overly bright fixtures. Dimmer switches are your best friend here, letting you adjust intensity for different times of day.
Install lights along the pond perimeter or behind rocks and plants rather than in open swimming areas. This gives fish safe, shadowy zones to retreat when they want privacy. Aim for warm white or amber tones around 2700-3000K – these wavelengths are less disruptive than cool blues.
Consider putting your underwater lights on a timer, limiting illumination to evening viewing hours. Your fish will thank you with more relaxed, natural behaviors.
Maintenance and Seasonal Adjustments
Keeping your pond lighting system in top shape doesn’t have to be a chore—think of it as part of your regular pond visits! I’ve learned that a quick monthly check makes all the difference. Simply wipe down light fixtures with a soft cloth to remove algae buildup, mineral deposits, and debris. For underwater lights, this is easiest when you’re already doing routine pond maintenance. A gentle scrub with a non-abrasive sponge works wonders, and your lights will shine like new again.
Before winter arrives, take time to inspect all connections and seals. Water can seep into compromised fixtures during freeze-thaw cycles, so address any issues now. In colder climates, consider whether your lights are rated for freezing temperatures. Some pond owners remove certain fixtures for winter storage, while others leave hardy systems in place to enjoy magical winter scenes.
Here’s where it gets exciting—seasonal adjustments let you completely transform your pond’s personality! During spring and summer, when your aquatic plant arrangements are lush and vibrant, adjust lights to highlight new growth and blooming flowers. As autumn approaches, shift focus to illuminating waterfalls and architectural elements that remain stunning after plants die back.
I love changing my lighting scheme with the seasons—warmer tones in autumn create cozy ambiance, while cooler blues in summer enhance refreshing vibes. Many LED systems offer color-changing options, making seasonal transitions simple with just a remote control. Keep a maintenance log noting what works each season, and you’ll develop a rhythm that keeps your pond looking spectacular year-round with minimal effort.
Common Mistakes to Avoid
Let me share some pitfalls I’ve stumbled into over the years so you can skip the learning curve and get straight to the gorgeous results!
The biggest mistake I see is over-lighting. When you’re excited about your new pond lights, it’s tempting to illuminate everything at once. But trust me, more isn’t always better. I once installed seven spotlights around a modest 10-foot pond, and it looked like a landing pad for UFOs! Ponds need shadows and mystery to feel natural. A good rule of thumb is to start with fewer lights than you think you need, then add more only if necessary.
Poor placement ranks as another common blunder. I learned this the hard way when I positioned an underwater light directly beneath my favorite water lily. Instead of highlighting the plant, the light just created a confusing glow that made it hard to see anything. Place lights at angles rather than directly under features, and always consider what you’ll see from your main viewing areas, typically your patio or deck.
Cable management might sound boring, but ignoring it creates safety hazards and eyesores. Exposed cables around water are dangerous, and they ruin the aesthetic you’ve worked so hard to create. Take the time to bury cables properly, use waterproof connectors, and map out where everything runs. Future you will be grateful when you’re doing maintenance or adding new features.
Choosing incompatible fixtures is another wallet-draining mistake. Mixing different voltage systems or using indoor-rated lights outdoors leads to failures and safety issues. Always verify that your fixtures are specifically designed for submersion or outdoor wet conditions, and stick with one voltage system throughout your project.
Finally, don’t skip testing before finalizing placement. Set up your lights temporarily before securing them permanently. Walk around your yard at night and view your pond from different angles. This simple step prevents costly do-overs and ensures you’ll love the results for years to come.
You’ve made it this far, which means you’re ready to transform your pond into something truly magical. Here’s the beautiful truth: you don’t need a professional lighting designer or a hefty budget to create stunning results. Start with just one or two lights in the spots that matter most to you. Maybe that’s highlighting your favorite waterfall, or illuminating the fish you love watching in the evening.
I remember my first attempt at pond lighting—I started with a single submersible spotlight aimed at my fountain. Was it perfect? Not even close. But it sparked something. Over the next few months, I experimented with angles, added an uplight for my Japanese maple, and gradually discovered what worked for my space. That’s the joy of this journey—there’s no pressure to get everything right immediately.
Take your time testing different placements before committing to permanent installations. Move lights around on different evenings, sit with your coffee or evening beverage, and really observe what delights you. Trust your instincts about what looks good, because ultimately, you’re the one who’ll be enjoying this space.
The most rewarding part isn’t the finished product—it’s those quiet moments when you step outside and catch your breath at the shimmering reflections you created. Your illuminated water garden is waiting. Start small, stay curious, and enjoy every glowing moment of the process.