
Why Your Pond Lights Look Murky (And How to Measure What’s Really Happening)
You’ve invested in beautiful pond lights, but peer into the water at night and see only a murky glow instead of the magical underwater display you imagined. The problem isn’t your lights—it’s likely your water clarity, and an underwater light meter can tell you exactly what you’re dealing with.
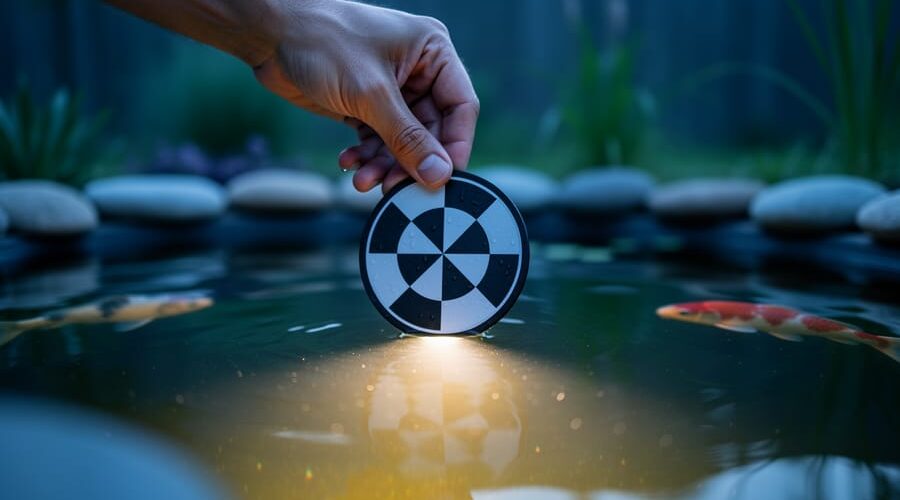
Think of an underwater light meter as a detective tool that measures how far light penetrates through your pond water. While professional aquatic scientists use expensive meters costing hundreds of dollars, you don’t need fancy equipment to diagnose your pond lighting issues. A simple Secchi disk (a white and black disk on a rope) serves the same purpose for under twenty dollars, or you can create a DIY version using a dinner plate and some fishing line.
Here’s what matters: if you can’t see objects clearly beyond two feet deep in daylight, your effective pond lighting will struggle at night regardless of how powerful your fixtures are. The good news? Water clarity is entirely fixable through proper filtration, beneficial bacteria, and regular maintenance—and measuring it is the first step toward those stunning nighttime reflections you’re after.
What an Underwater Light Meter Actually Does
The Science Made Simple: Light and Water Don’t Always Play Nice
Here’s something that surprised me when I first started lighting my pond: water that looked crystal clear during the day made my lights look like they were shining through milk at night. What gives?
The problem is that water and light have a complicated relationship. Even pure water naturally absorbs light as it travels through, but that’s just the beginning of the story. When light hits water, it doesn’t just pass straight through. It bounces around, scatters, and gets absorbed by everything in its path.
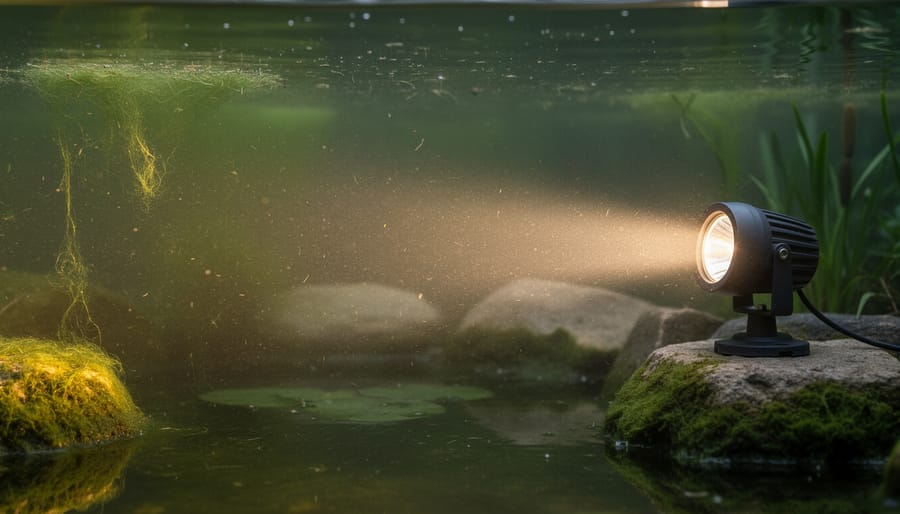
Think of it like driving in fog. You can see the road ahead just fine during the day, but turn on your headlights at night and suddenly that same fog becomes a glowing wall. Your pond works the same way. Those tiny suspended particles, microscopic algae, and dissolved organic matter that are nearly invisible to your eyes become light blockers when your underwater lights switch on.
Here’s the kicker: our eyes are remarkably forgiving. We automatically adjust to different lighting conditions and can see through minor cloudiness without really noticing it. Light, on the other hand, doesn’t adjust. It hits every little particle and either bounces off or gets absorbed. What looks perfectly clear to you might be blocking thirty, forty, or even fifty percent of your light output.
This is exactly why pond owners often feel disappointed with expensive lighting setups. The lights aren’t the problem; the invisible particles stealing your light are the real culprits.
What the Numbers Tell You About Your Pond
Let’s make sense of those numbers on your light meter without turning this into a physics lecture! When you take readings at different depths in your pond, you’re basically getting a report card on how well light travels through your water.
Here’s the simple version: if your meter shows a dramatic drop in light levels within the first foot of water, you’ve got clarity issues. Clear, healthy pond water should allow light to penetrate reasonably well to at least two or three feet deep. Think of it like looking through a window—dirty glass blocks the view, and murky water does the same thing to light.
In practical terms, if you’re getting less than 20% of surface light at one foot deep, your pond is telling you it needs attention before you invest more in lighting. That’s like trying to read by candlelight in a foggy room. On the flip side, if you’re maintaining 40-50% light penetration at that same depth, you’re in great shape for choosing quality pond lights that will actually showcase your fish and plants.
The beauty of understanding these numbers is they give you a baseline. Take readings before you clean your filters, then again after. You’ll actually see the improvement in measurable terms, which makes all that maintenance work feel pretty rewarding! Most importantly, you’ll know whether your lighting disappointment stems from inadequate fixtures or simply water that needs better care.
When You Actually Need a Light Meter (And When You Don’t)
Signs Your Pond Lighting Isn’t Working Because of Water Clarity
Has your pond lighting lost its magic? Here are the telltale signs that murky water might be the culprit, not your lights themselves.
The most obvious indicator is when your lights look disappointingly dim, even though you know the bulbs are fairly new. You turn them on at dusk, expecting that beautiful glow you remember, but instead everything looks washed out and barely visible from the surface.
Another common problem is uneven illumination throughout your pond. Maybe the lights near your waterfall still look decent, but the ones in the deeper areas seem to have disappeared completely. This happens because suspended particles scatter light differently depending on water depth and movement.
You might also notice what I call the “muddy glow” effect—instead of crisp, defined beams highlighting your fish and plants, you see an undefined haze of light that doesn’t seem to penetrate more than a few inches. The water itself appears to glow rather than the objects you’re trying to illuminate.
Perhaps the most frustrating scenario is when your lights worked beautifully last season but now produce lackluster results, even after cleaning the fixtures. This seasonal change often points directly to water clarity issues like algae blooms or accumulated organic matter affecting light transmission.
The DIY Alternative: Testing Water Clarity Without Special Equipment
Before you invest in fancy equipment, here’s some great news: you can assess your pond’s water clarity using simple DIY methods that cost next to nothing. These tests won’t give you precise scientific measurements, but they’ll definitely tell you whether murky water is sabotaging your lighting efforts.
The classic Secchi disk test is wonderfully simple. Create your own disk by painting a white plastic plate or coffee can lid completely white. Attach it to a string with distance markers every six inches. Lower it into your pond during midday and note the depth where it disappears from view. If you can’t see it past 18 inches in a decorative pond, your water clarity needs attention. For reference, many beautiful backyard ponds maintain visibility between 2-4 feet.
An even easier approach is the arm test. On a sunny afternoon, submerge your arm elbow-deep into the water. Can you clearly see your hand? If not, that’s why your underwater lights look disappointing at night.
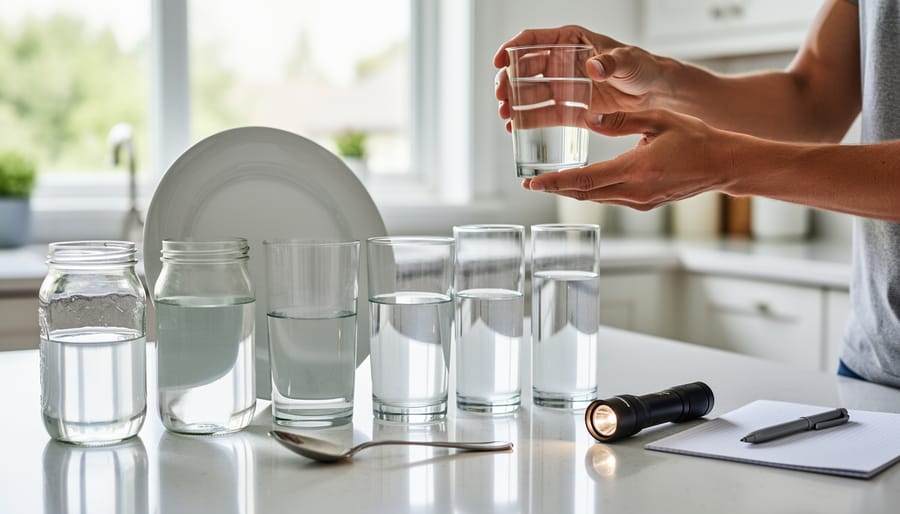
You can also try the glass jar comparison. Fill a clear jar with your pond water and another with tap water. Place both against a white background. The difference in clarity becomes immediately obvious and helps you track improvement as you work on water quality.
These simple methods give you the essential information you need: whether improving water clarity should be your first priority before troubleshooting your lighting system further.
How Water Clarity Changes Your Pond Lighting Game
Choosing the Right Light Intensity for Your Water Conditions
Once you’ve measured your water clarity, it’s time to match your lighting to what you discovered! Think of it like choosing the right bulb for a room—you wouldn’t use the same wattage in a cozy bedroom as you would in a garage workshop.
For crystal-clear water (readings showing excellent transparency), you’re in luck! Standard underwater landscape lights at 3-5 watts or around 200-400 lumens work beautifully. Your water already lets light travel easily, so you don’t need to overpower it. I remember installing 3-watt lights in my friend’s koi pond, and we were amazed at how far the glow reached through that pristine water.
Moderately turbid water needs a bit more oomph. Aim for 7-10 watts or 500-800 lumens. The suspended particles scatter light, so you’ll want brighter sources to compensate. It’s like driving with fog lights instead of regular headlights—you need that extra punch to cut through.
For murky or algae-heavy water, here’s the honest truth: sometimes more light isn’t the answer. Lights above 10 watts might just illuminate the murkiness without creating beauty. Focus on improving water clarity first through filtration and maintenance. Once your readings improve, then invest in quality lighting. Throwing powerful lights at cloudy water is like trying to brighten a dusty window—clean the window first, and you’ll get much better results!
Light Placement Strategies Based on Water Clarity
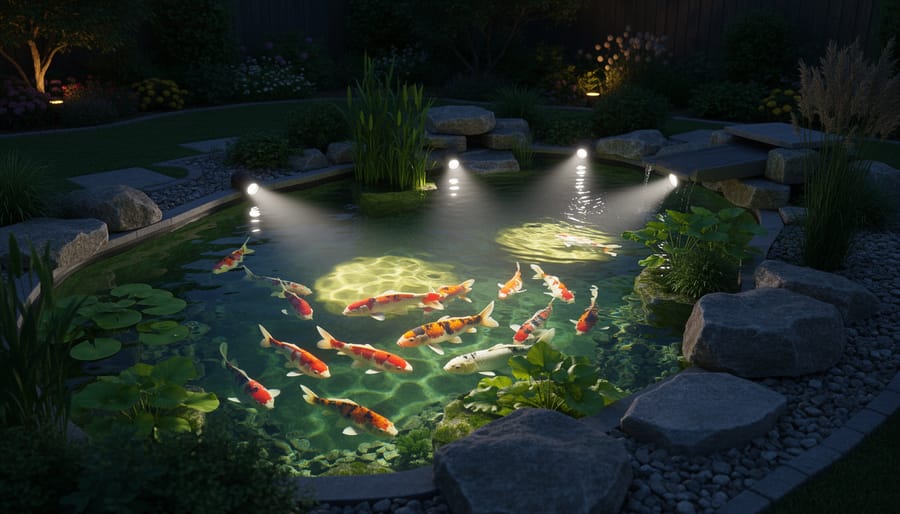
Your light meter readings will guide exactly where and how to position your lights for the best effect. In crystal-clear water, you’re in luck! You can place lights deeper—even at the pond bottom—and space them further apart, since the light travels beautifully through clean water. I’ve seen stunning results with lights positioned 60-90cm apart in pristine ponds, creating an even, magical glow.
Cloudy or murky water tells a different story. When your meter shows rapid light loss over short distances, you’ll need to adjust your koi pond lighting strategies. Position lights shallower and closer together—perhaps 30-45cm spacing—to compensate for the reduced visibility. Consider placing them near the surface or angled upward rather than pointing straight across.
Here’s a practical tip: if your water clarity varies seasonally (spring algae blooms, anyone?), position lights with adjustability in mind. Mount them on movable brackets or use floating fixtures that you can reposition as conditions change. This flexibility means you won’t need to dive in and rewire everything when water clarity improves after your spring cleaning!
Improving Water Clarity to Make Your Lights Shine
Quick Wins: Simple Changes That Improve Light Transmission
Before you invest in fancy equipment or major pond renovations, let’s talk about the simple stuff that can dramatically improve your water clarity and light transmission. I’ve seen ponds transform within days just from these basic tweaks!
Start with the obvious: physically remove debris from your pond. Fallen leaves, grass clippings, and that mysterious sludge at the bottom all block light. Grab a skimmer net and make it a weekly habit. You’ll be amazed at the difference. I once helped a neighbor whose lights barely glowed, and after just one thorough cleaning session, her underwater lights looked twice as bright.
Next, consider adding beneficial bacteria to your pond. These tiny helpers break down organic waste that clouds your water. They’re like having a clean-up crew working 24/7. You can find liquid or powder formulations at any pond supply store, and they’re super easy to use—just pour them in according to the package directions.
Algae control is your next target. While a little algae is normal and even healthy, excessive growth creates that green soup effect that blocks all light. Try adding more aquatic plants, which compete with algae for nutrients. Barley straw is another natural option that slowly releases compounds to suppress algae growth.
Finally, optimize your filtration system. Clean or replace filter media regularly, and make sure your pump is appropriately sized for your pond volume. Better filtration means clearer water, which means your lights can actually do their job and create that magical evening ambiance you’re after.
Long-Term Solutions for Crystal Clear Water
Getting your pond water crystal clear isn’t just about quick fixes—it’s about creating a balanced ecosystem that stays healthy year-round. Think of your pond as a living community where everything works together.
Start with plant power! Submerged plants like hornwort and water lilies are nature’s filtration system. They gobble up excess nutrients that feed algae, and as a bonus, they look gorgeous. I’ve found that covering about 60% of your pond’s surface with plants makes a huge difference in water clarity.
Your biological filtration is the unsung hero of pond health. Consider upgrading your filter media or adding a secondary biological filter if you’re dealing with persistent cloudiness. These filters house beneficial bacteria that break down fish waste and organic matter—basically, they’re your pond’s cleanup crew working 24/7.
UV clarifiers are game-changers for tackling green water caused by suspended algae. They work by zapping algae cells as water flows through, causing them to clump together so your filter can catch them. It’s completely safe for fish and plants.
Don’t forget seasonal maintenance! Spring cleaning removes debris before it becomes a problem, summer means checking filters more frequently, autumn requires netting to catch falling leaves, and winter preparation ensures your system survives the cold months. Consistent care beats emergency interventions every time, and your underwater lights will shine brilliantly through that crystal-clear water.
Tracking Your Progress: Seasonal Monitoring That Actually Helps
Creating Your Pond’s Clarity Calendar
Keeping track of your pond’s clarity doesn’t need to be complicated. I started with a simple notebook by my back door, jotting down readings once a week during pond season. Here’s what works: create a basic chart with the date, your light meter reading (or Secchi disk depth), recent weather, and any changes you’ve made to the pond. That’s it!
After a few weeks, you’ll start noticing patterns. Spring typically brings lower clarity as organic matter wakes up and fish become more active. Summer readings might dip during hot spells when algae blooms, then improve after rain oxygenates the water. These are normal seasonal shifts.
What should concern you? Sudden drops in clarity over just a few days, especially if you haven’t changed anything. Or readings that stay consistently poor even after you’ve addressed the usual suspects like adding beneficial bacteria or cleaning filters.
I recommend taking readings weekly during active months and monthly in winter. Take them at the same spot and time of day for consistency. Your calendar becomes your pond’s story, helping you distinguish between “this happens every June” and “something’s wrong and needs fixing.” This simple habit has saved me from countless unnecessary interventions and helped me catch real problems early.
Here’s the truth: you don’t need fancy equipment or a degree in physics to understand what’s happening with light in your pond. The journey really comes down to paying attention to how light and water work together. Start simple. Try the hand test we talked about—dip your hand in at different depths and see what happens. Drop a white plate into the water on a sunny day. These basic clarity checks tell you everything you need to know about whether your lighting challenges stem from water quality or equipment placement.
Once you understand your water’s clarity, making smart lighting decisions becomes so much easier. You’ll know whether investing in more powerful lights makes sense, or if improving water quality should come first. You’ll stop guessing and start creating the exact ambiance you’ve been picturing.
Remember, every beautiful pond you’ve admired started with someone asking questions and experimenting. Your pond can absolutely become that stunning nighttime focal point you’ve envisioned—the one where fish glide through crystal-clear water illuminated perfectly, where every ripple catches the light just right. Armed with what you now know about underwater optics, you’re already on your way. Take that first measurement, make those adjustments, and watch your pond transform into the glowing oasis you’ve always wanted.