

Save Your Pond: Simple Steps to Fix Liner Leaks Fast
Locate pond liner leaks quickly by adding non-toxic dye to the water and watching for color trails, or inspect the liner during dry conditions for visible tears and punctures. Follow these expert pond leak solutions to restore your water feature’s integrity. Apply a specialized underwater patch kit for immediate temporary repairs, ensuring the surface is clean and dry before application. For permanent fixes, drain the pond partially, thoroughly clean the damaged area, and use EPDM rubber patches with marine-grade sealant, extending the patch at least 2 inches beyond the tear edges. Prevention is equally crucial – install protective underlayment, remove sharp objects, and maintain proper water levels to avoid future liner stress. These proven repair methods work for both small punctures and significant tears, restoring your pond’s beauty and functionality without requiring complete liner replacement.
Signs Your Pond Has a Liner Leak
Visual Indicators
The first step in fixing a pond liner leak is identifying its location through clear visual indicators. The most obvious sign is a noticeable drop in water level that exceeds normal evaporation rates. While all ponds lose some water naturally, a drop of more than one inch per week typically signals a leak.
Keep an eye out for soggy spots or unusually lush grass patches around your pond’s perimeter. These wet areas often indicate where water is escaping. You might also notice exposed liner edges, particularly after heavy rains or when soil erosion occurs.
Check for bubbles or wrinkles in the liner, as these can indicate water accumulation underneath. Sometimes, you’ll spot actual tears or holes, especially near rocks or other sharp objects. In deeper areas, look for swirling or circular patterns in the water, which might suggest water being pulled through a hole.
During winter, pay attention to uneven ice formation or areas that won’t freeze – these could point to spots where warmer water is leaking. Remember, catching these signs early makes repairs much easier and prevents extensive damage.
Water Loss Tests
Before diving into repairs, it’s essential to confirm you have a leak and determine its severity. The bucket test is a simple yet effective method to measure water loss. Place a bucket filled with water next to your pond and mark the water levels in both. After 24 hours, compare the levels – if your pond has dropped more than the bucket, you’ve got a leak.
For a more precise measurement, mark your pond’s water level with tape or a marker. Check the level every 24 hours for 3-4 days. If the water stops dropping at a certain point, the leak is likely at that level. If it continues dropping until empty, the leak is probably at the bottom.
During dry weather, look for unusually damp spots around your pond’s perimeter. These wet areas often indicate where water is escaping. Also check for water loss during rain – if your pond level drops even during wet weather, it confirms a liner issue rather than natural evaporation.
Remember to account for normal evaporation, which typically causes about 1 inch of water loss per week during warm weather.
Finding the Leak
The Dye Test Method
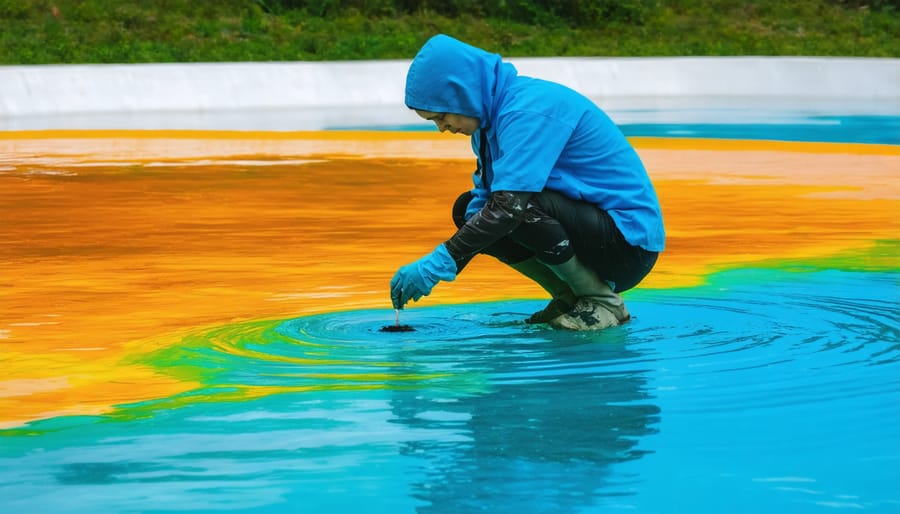
The dye test method is one of the most reliable ways to locate a leak in your pond liner. You’ll need a bottle of non-toxic pond dye, which comes in various colors like blue or green. Start by turning off your pond pump and letting the water settle completely – this helps prevent the dye from dispersing too quickly.
Drop small amounts of dye near suspected leak areas, particularly around folds, seams, or any visible damage in the liner. The dye will naturally follow the water’s flow, creating a visible trail that leads directly to the leak. Pay special attention to areas where the water level stops dropping, as this is typically where the leak is located.
Work methodically around your pond, section by section. Sometimes, you’ll need to wait a few minutes to see the dye movement clearly. If you’re having trouble seeing the dye in deeper areas, try using a flashlight to improve visibility. Remember to test around any plumbing connections, skimmers, and waterfall areas, as these are common leak points.
For best results, perform the dye test on a calm day when there’s minimal wind to disturb the water surface. Once you’ve identified the leak location, mark it clearly with a marker or small flag so you can easily find it again when making repairs.
Visual Inspection Techniques
Start by draining your pond water to just below the suspected leak area. For the most thorough inspection, you’ll want to examine the liner when it’s slightly damp but not submerged. Take a slow, methodical approach, working in small sections at a time.
Look for obvious signs first: tears, punctures, or worn areas that appear thinner than the rest of the liner. Pay special attention to corners, folds, and areas near rocks or other features where stress might occur. Run your hands gently along the liner’s surface – sometimes you can feel damage that’s hard to see.
For harder-to-spot leaks, try these visual inspection techniques:
– Use a bright flashlight at different angles to spot potential holes
– Look for discolored areas or algae growth, which might indicate water seepage
– Check for wet soil or unusually lush plant growth outside the pond
– Inspect seams and edges where the liner meets other materials
If these methods don’t reveal the leak, try the dye test. Add a few drops of non-toxic food coloring near suspected areas while the water is still. Watch carefully – the dye will be pulled toward any leaks, making them easier to spot. Mark any discovered damage points with a waterproof marker for easier repair later.
Fixing Your Pond Liner
Small Punctures and Tears
Small punctures and tears in your pond liner can be effectively repaired using patches and underwater sealants. Before starting any repair, gather your essential pond repair tools, including a patch kit, underwater sealant, scissors, and cleaning materials.
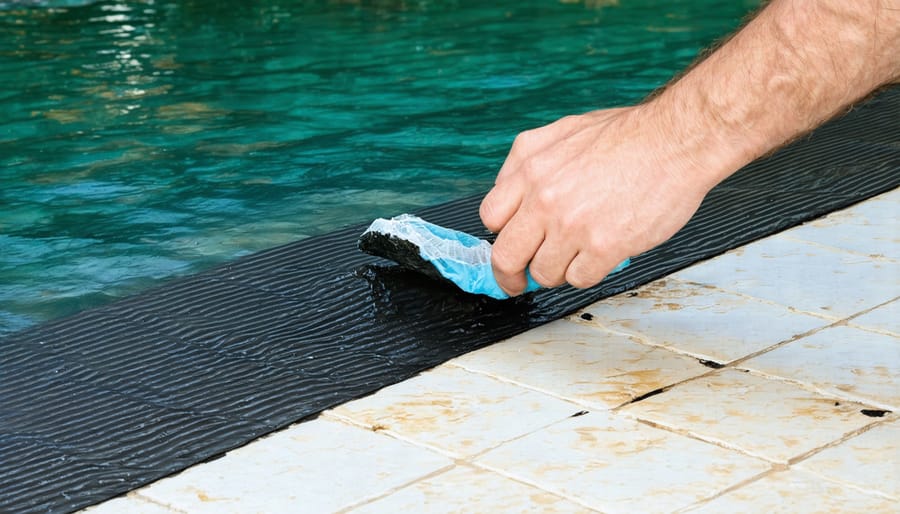
First, thoroughly clean the damaged area using a soft cloth to remove any algae, dirt, or debris. For underwater repairs, specialized pond patches with strong adhesive backing work best. Cut your patch to extend at least 2 inches beyond the damaged area on all sides to ensure a secure seal.
For above-water repairs, dry the area completely before applying the patch. Peel off the backing and press the patch firmly onto the liner, working from the center outward to prevent air bubbles. Some patches work best when heated slightly with a hairdryer to activate the adhesive.
For underwater repairs, use a self-adhesive underwater patch or specialized pond sealant. These products are designed to bond even in wet conditions. Apply firm pressure for several minutes to ensure proper adhesion. If possible, temporarily lower the water level below the repair area for better results.
Let the patch cure for at least 24 hours before fully refilling the pond. Monitor the repair site over the next few days to ensure the seal holds properly. For extra protection, consider applying a second patch over the first one after the initial repair has cured.
Large Tears and Seam Repairs
For larger tears and seam separations, you’ll need to take a more comprehensive approach than simple patch jobs. Start by thoroughly cleaning and drying the damaged area – this means removing any algae, dirt, or debris using a mild soap solution and letting it dry completely.
For tears longer than 6 inches, cut a patch that extends at least 3 inches beyond all sides of the damage. Round the corners of your patch to prevent future lifting. EPDM or PVC patches work best, but they must match your liner material for proper adhesion.
Apply a generous layer of pond liner sealant in a circular motion, starting from the center and working outward. Press the patch firmly into place, working from the middle toward the edges to prevent air bubbles. Use a roller tool or the edge of a credit card to ensure complete contact.
For seam repairs, you’ll need to overlap the separated edges by at least 4 inches. Apply seam tape between the layers, then seal the edges with liner sealant for extra protection. In cold weather, consider using a heat gun to warm the patch area slightly – this helps the adhesive bond more effectively.
Let the repair cure for at least 24 hours before refilling your pond. For extra protection, consider applying a second patch over the first one, offsetting it slightly to create a double-seal effect.
Emergency Temporary Fixes
When you discover a pond liner leak and can’t make permanent repairs immediately, several temporary solutions can help minimize water loss until you can fix the problem properly. One quick fix is applying waterproof tape specifically designed for pond liners – press it firmly over the leak while the surface is as dry as possible. For small punctures, you can use a specialized underwater sealant that works even in wet conditions.
Another emergency solution is placing a heavy-duty tarp over the affected area, weighing it down with rocks or bricks. This won’t seal the leak completely but can significantly reduce water loss. For tears near the pond’s edge, you can temporarily lower the water level below the damaged area and use a combination of bentonite clay and sand to create a temporary seal.
If you can’t locate the exact leak but need to maintain water levels, adding a continuous slow flow of fresh water can help balance the loss until permanent repairs are possible. Keep in mind that these are short-term solutions and shouldn’t be relied upon for more than a few days to a week.
Monitor your temporary fix closely and plan for permanent repairs as soon as possible. While these quick fixes can buy you time, they’re not substitutes for proper repair methods that will ensure your pond’s long-term health and stability.
Preventing Future Leaks
Regular Maintenance Checks
To prevent future liner leaks, establishing a regular maintenance schedule is crucial for your pond’s longevity. Make it a habit to perform essential pond maintenance checks at least once every season, with more frequent inspections during spring and fall.
Create a simple checklist and mark your calendar for these routine inspections:
Monthly Checks:
– Walk around the pond’s perimeter, looking for obvious signs of water loss
– Check for any visible tears or damage in exposed liner areas
– Monitor water levels and mark them to track any unusual drops
– Inspect the edges where the liner meets the ground for proper coverage
Seasonal Checks:
– Remove debris and clean around the pond edges
– Check for plant root penetration through the liner
– Inspect for UV damage in exposed areas
– Look for signs of animal activity near the liner
– Test seams and patches from previous repairs
During each inspection, pay special attention to:
– Areas around pond features like waterfalls and streams
– Spots where the liner folds or creases
– Regions near sharp rocks or landscaping elements
– Places where plants or roots contact the liner
Keep a maintenance log to track any concerns or repairs, making it easier to identify potential problem areas before they become serious leaks. Remember to address any issues promptly to prevent more extensive damage.
Protective Measures
Preventing pond liner damage is just as important as knowing how to fix it. Start by ensuring your pond base is properly cushioned with sand or underlayment material to protect against sharp rocks or roots. Remove any nearby trees or bushes with aggressive root systems that could puncture your liner over time.
Regular maintenance is crucial – follow these water feature maintenance tips to keep your pond in top condition. Install protective edging or rocks around the pond’s perimeter to shield the liner from UV damage and prevent it from becoming brittle. When placing decorative rocks inside your pond, add a protective layer of fabric underneath to prevent friction damage.
Keep pets and wildlife in mind by creating gentle slopes and avoiding sharp edges where animals might tear the liner. During seasonal maintenance, never drag equipment across the liner – always lift and place carefully. If you live in a cold climate, use a pond heater during winter to prevent ice damage, and maintain proper water levels to avoid stress on the liner.
Consider installing protective fencing if you have active pets or children who might accidentally damage the pond. When adding new plants, use proper planting baskets to prevent root penetration, and regularly trim any invasive plant growth that could compromise the liner’s integrity.
A leaking pond liner can be frustrating, but with the right approach and prompt attention, it’s a problem you can definitely solve. Remember to start by carefully identifying the leak location using the dye test or observation method. Once found, apply temporary fixes like patch kits or waterproof tape for immediate relief, then plan for a permanent solution using appropriate repair methods for your liner type. Regular maintenance and inspection can help prevent future leaks, saving you time and money in the long run. Don’t let a small leak become a bigger problem – addressing it quickly will help preserve your pond’s beauty and protect your aquatic ecosystem. With these repair techniques in your DIY toolkit, you can keep your water garden healthy and vibrant for years to come.