
Transform Your Pond into Art: How 3D Design Creates Stunning Water Features
Transform your backyard pond into a stunning visual masterpiece by mastering the art of 3D pond drawing. Creating depth, dimension, and dynamic sculptural elements brings your water feature to life, making it a focal point that captures attention from every angle. Start by sketching your pond’s basic outline on graph paper, using multiple perspectives to visualize the complete three-dimensional structure. Layer your design with varying depths, incorporating shallow shelves for aquatic plants and deeper zones for fish, creating natural transitions that mirror real-world water ecosystems. Consider how sunlight and shadows will play across your pond’s surface throughout the day, positioning rocks, waterfalls, and plantings to maximize these natural effects. This thoughtful approach to 3D pond design doesn’t just result in a beautiful water feature – it creates an immersive landscape that draws viewers in and provides a harmonious habitat for aquatic life.
Understanding 3D Pond Design Basics
Vertical Layers and Depth Zones
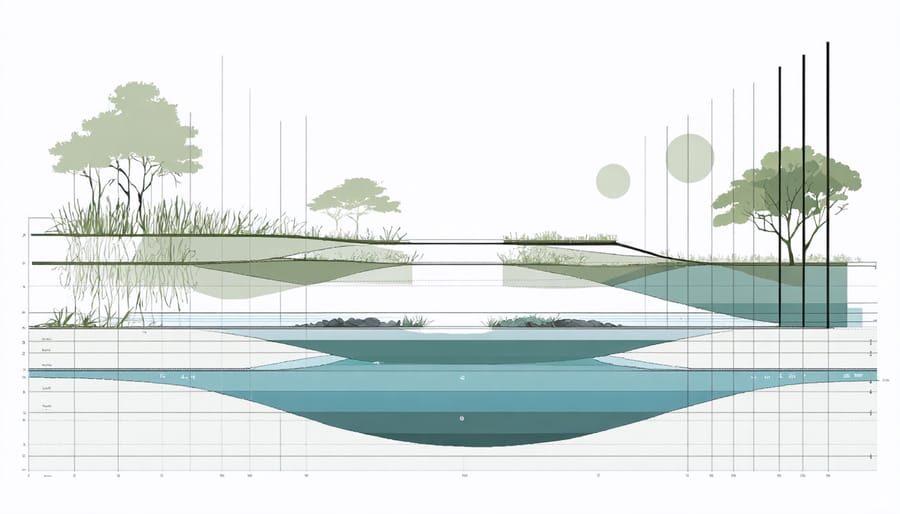
Creating depth in your pond drawing starts with understanding the natural layers that exist in water features. Begin by sketching three distinct zones: shallow, middle, and deep. The shallow zone, typically 6-12 inches deep, provides a gentle entry point and houses marginal plants. Your middle zone, ranging from 12-24 inches, creates perfect spots for aquatic plants and adds visual interest. The deepest zone, usually 24-36 inches, offers fish a safe haven and helps maintain stable water temperatures.
When drawing these layers, use varying line weights to show depth transitions. Darker, heavier lines represent deeper areas, while lighter strokes indicate shallow sections. Add visual markers like rock shelves, plant shelves, and gentle slopes between zones. These transitions should flow naturally, avoiding sharp drops that could be dangerous for wildlife or difficult to construct.
Consider incorporating multiple viewing angles in your drawing to showcase how these layers interact. This helps visualize the final result and ensures your design achieves both aesthetic appeal and practical functionality. Remember to indicate measurements clearly on your drawing to guide the actual construction process.
Natural Contours and Elevation Changes
When creating a 3D pond design, incorporating natural contours and shapes is essential for achieving a realistic, dynamic appearance. Start by identifying the natural slope of your land and use these existing elevation changes to your advantage. Rather than drawing perfectly straight lines or uniform depths, sketch gentle curves that mirror what you’d find in nature.
Consider creating multiple depth zones within your pond design, with gradual transitions between each level. These varying depths not only add visual interest but also provide different habitats for aquatic plants and fish. When drawing your elevation changes, use light pencil strokes to indicate shallow areas and darker, more pronounced lines for deeper sections.
Don’t forget to include beach-like entry points where the water meets the land. These gradual slopes create a more natural transition and make maintenance easier. Add subtle undulations along the pond’s edge to create mini-peninsulas and quiet coves, making the design feel more organic and less artificial. Remember, nature rarely follows perfect geometrical patterns, so embrace irregular curves and flowing lines in your design.
Essential Elements of 3D Pond Features
Waterfalls and Cascades
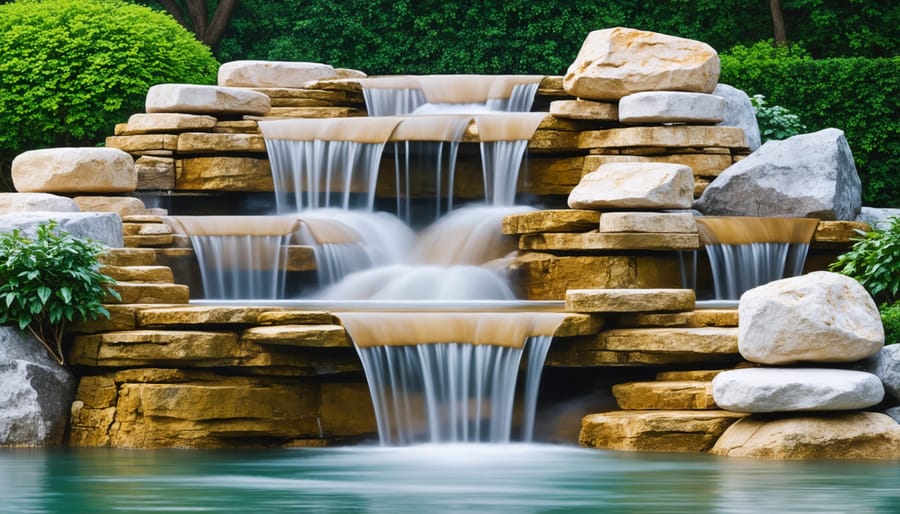
Moving water features bring life and drama to your 3D pond design, creating focal points that captivate visitors. When drawing waterfalls and cascades, start by sketching the basic rock formation that will support your water feature. Layer your rocks naturally, ensuring each level has a slight backward tilt to direct water flow inward rather than splashing outward.
For realistic cascade effects, draw water paths that vary in width and follow natural gravitational flow. Include small collection pools or shelves where water can gather before continuing its journey downward. These resting points add visual interest and create soothing sounds when built.
Consider different waterfall styles in your design: sheet falls for dramatic impact, stepped cascades for gentle movement, or multiple streams for a natural brook effect. When sketching the water itself, use flowing lines and indicate movement with directional arrows to guide construction later.
Remember to include practical elements in your drawing, such as hidden plumbing access points and strategically placed rocks that will direct water flow. Show depth variations in your pools and indicate spots where lighting could enhance nighttime drama.
Add details like spray patterns and ripple effects to help visualize the final result. These elements are crucial for planning pump sizes and water volume requirements. Include notes about desired sound levels and viewing angles to ensure your cascade creates the perfect ambiance for your pond setting.
Rock Placement and Stacking
Creating natural-looking rock arrangements is essential for bringing your 3D pond design to life. Start by selecting rocks of varying sizes, from large anchor stones to smaller accent pieces. Think of rock placement as telling a story – each stone should look like it naturally belongs where you’ve placed it.
When stacking rocks, always position the largest, flattest stones at the base to create a stable foundation. Imagine how water would naturally flow around these rocks in nature, and arrange them accordingly. Avoid perfectly symmetrical patterns, as these can look artificial. Instead, create irregular groupings that mimic natural rock formations.
Layer your rocks with the grain patterns facing the same direction, just as they would appear in nature. Leave small gaps between some stones to create planting pockets for aquatic plants or hiding spots for pond life. These spaces add depth and interest to your design while serving practical purposes.
A helpful technique is to partially bury some rocks, making them appear as if they’ve been there for years. This creates a more established look and helps anchor the stones securely. When placing rocks around waterfalls or streams, angle them slightly inward to direct water flow back into the pond.
Remember to step back frequently and view your rock arrangement from different angles. This helps ensure your design looks natural and balanced from all viewing points. Make adjustments as needed until you achieve a composition that feels organic and harmonious with your overall pond design.
Plant Shelves and Terracing
Creating depth and visual interest in your pond design involves thoughtful placement of planted areas at different heights. By incorporating terraced shelves and graduated planting zones, you can achieve a more natural, three-dimensional look that mimics the varied topography found in nature.
Start by sketching multiple planting shelves at different depths in your pond design. The uppermost shelf, typically 2-4 inches below water level, is perfect for shallow-water plants like marsh marigolds and rushes. A middle shelf, around 8-12 inches deep, accommodates various smart planting strategies for marginal plants such as iris and pickerelweed.
Consider creating “stepped” terraces along the pond’s edges using natural stone or preformed shelves. These not only provide stable platforms for potted aquatic plants but also create interesting shadows and reflections in the water. When drawing your design, use different line weights to show depth changes and include small sketches of proposed plant varieties at each level.
Don’t forget to incorporate dry shelves above the waterline for moisture-loving terrestrial plants. These areas can be built using stacked rocks or constructed planters, creating a seamless transition between your pond and the surrounding landscape. Remember to leave enough space between shelves for easy maintenance access and future plant growth.
Practical Implementation Tips
Planning Your Layout
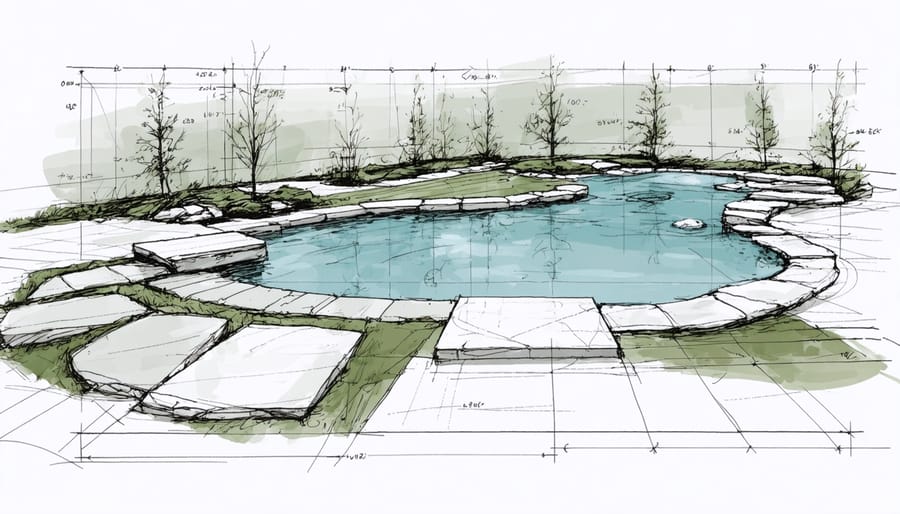
Before diving into the detailed design of your 3D pond, taking time to plan your layout is crucial for success. Start by grabbing a sheet of paper and sketching your pond’s basic shape from a bird’s-eye view. Don’t worry about artistic perfection – even simple shapes will help you visualize the final result.
Consider using graph paper for more precise measurements, where each square can represent one foot or meter of actual space. This helps maintain proper scale and ensures your design will fit your available area. Mark key elements like depth variations, shelves for plants, and any planned waterfalls or streams.
Once you have your top-down view, create side-view sketches (called elevations) showing the different depths and layers of your pond. These drawings help you understand how the vertical elements will work together and where to place essential features like filtration systems and lighting.
To add dimension to your planning, try using tracing paper overlays. Layer different aspects of your design – one for the basic shape, another for depth contours, and a third for landscaping elements. This technique allows you to experiment with different arrangements without starting over each time.
For a more tech-savvy approach, consider using free online drawing tools or garden design apps. These digital solutions let you easily modify your design and often come with pre-made elements you can incorporate into your plan.
Remember to mark the location of existing features like trees, utilities, and structures that might affect your pond’s placement. Also, indicate the direction of natural water flow to ensure proper drainage and prevent future issues.
Construction Techniques
When creating 3D elements in your pond, safety and stability are paramount. Start by ensuring your foundation is solid – compact the soil thoroughly and use a level to check for evenness. For vertical structures, always work from the bottom up, establishing a wider base that gradually tapers as you build height.
Consider using lightweight materials like foam blocks or specially designed pond construction blocks for larger features. These are easier to handle and won’t put excessive pressure on your liner. When stacking rocks or creating waterfalls, incorporate a slight backward tilt of about 10-15 degrees to ensure water flows properly and prevent toppling.
For intricate details, try using flexible liner material to create natural-looking folds and crevices. Secure each layer with appropriate planting media selection and pond-safe adhesive where needed. Remember to leave small pockets and ledges for adding plants later – these will help integrate your 3D features naturally into the landscape.
When working with concrete or mortar, always use fish-safe products and allow proper curing time before introducing water. Create texture by pressing natural materials like leaves or bark into partially set surfaces. For smoother transitions between different elements, use river rock or gravel to disguise joints and edges.
Test water flow patterns frequently during construction by using a garden hose to simulate your waterfall or stream. This helps identify and fix any potential issues before they become permanent problems. Always work methodically and take time to step back and assess your progress from different angles.
Maintenance Considerations
Seasonal Care Requirements
Each season brings unique challenges and opportunities for maintaining your 3D pond features. In spring, focus on cleaning any winter debris and checking for damage from frost or ice. This is the perfect time to refresh paint or sealants on your 3D elements and ensure they’re securely anchored after winter thaws.
Summer requires regular cleaning to prevent algae buildup on your 3D features, especially in areas where water splashes. Keep an eye on water levels, as evaporation can expose parts of your sculptural elements that should remain submerged. Consider adding floating plants to provide natural shade and balance.
Fall maintenance involves removing fallen leaves before they sink and decompose. Take photos of your 3D features’ placement and connections – this documentation will be invaluable for spring setup.
For winter protection, decide whether to remove smaller 3D elements entirely or leave them in place with appropriate protection. In freezing climates, consider using pond heaters around valuable 3D features to prevent ice damage. If leaving elements in place, ensure they’re deeply anchored to withstand ice movement.
Troubleshooting Common Issues
When creating 3D pond features, you might encounter some common challenges. If your design appears flat despite your best efforts, try adding more contrast between light and dark areas to create depth. Struggling with perspective? Use a grid system as a guide to maintain proper proportions throughout your drawing.
For those finding it difficult to achieve realistic water effects, start by practicing simple ripple patterns separately before incorporating them into your main design. If your underwater elements look disconnected, remember to add shadows beneath them and subtle distortion effects through the water’s surface.
Color mixing issues are also common – if your water colors appear muddy, work in layers starting with lighter tones and gradually build up to darker shades. When shadows appear too harsh, soften them using gentle blending techniques or a slightly damp brush.
Digital artists might face pixelation problems when scaling their designs. Always work at a higher resolution than needed and reduce the size later. For traditional artists, if your paper warps from too much water, use proper watercolor paper and tape down the edges before starting.
These solutions should help you overcome the most frequent obstacles in creating stunning 3D pond artwork.
Creating a 3D pond design is an exciting journey that can transform your outdoor space into a dynamic, multi-dimensional oasis. By incorporating various levels, depths, and sculptural elements, you can craft a water feature that captivates from every angle. Remember that successful 3D pond design combines careful planning, creative vision, and attention to detail. Whether you’re starting with simple sketches or using digital tools, the key is to visualize your pond as a living, breathing ecosystem. Don’t be afraid to experiment with different design elements and materials to achieve your desired effect. With the techniques and principles we’ve discussed, you’re well-equipped to bring your three-dimensional pond vision to life. Start small if needed, but dream big – your perfect 3D pond design awaits!