
Set It and Forget It: Your Pond’s Self-Maintaining Water Change System
Transform your pond maintenance routine from a weekly chore into a completely hands-free operation by installing a simple automatic water change system that works while you sleep. Picture this: crystal-clear water, healthy fish, and thriving plants without ever hauling another bucket or wrestling with hoses on Saturday mornings.
Your pond loses water daily through evaporation and fish waste constantly builds up harmful compounds, creating a maintenance treadmill that never stops. An automatic system solves both problems simultaneously by adding fresh water on a timer while removing old water through an overflow drain, exactly like your car’s transmission gets serviced on schedule to prevent damage.
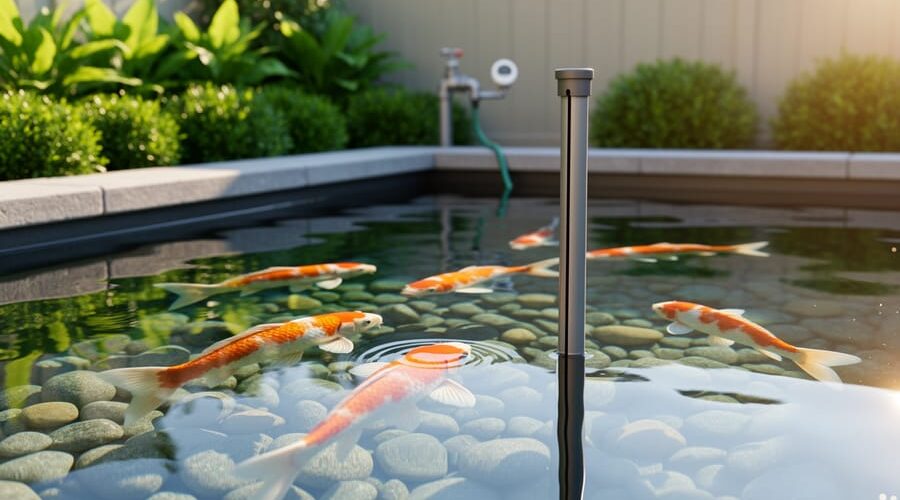
Set up a basic drip system using a garden timer connected to your outdoor spigot, feeding fresh water at a slow, steady rate into your pond. Position an overflow pipe or standpipe at your desired water level to drain excess water carrying dissolved waste products. The incoming water pushes out the old, maintaining perfect water chemistry without shocking your fish or disrupting beneficial bacteria colonies.
This set-it-and-forget-it approach does more than save time. It creates stable water conditions that prevent the dramatic swings in temperature, pH, and toxin levels that stress fish and trigger algae blooms. Your pond becomes a self-regulating ecosystem requiring minimal intervention, giving you more time to actually enjoy watching your koi glide through pristine water instead of scrubbing filters and testing chemical levels every weekend.
Why Your Pond Needs Regular Water Changes (Just Like Your Car Needs Transmission Service)
What Happens When You Skip Water Changes
Think of your pond like a car’s transmission – skip the regular maintenance, and you’re headed for trouble. When you neglect water changes, ammonia from fish waste starts building up like sludge in an engine. This invisible toxin stresses your fish, weakening their immune systems and making them vulnerable to disease.
I learned this the hard way when I got busy one summer and skipped a few weeks of water changes. My once-clear pond turned into murky green soup practically overnight. The water became cloudy, algae bloomed like crazy, and my beloved koi started hanging near the surface, gasping for oxygen. It’s a heartbreaking sight that no pond owner wants to see.
The problem compounds quickly because poor water quality creates a vicious cycle. Excess nutrients feed algae growth, which depletes oxygen levels even further. Your beneficial bacteria struggle to keep up, and suddenly you’re dealing with fish illness, foul odors, and a pond that looks more like a swamp than the peaceful water feature you envisioned. Just like ignoring transmission service leads to expensive repairs, skipping water changes transforms simple maintenance into a full-blown crisis that’s much harder and costlier to fix.
The Manual Water Change Burden
Let’s be honest—manual water changes are nobody’s idea of a good time. We’ve all been there: dragging hoses across the yard, standing around waiting for tanks to fill or drain, and trying to remember when we last did a water change (was it two weeks ago or three?). It’s backbreaking work, especially when you’re dealing with larger ponds that need significant water volume replaced regularly.
The real problem isn’t just the physical effort, though that’s certainly part of it. It’s the consistency challenge. Life gets busy, weekends fill up with other commitments, and suddenly that essential water feature maintenance keeps getting pushed to next week. Before you know it, your pond water quality has declined, your fish are stressed, and you’re facing a much bigger problem than a simple routine water change would have prevented.
I’ve talked to countless pond owners who admit they procrastinate on water changes simply because it feels like such a chore. The good news? There’s a better way that takes the burden off your shoulders entirely.
How Automatic Water Change Systems Work
The Continuous Drip Method
Think of the continuous drip method as the most hands-off approach you’ll find for keeping your pond sparkling clean. It’s beautifully simple: you set up a slow, steady trickle of fresh water flowing into your pond while an overflow drain removes the same amount of old water. The magic happens because the exchange is so gradual that your pond never experiences those stressful water quality swings.
I discovered this method after years of doing weekly water changes that left me exhausted every Sunday. Now, my setup runs 24/7 without any input from me. The constant flow dilutes fish waste, excess nutrients, and harmful compounds before they can build up. You’ll adjust your drip rate based on your pond size, typically aiming to replace about 10-20% of your water volume weekly when spread across all seven days.
The beauty is in its gentleness. Fish don’t experience sudden temperature changes, beneficial bacteria colonies stay happy, and algae struggles to establish itself. Just connect a hose with a valve to control flow rate, position your overflow strategically, and you’re done. It’s the ultimate set-it-and-forget-it solution.
The Scheduled Exchange Method
Think of the scheduled exchange method as your pond’s regular maintenance appointment. Just like your car gets transmission fluid changes at specific mileage intervals, this system performs larger water changes at set times, whether weekly, bi-weekly, or monthly.
Here’s how it works: A programmable timer controls both the drain and fill valves. When the scheduled time arrives, the system drains a predetermined amount of old water (typically 10-25% of your pond’s volume), then automatically refills it with fresh, treated water. The whole process happens while you’re at work or sleeping.
I love this method because it mimics what experienced pond keepers already do manually. You’re essentially automating your good habits! The key advantage is consistency. Your pond gets its water change every single time, on schedule, without fail. No more forgetting or putting it off because you’re busy.
The best part? You can adjust the schedule seasonally. During hot summer months when water evaporates quickly and fish are more active, schedule more frequent exchanges. In cooler months, dial it back. This flexibility lets you match nature’s rhythms while maintaining that hands-off convenience we all appreciate.
What You’ll Need to Build Your System
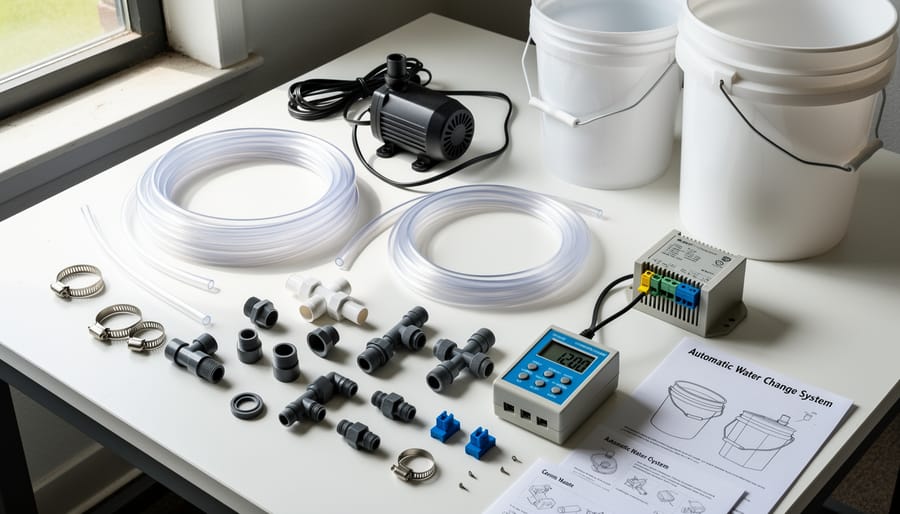
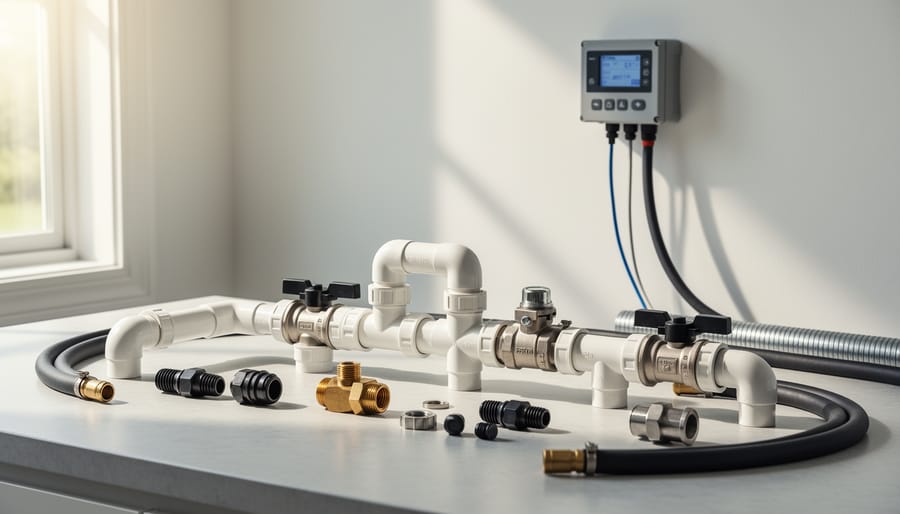
Water Supply Components
Let’s talk about getting fresh water into your pond system! Think of this as the fuel line for your automatic setup – you need a reliable source and the right controls to make everything work smoothly.
Your water source is typically your garden hose connection or a dedicated outdoor spigot. I remember my first attempt using a regular hose bib – worked like a charm! Just make sure you have good water pressure, somewhere between 40-60 PSI is ideal. You’ll want to install a Y-splitter if you need that hose for other tasks too.
Now here’s where it gets fun. A flow restrictor is your best friend – it’s a simple device that limits how fast water enters your pond. You don’t want a firehose effect startling your fish! I use a quarter-inch drip irrigation valve that delivers about half a gallon per minute. Perfect for a gentle, steady fill.
For timing, you have options. Mechanical hose timers cost around twenty dollars and work brilliantly for basic schedules. Set it to run for fifteen minutes daily, and you’re golden. Digital programmable timers give you more flexibility with multiple daily sessions if needed.
Water conditioner dosing is optional but recommended, especially if you have chlorinated tap water. You can either dose manually during setup or install an inline dosing system that automatically treats incoming water. Some pond keepers prefer a mixing chamber where conditioner pre-treats the water before entering the pond.
Drainage Components
Now let’s talk about getting water out of your pond, because what goes in must come out! The drainage side of your automatic system is just as important as the inlet, and there are several clever ways to handle it.
The simplest solution is an overflow drain, which works exactly like your bathtub. Install a standpipe or overflow outlet at your desired water level, and excess water naturally spills out. I love this method because it’s foolproof and requires zero maintenance. Position your overflow to drain into a garden bed or rain garden, and you’re recycling that nutrient-rich water beautifully.
Siphon systems offer another hands-off approach. Once water reaches a certain level, gravity creates a siphon that drains a predetermined amount before automatically stopping. These are fantastic for creating regular water changes on a schedule, though they do require careful setup to work properly.
Float valves can also control drainage by triggering a drain valve when water rises too high. Think of them as the opposite of your inlet float valve, working together like a perfect team. This option pairs wonderfully with external pond filters because you’re constantly refreshing the water they’re working to clean.
Whatever drainage method you choose, make sure it can handle your maximum flow rate. A blocked or undersized drain means overflow where you don’t want it, which defeats the whole purpose of automation. Always include a backup overflow as your safety net.
Building Your Automatic Water Change System: Step-by-Step
Step 1: Planning Your Setup
Before diving into building your system, let’s take a thoughtful look at what your pond actually needs. I learned this the hard way when I excitedly installed a setup for my 500-gallon koi pond, only to realize I was changing too much water too quickly and stressing my fish!
Start by measuring your pond’s volume. Grab a calculator and multiply length times width times depth, then multiply by 7.5 to get gallons. This number is your foundation for everything else.
Next, consider what lives in your pond. Fish-heavy ponds typically benefit from changing 10-15% of water weekly, while plant-focused water gardens might only need 5-10%. I’ve found goldfish are pretty forgiving, but koi appreciate more frequent changes to keep nitrates low.
Now think about your water source. Municipal water with chlorine needs dechlorination, while well water might be perfect as-is. Test your tap water first to avoid surprises.
Finally, choose your system type. Drip systems work beautifully for small ponds under 1,000 gallons, running continuously at a trickle. Timed systems suit larger setups, replacing water in scheduled batches. For my medium-sized pond, a simple timer-controlled valve connected to a garden hose does the trick perfectly, running twice weekly for thirty minutes.
Step 2: Installing the Water Supply Line
Now it’s time to get water flowing to your pond! Start by locating your water source – this could be an outdoor spigot, garden hose connection, or dedicated water line. I remember my first attempt involved running a bright green garden hose across my entire yard until a friend gently suggested I could bury it!
For flow control, install a simple ball valve or timer-controlled solenoid valve near your water source. This lets you adjust how much water enters your pond during each cycle. A basic hose timer from your local hardware store works wonderfully for beginners and costs under twenty dollars.
If your tap water contains chlorine or chloramines (check with your water company), consider adding an inline dechlorinator filter between the source and your pond. Your fish will thank you! These filters are straightforward to install – just attach them like you would any garden hose connector.
For aesthetics, bury your supply line about six inches deep if you’re using flexible tubing, or run it along fence lines and behind plants. Use UV-resistant tubing if any portion remains exposed to sunlight. I’ve found that black tubing blends beautifully into most landscapes and won’t turn brittle after a season or two.
Step 3: Setting Up the Drainage System
Now that your fresh water supply is ready, let’s tackle the drainage side of things. Think of this as creating an escape route for your old pond water, much like how your car’s transmission needs a way to flush out old fluid.
The simplest approach is installing an overflow drain. Position a standpipe or bulkhead fitting at your desired water level, typically about an inch below your pond’s rim. This creates an automatic threshold where excess water simply flows out when new water enters. I learned this the hard way after my first attempt resulted in a mini flood in my backyard during a rainstorm!
For the actual drainage path, you have several options. A simple garden hose connected to your overflow can direct water to flower beds, giving your plants a nutrient-rich treat from fish waste. Alternatively, route it to a storm drain or designated drainage area following local regulations. Make sure your drainage line slopes downward consistently to prevent backflow.
If you’re working with established water circulation systems, integrate your overflow before your filter intake to ensure you’re removing older water, not freshly filtered water. Test your drainage by running water through it before finalizing the installation. This prevents surprises and ensures everything flows smoothly.
Step 4: Adding Automation and Controls
Now comes the exciting part where your system truly runs itself! Let’s explore the automation options that’ll make your pond maintenance practically hands-free.
Timers are your simplest option and work beautifully for most backyard ponds. A basic outdoor outlet timer can control your water supply valve, switching it on for 15-30 minutes daily or every few days, depending on your pond size. I use a digital timer on my koi pond that runs every other morning at 6 AM, and I honestly forget it’s even there most of the time.
For more precision, consider adding a float valve in your pond. This clever device automatically stops water flow when your pond reaches the perfect level, preventing overflows during rainy weather. Install it at your desired water height, and it’ll shut off the incoming water automatically.
Flow meters take things up a notch by measuring exactly how much water enters your pond. You can set them to deliver a specific number of gallons per week, ensuring consistent water changes regardless of seasonal variations.
Solenoid valves paired with timers offer electronic control, giving you precise scheduling without manual adjustments. They’re especially handy if you travel frequently or simply want that complete set-and-forget experience. Most systems combine a timer with either a float valve or flow meter for foolproof operation that adapts to your pond’s actual needs.
Fine-Tuning Your System (The Service Schedule)
Calculating the Right Water Change Rate
Getting your water change rate right is simpler than you might think! Just like automatic transmission specialists follow specific service intervals, your pond needs a consistent schedule based on its unique needs.
Here’s my go-to formula: aim to exchange 10-20% of your pond volume weekly for lightly stocked ponds (think a few goldfish), and 20-30% for heavily stocked koi ponds. For daily changes, divide these numbers by seven. So a 1,000-gallon pond with moderate fish load would benefit from roughly 20-40 gallons daily.
To calculate your specific needs, consider these factors: one inch of fish per 10 gallons of water is a safe guideline. Count your fish length (excluding tails), then adjust upward if you have koi or large goldfish that produce more waste.
I always recommend starting conservative and monitoring your pond water quality with test strips weekly. If ammonia or nitrite levels creep up, increase your exchange rate by 5% increments until parameters stabilize. Your fish will thank you!
Monitoring and Adjusting
During your system’s first two weeks, check water parameters every other day—it’s like keeping an eye on a new recipe until you know it works perfectly. Test ammonia, nitrite, pH, and chlorine levels to ensure your exchange rate isn’t too aggressive or too gentle. If ammonia creeps up, you might need more frequent changes. Conversely, if your beneficial bacteria seem disturbed, slow things down a bit.
Watch your pond’s clarity and your fish’s behavior closely. Happy fish are active and have good appetites, telling you the system is working beautifully. Keep a simple notebook tracking test results and observations—you’ll spot patterns quickly this way.
Adjust your timer settings in small increments, maybe 15-minute changes at a time, rather than making dramatic shifts. I learned this the hard way when I doubled my exchange time overnight and stressed my koi unnecessarily. Patience pays off here. Once you’ve found the sweet spot where parameters stay stable and fish thrive, you can relax into weekly testing and truly enjoy that hands-off maintenance you built this wonderful system for.
Troubleshooting Common Issues
Water Level Problems
Water level problems can sneak up on you, but they’re usually easy to fix once you know what to look for. If your pond is overflowing, check your float valve first. It might be stuck or set too high. I learned this the hard way when my backyard turned into a mini swamp one weekend! Simply adjust the float arm downward or clean any debris that’s preventing it from shutting off properly.
Insufficient drainage often means your drain valve isn’t opening fully or your outlet pipe is too small for the water volume. Try increasing the pipe diameter or installing a second drain line. For level fluctuations, ensure your timer is set correctly and your water pressure is consistent. Sudden drops might indicate a leak in your pond liner, while rises could mean your inlet valve isn’t closing completely. Regular weekly checks help you catch these issues before they become real headaches, keeping your system running smoothly.
Flow Rate Issues
Flow problems can really throw a wrench in your automatic system, but they’re usually simple to fix! If water barely trickles in or out, first check your intake and output lines for leaves, debris, or even curious pond snails. I once discovered a small twig had wedged itself perfectly in my drain line, causing all sorts of headaches. Disconnect the lines and flush them with a garden hose to clear blockages.
For water flowing too fast, adjust your flow restrictor valve gradually until you reach the perfect exchange rate. Think of it like tuning a guitar – small adjustments make big differences. If your home water pressure varies throughout the day (common in many neighborhoods), consider installing a pressure regulator at your system’s inlet. This keeps everything consistent, ensuring your 10% daily water change happens smoothly whether it’s morning or evening. A quick monthly inspection of all connections prevents most flow issues before they start.
Temperature and Chlorine Concerns
When fresh tap water flows into your pond, two main challenges pop up: temperature differences and chlorine content. Think of it like jumping into a cold pool versus easing in gradually – your fish need that same gentle transition!
Temperature shock happens when new water is significantly cooler or warmer than your pond. The simple fix? Run your automatic system during similar daily times, allowing incoming water to gradually blend rather than dump all at once. A slow drip rate (think 5-10% water change over several hours) gives your pond ecosystem time to adjust naturally.
Chlorine is the sneakier problem since most municipal water contains it. I’ve found two reliable approaches: install an inline dechlorinator filter on your water supply line, or add a chlorine neutralizer to a small reservoir before it enters your pond. The first option is truly hands-off, while the second requires occasional refills but costs less upfront. Your fish will thank you either way!
The Benefits You’ll Actually Notice
Here’s what really matters – the changes you’ll actually see in your backyard oasis once you get an automatic system running.
First up, your fish are going to thank you. I learned this the hard way after losing a few koi to ammonia spikes during a particularly hot summer. With consistent water changes happening automatically, those dangerous toxin buildups just don’t happen anymore. Your fish will be more active, their colors will pop, and you won’t wake up worrying about whether the water quality crashed overnight.
The water clarity difference is honestly dramatic. Instead of that slightly murky look that creeps in between manual water changes, your pond stays crystal clear. You’ll actually be able to see your fish swimming at the bottom. It’s like having a brand new pond every single day without lifting a finger.
Algae becomes way less of a headache too. Those green blankets and pea-soup water that plague so many ponds? They thrive on stagnant conditions and excess nutrients. Regular automatic water exchanges keep things fresh and make it much harder for algae to establish its stronghold.
But the biggest benefit – and I can’t stress this enough – is getting your weekends back. Instead of spending Saturday morning with a hose and bucket, you’re actually sitting by your pond with coffee, watching the fish, and enjoying what you built. That’s the whole point of having a pond in the first place, right?
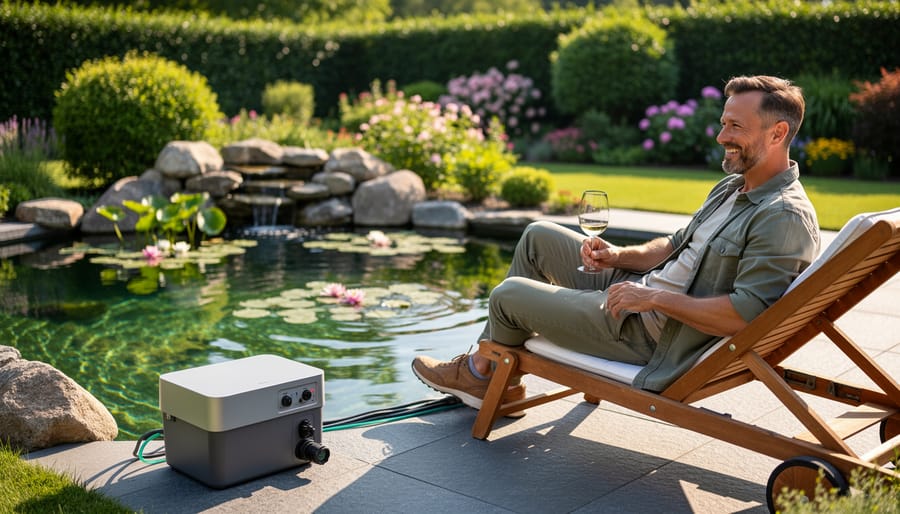
You’ve just created something truly special for your pond, and here’s the best part: you never have to think about it again. Just like your car’s transmission quietly shifts gears without you lifting a finger, your automatic water change system is now working behind the scenes, protecting your fish and keeping your water crystal clear. It’s handling the boring maintenance tasks while you get to enjoy the good stuff, like watching your koi glide through pristine water or admiring your water lilies in full bloom.
If you’ve made it this far in your build, give yourself a pat on the back. This project might have seemed intimidating at first, but you did it! And honestly, once it’s up and running, you’ll wonder why you ever spent weekends hunched over your pond with a hose and bucket. Your investment in fish, plants, and equipment is now safeguarded by a system that works tirelessly, day and night. Set it, forget it, and get back to actually enjoying your pond. That’s the kind of automation we can all get behind.