
Transform Your Water Feature with Nature’s Most Beautiful Textures
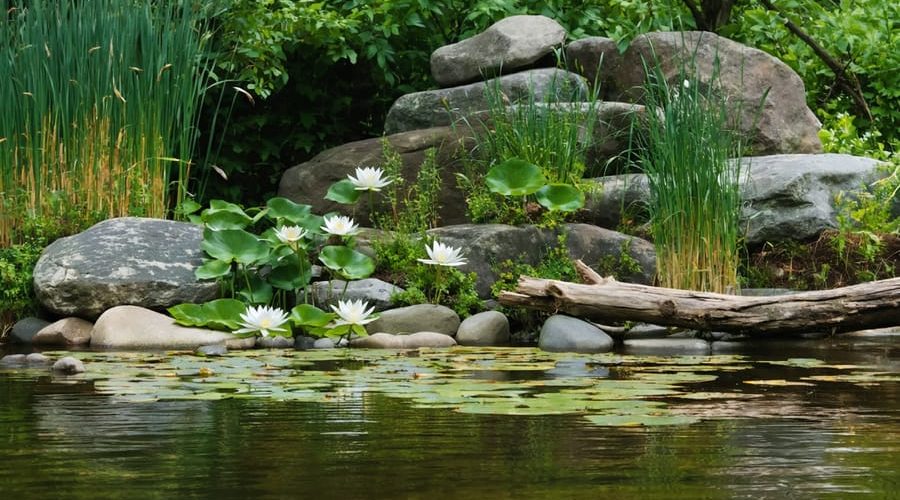
Nature’s textures transform ordinary water features into living art in water features, creating dynamic spaces that engage all senses. Layer smooth river rocks with rough-hewn boulders to establish depth and visual interest. Integrate native aquatic plants like rushes and water lilies, allowing their varied leaf structures to create natural shadowing and movement. Position weathered driftwood strategically along water edges, mimicking nature’s organic placement while providing essential hiding spots for pond life. The interplay of these elements – stone, wood, and foliage – mirrors the complexity found in natural water bodies, inviting wildlife and creating a self-sustaining ecosystem that evolves with each passing season. These textural combinations not only enhance aesthetic appeal but also serve crucial biological functions, supporting beneficial bacteria and providing sanctuary for aquatic creatures.
Rock Textures That Make Your Water Feature Pop
Weathered Stone Selection
When selecting weathered stones for your water feature, look for pieces that show natural aging and character. The best specimens often have rounded edges, interesting patterns, and varied textures that suggest years of exposure to the elements. Local quarries and landscape suppliers typically offer excellent options, but you can also collect stones from permitted areas.
Choose rocks of different sizes to create visual interest, with larger pieces serving as focal points and smaller ones providing support and transitions. Look for stones with subtle color variations in earth tones – grays, browns, and tans work particularly well together. Avoid rocks with sharp edges or those that appear artificially broken.
When arranging your stones, position them as they would naturally occur. Place larger rocks first, partially burying them to appear as if they’ve settled over time. Group stones in odd numbers, and avoid perfectly symmetrical arrangements, as nature rarely creates perfect patterns. Consider how water will flow over and around the stones, as this will enhance their weathered appearance and create pleasing sounds.
Remember to clean your selected stones thoroughly before installation, removing any loose debris or soil that might affect your water quality.
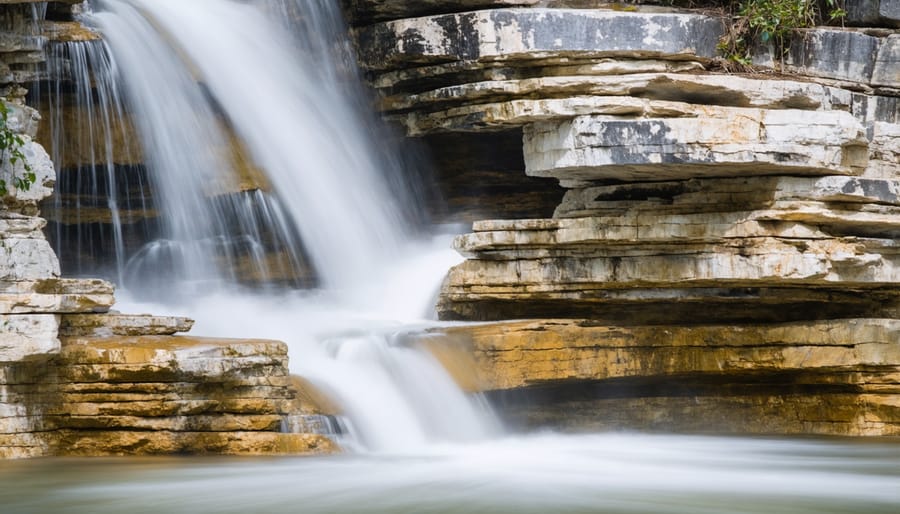
Creating Natural Rock Formations
When creating natural-looking rock formations, the key is to observe and mimic patterns found in nature. Start by selecting rocks of varying sizes and shapes, including both angular and rounded specimens. Position your largest rocks first, setting them slightly into the ground for stability. These anchor stones create the foundation for your sculptural rock arrangements.
Layer smaller rocks around the base, positioning them as if they’ve naturally fallen or eroded into place. Avoid perfectly straight lines or obvious patterns – nature is beautifully random. Tilt rocks at slight angles and nestle them together with varying depths to create natural-looking crevices and shadows.
Remember to leave spaces between some rocks for plants to grow, adding to the natural appearance. Consider the viewing angles from different positions in your garden, ensuring the formation looks balanced from all sides. For added authenticity, partially bury some smaller rocks to suggest they’ve been there for years.
A helpful tip is to study local rock formations in your area and photograph them for reference. This ensures your created features blend seamlessly with the regional landscape.
Plant Textures That Bring Your Pond to Life
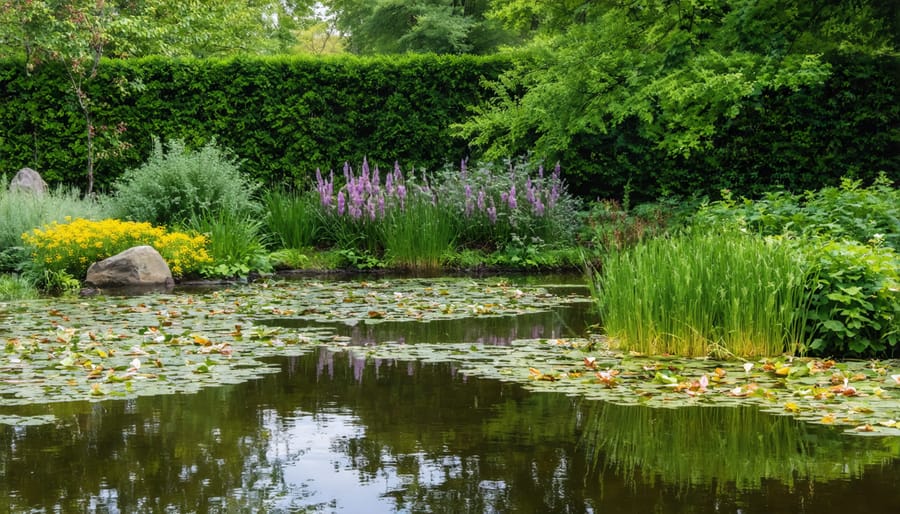
Marginal Plants and Grasses
The magic of a natural-looking pond comes alive with thoughtfully placed marginal plants and ornamental grasses. These elements are essential for artistic water garden design, creating layers of visual interest and mimicking nature’s own textures.
Start by selecting plants of varying heights and textures. Tall, dramatic plants like cattails and rushes create striking vertical lines, while lower-growing varieties like marsh marigolds offer dense, spreading coverage. Mix in some iris varieties for their sword-like leaves and colorful blooms.
When placing your marginal plants, work in groups of odd numbers – three, five, or seven plants together create more natural-looking clusters. Position taller plants toward the back of your pond, gradually stepping down to shorter varieties at the water’s edge. This creates depth and draws the eye naturally across your water feature.
Consider seasonal interest too. Ornamental grasses like fountain grass or Japanese forest grass provide movement and sound as they sway in the breeze. Many marginals, such as sedges and sweet flag, maintain their structure through winter, offering year-round texture.
Remember to leave some open spaces between plant groupings. This not only looks more natural but also allows easier access for maintenance and creates viewing windows to enjoy your pond’s water surface.
Floating and Submerged Texture
Water plants add a mesmerizing dimension to your water feature by creating layers of texture both above and below the surface. Floating plants like water lilies and lotus create stunning surface patterns with their broad leaves, while their flowers add pops of color that seem to dance on the water. These surface-dwelling plants not only provide visual interest but also help maintain water quality by reducing algae growth through shade.
Beneath the surface, submerged plants like hornwort and anacharis create gentle, swaying movements that mimic natural waterways. These underwater gardens add depth and create a sense of mystery, especially when viewed from above. Consider placing taller plants like rushes and cattails along the edges, allowing their stems to create vertical lines that contrast beautifully with the horizontal plane of the water.
For the best effect, combine different plant heights and growth patterns. Try clustering water hyacinths in one corner while allowing duckweed to spread naturally across open areas. The key is to balance the placement – too many floating plants can overwhelm the space, while too few might leave your water feature looking sparse.
Remember that different seasons bring changes to your aquatic plants. Spring growth provides fresh, bright textures, while autumn can transform floating leaves into striking golden platforms. This natural cycle keeps your water feature dynamic and engaging throughout the year.
Natural Bottom Materials and Substrates
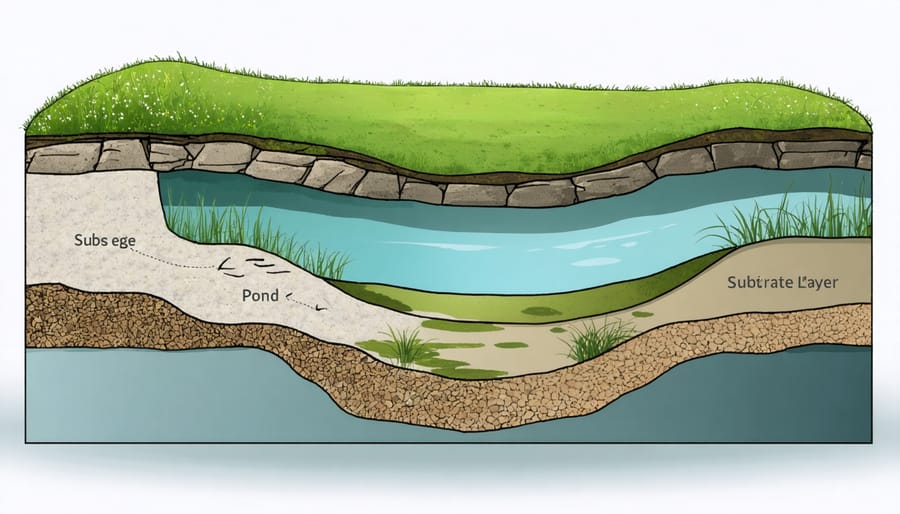
Gravel and Sand Combinations
Combining different sizes of gravel and sand creates natural-looking layers that mimic stream beds and pond bottoms found in nature. Start with a base layer of coarse gravel (1-2 inches in diameter) along the deepest parts of your water feature. Gradually transition to medium-sized gravel (½-1 inch) as you move toward the shallower areas. For a truly authentic look, add patches of fine gravel and coarse sand in between larger stones.
Create visual interest by making gentle slopes and varied depths with your substrate. Consider using darker gravels in deeper areas and lighter-colored materials in shallower zones to enhance the natural appearance. When placing your materials, avoid perfectly straight lines or uniform patterns – nature is beautifully imperfect!
For areas where plants will grow, mix in some aquatic soil with finer gravels to provide necessary nutrients. Remember to rinse all materials thoroughly before adding them to your water feature to prevent cloudy water. This layered approach not only looks stunning but also provides essential hiding spots for beneficial bacteria and small aquatic life.
Natural Edge Transitions
Creating seamless transitions between your water feature and the surrounding landscape is key to achieving a natural look. Start by using native stones and plants that gradually blend the water’s edge into your garden. Layer rocks of varying sizes, placing larger boulders at the water’s edge and progressively smaller stones as you move outward. This creates a realistic shoreline that mimics natural bodies of water.
Consider incorporating marginal plants that naturally grow along water edges, such as rushes and sedges, to soften hard boundaries. Plant them between rocks and allow them to spill slightly over the water’s edge. For an even more natural appearance, add creeping ground covers that can grow between stones and gradually transition into your lawn or garden beds.
Don’t aim for perfectly straight lines – nature rarely creates them. Instead, create gentle curves and irregular edges that look as if they were shaped by natural processes. Use soil pockets between rocks to establish small plants, and consider adding moss or low-growing vegetation to soften any harsh transitions. Remember, the goal is to make your water feature appear as though it’s always been part of the landscape.
Maintaining Natural Textures Year-Round
Natural textures require thoughtful care to maintain their beauty throughout the changing seasons. In spring, gently clean accumulated debris from rock surfaces using a soft brush and water, being careful not to disturb the beneficial patina that develops naturally. Consider applying a light coat of natural sealant to wooden elements to protect them while preserving their organic appearance.
Summer maintenance focuses on preventing excessive algae growth while encouraging beneficial moss development in shaded areas. Regular water circulation helps maintain clean surfaces while creating beautiful ripple patterns. For plant textures, careful pruning maintains natural shapes without creating artificial-looking edges.
As autumn approaches, incorporate falling leaves selectively into your design – while removing excess to prevent decomposition issues. This is also the perfect time to add new natural elements like river rocks or driftwood, allowing them to weather naturally through winter.
Winter presents unique opportunities to appreciate frozen textures, but requires preparation. Protect delicate stone features from freeze-thaw damage by ensuring proper drainage. For wooden elements, apply protective oil treatments before cold weather sets in. Consider installing subtle lighting to highlight textural features during shorter days.
Photography enthusiasts find that different seasons create stunning opportunities to capture varying textures – from frost-covered stones to summer’s water-splashed surfaces. Document these changes to inform your maintenance routine and inspire future design modifications.
As we’ve explored, natural textures bring an authentic, calming presence to any water feature. From the rugged appeal of carefully placed rocks to the gentle movement of native plants, each element contributes to creating a slice of nature in your own backyard. Remember that successful incorporation of natural textures isn’t just about aesthetics – it’s about creating a sustainable, low-maintenance environment that supports local wildlife and enhances your outdoor living space.
By starting small and gradually building your design, you can experiment with different combinations of stones, plants, and organic materials until you find the perfect balance for your space. Don’t be afraid to take inspiration from natural water features in your area, as these provide excellent examples of how textures work together in your specific climate.
Whether you’re creating a small fountain or a large pond, incorporating natural textures will transform your water feature from a simple garden element into a living, breathing ecosystem. So go ahead – let nature be your guide and watch as your water feature becomes a stunning focal point that brings joy throughout the seasons.