
Keep Your DIY Waterfall Running Through Every Season (Without the Headaches)
Prepare your waterfall for temperature swings by installing a bypass valve during construction—this simple addition lets you reduce flow rates in winter without completely shutting down your feature, preventing ice damage while maintaining water circulation. When building your waterfall, position your pump at least 18 inches below the waterline to protect it from freezing, and choose materials like slate or granite that withstand freeze-thaw cycles without cracking.
Switch to cold-water beneficial bacteria formulations once temperatures drop below 50°F, applying them every two weeks instead of weekly to maintain biological filtration without wasting product. Remove tropical plants before the first frost and trim back hardy marginals to 2-3 inches above water level, which prevents decomposing foliage from fouling your water during winter months.
Deploy a floating de-icer or leave your pump running on low during freezing weather—both methods create a small opening in ice cover that allows harmful gases to escape while protecting your liner and rocks from expansion damage. Store removable spillways, decorative elements, and lighting fixtures indoors to extend their lifespan and prevent weather-related deterioration.
Create a seasonal maintenance calendar marking critical tasks: spring pump inspection and cleaning, summer algae monitoring, fall plant management, and winter equipment checks. This proactive approach transforms seasonal changes from potential disasters into manageable routines, keeping your waterfall beautiful and functional year-round while minimizing emergency repairs and costly replacements.
Why Your Waterfall Needs Seasonal Care
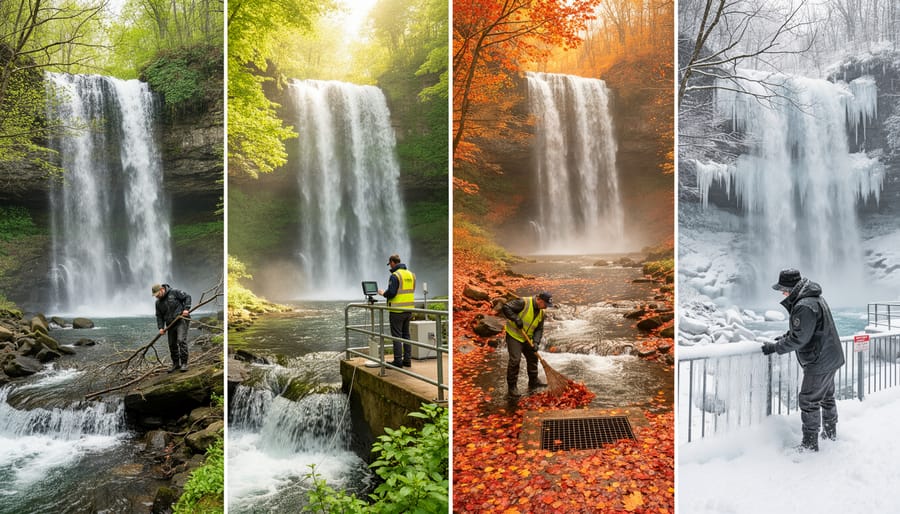
What Happens to Your Waterfall in Different Seasons
Your beautiful DIY waterfall will face different challenges as the seasons change, but don’t worry—knowing what to expect makes all the difference!
Winter brings the biggest concern: freezing. When temperatures drop below 32°F, ice can form and potentially crack pumps, pipes, and pond liners. You’ll need to decide whether to shut down your feature completely or keep it running through cold months. I learned this the hard way my first winter when I didn’t realize my pump needed protection!
Spring welcomes warmer weather but also brings debris from winter storms and the return of algae. As temperatures rise, that green stuff loves to bloom, turning your crystal-clear water into pea soup. You’ll also notice leaves, twigs, and pollen washing into your waterfall, which means more frequent cleaning sessions.
Summer presents its own puzzle: evaporation. On hot days, you might be surprised how quickly water levels drop. I check mine every few days during heat waves and keep the hose handy for top-offs. Lower water levels can stress your pump and affect your waterfall’s flow.
Fall means leaves, leaves, and more leaves. They’ll collect in your basin, clog your pump, and create maintenance headaches if you don’t stay on top of them. A simple net can save you hours of scooping.
Understanding these seasonal patterns helps you stay ahead of problems rather than constantly reacting to them.
Spring Adaptation: Waking Up Your Waterfall
The Spring Cleaning Routine
After months of hibernation, your waterfall is ready for its grand reopening! Spring cleaning might sound like a chore, but trust me, there’s something incredibly satisfying about bringing your water feature back to life. I still remember the first spring with my waterfall—I was amazed at how much gunk had accumulated over winter.
Start by removing any debris that’s collected around and in your feature. Leaves, twigs, and other organic matter love to settle in every nook and cranny. Use a small net or even your hands (wear gloves!) to scoop out the larger pieces, then give everything a good rinse with your garden hose. Don’t stress about getting it perfect right away; you’ll do a deeper clean as you go.
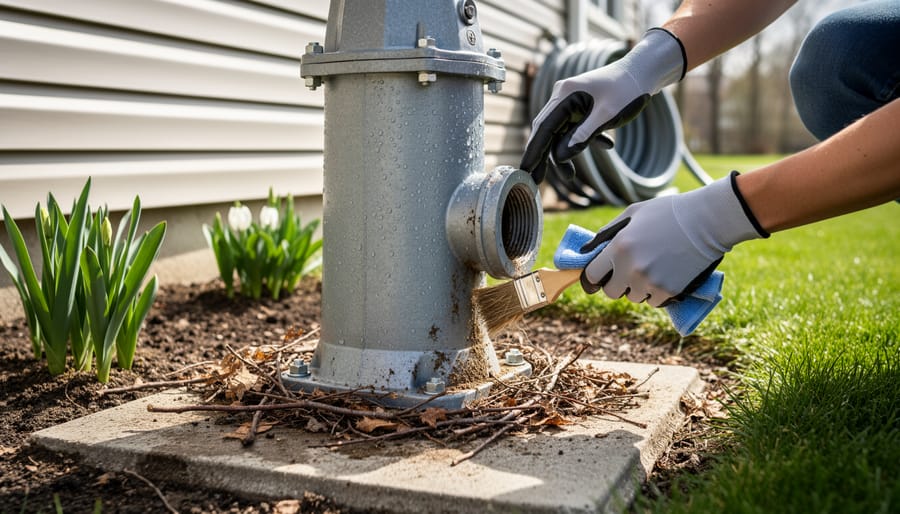
Next, locate your pump and carefully remove it from the water. Give it a visual inspection for any obvious damage or wear. Clean the intake screen or filter thoroughly—this little guy takes a beating and accumulates sludge like nobody’s business. Before reinstalling, plug it in briefly to make sure it’s running smoothly. Listen for any unusual sounds or vibrations that might signal a problem.
Now walk the entire length of your tubing and check all connections. Look for cracks, splits, or loose fittings that could cause leaks. Winter weather can make materials brittle, so replace anything questionable now rather than dealing with mysterious water loss later.
Finally, test your water quality. Use a basic pond test kit to check pH levels and consider adding beneficial bacteria to jumpstart your ecosystem. Fill your basin, fire up that pump, and enjoy the sweet sound of flowing water once again!
Managing Spring Runoff and Algae
Spring brings a double challenge to your DIY waterfall: managing extra water from snowmelt and rain, plus tackling those pesky early-season algae blooms. Let’s tackle both head-on so your feature stays beautiful as the weather warms up.
First, let’s talk about that surge of springtime water flow. When snow melts or spring rains arrive, you might notice your waterfall running faster than usual. This is actually a good time to check that your pump can handle the increased volume without overworking. I learned this the hard way when my first spring runoff overwhelmed my small pump! If water starts overflowing where it shouldn’t, consider temporarily redirecting excess flow or upgrading to a slightly larger pump for future seasons.
Now, about algae. As temperatures rise and sunlight increases, algae loves to make an appearance. The key is getting ahead of it before it takes over. Start by doing a thorough spring cleaning: remove any debris that accumulated over winter, as decomposing leaves and organic matter feed algae growth. Add beneficial bacteria products early in the season when water temperatures reach about 50 degrees Fahrenheit. These good bacteria compete with algae for nutrients.
Consider adding more aquatic plants in spring too. They’ll absorb excess nutrients that would otherwise feed algae, plus they look gorgeous cascading around your waterfall rocks. Barley straw extract is another natural option that helps prevent algae without harsh chemicals, keeping your water feature safe for wildlife visitors.
Summer Adaptation: Keeping the Flow Strong
Fighting Evaporation and Water Loss
Summer heat can turn your beautiful waterfall into a constant refilling project if you’re not careful. I learned this the hard way my first summer when I was topping off my feature every other day! The good news is that with a few smart strategies, you can dramatically reduce water loss.
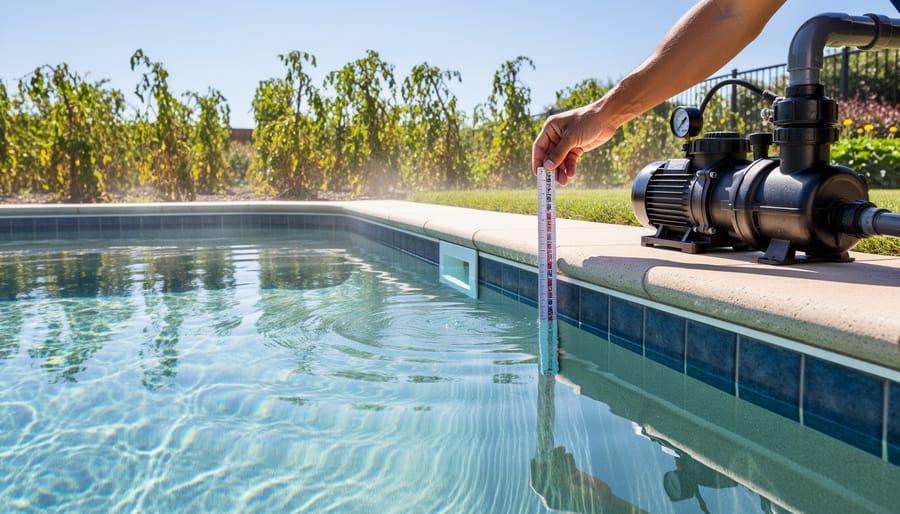
Start by checking your water level daily during hot months. A simple permanent marker line on your reservoir or liner gives you a quick visual reference. Most waterfalls lose about an inch per week to normal evaporation, but hot, windy days can double that amount.
Adding shade is your best defense against evaporation. Position a patio umbrella nearby, plant tall ornamental grasses on the sunny side, or train climbing vines over a trellis beside your feature. Even partial shade during the hottest afternoon hours makes a noticeable difference. I planted a couple of small trees near mine, and my water loss dropped by almost 40 percent once they filled in.
Consider installing a simple float valve connected to your garden hose, similar to what’s inside a toilet tank. This automatically adds water when levels drop, saving you from constant monitoring. You can find these at most pond supply stores for under thirty dollars.
Finally, don’t forget to check for leaks regularly. Sometimes what looks like evaporation is actually a small crack or loose connection. Run your hand along the liner edges and pump connections weekly, especially after temperature swings that can shift materials.
Pump Protection in Peak Heat
Summer heat can be tough on your waterfall pump, but with a few simple precautions, you’ll keep everything running smoothly. I learned this the hard way one scorching January here in Australia when my pump started making concerning noises!
First things first: water level is your pump’s best friend. During hot weather, evaporation speeds up dramatically. Check your reservoir or pond daily and top it up as needed. Your pump should always be completely submerged with at least 10-15cm of water above it. A pump running partially dry will overheat quickly and burn out, which is an expensive mistake to make.
Speaking of overheating, many pumps actually benefit from reduced flow rates during extreme heat. Counter-intuitive, right? But a slower flow means water circulates through the pump more gradually, giving it better cooling time. If your proper pump setup includes an adjustable flow valve, dial it back about 20-30% on those scorching days.
Position also matters. If your pump sits in shallow water that gets direct afternoon sun, consider adding shade cloth above the reservoir or relocating rocks to create shade. The cooler you keep that water, the happier your pump will be.
Finally, give your pump a quick weekly check during heat waves. Clean any debris from the intake screen and listen for unusual sounds. A well-maintained pump running in adequate water at reasonable flow rates will thank you with years of reliable service.
Fall Adaptation: Preparing for the Cool Down
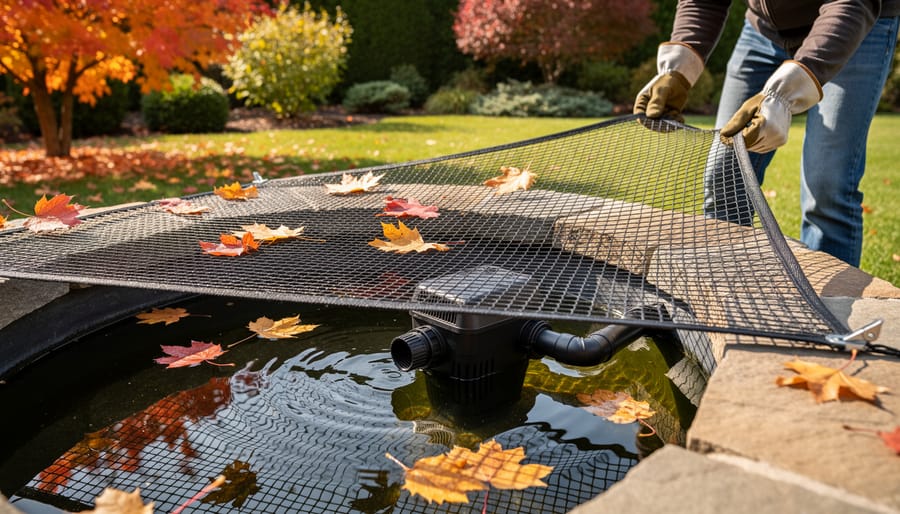
Leaf and Debris Management Systems
Fall brings a gorgeous palette of colors, but those beautiful leaves can spell trouble for your waterfall feature if you’re not prepared. I learned this the hard way my first autumn with a pond—I came home from a weekend trip to find my pump struggling under a blanket of soggy maple leaves!
The good news is that preventing clogs is straightforward with the right setup. Start by installing fine netting over your pond before leaves begin to drop. Stretch the netting taut across the water surface, securing it with stakes or rocks around the edges. You can easily lift it periodically to remove accumulated debris, keeping leaves out of your pump and filter entirely.
For a more permanent solution, consider adding a skimmer to your waterfall system. These handy devices sit at water level and automatically capture floating debris before it sinks. Clean the skimmer basket every few days during peak leaf-fall season—it takes just two minutes and saves you from major maintenance headaches later.
Create a simple cleaning schedule that works for your landscape. If you’re surrounded by trees, plan on checking your system every 2-3 days during autumn. Mark it on your calendar or set phone reminders. Remove any visible debris from the waterfall rocks and basin, and give your pump intake a quick inspection.
Don’t forget to trim back overhanging branches if possible. Less foliage directly above your feature means dramatically less cleanup throughout the season.
Transition Maintenance Before Winter
Before the first frost arrives, giving your waterfall feature a thorough once-over can save you from expensive repairs and headaches come spring. Think of it as tucking your water feature in for a long winter’s nap.
Start with a deep cleaning while the water is still manageable temperature-wise. Remove any debris, fallen leaves, and accumulated sludge from the bottom of your pond or reservoir. This gunk might not seem like much, but it can decompose over winter and create toxic conditions that harm fish or beneficial bacteria. I learned this the hard way my first year when I skipped this step and spent half of spring battling murky water.
Next, trim back any aquatic plants or surrounding vegetation. Cut perennials down to about three inches above the waterline. Remove any annuals completely since they won’t survive freezing temperatures. Dead plant material left in the water breaks down and affects water quality, plus it creates hiding spots for unwanted pests.
Now’s the perfect time to inspect all your components with a critical eye. Check your pump for any unusual wear, examine tubing for cracks or brittleness, and look over stones and edging for shifting or damage. Test your electrical connections to ensure everything’s functioning properly. Replace worn parts now rather than discovering problems when you’re eager to start up again in spring. Run your system one final time to confirm everything operates smoothly before you begin any winterization steps.
Winter Adaptation: Two Paths for Cold Months
The Complete Winterization Method
When the first frost warnings arrive, it’s time to give your waterfall feature some TLC before winter fully sets in. I’ll walk you through the complete process that’s kept my own waterfall safe through many cold seasons.
Start by turning off your pump and draining all the water from your system. Use a submersible pump or wet-dry vacuum to remove water from the basin, catching basin, and any low spots where water collects. This is crucial because trapped water expands when frozen and can crack even the most durable materials.
Next, remove your pump completely. Don’t just disconnect it and leave it in place. Clean off any algae or debris with a soft brush, then store it indoors in a bucket of water if it’s a submersible model. This prevents seals from drying out and cracking. I keep mine in my basement where temperatures stay moderate.
Now tackle the tubing and plumbing. Disconnect flexible tubing sections and drain them thoroughly by holding one end high and letting gravity do its work. For rigid pipes, use an air compressor on low pressure to blow out any remaining water. Store removed tubing indoors or in a shed to prevent sun damage and weathering.
Protect your liner and rocks by removing any organic debris like leaves that could decompose and create problems come spring. If you have fish or plants in your basin, relocate them before draining.
Finally, cover your feature with a breathable tarp or pond netting secured with stakes or heavy rocks. This keeps debris out while allowing air circulation, preventing mold and mildew buildup during the dormant months.
Running Your Waterfall Through Winter
For those of us in milder climates or who simply can’t bear to see our waterfalls silent during winter, keeping your feature running year-round is absolutely possible with the right approach. I’ve kept mine going through several winters, and while it requires more attention than the warmer months, the sight of water tumbling over ice-frosted rocks is truly magical.
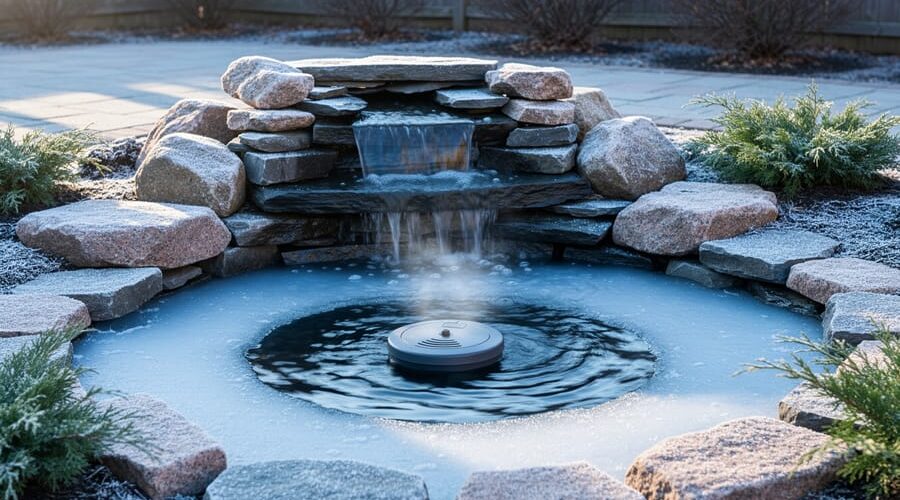
The key to winter operation is managing ice formation without letting it damage your equipment or structure. Start by reducing your pump’s flow rate to about half of what you run in summer. Slower water is less likely to splash onto rocks where it can freeze and create ice dams that redirect water outside your basin. This gentler flow also puts less strain on your pump working in colder conditions.
Installing a pond de-icer is essential if temperatures regularly dip below freezing in your area. These floating heaters keep a small area of your basin ice-free, allowing gases to escape and preventing pressure from building up under solid ice. Position it away from where your waterfall enters the basin so the warmer water doesn’t work against the de-icer’s purpose.
Monitor your waterfall daily during freezing weather. Ice can build up surprisingly fast and create unexpected pathways that send water over the edge of your liner. I’ve learned to keep a kettle of warm water handy for melting problematic ice formations before they become serious issues. Check that your basin’s water level stays consistent, as ice accumulation can trap significant amounts of water.
Remove any decorative elements that might crack in freezing temperatures, and consider adding extra water to your basin since some will inevitably become locked in ice. If a severe cold snap is forecast and you’re uncomfortable with the risks, don’t hesitate to shut down temporarily. Your waterfall will be there waiting when conditions improve, and protecting your investment is always the smart choice.
Smart Design Choices for Easier Seasonal Transitions
Build-In Features That Save Time
When you’re planning your waterfall from the start, incorporating a few smart features can save you countless hours and headaches down the road. Think of these as little gifts to your future self!
Start with an accessible pump vault. This is simply a sturdy container or chamber that houses your pump and makes it incredibly easy to reach without dismantling half your waterfall. I learned this the hard way after spending an hour moving rocks just to check my pump connections. Now, my pump sits in a vault with a removable lid that’s disguised by a flat capstone, and maintenance takes minutes instead of hours.
Drain valves are another game-changer, especially for seasonal transitions. Install a valve at the lowest point of your system, and you can drain the entire feature in minutes rather than bailing water by hand. This becomes essential during fall winterization or spring cleaning sessions.
Consider using removable rock caps on key areas of your waterfall structure. These are larger, decorative stones that sit on top of crucial access points. They look natural but lift right off when you need to reach plumbing connections, check for leaks, or adjust water flow. It’s like having secret doors throughout your feature.
Modular components, while part of your initial design considerations, make seasonal adjustments so much easier. Pre-formed spillway units, for example, can be removed completely in harsh winter climates and stored safely until spring. These thoughtful additions might add a bit to your initial setup time, but they’ll pay dividends every single season.
Plant Selection for Year-Round Beauty
Selecting the right plants around your waterfall can dramatically reduce your seasonal workload while keeping your feature stunning year-round. I’ve learned through trial and error that evergreen options are your best friends here – they maintain their foliage through winter and don’t shed leaves into your water, which means less cleaning and better water quality.
Consider hardy ornamental grasses like Japanese forest grass or fountain grass near the waterfall’s edge. They add graceful movement without creating debris problems, and many varieties look beautiful even when dormant. For ground cover, creeping jenny and moss varieties work wonderfully, staying green most of the year and requiring minimal trimming.
Native ferns are another excellent choice – they’re naturally adapted to moist environments and provide lush texture without seasonal mess. Pair these with winter-blooming heathers or early spring bulbs for pops of color when you need them most.
When making your plant choices, stick with species that have minimal leaf drop and avoid deciduous trees directly overhead. This simple strategy will save you countless hours of skimming and filter cleaning while ensuring your waterfall looks intentional and well-maintained regardless of the season.
Creating Your Personal Seasonal Maintenance Calendar
Creating a maintenance calendar that fits your specific situation makes all the difference between a thriving waterfall and a stressful project. I learned this the hard way when I tried following a generic schedule meant for Florida gardeners while living in Minnesota – not my smartest moment!
Your climate zone is your starting point. If you live where temperatures drop below freezing, you’ll need winterization tasks that warm-climate folks can skip entirely. Similarly, a small 3-foot waterfall requires less time and effort than a sprawling 15-foot cascade with multiple streams.
Here’s a simple framework to build your personalized calendar:
Start by identifying your USDA hardiness zone. This tells you when your first and last frosts typically occur, which determines your active maintenance season. For zones 7 and warmer, you might run your waterfall year-round with minimal adjustments. Zones 6 and colder usually require seasonal shutdown.
Next, measure your waterfall’s water volume and surface area. Larger features need more frequent filter cleaning and chemical balancing, while smaller ones might go weeks between deep maintenance sessions.
Now, use this basic template and adjust timing based on your zone:
Spring Startup (March-May depending on zone): Remove winter covers, inspect pump and tubing, clean filters, restart circulation, test water quality, trim back plants.
Summer Maintenance (June-August): Weekly water level checks, bi-weekly filter cleaning, monthly pump inspection, algae monitoring, plant fertilizing.
Fall Preparation (September-November): Reduce feeding schedule, cut back dying foliage, net falling leaves, prepare winterization supplies.
Winter Care (December-February): Complete shutdown and drainage for cold zones, or continue minimal operation with heaters for moderate climates, monthly equipment checks even when dormant.
Block out 30 minutes weekly during active season and note tasks in your phone calendar. Your waterfall will reward your consistency with year-round beauty and fewer emergency repairs.
Here’s the truth: seasonal adaptation for your DIY waterfall doesn’t have to feel overwhelming. When you break it down into manageable chunks—spring cleaning, summer monitoring, fall prep, and winter protection—it becomes part of your regular outdoor routine, just like mowing the lawn or trimming hedges. You’ve already tackled the biggest challenge by building your waterfall in the first place. Keeping it beautiful through the seasons is actually the easier part.
The techniques we’ve covered aren’t rocket science. They’re simple habits that, once established, become second nature. Check your pump monthly. Clear debris regularly. Watch water levels during hot spells. Winterize before the first hard freeze. These small actions add up to a water feature that remains a stunning focal point in your yard, season after season, without constant stress or surprise repairs.
I’ll never forget the first winter after I built my backyard waterfall. I was nervous about whether I’d done everything right during winterization. Come spring, when I removed the netting and restarted the pump, that first rush of water cascading over the rocks felt like pure magic. Seven years later, that same waterfall still brings me joy every single day. The sound of flowing water after a long winter never gets old, and knowing I’ve protected my investment makes it even sweeter. Your waterfall can give you that same reliable beauty and satisfaction. You’ve got this.