
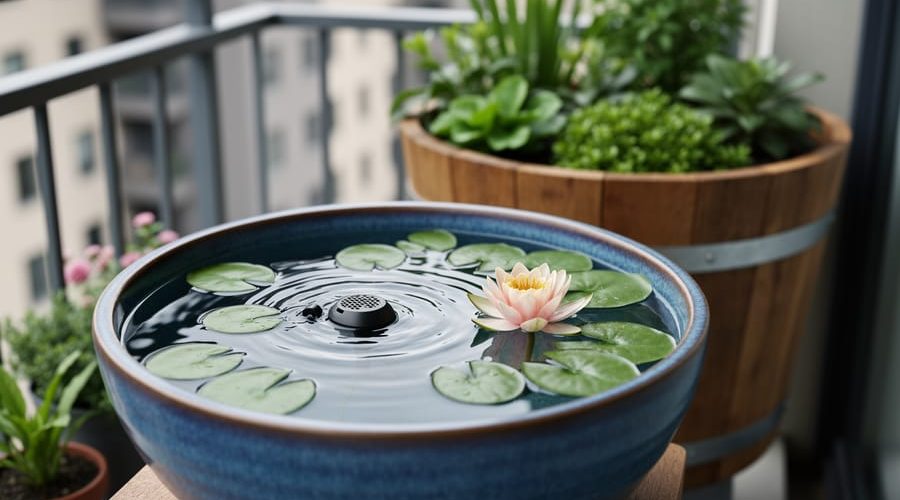
How to Build a Water Garden in Compact Urban Spaces (Step-by-Step)
You can create a beautiful water garden in just 2 to 10 square feet using nothing more than a watertight container, a small pump, and a handful of aquatic plants. Whether you have a tiny balcony, a narrow patio, or a modest courtyard, compact water gardens bring the calming sound of flowing water and living greenery to even the smallest urban spaces. The entire project typically costs between $75 and $250 and can be completed in a single afternoon.
The beauty of small-scale water gardening lies in its accessibility. You don’t need plumbing expertise, expensive equipment, or a sprawling backyard. A half-barrel on a balcony or a glazed ceramic bowl tucked beside your front door can support water lilies, floating plants, and even a few goldfish if you design it properly.
This guide walks you through every step of planning and installing a compact water garden tailored for limited spaces. You’ll learn how to assess your available area for weight limits and sunlight, choose the right container and pump size, assemble all components safely, and select plants that thrive without spreading aggressively. By the end, you’ll have a self-contained aquatic feature that requires minimal maintenance while delivering maximum visual and sensory impact. The process is straightforward, the results are immediate, and the satisfaction of watching dragonflies visit your urban oasis is absolutely worth the effort.
Assessing Your Urban Space
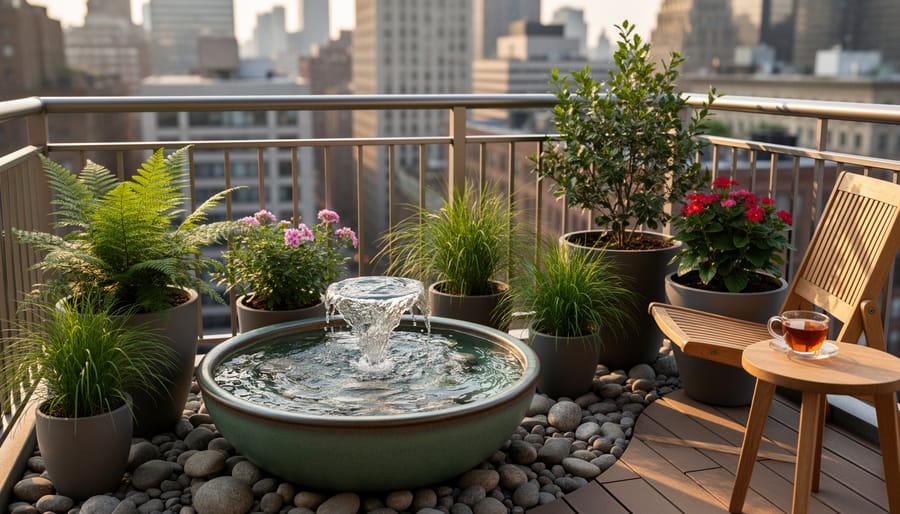
Before buying your first container or plant, walk outside with a measuring tape and notebook. Your urban space dictates everything about your water garden design, and a 15-minute assessment saves you from expensive mistakes.
Start with the footprint. Measure the exact area you can dedicate to your water feature. A balcony might offer a corner spot 2 feet by 3 feet, while a patio could accommodate a 4-foot diameter container. Remember that you need walkway space around the garden, don’t fill every inch. Sketch your area and mark any fixed obstacles like railings, vents, or furniture that can’t move.
Weight capacity matters tremendously for elevated spaces. Water weighs about 8 pounds per gallon, and a modest 20-gallon container pond weighs over 200 pounds when you factor in the container, substrate, rocks, and plants. Balconies typically support 50 to 100 pounds per square foot, but verify your building’s specifications before proceeding. Rooftop installations often require professional structural assessment. Ground-level patios and courtyards don’t face these restrictions, giving you more freedom with container size.
Track sunlight patterns over a full day. Most water plants thrive with 4 to 6 hours of direct sun, though some marginals tolerate partial shade. Watch where shadows fall at 10 a.m., 2 p.m., and 5 p.m. Tall buildings create unique light challenges, and what seems sunny in spring might be shaded in summer when the sun shifts.
Assess these practical factors:
- Weight capacity of your balcony or rooftop (consult building documents if uncertain)
- Daily sunlight hours in your chosen spot (minimum 4 hours for most aquatic plants)
- Proximity to a water source for filling and topping off (long hose runs get tedious)
- Drainage options for water changes and overflow during heavy rain
- Wind exposure, especially on upper floors (strong gusts disrupt water features and stress plants)
Finally, locate the nearest outdoor electrical outlet. You’ll need GFCI-protected power for pumps and optional lighting, preferably within 6 feet of your water garden location. Extension cords create trip hazards and aren’t ideal for permanent installations.
Choosing the Right Container and Design
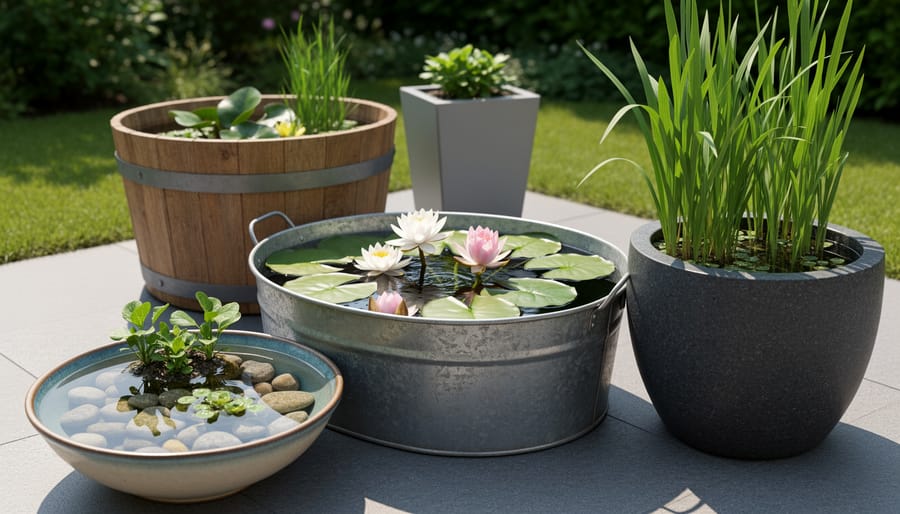
The container you choose becomes the foundation of your compact water garden, and in urban spaces, it needs to work double duty, holding water and looking great in your limited outdoor area. Let’s explore your options.
Half-Barrel Ponds
Whiskey barrels and half-barrels remain popular for good reason. At roughly 25 inches in diameter, they fit nearly any balcony or patio corner while providing enough volume (about 25 gallons) for a few plants and possibly a couple of small goldfish. You’ll need to line them with pond liner since the wood alone won’t hold water permanently. They offer a rustic charm that complements both modern and traditional outdoor décor.
Ceramic and Glazed Bowls
For contemporary urban spaces, large ceramic bowls create stunning focal points. Look for frost-proof options at least 18 inches across and 10 inches deep. Glazed bowls in blues, blacks, or earth tones don’t require additional lining and clean easily. They’re lighter than stone but still provide adequate weight for stability. The downside? They typically hold only 15 to 20 gallons, limiting your plant and fish options.
Stock Tanks and Galvanized Containers
Galvanized stock tanks have become trendy in urban gardens for their industrial-chic aesthetic. Available in oval and round shapes from 2 feet to 6 feet long, they’re lightweight, affordable, and surprisingly durable. The 100-gallon models offer serious growing space without overwhelming a small patio. Just ensure you get a livestock-safe coating or seal the interior to prevent metal leaching.
Self-Contained Fountain Kits
If you’re renting or want maximum flexibility, all-in-one fountain kits offer plug-and-play simplicity. These units include the reservoir, pump, and fountain feature in one package. They’re typically smaller (10 to 15 gallons) but require zero installation skills and can move with you.
Custom-Built Raised Ponds
For permanent installations, consider a raised pond built from stacked stone, concrete blocks, or composite decking materials. These can conform to awkward corner spaces or run along a railing, maximizing your usable area. Budget around $300 to $800 depending on size and materials.
Match your container choice to your space’s style. Modern apartments suit sleek ceramics or steel tanks. Traditional brownstones pair beautifully with half-barrels. Industrial lofts can pull off galvanized stock tanks. Your water garden should feel like a natural extension of your outdoor room, not an afterthought.
Tools and Materials You’ll Need
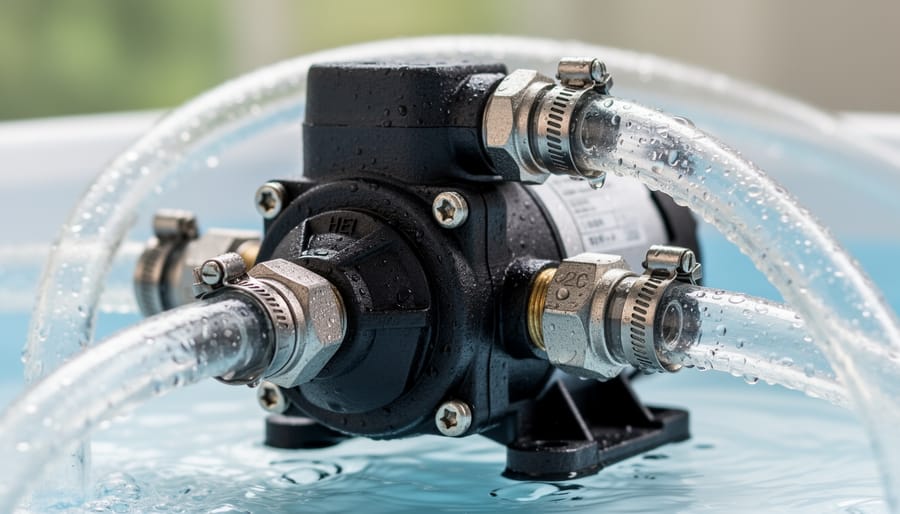
Building a compact urban water garden doesn’t require a truckload of supplies, just smart choices that work in tight quarters. Before you start shopping, measure your space and determine your budget, as container size will dictate most other purchases.
Container and Liner Materials
Your foundation is the container itself. Half-barrel planters (15-25 gallon capacity) work beautifully on balconies, while larger patios can accommodate 50-100 gallon stock tanks or preformed pond shells. If you’re using a porous container like an unlined wooden barrel or ceramic pot, you’ll need a flexible pond liner (EPDM or PVC). Home improvement stores like Home Depot carry basic liners, but specialty aquatic shops stock higher-quality materials. Consider eco-friendly materials like recycled rubber liners if sustainability matters to you.
Plumbing and Filtration Components
A small submersible pump (50-200 gallons per hour) is essential for water circulation. Popular compact options include the Aquascape Ultra pumps or Laguna PowerJet fountains, both available online or at garden centers. You’ll also need vinyl tubing to connect the pump to a fountain head or waterfall feature if desired.
Complete Shopping List
- Container: Half-barrel, stock tank, or preformed shell (15-100 gallons depending on space)
- Pond liner: EPDM flexible liner if container isn’t waterproof
- Submersible pump: 50-200 GPH capacity
- Aquatic plants: 2-4 varieties suited to your container depth
- Optional: Small biological filter for fish, LED underwater lighting, decorative river rocks, mosquito dunks
Urban gardeners can source most materials from local nurseries, Aquascape dealers, or online retailers like The Pond Guy. Many cities now have specialty aquatic plant nurseries that offer expert advice alongside materials, worth the trip for first-timers.
Safety Warnings and Urban Considerations
Before you place your first container or turn on a pump, take time to address the safety considerations unique to urban water gardens. These aren’t just bureaucratic hoops, they’re essential steps that protect your investment, your property, and your peace of mind.
Structural Load Limits
Balconies and rooftops have weight capacities that seem generous until you start adding water. A 50-gallon container pond weighs over 400 pounds when filled, not counting the container itself, rocks, or soil. Your balcony might be rated for 50 pounds per square foot, which sounds adequate, but concentrating all that weight in one spot creates stress points that can exceed safe limits.
Check your lease, building specifications, or contact management for load ratings. Distribute weight strategically by placing containers near support walls or beams rather than at the balcony’s center or edge.
Electrical Safety
Water and electricity demand respect. Every pump, filter, or lighting element must connect to a GFCI (ground fault circuit interrupter) outlet, which cuts power instantly if moisture creates a short. Never use extension cords as permanent solutions or run electrical lines where foot traffic might damage them. If your space lacks outdoor outlets, hire a licensed electrician to install one properly, it’s worth every dollar.
Mosquito Prevention
Still water becomes a mosquito nursery within days. Moving water from pumps disrupts breeding, but you need backup strategies to stop mosquitoes completely. Add mosquito dunks containing Bti bacteria monthly, ensure your pump runs continuously, and remove standing water from saucers or overflow areas. In urban environments where neighbors are close, mosquito control isn’t just courteous, it’s essential.
Child and Pet Safety
Even shallow containers pose drowning risks for toddlers and curious pets. If children or animals access your space, install protective mesh just below the water surface or fence the area completely. Avoid toxic plants like water hemlock, and secure pumps so cords don’t create tripping hazards.
Building Codes and HOA Rules
Many urban buildings restrict water features due to liability concerns or aesthetic guidelines. Read your HOA covenants and check local ordinances before purchasing materials. Some buildings require written approval, engineer letters, or additional liability insurance. It’s frustrating paperwork, but discovering restrictions after installation is worse.
Step-by-Step Installation Process
Preparing Your Location
Start by thoroughly cleaning your chosen spot, sweep away dirt, debris, and anything that could puncture your liner or container. Even small pebbles can cause problems over time, so give the area a good once-over.
Next, lay down protective underlayment. Old carpet remnants, pond liner underlayment, or even layers of cardboard work well to cushion the container and protect your balcony or patio surface from moisture. This step is crucial for elevated spaces where water damage to the structure below could be costly.
Use a carpenter’s level to check that your surface is flat. Water will find the low spots, and an unlevel container looks unprofessional and can stress the structure unevenly. If you’re on a slightly sloped balcony, use shims or pavers to create a level base.
Finally, plan your electrical access. You’ll need a GFCI-protected outlet within reach for your pump. If your outlet is far away, measure now so you can purchase the right length of outdoor-rated extension cord. Never run electrical cords through doorways where they can be pinched or create a tripping hazard.
Setting Up the Water Container
Start by lining your container if it wasn’t pre-sealed. For porous materials like wood barrels or concrete, use a flexible pond liner that extends at least six inches over the rim, tuck and fold it neatly rather than cutting it yet, because the water weight will settle it into place. Smooth out major wrinkles with your hands to prevent weak spots.
Position your container in its final location now, before adding water. Even a small water garden becomes too heavy to move once filled. Make sure it sits absolutely level, use a carpenter’s level and shim with composite shingles if needed. An unlevel container creates uneven water depth and makes your plants look lopsided.
Create planting shelves by stacking bricks or turning plastic nursery pots upside down inside the container. Most marginal plants need their crowns just four to six inches below the surface, while your deeper center area accommodates water lilies or fish. Space these platforms around the perimeter, leaving the middle section at full depth. Test stability by pressing down firmly, wobbly shelves will topple when you’re trying to position plants later.
Installing Pump and Filtration
In compact urban water gardens, you’ll want a pump rated between 50-150 gallons per hour, enough to circulate the water without creating a whirlpool. Look for submersible fountain pumps specifically labeled for small containers. These are quieter and easier to conceal than external models.
Place the pump in the deepest part of your container, away from where you’ll position plants. Most small pumps come with adjustable flow controls, which is essential because you can dial back the intensity if it disturbs your plants or splashes out of the container.
For filtration in tiny systems, keep it simple. A basic sponge filter attached to your pump intake catches debris and provides biological filtration as beneficial bacteria colonize the sponge. If you’re adding fish, upgrade to a small canister filter rated for aquariums of similar volume.
Hide pump cords by running them behind decorative rocks or beneath plant containers before routing them over the edge. Use black electrical tape to secure cords along dark container edges where they’ll disappear visually.
Rinse the sponge filter weekly in pond water, never tap water, which kills the helpful bacteria.
Adding Plants and Finishing Touches
Start with your smallest plants, dwarf water lilies and compact marginals, placing them on the shelves you created earlier. Submerge containers so their rims sit just below the waterline, which keeps roots healthy while leaves float naturally. Position taller varieties like dwarf papyrus toward the back or center, and let low-growing floaters like fairy moss spread across the surface between lily pads.
Compact spaces demand restraint. Overcrowding kills visual impact and chokes plant growth, so choose three to five varieties maximum and give each room to breathe. A single beautiful specimen can outshine a jumbled collection. Group odd numbers of plants for a natural look, and vary heights to create depth even in a shallow container.
Once plants are settled, arrange your hardscape elements. Tuck smooth river stones around container edges to hide plastic rims, and position a small piece of driftwood or a decorative rock as a focal point. These natural touches blend your water garden into its urban surroundings rather than making it feel like an artificial insert.
Consider adding smart lighting beneath the waterline or around the container’s perimeter, even a simple submersible LED creates stunning evening ambiance on a balcony or patio. For finishing touches, add beneficial bacteria to jumpstart your water’s ecosystem, and drop in a couple of mosquito dunks to prevent breeding without harming plants.
Step back and observe from different angles. Your water garden should feel intentional, not cluttered. Adjust plant placement and trim any damaged leaves before the system settles into its rhythm over the next few weeks.
Best Plants for Compact Urban Water Gardens
Choosing the right plants transforms your compact water garden from a simple container of water into a thriving miniature ecosystem. The key is selecting varieties that stay small, grow slowly, and won’t overwhelm your limited space within a single season.
Compact Water Lilies for Small Containers
Skip the standard water lilies, they’ll quickly dominate a small garden. Instead, look for dwarf cultivars specifically bred for container growing. ‘Helvola’ (hardy to zone 4) produces canary-yellow blooms and spreads only 1-2 feet, perfect for containers as small as 18 inches across. ‘Pygmaea Rubra’ stays equally compact with deep red flowers. For tropical options in warmer climates or seasonal displays, ‘Panama Pacific’ delivers vibrant purple blooms without the aggressive growth. These miniatures need just 6-12 inches of water depth.
Space-Saving Plant Options
Your best choices for compact urban water gardens include:
- Dwarf papyrus (Cyperus haspan), reaches only 18-24 inches tall instead of 6 feet, adds vertical interest without blocking views
- Fairy moss (Azolla), floating groundcover that stays naturally tiny, helps shade water and prevent algae
- Water lettuce, compact rosettes float on the surface, easy to thin when they multiply
- Miniature cattails (Typha minima), grows to just 12-18 inches, provides classic pond aesthetics at balcony scale
- Dwarf four-leaf clover (Marsilea minuta), spreads slowly as a shallow marginal, tolerates partial shade
- Creeping Jenny (Lysimachia nummularia), cascades beautifully over container edges, thrives in boggy margins
Position taller plants like dwarf papyrus toward the back or center of your container, with floating plants scattered across the surface and trailing marginals softening the edges. Start with 3-5 plant types maximum, overcrowding defeats the purpose of a compact design and makes maintenance harder in tight urban spaces.
Verification and Troubleshooting
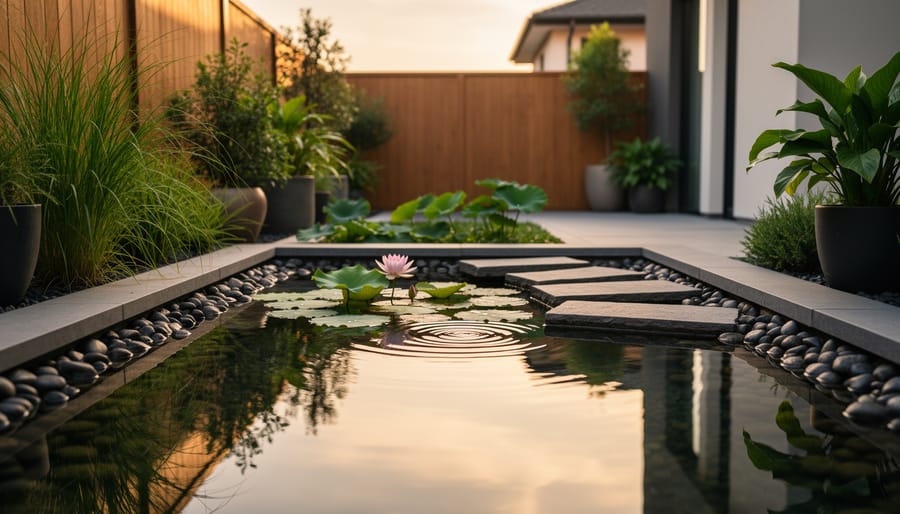
After you’ve completed your water garden setup, give it 24 hours before declaring victory. Walk out to your new feature and listen, you should hear a gentle trickle or burble from your pump. If there’s silence, check that the pump is plugged in and not clogged with debris. Kneel down and look at the water surface; you should see ripples or movement indicating proper circulation. Stagnant water means your pump isn’t working correctly or the flow rate is too low.
Check your plants daily for the first week. Floating plants like water lettuce should stay on the surface, not sink. Submerged plants might look a bit shocked initially but should perk up within three to five days. If leaves turn yellow or brown quickly, you might have placed sun-loving plants in too much shade, or vice versa. Marginal plants in shallow areas should have their roots underwater but stems and leaves above the surface.
Cloudy water is normal for the first week as your system establishes beneficial bacteria. If it persists beyond ten days, you’re likely overfeeding fish or have too much organic matter decomposing. Do a 25% water change and cut back on feeding. Green water means algae has taken hold, usually from too much sunlight hitting bare water. Add more floating plants to shade the surface, or move your container to a spot with less direct sun.
If your pump stops working, unplug it immediately and check the intake screen. In compact urban gardens, leaves and debris accumulate fast. Clean the impeller, that small spinning part inside, every two weeks during growing season. When plants struggle despite good placement, test your water. Pet stores sell simple test strips. Urban tap water often contains chlorine or chloramines that harm plants and fish, so let water sit 24 hours before adding it, or use a dechlorinator.
Next Steps and Seasonal Maintenance
Once your water garden is up and running, keeping it healthy through the seasons takes consistent but simple care. In spring, restart your pump after winter, divide overgrown plants, and refresh the water. Summer demands the most attention: top off water lost to evaporation weekly, shade the container if temperatures exceed 30°C to prevent algae blooms, and monitor fish for stress in hot weather. Autumn is the time to trim back dying foliage, reduce feeding if you have fish, and prepare for colder months.
Winter protection is critical for urban containers, especially on exposed balconies. In frost-prone areas, either move the container to a sheltered spot, insulate it with bubble wrap, or drain it completely and store plants indoors in buckets of water. Ceramic and thin-walled containers can crack if water freezes and expands.
Can I leave my water garden outside in winter?
It depends on your container material and climate. Thick plastic and stock tanks can often stay out with insulation, but ceramic and thin resin pots should be drained or moved indoors to prevent cracking from ice expansion.
How often do I need to clean it?
Remove debris weekly and do a partial water change monthly. A thorough clean, draining, scrubbing, and refreshing substrate, is needed once or twice a year depending on plant density and whether you keep fish.
Can I add fish to a small container?
Only in containers holding at least 150 litres with adequate filtration. Choose hardy species like white cloud minnows or a single goldfish, and never overstock.
What if I move apartments?
Compact water gardens are surprisingly portable. Drain most of the water, keep plants moist in plastic bags, transport the container, and refill at your new place within a day or two.
When you’re ready to expand, consider adding a second container to create a layered display, introducing smart tech like automated top-off systems or lighting, or connecting multiple features with a small stream. Your compact water garden can grow with your confidence and available space.
Creating a water garden in your compact urban space isn’t just achievable, it’s one of the most rewarding projects you’ll ever tackle, even if you’ve never touched a pond liner before. You’ve got everything you need now: the knowledge to assess your space, choose the right container, gather materials, follow safety protocols, and install your water feature step by step. There’s no mystery left, just the doing.
Start small if you’re feeling uncertain. A simple 20-gallon ceramic bowl with a handful of water lettuce and a tiny pump can transform your balcony into a peaceful retreat. You can always expand later once you’ve experienced the magic firsthand.
I still remember the first morning after setting up my own balcony water garden in a cramped apartment courtyard. I stepped outside with my coffee, heard that gentle trickle of water, and felt something shift. The traffic noise didn’t disappear, but it faded into the background. That little fountain became my five-minute vacation every single day.
Your neighbors might peek over and ask how you did it. You’ll smile because you’ll know it wasn’t complicated, you just followed the steps. The plants will grow, the water will sparkle in the morning sun, and you’ll have created something living and beautiful in the middle of the concrete jungle. That’s the real achievement: bringing nature into your daily routine, one small container at a time.