
How Smart Water Management Turns Your Garden into a Climate Survivor
Position your pond or water feature where you can observe natural drainage patterns during heavy rain—watch where water pools and flows across your yard for at least one storm cycle before finalizing placement. This single observation will prevent 90% of flooding headaches down the road.
Install overflow routes immediately, even before your water garden is complete. Dig a shallow swale or gravel channel that directs excess water away from foundations and toward rain gardens or permeable areas. During unexpected downpours, this pre-planned escape route protects both your feature and your home’s foundation from water damage.
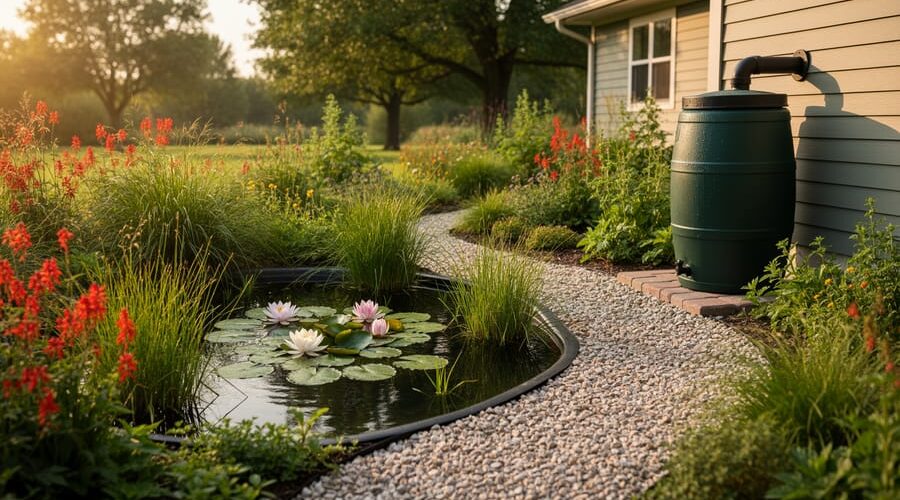
Layer your water garden with climate buffers that work year-round. Add floating plants that shade water during heat waves, reducing evaporation by up to 30%. Surround the perimeter with moisture-loving plants like cardinal flower or rush grasses that absorb excess runoff during storms while thriving on stored moisture during dry spells. These living barriers adapt automatically to whatever weather arrives.
Build water storage into your landscape design from day one. Connect downspouts to rain barrels positioned near your water feature, creating a backup reservoir for topping off during droughts. A simple 55-gallon barrel refills your average pond five to seven times through a dry summer, eliminating the guilt and cost of using treated tap water.
Your water garden doesn’t need to be a weather victim. With thoughtful placement and integrated climate management systems, it becomes more resilient than traditional landscaping. The key shift is moving from reactive problem-solving to proactive design—building flexibility into your outdoor space so it handles both feast and famine without constant intervention. When climate works with your design instead of against it, maintenance drops and enjoyment soars.
Understanding Your Water Garden’s New Reality
The Weather Rollercoaster Your Pond Faces
Your backyard pond isn’t just dealing with the gentle rhythm of seasons anymore. Today’s weather patterns feel more like a wild theme park ride, and your water feature is strapped in for the journey.
Let’s talk about what’s really happening out there. Prolonged droughts are becoming the new normal in many regions, causing water levels to drop faster than you can top them off with a garden hose. I’ve watched friends lose six inches of pond depth in just two weeks during last summer’s heat wave. That’s not just an aesthetic problem. As water levels drop, concentrations of fish waste and organic matter spike, creating a toxic soup that stresses your fish and encourages algae blooms.
Then, seemingly overnight, the weather flips. Sudden downpours dump inches of rain in hours, overwhelming your pond’s capacity. That overflow carries precious beneficial bacteria right out of your system while washing in lawn chemicals, dirt, and debris from surrounding areas. Your carefully balanced ecosystem just got hit with a reset button.
Temperature swings are equally challenging. Those 40-degree differences between day and night? They stress fish, disrupt beneficial bacteria colonies, and can trigger rapid algae growth. Spring warm-ups followed by surprise freezes can devastate plants you thought were safely established.
The good news? Understanding these challenges is your first step toward building a pond that can handle whatever weather comes its way.
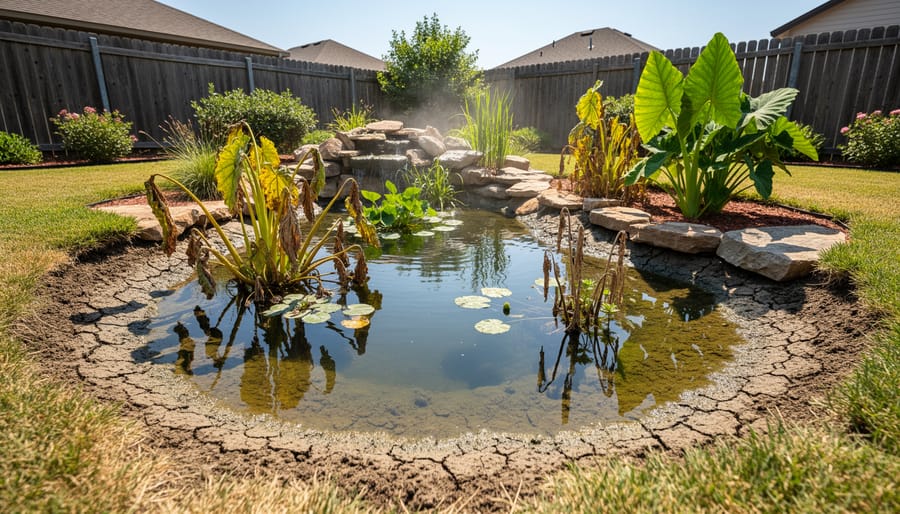
What Happens When Water Gardens Aren’t Prepared
I learned this lesson the hard way one spring when I skipped my usual pond prep. By mid-May, my once-crystal-clear water feature had transformed into a thick green soup of algae. The bloom happened so fast that my goldfish were gasping at the surface, desperately searching for oxygen. It was heartbreaking to watch, and the emergency pond cleanup cost me three times what proper preparation would have.
My neighbor John experienced a different disaster. He ignored the hairline crack in his pond liner, thinking it was too small to matter. One winter freeze later, that tiny crack became a six-inch split. He woke up to a waterlogged patio and a very expensive repair bill, not to mention his prized koi had to be temporarily rehomed during the restoration.
These scenarios aren’t rare. When water gardens face extreme weather unprepared, the results cascade quickly. Summer droughts concentrate waste products, stressing fish and encouraging mosquito breeding. Heavy rains overflow poorly designed edges, washing mulch and debris into the water or flooding surrounding patios. Temperature swings crack rigid materials and send pumps into early retirement.
The financial toll adds up fast. Emergency algae treatments, replacement fish, liner repairs, and constant water quality testing become your new normal. What should be a peaceful backyard retreat becomes a money pit and a source of stress. A few hours of seasonal preparation prevents months of headaches.
The Smart Water Capture System
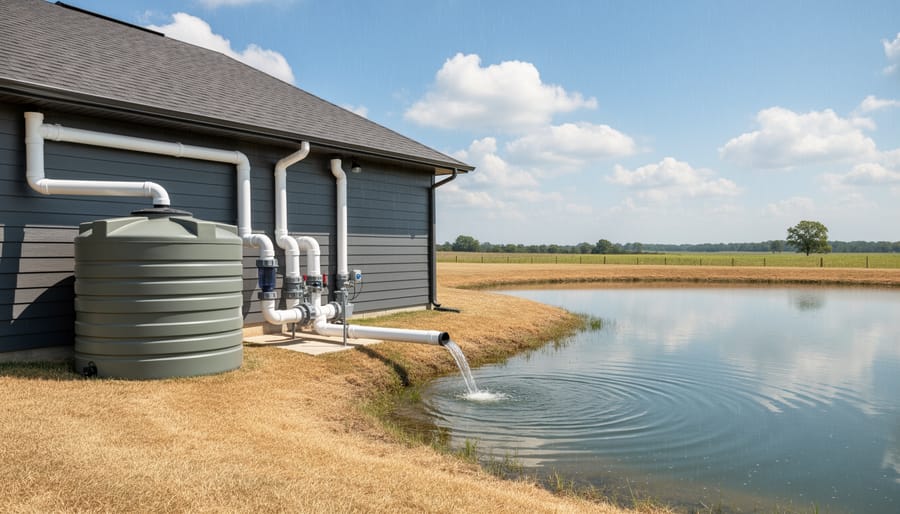
Setting Up Rainwater Collection for Your Water Garden
Setting up a rainwater collection system for your water garden is easier than you might think, and it’s one of my favorite weekend projects! Let’s walk through it together.
Start by examining your roof and gutters. Your roof is essentially a giant water-catching surface just waiting to be tapped. Calculate roughly how much water you can collect by multiplying your roof area by the rainfall amount – even a modest roof can capture hundreds of gallons during a good storm! For a typical backyard pond of 500-1000 gallons, a single 55-gallon rain barrel might fill your needs for top-offs between rains, but serious water gardeners often daisy-chain multiple barrels together.
First things first: install a first-flush diverter on your downspout. This clever little device diverts the initial dirty water (full of roof debris, bird droppings, and accumulated dust) away from your collection barrel. Think of it as a bouncer for your water garden – keeping out the riffraff! You can purchase ready-made diverters or build a simple one using PVC pipe with a ball valve.
Next, position your rain barrel on a stable platform near your pond. Elevation matters here – gravity becomes your friend when it’s time to move water. Connect your downspout to the barrel using a diverter kit (available at most hardware stores). Make sure your barrel has an overflow valve to prevent flooding during heavy downpours.
For sizing, follow this rule of thumb: aim for collection capacity equal to at least 10-15 percent of your pond volume. This ensures you’ll have enough stored water for regular evaporation losses during dry spells without constantly refilling from municipal sources.
Overflow Planning That Protects Your Patio
When heavy rains hit, having a plan for where that extra water goes can mean the difference between a protected patio and an indoor swimming pool you definitely didn’t ask for. I learned this the hard way during a surprise thunderstorm that sent water cascading right toward my back door before I’d thought through my overflow system.
The key is creating intentional pathways that guide excess water away from your outdoor living spaces and toward areas where it can safely absorb or drain. Start by observing your patio during a moderate rain. Where does water naturally want to go? Instead of fighting gravity, work with it by creating shallow swales or decorative channels that direct overflow toward rain gardens, lawn areas, or French drains.
For water gardens, install an overflow pipe or spillway at a strategic height. This acts like a safety valve, releasing excess water before your pond overflows its edges. Position the overflow outlet so it directs water away from patios, foundations, and seating areas. A simple pipe angled toward a gravel bed or planted area does the trick beautifully.
Consider adding a secondary collection basin downhill from your main water feature. This backup system catches overflow and slowly releases it into the soil, preventing erosion and pooling. Line it with river rocks for a natural look that doubles as functional drainage.
Remember, your overflow system should handle at least twice your typical rainfall. Mother Nature doesn’t always follow the forecast, and a little over-planning now saves a lot of scrambling with sandbags later.
Building a Drought-Ready Water Garden
The Deep-and-Small Advantage
Here’s a water-saving trick that surprised me when I first learned it: a deeper, narrower pond loses far less water than a shallow, sprawling one. It’s all about surface area. Think of it like this—evaporation happens at the water’s surface, so the more surface you expose to sun and wind, the more water you’ll lose. A pond that’s 3 feet deep and 8 feet wide will retain moisture much better than one that’s 1 foot deep and 15 feet across, even if they hold similar volumes.
I recommend aiming for a minimum depth of 2 to 3 feet for most water gardens. This depth range not only reduces evaporation but also helps fish and plants survive temperature swings. If you’re planning a new feature, consider using eco-friendly pond materials that support vertical walls for maximum depth efficiency.
Already have a shallow pond? You can retrofit it by excavating deeper zones in sections, creating varied depths that serve multiple purposes. Even adding a deeper pocket in one area makes a noticeable difference. These deeper sections also provide cooler refuge zones for aquatic life during heat waves—a win-win for water conservation and pond health.
Shade Strategies That Actually Work
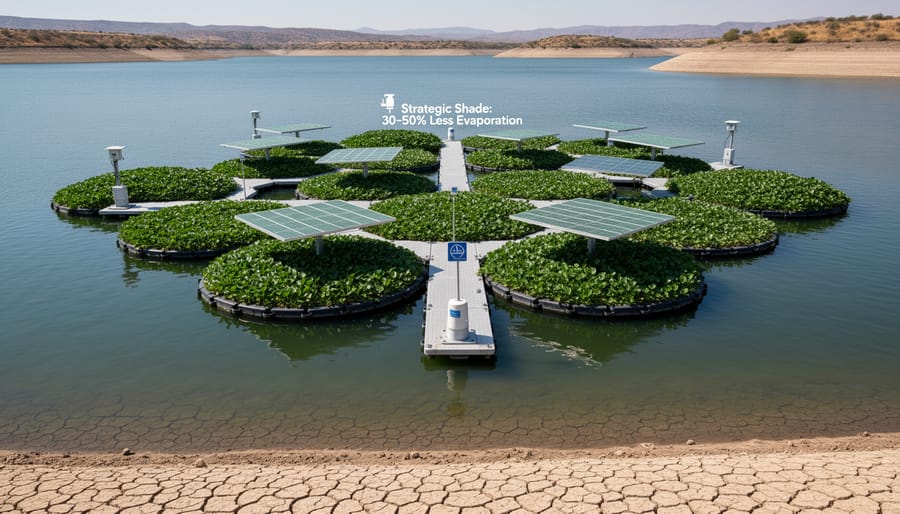
One of the simplest yet most effective ways to keep more water in your pond is to keep it cool and shaded. Direct sunlight accelerates evaporation dramatically, but the right shade strategies can cut water loss by 30-50% during hot months.
Let’s start with floating plants, nature’s built-in shade solution. Water lilies are the classic choice, covering the surface beautifully while their roots help filter the water. For smaller ponds, try water lettuce or frogbit, which multiply quickly and are easy to thin out when they get too enthusiastic. Aim to cover about 40-60% of your water surface for the sweet spot between shade and oxygen.
Overhead structures work wonders too. A simple pergola positioned on the sunny side of your pond creates dappled shade without blocking airflow. I installed a shade sail over my own pond three summers ago, angling it to cover the water during peak afternoon sun, and my refill frequency dropped noticeably. These sails are budget-friendly and come down easily before storm season.
Strategic planting around your pond perimeter makes a huge difference. Ornamental grasses like maiden grass or fountain grass positioned on the south and west sides provide afternoon shade as they mature. For faster results, consider tall perennials like Joe Pye weed or hibiscus, which shoot up quickly each season and create natural shade curtains.
The key is layering your approach. Combine floating plants with a structural element and border plantings for maximum evaporation control without turning your pond into a dark cave.
Smart Topping-Off Techniques
Keeping your water garden properly topped off doesn’t have to be complicated, even when water restrictions challenge us. I’ve found that checking water levels twice weekly during hot months gives you a good baseline—just mark your ideal water line with a small piece of tape on your liner or container edge so you can easily spot when levels drop.
The best time to add water? Early morning or evening when evaporation is minimal. You’ll maximize every drop and give your plants and fish time to adjust to any temperature differences. Aim to replace no more than 10-15% of your total volume at once to avoid shocking your aquatic ecosystem.
Automatic top-off systems are game-changers during dry spells. Float valves work like the mechanism in your toilet tank—simple, reliable, and water-efficient. They only add water when truly needed, preventing waste. If you’re under water restrictions, you can still use these systems by connecting them to rainwater barrels instead of municipal supplies. I did this last summer and kept my pond perfectly balanced without touching my regular water allowance. Just remember to check your float valve monthly for debris that might prevent proper shutoff—learned that lesson the soggy way!
Managing Heavy Rain Events Without the Mess
Preventing Pond Overflow Disasters
Let me share a story from my own backyard: I once woke up to find my beloved pond had transformed into a mini lake after an unexpected downpour, flooding my patio and overwhelming my carefully placed aquatic plants. That morning taught me the importance of planning for overflow before disaster strikes.
The good news? Preventing overflow is straightforward with three essential safeguards working together. Think of it as giving your pond multiple escape routes for excess water.
Start with an overflow drain, your first line of defense. Position it about two inches below your pond’s maximum water line. You can create a simple version using PVC pipe that directs excess water to a designated drainage area away from your house foundation. For installation, dig a trench sloping away from the pond at least one inch per eight feet of length. This gravity-powered system works 24/7 without electricity.
Next, build a protective berm around vulnerable areas. This raised earth barrier doesn’t need to be elaborate. A gentle mound of soil, 6-8 inches high and planted with ground cover, directs overflow away from patios and structures while looking naturally integrated into your landscape.
Finally, design a flexible overflow zone, essentially a shallow depression planted with water-tolerant plants like sedges or marsh marigolds. This backup area temporarily holds excess water during extreme events, allowing it to slowly percolate into the ground. Position it downhill from your pond where occasional flooding won’t damage existing landscaping.
These three layers of protection work together beautifully, keeping your water garden thriving through whatever weather comes your way.
Protecting Your Fish and Plants During Storms
When severe weather rolls in, your pond residents need your help! I learned this the hard way during my first big storm when I watched my water lilies nearly blow away and my koi frantically searching for shelter.
Start by securing floating plants before storms hit. Use plastic mesh or netting weighted at the edges to keep them from blowing across the pond or into your skimmers. You can also temporarily move smaller floating plants into a protected container filled with pond water.
Create safe zones where fish can ride out the turbulence. Deep areas of at least three feet work best, as they remain calmer during heavy rain. Add clay pipes, overturned plant pots, or pond shelters near the bottom so fish have somewhere to hide from debris and rushing water. During one particularly wild thunderstorm, I watched all my goldfish disappear into their terracotta hideaways until conditions calmed.
Preventing contaminated runoff is crucial for keeping your water healthy. Install a small berm or decorative rock border around your pond’s uphill side to redirect water away. Rain gardens positioned strategically can catch runoff before it reaches your pond, filtering out fertilizers, pesticides, and sediment. If runoff does enter during heavy storms, plan to test your water afterwards and perform partial water changes if needed to dilute any contaminants.
The Self-Regulating Water Garden
Plants That Balance Themselves
Here’s the secret I’ve learned after years of tending water gardens: the right plants practically take care of themselves while doing the heavy lifting of water management. They’re your climate-resilience dream team!
Marginal plants are absolute champions at adapting to water level fluctuations. Papyrus and pickerel rush can handle both partially submerged roots and drier conditions when water levels drop. They create natural ecosystem balance by filtering excess nutrients and providing shade that prevents algae blooms. I’ve watched my pickerel rush thrive through scorching summers and soggy winters without any fussing from me.
For floating plants, water lettuce and water hyacinth are fantastic natural purifiers. They absorb nutrients directly from the water, essentially acting as living filters. Just keep an eye on them during growing season as they can spread enthusiastically in warm weather.
If you want low-maintenance beauty, try water lilies and lotus plants. Their large leaves shade the water surface, reducing evaporation during droughts and keeping temperatures stable. They’re surprisingly tough, withdrawing into deeper water when conditions get harsh.
For edges that fluctuate, cattails and sweet flag are nearly indestructible. They’ll grow whether they’re standing in water or simply enjoying moist soil, making them perfect for unpredictable rainfall patterns.
The beauty of these plants is simple: once established, they adapt naturally while improving your water quality. That’s smart gardening!
Creating Natural Filtration That Handles Stress
Nature’s best filtration systems aren’t complicated contraptions requiring constant attention. They’re simply wetland edges that work tirelessly through scorching summers and freezing winters. I learned this after my mechanical filter failed during a heat wave, but my planted bog area kept chugging along beautifully.
Building a bog filter is remarkably straightforward. Create a shallow zone alongside your pond, about 8-12 inches deep, filled with pea gravel or small river rocks. This becomes the growing medium for water-loving plants like iris, rushes, and cattails. Water flows slowly through this planted area before entering your main pond, and the plant roots work magic by absorbing excess nutrients and harboring beneficial bacteria.
What makes these systems climate-resilient is their natural flexibility. During droughts, established bog plants develop deeper root systems and enter semi-dormancy while still filtering available water. When temperatures soar, the shading from foliage actually keeps the filtration zone cooler and more effective. Heavy rainfall doesn’t overwhelm them because the gravel bed disperses energy and the plants simply grow more vigorously with extra water.
The key is choosing tough regional natives that tolerate your specific conditions. In my experience, mixing species with different bloom times and root depths creates redundancy. If one plant struggles during extreme weather, others compensate. This isn’t about perfection but about building a resilient community that adapts naturally, requiring minimal intervention from you while keeping water quality stable year-round.
Patio Integration That Works With Climate Extremes
Permeable Surfaces That Save Your Water Garden
Here’s a simple truth I’ve learned from years of water gardening: the ground around your pond matters just as much as what’s in it. When heavy rains hit, traditional concrete patios can turn into rivers that either flood your pond or wash away its precious ecosystem. The good news? Permeable surfaces are your garden’s best friend.
Think of water-saving hardscape materials like a sponge instead of a plate. Permeable pavers, gravel, and decomposed granite let rainwater seep through naturally, feeding your garden instead of creating flash floods. I switched to permeable pavers around my koi pond three years ago, and the difference during storm season is remarkable.
For installation, start by excavating 6-8 inches deep around your water garden. Lay down landscape fabric to prevent weeds, then add a 4-inch base layer of crushed stone. This acts as your water reservoir. Top with 2-3 inches of your chosen material. Permeable pavers work beautifully for high-traffic areas, while decomposed granite creates softer pathways. Pea gravel is budget-friendly and easy to spread yourself.
The magic happens beneath the surface where water slowly infiltrates, recharging groundwater and keeping your water garden stable during downpours. Plus, these surfaces stay cooler in summer heat and require minimal maintenance. Just occasionally sweep debris and top up materials as needed. Your pond will thank you.
Smart Grading for Water Control
Think of your yard as a gentle highway system for water, where subtle slopes guide rainfall exactly where you want it to go. Creating proper grading doesn’t require heavy equipment or a degree in engineering—just some attention to detail and a willingness to move some soil around.
The magic number is a 2-3% slope away from your home’s foundation. That translates to about a 2-3 inch drop for every 10 feet of distance. It’s so subtle you’ll barely notice it visually, but water definitely will! I learned this the hard way when my first pond kept receiving runoff laden with debris from a poorly graded area near the house.
Here’s the beautiful part: while you’re directing water away from your foundation, you can simultaneously guide it toward your water garden or rain garden. During storm events, your pond becomes a functional landscape feature that captures and stores rainfall naturally. Just ensure the final grade around the pond creates a shallow basin that prevents water from flowing back toward structures.
To check your existing grade, place a long board or string level across the area after a rainstorm and watch where puddles form. These low spots tell you exactly where adjustments are needed. Add topsoil to low areas and redistribute high spots gradually, always working to create that gentle, consistent slope. Your foundation stays dry, and your water features get a natural refill.
Year-Round Monitoring Made Simple
What to Watch and When
Think of monitoring your water garden like checking in on a good friend – a quick weekly visit can tell you volumes about their wellbeing. Start with water levels, which are your first clue to climate stress. During drought periods, you’ll notice levels dropping faster than normal, while heavy rains might push them dangerously high. Keep a simple log or even snap photos to track changes over time.
Check water clarity by looking for murkiness or sudden algae blooms, which often signal temperature stress or nutrient imbalances from heavy runoff. Temperature matters too – if your water feels unusually warm to the touch, your fish and plants are feeling it even more. I learned this the hard way one scorching summer when my goldfish started gasping at the surface.
Your plants are nature’s early warning system. Watch for wilting marginals, browning lily pads, or stunted growth. These signal either water quality issues or temperature extremes before things become critical.
For those who want to stay ahead of problems without constant vigilance, automatic monitoring systems can track these parameters continuously. But even a simple weekly walkthrough with your morning coffee, noting what looks different, will help you catch problems while they’re still manageable. Trust your observations – you know your water garden best.
Seasonal Adjustments That Take Minutes
A few minutes each month can make all the difference in keeping your water garden resilient through changing seasons. I’ve found that spending just 10-15 minutes on seasonal pond maintenance saves me hours of corrective work later.
Start each season by checking your overflow drains and clearing any debris. Before hot months arrive, top up mulch around pond edges to reduce evaporation. As cooler weather approaches, trim back overgrown plants that might decompose in winter and cloud your water. I always adjust my pump settings seasonally too—running them slower in winter conserves energy while maintaining circulation.
Keep a simple monthly checklist on your phone: inspect seals, test water levels, and observe plant health. These quick observations help you spot potential problems before they become emergencies, giving you peace of mind regardless of what weather comes your way.
Here’s the truth I’ve learned after years of managing water gardens through scorching droughts and torrential downpours: climate-resilient water management doesn’t require breaking the bank or adding hours to your weekend to-do list. It’s really about making thoughtful design choices that let nature do the heavy lifting for you.
I still remember the panic I felt watching my first pond nearly overflow during an unexpected storm, then watching it drop dangerously low just weeks later during a heat wave. But once I implemented just a couple of the strategies we’ve covered—adding overflow channels and surrounding my pond with moisture-loving plants—everything changed. My water garden became self-regulating instead of requiring constant intervention.
The beauty of climate-resilient design is that you don’t need to tackle everything at once. Start with the challenge that bothers you most. Is summer heat evaporating your pond faster than you can refill it? Try adding shade cloth or floating plants first. Dealing with flooding during spring rains? Focus on creating a simple overflow system or rain garden. Each small improvement builds on the last, and you’ll be amazed at how quickly your outdoor space becomes more resilient.
Remember, nature has been managing water through droughts, floods, and temperature swings for millions of years. By working with natural patterns rather than fighting them, you’re creating a water garden that’s not just surviving but actually thriving through whatever weather comes your way. You’re building something beautiful and sustainable that will bring you joy for years to come, no matter what climate challenges the future holds.
So take that first step. Your perfect, resilient water garden is waiting, and you already have everything you need to create it.