
Smart Drainage Pond Design: Future-Proof Your Water Garden Against Climate Change
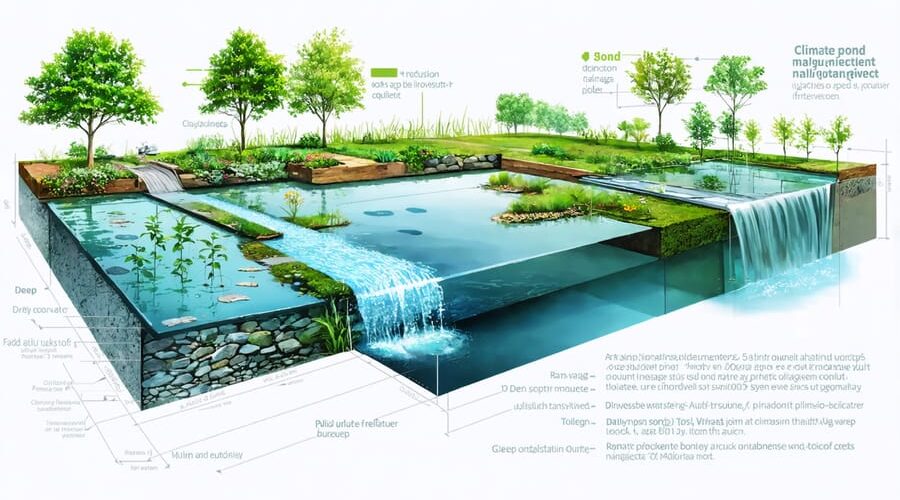
Design your drainage pond with climate resilience in mind by positioning the inlet structure above the permanent pool level, creating a multi-stage outlet system that handles both regular flows and extreme events. Calculate storage volume using the 100-year storm projection rather than historical data, ensuring your pond can manage increasingly intense rainfall patterns.
Shape the pond basin with gentle slopes (no steeper than 3:1) and incorporate vegetated benches at different elevations to prevent erosion, filter pollutants, and provide crucial habitat diversity. These natural design elements not only enhance stability during major weather events but also reduce long-term maintenance requirements.
Install flexible infrastructure like adjustable weirs and variable-height outlets to actively manage water levels throughout changing seasons. This adaptive approach allows for water conservation during drought periods while maintaining capacity for sudden storm events. The key to modern drainage pond design lies in this balance between everyday functionality and extreme weather preparedness.
Transform traditional stormwater management into a resilient, ecological asset by integrating native plants, creating microhabitats along the shoreline, and establishing designated overflow areas that protect critical infrastructure during peak events. This comprehensive design strategy ensures your drainage pond serves multiple purposes while standing ready for whatever weather challenges arise.
Climate-Smart Sizing and Depth Planning
Rainfall Capacity Calculations
Calculating your pond’s required volume starts with effective rainfall capacity planning, which is simpler than you might think! Begin by finding your area’s annual rainfall data through local weather services or online resources. For a basic calculation, multiply your drainage area (in square feet) by the maximum expected rainfall (in feet) to get the minimum pond volume needed.
For example, if you have a 1,000-square-foot drainage area and expect 6 inches (0.5 feet) of rain in a heavy storm, you’ll need a pond that can hold at least 500 cubic feet of water. Remember to add an extra 20% capacity as a safety buffer for unexpected downpours.
Don’t forget to consider your soil type – sandy soils drain faster than clay-rich ones. For areas with quick-draining soil, you might want to increase your pond’s capacity by an additional 15%. Also, factor in any water that flows from nearby surfaces like driveways or roofs.
A simple way to track your calculations is to use this formula:
Pond Volume = Drainage Area × Maximum Rainfall × Safety Factor (1.2)
This approach ensures your pond can handle typical rainfall while maintaining proper drainage for your property.
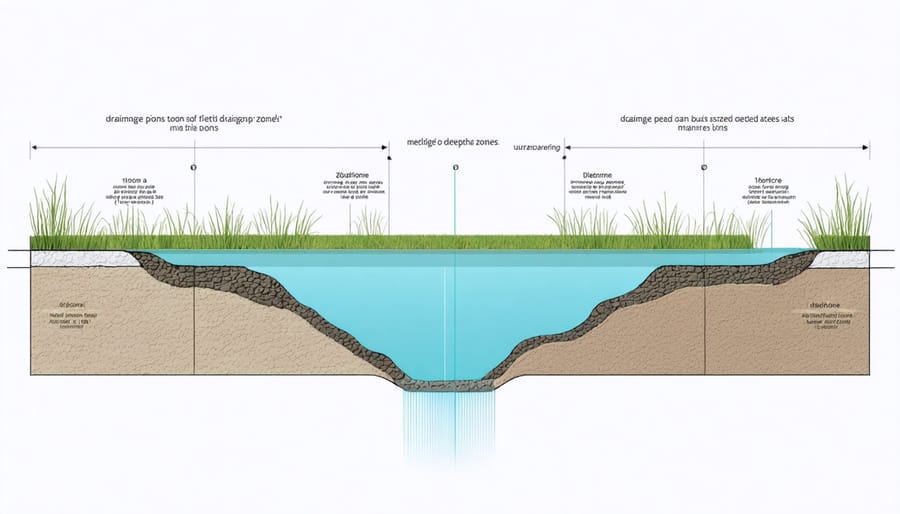
Strategic Depth Zones
Creating different depth zones in your drainage pond isn’t just about aesthetics – it’s a smart strategy for maintaining a healthy ecosystem. These essential pond zones serve multiple purposes, from regulating water temperature to providing safe havens for wildlife.
Start with shallow margins (6-12 inches deep) around the pond’s edge, perfect for marsh plants and creating safe entry points for animals. This zone also helps filter runoff water before it enters deeper areas. Moving inward, create a mid-depth zone (2-3 feet) where water lilies and other aquatic plants thrive. This area helps maintain stable water temperatures during hot summers.
The deepest zone should be at least 4-5 feet, providing a cool refuge during extreme heat and preventing complete freezing in winter. This depth also offers protection for fish and other aquatic life from predators and harsh weather conditions.
When planning these zones, aim for gentle slopes between depth changes (no steeper than 3:1) to prevent erosion and ensure safety. Consider adding underwater shelves or ledges for easy plant placement and maintenance. These varied depths create a more resilient pond system that can better handle climate fluctuations while supporting diverse wildlife.
Resilient Edge and Bank Construction
Natural Erosion Controls
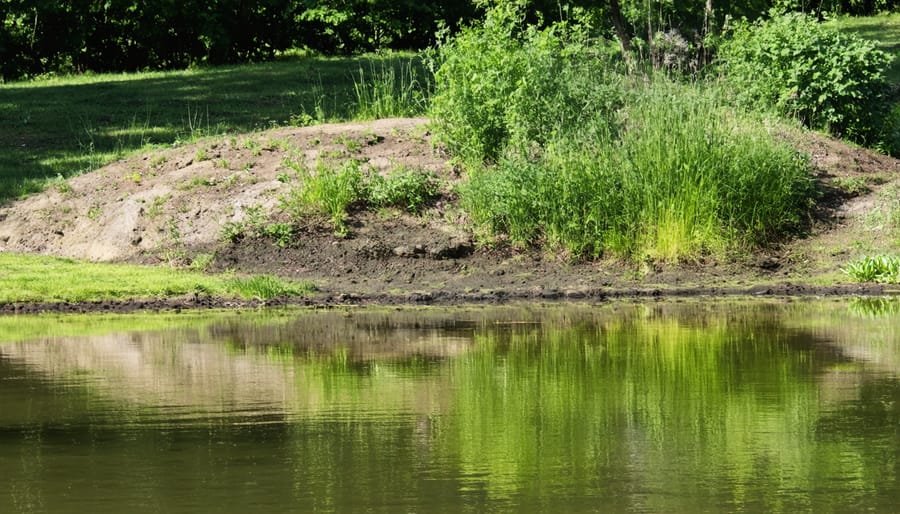
Natural erosion control methods offer an eco-friendly and visually appealing way to protect your drainage pond’s banks. Plants are your best allies in this effort, with deep-rooted native species being particularly effective. Start by planting grasses like switchgrass or blue sedge along the upper banks, as their extensive root systems hold soil in place while adding natural beauty to your pond.
For the areas closest to the water line, consider moisture-loving plants such as rushes, cattails, and iris. These plants not only prevent erosion but also create natural habitats for wildlife and help filter water. Space them about 12-18 inches apart to allow for growth while maintaining adequate coverage.
Beyond plants, natural materials like coconut fiber rolls (coir logs) can provide immediate erosion protection while vegetation establishes itself. Place these biodegradable rolls along the waterline and secure them with wooden stakes. For steeper banks, consider creating terraces using local stone or installing rock riprap at critical points where water flow is strongest.
A layer of organic mulch applied between plants helps retain moisture and protect soil from rain impact. Use bark mulch or straw, keeping it 2-3 inches deep but avoiding direct contact with plant stems. Remember to inspect your natural erosion controls regularly, especially after heavy rains, and replace or reinforce areas as needed. This combination of plants and natural materials creates a sustainable, low-maintenance solution that improves with time.
Overflow Systems
Every drainage pond needs a well-designed overflow system to handle those unexpected downpours safely. Think of it as your pond’s emergency exit – it needs to be reliable and ready when heavy rains hit. The main overflow should be positioned slightly below your pond’s maximum desired water level, typically through a pipe or channel that directs excess water away from your property.
For added safety, include a secondary overflow route that kicks in during extreme events. This could be a grass swale or a reinforced spillway that can handle the overflow without causing erosion. Position these overflow points where they won’t cause problems for neighboring properties or structures.
Consider installing a stepped cascade or rock-lined channel to slow down fast-moving water. This not only prevents erosion but also adds an attractive feature to your pond design. The overflow path should follow natural contours where possible, making use of existing slopes to guide water away naturally.
Don’t forget to maintain clear paths for your overflow systems. Regular checks for debris, especially before storm seasons, will keep them working properly. Installing debris screens or grates can help prevent blockages while still allowing water to flow freely. Remember, a well-planned overflow system isn’t just about handling excess water – it’s about protecting your entire pond investment when Mother Nature throws her worst your way.
Sustainable Water Management Features
Water Conservation Systems
Smart water conservation is key to any successful drainage pond design, and incorporating effective water recycling systems can make your pond both environmentally friendly and cost-effective. One of the simplest ways to conserve water is by installing a rainwater harvesting system. This typically includes strategically placed gutters and downspouts that direct rainwater from your roof directly into your pond.
Consider adding a first-flush diverter to your system – it’s like a filter that prevents the initial dirty runoff from entering your pond. Once the first flush of debris-laden water passes, cleaner rainwater flows into your pond, helping maintain water quality while reducing your reliance on municipal water sources.
Storage tanks are another great addition to your conservation setup. These can collect excess rainwater during wet periods, which you can use to top up your pond during dry spells. Think of it as a savings account for water! Many pond owners also incorporate a pump system that circulates water through garden beds before returning it to the pond, creating a mini ecosystem that benefits both your pond and surrounding landscape.
For those really committed to sustainability, consider adding aquatic plants that naturally filter water and reduce evaporation. Water lilies, for example, provide shade that keeps water temperatures stable and reduces water loss through evaporation. Plus, they add beautiful color to your pond!
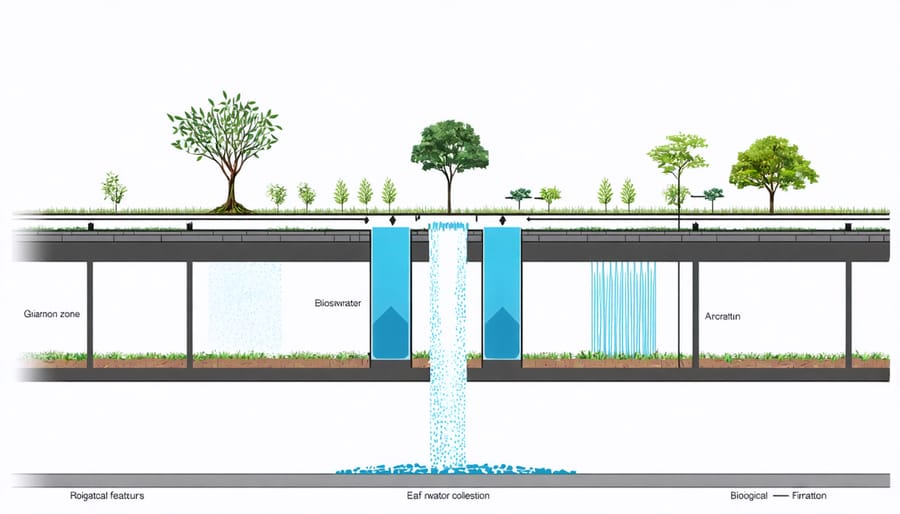
Natural Filtration Zones
Natural filtration zones are essential components of a well-designed drainage pond, acting as nature’s own water purification system. These areas use a combination of carefully selected plants and layered substrates to filter pollutants, sediments, and excess nutrients from the water before it enters the main pond area.
Start by creating shallow shelves or terraces around the pond’s edge, varying in depth from 6 to 18 inches. Layer these areas with different-sized gravel, starting with larger stones at the bottom and progressively smaller ones toward the top. This creates multiple filtering layers that trap different types of debris.
Choose native aquatic plants that are known for their filtering abilities. Cattails, rushes, and iris are excellent choices for removing heavy metals and excess nutrients, while water lilies help shade the water and reduce algae growth. Plant these in groups, ensuring about 50-60% of your filtration zone is covered with vegetation.
Consider creating a dedicated wetland buffer zone at the pond’s inlet point, where water first enters the system. This area should be slightly higher than the main pond and filled with dense plantings of moisture-loving species. The plants’ root systems will help slow water flow, allowing sediments to settle while absorbing excess nutrients.
For optimal performance, maintain these zones by removing dead plant material regularly and dividing overgrown plants every few years. This prevents the buildup of organic matter and ensures continued efficient filtration.
Drought-Ready Design Elements
Shade Strategies
Implementing effective shade strategies is crucial for managing high temperatures and reducing water loss in your drainage pond. Start by incorporating both natural and artificial shade elements to create a balanced ecosystem that stays cooler throughout the day.
Consider planting native trees and shrubs along the northern and western edges of your pond, where the sun’s intensity is strongest. Fast-growing species like willows and river birch provide excellent coverage while adding natural beauty to your landscape. Remember to position trees far enough from the pond to prevent leaf litter from overwhelming your water system.
Floating plants offer another natural solution, covering up to 70% of your pond’s surface. Water lilies, lotus, and duckweed not only provide shade but also help control algae growth by limiting sunlight penetration. For immediate results, consider installing shade sails or pergolas above your pond. These artificial structures can be adjusted seasonally and provide reliable coverage during peak heat periods.
Creating small islands or peninsulas within larger ponds offers additional opportunities for shade-providing vegetation. These features can host moisture-loving plants while creating cooler micro-environments for aquatic life. For smaller ponds, portable shade solutions like retractable awnings give you the flexibility to adjust coverage as needed throughout the day.
Remember to monitor water temperatures regularly and adjust your shade strategy seasonally. The goal is to maintain a balance that keeps your pond cool without completely blocking all sunlight, as some sun exposure is essential for healthy plant growth and natural processes.
Emergency Water Storage
Emergency water storage is a crucial component of any well-designed drainage pond system, serving as a backup during droughts and water shortages. By incorporating smart storage solutions, you can ensure your pond remains functional and sustainable even during challenging weather conditions.
One effective approach is to create a deeper section within your pond, known as a conservation zone. This area, typically 2-3 feet deeper than the main pond, acts as a reservoir during dry spells. Line this zone with heavy-duty pond liner and consider adding aquatic plants that can tolerate varying water levels.
Installing a rainwater harvesting system around your pond can significantly boost your water storage capacity. Direct roof runoff and surface water into collection tanks or cisterns connected to your pond. For every 1,000 square feet of collection area, you can gather approximately 600 gallons of water from just one inch of rainfall.
Consider implementing water-saving features like floating covers or shade balls to reduce evaporation during hot periods. These can cut water loss by up to 90% while maintaining proper oxygen levels for aquatic life. Installing a monitoring system with water level sensors can help you track storage levels and implement conservation measures when needed.
Remember to maintain proper filtration systems for stored water to prevent stagnation and ensure water quality remains suitable for your pond’s ecosystem. Regular maintenance of your storage systems, including checking for leaks and cleaning collection surfaces, will help maximize their efficiency and reliability.
Creating a well-designed drainage pond is more than just digging a hole and hoping for the best. By following the key principles we’ve discussed – proper sizing, strategic placement, effective inlet and outlet structures, and careful consideration of slope gradients – you’ll be well on your way to building a drainage pond that’s both functional and aesthetically pleasing.
Remember that successful pond design requires a balance between water management and environmental benefits. Your pond can serve multiple purposes, from controlling stormwater runoff to creating a beautiful habitat for local wildlife. The key is to work with your landscape’s natural features while incorporating essential engineering elements that ensure long-term stability.
Don’t be afraid to start small and expand your pond system as you gain confidence and experience. Regular maintenance and monitoring will help you identify any issues early on and make necessary adjustments. Consider keeping a journal of your pond’s performance through different seasons and weather events – this information will be invaluable for future improvements.
Whether you’re tackling this project to solve drainage issues or enhance your property’s appeal, remember that a well-designed drainage pond is an investment in both your property’s value and environmental sustainability. With proper planning and attention to detail, you can create a drainage solution that serves your needs while contributing to local ecosystem health for years to come.