
Transform Your Garden with a Natural Spring: A Water Feature That Brings Life
Transform your outdoor space into a mesmerizing oasis with a carefully developed water spring. Natural springs harness the earth’s perpetual water flow, creating a sustainable focal point that enhances any landscape while supporting local wildlife. Whether you’re developing an existing spring or crafting an artificial one, proper spring development combines technical expertise with artistic vision to create a feature that’s both functional and beautiful.
Water springs do more than just add aesthetic appeal – they serve as vital water sources, create soothing soundscapes, and establish thriving ecosystems. From modest garden springs to elaborate waterfall systems, spring development projects offer endless possibilities for property enhancement. By understanding the fundamentals of hydrology, construction techniques, and ecological considerations, you can create a spring feature that provides years of enjoyment while potentially increasing your property’s value.
This guide explores essential aspects of water spring development, from site selection and water source evaluation to construction methods and ongoing maintenance. Learn how to capture, channel, and showcase natural water flow while ensuring environmental sustainability and structural integrity. Whether you’re a DIY enthusiast or working with professionals, mastering these principles will help you bring your vision of a perfect water spring to life.
The Magic of Natural Springs in Your Water Garden
Creating the Perfect Water Flow
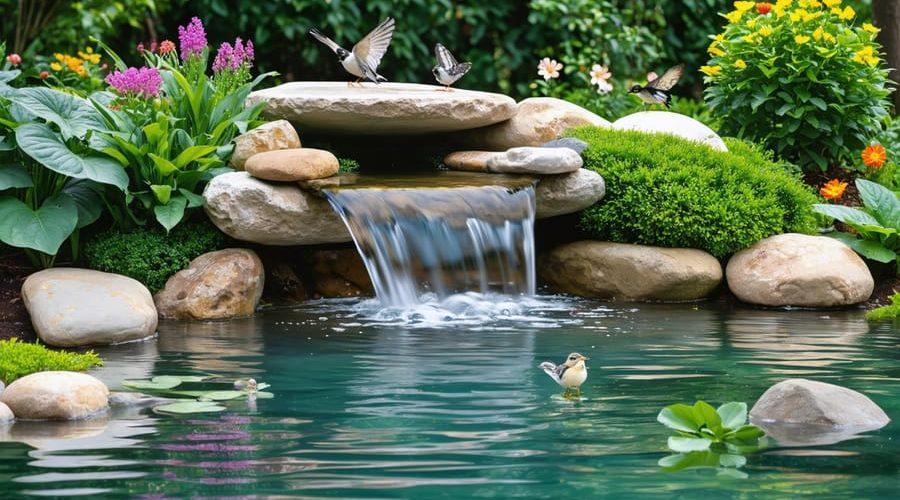
Water movement is the heart and soul of any spring feature, creating both visual appeal and soothing sounds that transform your garden into a peaceful retreat. The key is finding the perfect balance between gentle ripples and more dramatic cascades. Start by experimenting with different flow rates – a good rule of thumb is to begin with about 2-3 gallons per minute for smaller features and adjust from there.
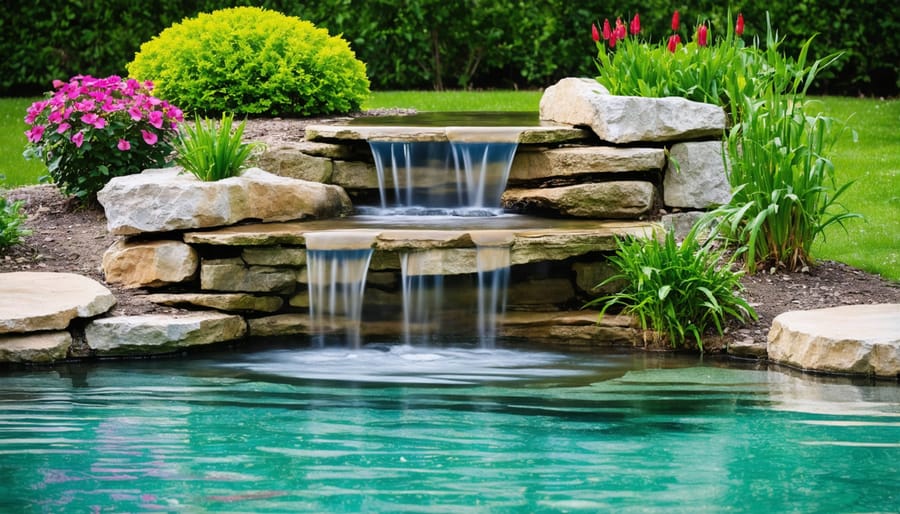
Consider creating multiple levels in your spring design, allowing water to travel through various paths. This natural meandering not only mimics wild springs but also creates different sound effects as water tumbles over rocks and into pools. Try incorporating both wider, gentle flows that produce soft murmurs and narrow channels that create melodic trickling sounds.
The direction of water flow matters too. Angling the water toward seating areas enhances the sensory experience, while ensuring the flow faces away from walkways prevents unwanted splashing. Remember that sunlight hitting moving water creates beautiful sparkles and reflections, so consider positioning your spring where it can catch morning or evening light for added magic in your garden space.
For the most natural look, vary the flow patterns using different-sized rocks and curves, creating a rhythm that feels organic rather than manufactured.
Benefits for Plants and Wildlife
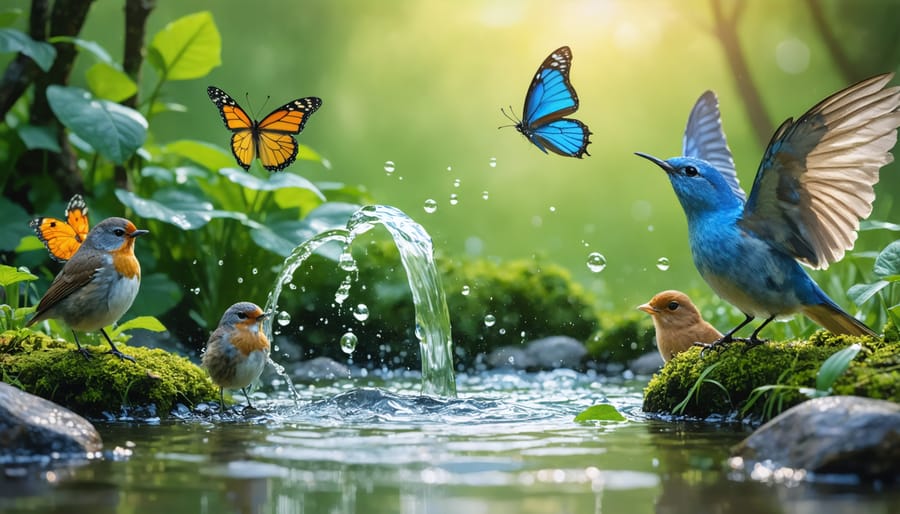
Natural springs create vibrant ecosystems that support a diverse range of wildlife. The clean, flowing water provides an ideal habitat for aquatic insects, small fish, and amphibians. Birds and small mammals are naturally drawn to these water sources, making your garden a bustling wildlife sanctuary. Native plants thrive around springs, their roots stabilizing the soil while creating shelter for creatures like frogs and salamanders.
Springs maintain consistent water temperatures year-round, which is crucial for supporting delicate aquatic life. This stable environment allows beneficial microorganisms to flourish, helping maintain water quality naturally. During dry seasons, springs become essential refuges for local wildlife, providing reliable water sources when other natural bodies may dry up.
Creating a spring feature in your garden not only enhances its beauty but also contributes to local biodiversity, making you an active participant in wildlife conservation.
Planning Your Spring Feature
Choosing the Right Location
Selecting the perfect spot for your water spring is crucial for both functionality and visual appeal. Start by examining your landscape’s natural drainage patterns during rainfall – this will help you identify areas where water naturally collects or flows. The ideal location should be slightly elevated from the surrounding area to prevent contamination from surface runoff.
Consider the distance from existing structures, as you’ll want your spring at least 50 feet away from buildings, septic systems, and property lines. The soil composition plays a vital role too – look for areas with good drainage but enough clay content to help retain water. Avoid locations with large tree roots that could interfere with construction or where falling leaves might cause excessive maintenance.
Sunlight exposure is another crucial factor. While some shade is beneficial to prevent excessive algae growth, too much shade can limit the growth of desirable aquatic plants. Choose a spot that receives 4-6 hours of sunlight daily for optimal balance.
Accessibility is key for both construction and maintenance. Ensure you can easily reach the spring for regular upkeep and that any necessary equipment can access the site. Also, consider the viewing angles from your home or outdoor living spaces – your spring should be visible from areas where you spend the most time outdoors.
Remember to check local regulations and obtain necessary permits before beginning any excavation work. Some areas have specific requirements regarding water features and drainage modifications.
Materials and Equipment Needed
Before you start your spring development project, gather these essential materials and tools. You’ll need a shovel, pickaxe, and garden rake for the initial groundwork. For water management, collect PVC pipes (various sizes), a water pump appropriate for your spring’s flow rate, and plumbing fittings including elbows and connectors.
Essential materials include gravel (both coarse and fine), sand for filtration, and larger rocks for decorative purposes and erosion control. You’ll also need geotextile fabric to prevent soil mixing and a pond liner if you’re creating a collection basin.
For proper construction, have ready:
– Concrete mix and forms (if building a spring box)
– Level and measuring tape
– Wheelbarrow for material transport
– Work gloves and safety glasses
– Reciprocating saw for cutting pipes
– Channel-lock pliers
– PVC primer and cement
– Filter material (activated charcoal optional)
– Garden hose for testing
Additional helpful items include:
– Landscape fabric pins
– Utility knife
– Marking paint or stakes
– Rope or string for layout
– Clean 5-gallon buckets
– Waterproof sealant
– Basic hand tools (hammer, screwdrivers)
Consider renting larger equipment like a mini-excavator if working with challenging terrain or managing a larger spring development project.
Remember to check local building codes, as you might need specific materials to meet regulations. Having these materials ready before starting will help your project flow smoothly and efficiently.
Step-by-Step Spring Installation
Creating the Base Structure
Creating a solid foundation is crucial for your water spring feature’s success and longevity. Start by selecting a level area or creating one through careful grading. Clear away any vegetation, rocks, or debris from your chosen spot, leaving enough space for both the spring feature and the surrounding decorative elements.
Begin by digging a hole approximately 2-3 feet deep and wide enough to accommodate your planned spring size. The exact dimensions will depend on your design, but remember to add an extra foot on all sides for proper installation of liner and materials. Line the bottom with 2-3 inches of sand to create a smooth, stable base that will protect your pond liner from punctures.
Next, compact the sand layer firmly using a hand tamper or plate compactor. This step is essential to prevent future settling that could compromise your spring’s structure. Once compacted, add a layer of small gravel (about 1-2 inches) over the sand. This creates additional stability and helps with drainage.
Install your pond liner, making sure it extends well beyond the edges of your hole. Work carefully to avoid tears or punctures, and create smooth folds in the corners rather than sharp creases. Secure the liner edges temporarily with large rocks while you continue construction.
For the spring’s core structure, position a large, flat rock or pre-made spring box near the back of your excavation. This will serve as the point where your water will emerge. Ensure it’s level and stable, as this will be the foundation for your entire water feature. Remember to leave space for plumbing access behind or beneath this focal point.

Installing the Pump System
Installing a pump system is crucial for maintaining a healthy and vibrant water spring feature. Begin by selecting a submersible pump that matches your spring’s flow rate and desired water movement. Position the pump at the lowest point of your collection basin, ensuring it’s fully submerged but elevated slightly off the bottom to prevent debris intake.
Connect the pump to your power source using waterproof electrical connections and make sure to protect your pond system from the elements by housing electrical components in a weatherproof box. The pump’s intake should face away from walls and be fitted with a pre-filter to prevent clogging.
Attach the appropriate diameter tubing to your pump’s output, securing it firmly with hose clamps. Run the tubing along your predetermined path, using landscaping stones or soil to conceal it naturally. If your design includes multiple outlets or waterfalls, install a flow control valve for each branch to adjust water distribution.
For optimal performance, consider installing a check valve near the pump to prevent water from flowing back when the system is turned off. This helps maintain prime and reduces startup strain on the pump. Position any additional filters or UV clarifiers according to manufacturer specifications, ensuring easy access for maintenance.
Remember to test the system thoroughly before finalizing the installation. Start with a low flow rate and gradually increase it while checking for leaks or pressure issues. Make adjustments to achieve your desired water movement and sound effects, keeping in mind that natural springs typically have a gentle, consistent flow.
Maintenance and Care
Seasonal Care Tips
Keeping your water spring vibrant throughout the year requires different care approaches for each season. In spring, focus on cleaning debris and checking pump functionality after winter dormancy. Remove dead plant material and gradually restart your pump system as temperatures warm up.
Summer maintenance involves regular algae monitoring and ensuring proper water levels during hot weather. Add floating plants to provide shade and maintain water quality. Check pump flow rates and clean filters more frequently due to increased biological activity.
As autumn approaches, remove falling leaves before they sink and decompose. Trim back aquatic plants and consider installing a protective net to catch debris. This preparation makes winter-proofing your water feature much easier.
During winter, maintain a small opening in any ice formation to allow gas exchange. If you live in a severe climate, consider installing a de-icer or running your pump at a lower level to prevent freezing. Remove snow accumulation from around the spring to prevent overflow during thaws.
Regular seasonal maintenance not only preserves your water spring’s beauty but also extends its lifespan and ensures healthy water flow year-round.
Troubleshooting Common Issues
Even well-planned springs can encounter issues, but most have simple solutions. If water flow decreases, check for debris blocking the collection box or pipe system. Regular cleaning and cold weather preparation can prevent most blockages. For muddy water, ensure your gravel layers are properly arranged and consider adding more filtering material. If you notice unwanted plant growth near the spring head, carefully remove it without disturbing the spring’s structure. When water appears to be seeping around rather than through your collection system, you may need to repack the clay seal or adjust the positioning of your collection box. Remember, most spring issues are maintenance-related and can be resolved with regular attention and care.
Creating your own water spring feature is an exciting and rewarding project that can transform your outdoor space into a tranquil oasis. With proper planning, the right materials, and attention to detail, you can develop a beautiful spring that will provide years of enjoyment. Remember to carefully consider your site location, ensure proper drainage, and maintain water quality for the best results. Whether you’re looking to create a small bubbling spring or a more elaborate water feature, the key is to start with a solid foundation and work step by step. Don’t be afraid to begin your water spring project – the sound of flowing water and the natural beauty it brings will make all your efforts worthwhile. Start planning your spring development today and watch as it becomes the centerpiece of your outdoor sanctuary.