

Transform Your Garden With Japanese Pond Drawing Techniques
Japanese pond drawing combines centuries-old artistic traditions with modern design sensibilities, creating a mesmerizing blend of natural elements and carefully crafted aesthetics. From the gentle curves of koi gliding through crystalline waters to the strategic placement of rocks and water plants, this art form captures the essence of Japanese garden philosophy – where every stroke and element serves a purpose in creating harmony and tranquility.
Drawing a Japanese pond requires understanding both the practical and spiritual aspects of traditional garden design. The process begins with careful observation of how water flows and interacts with surrounding elements, followed by thoughtful composition that balances negative space with detailed features. Masters of this craft often spend years perfecting the delicate balance between realistic representation and artistic interpretation, where even the smallest ripple holds significance.
Whether you’re sketching with pencil and paper or planning an actual garden installation, Japanese pond drawing teaches valuable lessons about patience, perspective, and the profound connection between humans and nature. This ancient art form continues to inspire modern designers and artists, offering timeless principles that transform ordinary spaces into serene sanctuaries of contemplation and beauty.
The Art of Japanese Pond Design
Key Elements of Japanese Pond Design
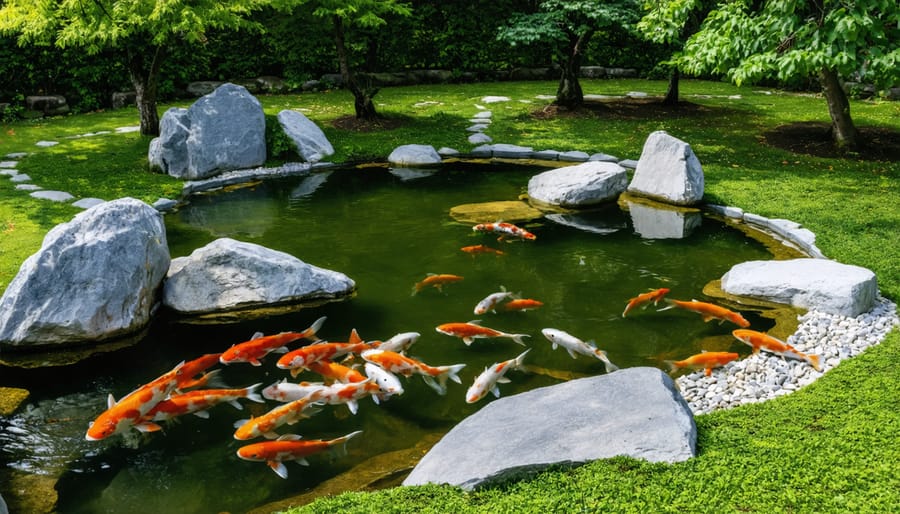
When creating traditional Japanese koi pond designs, three key elements work together to create harmony and balance. First, rocks form the foundation of your pond’s character. Large stones anchor the design, while smaller ones create natural-looking edges. Position them asymmetrically to mirror nature’s organic patterns.
Water flow is crucial for both aesthetics and functionality. Incorporate gentle waterfalls or streams that create soothing sounds and maintain healthy oxygen levels. The water’s movement should feel natural, flowing around rocks and creating peaceful ripples across the surface.
Plants add the final layer of beauty and balance. Choose a mix of aquatic plants like water lilies for surface coverage, marginal plants along the edges, and surrounding vegetation like Japanese maples or bamboo. Remember to include both evergreen and seasonal plants to ensure year-round interest.
For authentic appeal, include traditional elements like stepping stones, wooden bridges, or lanterns. These features not only enhance visual interest but also create focal points that draw the eye through your pond design.
Symbolism and Balance
In Japanese pond design, every element serves a purpose beyond its physical presence. The careful placement of rocks, plants, and water features reflects the ancient principle of balance between opposites – what’s known as ‘in’ and ‘yo’ (yin and yang). When drawing your pond design, consider how larger elements can be balanced by smaller ones, and how vertical features like bamboo can complement horizontal water surfaces.
Natural asymmetry plays a key role in Japanese design philosophy. Rather than creating perfect mirror images, aim for a harmonious flow that feels intentional yet organic. For example, if you place a large decorative rock on one side, balance it with a cluster of smaller stones or plants on the opposite side. Water should appear to flow naturally through the landscape, even in still ponds.
Colors also contribute to visual harmony. Traditional Japanese ponds incorporate earthy tones – greys, browns, and deep greens – punctuated by seasonal touches of color from flowering plants and autumn foliage. This creates a soothing atmosphere that encourages contemplation and connection with nature.
Interactive Workshop Setup
Materials and Tools
To create your Japanese pond drawing, you’ll need both basic art supplies and some reference materials to capture the essence of traditional Japanese water gardens. Start with a selection of drawing tools: a set of graphite pencils (2H, HB, and 2B), a fine-liner pen for details, and quality drawing paper (preferably heavyweight, 140lb or more) that can handle light washes.
For adding color, watercolors work beautifully for depicting water features and surrounding vegetation. Choose a basic set with essential colors like indigo, moss green, and earth tones. Include a few good-quality brushes – a medium round brush (#6 or #8) for general work and a smaller detail brush (#2) for fine elements.
Additional helpful tools include:
– Ruler and compass for initial layout
– Kneaded eraser for lifting highlights
– White gel pen for water reflections
– Reference photos of Japanese gardens
– Tracing paper for planning layouts
Consider keeping a small sketchbook for practicing individual elements like rocks, lanterns, and water ripples. Japanese gardening books can provide valuable insights into traditional design principles and element placement. A collection of photos showing different lighting conditions and seasons will help you understand how Japanese ponds change throughout the year.
Remember to have a clean workspace with good lighting and a flat surface for precise drawing. Having all materials organized before starting will make the creative process more enjoyable and efficient.
Workshop Environment
Creating the perfect workshop environment is essential for bringing your Japanese pond designs to life on paper. Start by choosing a well-lit space, preferably with natural light from north-facing windows to avoid harsh shadows on your drawing surface. If natural light isn’t available, invest in adjustable desk lamps with daylight bulbs to simulate natural lighting conditions.
Set up a dedicated drawing table at a comfortable height, angled slightly for better perspective and reduced strain on your back and shoulders. Keep your reference materials, including photos of inspiring pond designs, within easy reach but not cluttering your main workspace.
Organize your drawing tools in clear containers or drawer organizers. Essential items include various grades of pencils, erasers, rulers, and specialty drawing papers suitable for both sketching and final artwork. Consider keeping a small water feature or indoor fountain nearby – the gentle sound of flowing water can help create an authentic atmosphere and spark creativity.
Maintain a clean, clutter-free environment by having a designated spot for completed drawings and works in progress. Add some Japanese-inspired elements like a small bonsai or bamboo plant to enhance the atmosphere. Remember to keep water and snacks away from your drawing area to protect your artwork, and ensure proper ventilation if you’re using any art materials with strong odors.
Drawing Techniques
Basic Sketching Methods
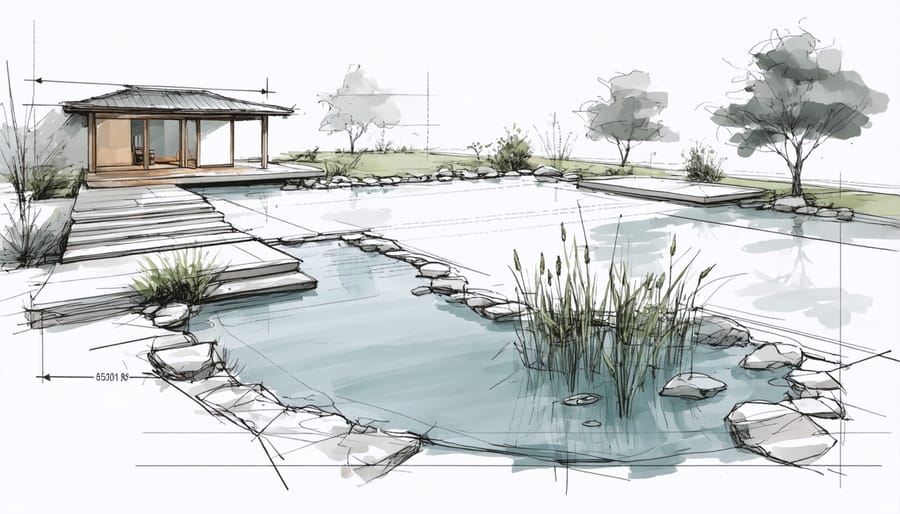
When starting your Japanese pond sketch, begin with light, loose pencil strokes to outline the basic shape. Rather than drawing a perfect circle or oval, aim for an organic, asymmetrical form that mimics nature. Imagine water flowing naturally through the landscape – this will help you create more authentic curves and edges.
Start by marking key focal points where you want special features like rocks or plants. Then, connect these points with flowing lines to create your pond’s outline. A helpful technique is to use the “three-point method,” where you establish three main curves that will define your pond’s character. This creates a more dynamic and interesting shape than simple geometric forms.
Layer your sketching by adding rough indications of depth variations. Use lighter strokes for shallow areas and darker ones for deeper sections. When drawing the surrounding landscape, work from the pond outward, keeping in mind that Japanese ponds typically have one side more developed than the other to create visual balance.
Consider sketching multiple thumbnail versions before settling on your final design. These quick, small drawings help you experiment with different layouts without committing too much time to each version. Remember to include approximate measurements on your sketch – this will be invaluable when you move forward with actual construction.
Water Feature Representation
When drawing a Japanese pond, capturing the water’s essence requires specific techniques that bring life to your artwork. Start by sketching gentle ripples using curved lines that radiate outward from points of movement, such as where koi fish break the surface or where a stone meets the water. These lines should be lighter towards the edges, creating a natural fade that suggests depth.
For reflections, observe how surrounding elements mirror on the water’s surface. Trees, rocks, and architectural features should appear slightly distorted and softer than their original forms. Use lighter strokes and subtle shading to create these reflected images, remembering that water reflections are never as dark as the objects they’re reflecting.
To convey depth, gradually darken the water as it moves away from the viewer. Near the pond’s edge, leave some areas lighter to suggest transparency, allowing glimpses of rocks or plants beneath the surface. Add texture by incorporating small, irregular patterns that suggest movement and light play on the water.
For a traditional Japanese aesthetic, consider incorporating negative space in your water drawings. Not every area needs to be filled with detail – sometimes, blank spaces can effectively represent still water or create a sense of serenity. When adding vegetation like lily pads or lotus flowers, ensure they interact naturally with the water’s surface, creating small ripples where they meet.
Landscape Integration
When drawing a Japanese pond, integrating it seamlessly with the surrounding landscape is crucial for achieving that authentic look. Start by observing the natural elements around your planned pond area – existing trees, rocks, and terrain features can serve as inspiration for your design. Consider how these elements can frame your pond and create natural focal points.
In traditional Japanese gardens, the pond is never viewed in isolation but as part of a larger, harmonious composition. When sketching your design, include flowing pathways that lead the eye naturally toward the water. Position larger rocks and boulders at strategic points to anchor the design, following the principles of asymmetrical balance that’s so essential in Japanese aesthetics.
Remember to incorporate different levels in your drawing, as varying heights add depth and interest to the landscape. Include traditional elements like stone lanterns, bridges, or stepping stones, but don’t overcrowd your design. Following aquatic ecosystem design principles will help ensure your pond not only looks beautiful but functions naturally.
Consider seasonal changes in your design by including plants that offer year-round interest. Draw in evergreen shrubs for permanent structure, deciduous trees for seasonal color, and water-loving plants that soften the pond’s edges. This thoughtful integration creates a design that feels both intentional and naturally evolved, true to Japanese garden philosophy.
From Drawing to Reality
Scale and Measurement
When bringing your Japanese pond drawing to life, converting your sketch dimensions into real-world measurements is crucial for successful implementation. A common approach is using the 1:48 scale, where 1/4 inch on paper represents 1 foot in reality. This scale works well for most residential pond projects and makes calculations straightforward.
Start by measuring your available garden space and mark these dimensions on your grid paper. For example, if you have a 20′ x 30′ area, your drawing would be 5″ x 7.5″ on paper. When sketching pond features, maintain this scale throughout – a 6-foot stone lantern would measure 1.5 inches in your drawing.
To make scaling easier, use graph paper with 1/4-inch squares. Each square can represent one foot in your actual garden, making it simple to visualize and adjust your design. Don’t forget to account for walking paths and viewing areas – a typical path should be at least 3 feet wide (3/4 inch on your drawing).
For irregular shapes like curved edges or islands, break them down into smaller, measurable segments. Use a flexible ruler or string to measure curved lines, then convert these measurements using your chosen scale. Remember to note these measurements directly on your drawing – it’ll save you time and prevent confusion during construction.
Finally, create a legend that clearly shows your scale and important measurements. This will be invaluable when sharing your plans with contractors or helpers.
Implementation Tips
When you’re ready to build your own pond, start by marking your design on the ground using spray paint or rope. This helps visualize the actual size and shape before breaking ground. For curved edges, use a garden hose to create smooth, natural-looking lines that mirror your drawing.
Consider the terrain’s natural slope when implementing your design. Water always finds its level, so work with the landscape rather than against it. If you’re including traditional elements like stones, place the largest ones first as anchor points, then work your way down to smaller features.
For authentic Japanese aesthetics, maintain asymmetrical balance by positioning elements at varying distances and heights. When installing water features, test the water flow direction before permanent placement to ensure it creates the desired sound and visual effect.
Remember to install your pond liner with plenty of overlap at the edges, and hide it naturally with carefully placed rocks and plants. For bridges or viewing platforms, ensure they’re positioned at the angles you identified in your drawing for the best viewing experience.
Start with the major structural elements and gradually add details like plants and decorative features. This approach allows you to make adjustments as needed while maintaining the overall design vision.
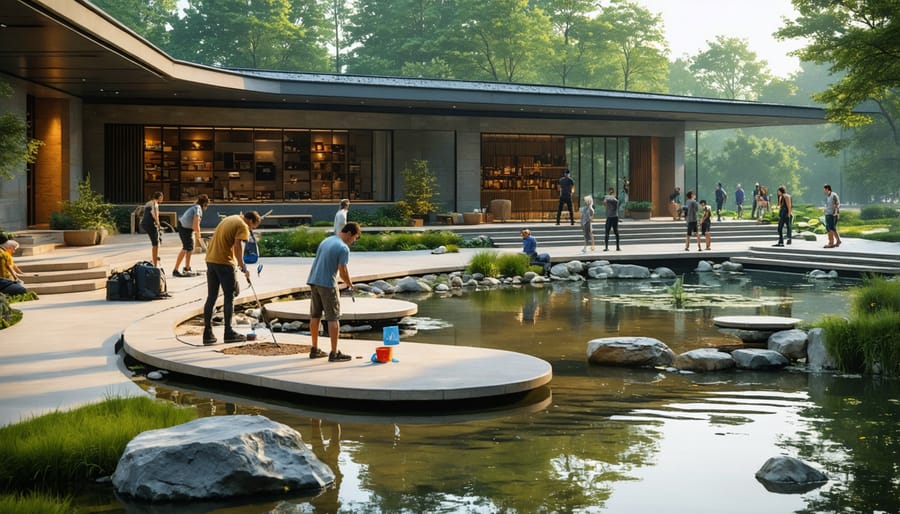
Participating in Japanese pond drawing workshops offers a wealth of benefits that extend far beyond simply learning to sketch water features. These sessions help develop your eye for design, teaching you to balance elements like rocks, plants, and water in harmony with the surrounding landscape. Through hands-on practice, you’ll gain confidence in creating authentic Japanese-inspired designs while understanding the cultural significance behind each element. Workshop participants often report feeling more connected to nature and experiencing a sense of calm during the creative process. Whether you’re planning to build your own pond or simply want to enhance your artistic skills, these workshops provide valuable insights into Japanese garden aesthetics that you can apply to various outdoor projects. The techniques and principles learned can inspire your own unique garden designs while helping you maintain the traditional essence of Japanese water features.