
How to Build an Edible Ecosystem Teaching Garden with Water Features
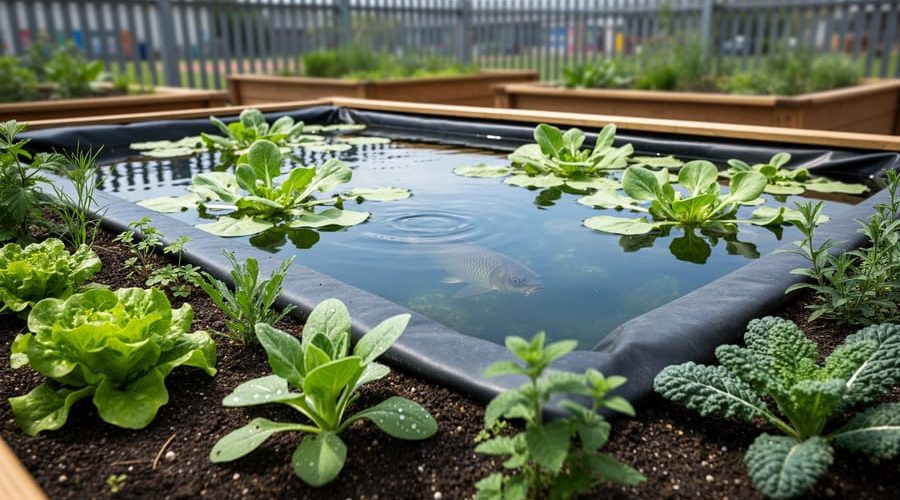
An edible ecosystem teaching garden combines a productive food garden with aquatic plants and water features to create a self-sustaining outdoor classroom where students learn ecology by growing their own meals. You can build one in a weekend using a simple pond liner or container, then stock it with watercress, water chestnuts, and lotus alongside land-based vegetables, creating visible connections between water cycles, nutrient flow, and food production that make abstract concepts tangible for learners of all ages.
The magic happens when kids see tadpoles eating algae that feeds on plant waste, or watch dragonflies control mosquitoes while bees pollinate the flowering aquatic plants they’ll harvest for dinner. This hands-on approach transforms abstract lessons about ecosystems into something you can touch, taste, and tend. I’ve watched even reluctant students lean over pond edges for hours, mesmerized by the interplay between water lettuce roots filtering nutrients and the fish darting below, suddenly grasping food webs in ways no textbook diagram ever achieved.
The beauty of this system is its flexibility. Start small with a whiskey barrel water garden on a school patio, or go larger with an in-ground pond integrated into raised vegetable beds. Either way, you’re creating a living laboratory that produces fresh herbs, vegetables, and edible aquatic plants while teaching observation skills, scientific method, and environmental stewardship. The initial setup takes some planning, but once established, these gardens largely maintain themselves, with students taking ownership of daily care tasks that reinforce responsibility and deepen their connection to where food actually comes from.
What Makes a Garden Both Edible and Educational
A teaching garden becomes genuinely transformative when every element serves double duty. The tomato plant isn’t just producing fruit, it’s demonstrating photosynthesis, seasonal growth patterns, and the relationship between pollinators and food production. The lettuce bed isn’t only lunch; it’s a lesson in succession planting and harvest timing.
I stumbled into this approach by accident. Years ago, I built a small pond to grow watercress for salads, and my neighbor’s kids kept wandering over to watch the dragonflies. One afternoon, I explained how the fish waste was feeding the plants, which cleaned the water for the fish. Their eyes lit up. That cycle, waste becoming food becoming clean water, made more sense to them in five minutes than weeks of classroom ecology ever could. I’ve been hooked on edible teaching gardens ever since.
Water gardens elevate this concept entirely. Adding aquatic plants like lotus, taro, or water chestnuts introduces a whole new plant family and growing method. Fish transform the space into a functioning nutrient cycle, their waste feeds beneficial bacteria, which convert ammonia to nitrates, which feed the plants. You can watch this nitrogen cycle happen in real time instead of drawing it on paper.
The best part? Harvesting watercress for dinner naturally leads to conversations about water quality, growing zones, and why some plants thrive with their roots submerged. Students taste the connection between healthy ecosystems and healthy food. That’s learning that sticks.
Planning Your Edible Water Garden Teaching Space
Choosing the Right Water Feature Style
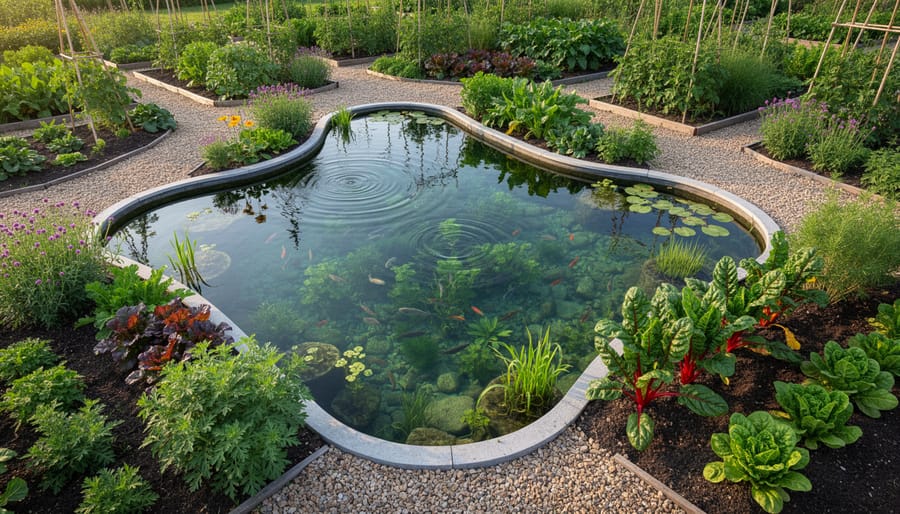
Your space and teaching goals determine which water feature works best. For compact urban yards or balconies, container water gardens offer the easiest entry point. A half-barrel or large glazed pot (minimum 50 litres) holds enough water for watercress, dwarf lotus, and a few goldfish. Students can observe the entire ecosystem at once, and you can move containers to catch sun or create different learning stations.
In-ground ponds suit larger properties where you want permanent installations. Digging a pond 60 to 90 centimetres deep creates distinct zones, shallow edges for marginal plants like taro, deeper centres for water chestnuts. This setup teaches about aquatic plant stratification and provides more growing volume for serious food production. The trade-off: construction demands more labour and commitment.
Bog gardens bridge the gap beautifully. Build a shallow depression (20 to 30 centimetres) lined with punctured pond liner to keep soil consistently moist but not flooded. Watercress, celery, Vietnamese coriander, and papyrus thrive here. Bog gardens need less water management than ponds yet still demonstrate wetland ecology. They work brilliantly alongside a small edible water garden pond, creating habitat diversity students can compare.
I started with containers before graduating to an in-ground system. Beginners gain confidence with small-scale success, then expand. Match the feature to your available space, budget, and how hands-on you want the learning experience. Containers suit close observation; in-ground ponds demonstrate larger ecosystem processes.
Designing Learning Zones Around Water
The key to a successful teaching garden is organizing the space so students can safely observe, interact with, and learn from every element without damaging the ecosystem or themselves.
Start by creating a primary observation zone on the most accessible side of your water feature. This should be a flat, stable area at least three feet wide where multiple people can gather comfortably. I’ve found that placing a simple bench or flat stones here transforms casual viewing into intentional learning moments. Position this zone where sunlight hits the water’s surface during teaching hours, making it easier to spot fish, insects, and underwater plant growth.
Adjacent to the water, establish planting beds in a U-shape or L-configuration that students can access from multiple angles without stepping into wet areas. Leave 18 to 24 inches between bed edges and the water’s edge as a walking path. This buffer zone prevents soil erosion into the pond while giving you room to maintain both areas independently.
Create deliberate access points using stepping stones or small wooden platforms at two or three locations around the perimeter. These designated spots minimize trampled areas while directing traffic to the best teaching locations. Mark them clearly so even young learners know where it’s safe to approach closely.
The flow between aquatic and terrestrial zones should feel natural, not like separate projects. Run a small overflow channel or decorative stream from the pond into a nearby bed to visually and functionally connect the systems, demonstrating how water moves through ecosystems.
Tools and Materials You’ll Need
Building your edible ecosystem teaching garden requires two distinct sets of supplies: those for the water feature itself and those for the surrounding terrestrial growing areas. Gathering everything before you start saves time and ensures you won’t need to pause mid-construction while plants wait in their nursery pots.
For the Water Garden Component:
- Pond liner or pre-formed container (choose eco-friendly materials like EPDM rubber for flexible liners or food-safe containers for small setups)
- Underlayment or sand base to protect liner from punctures
- Pump sized for your water volume (calculate at least 50% of total gallons per hour)
- Simple biological filter or filter media (sponge filters work well for small teaching ponds)
- Tubing and fittings for water circulation
- Rocks and gravel for edging and creating planting shelves
For Planting and Stocking:
- Edible aquatic plants in starter sizes (watercress, water chestnuts, taro, lotus)
- Aquatic planting baskets and aquatic soil or clay-based substrate
- Terrestrial edible seedlings or seeds (moisture-loving varieties like celery, mints, leafy greens)
- Compost and organic amendments for surrounding beds
- Goldfish or koi (optional, but valuable for demonstrating nutrient cycling)
Educational and Safety Equipment:
- Water testing kit (pH, ammonia, nitrite, nitrate strips)
- Thermometer for tracking seasonal temperature changes
- Observation journal or logbook
- Magnifying glasses for close-up study
- Safety barriers or fencing materials if needed
- Non-slip pavers or decking for access points
- GFCI-protected outdoor electrical outlet for pump
Start with the basics and add specialized items as your teaching garden evolves. You don’t need everything on day one, many successful teaching gardens begin with a simple container, a few plants, and grow from there as students’ curiosity expands the project.
Important Safety Considerations
Water features in teaching gardens demand thoughtful safety planning, especially when children will be learning and exploring near them. Start by keeping shallow depths, no more than 12 inches for gardens used by young students, 18-24 inches maximum if only supervised older students access the area. Consider physical barriers: low fencing, raised edging, or dense border plantings that create a clear boundary without blocking educational views. Install these barriers at least two feet back from the water’s edge to prevent accidental falls during enthusiastic observation.
Surface traction matters more than most builders realize. Ring your pond with textured pavers, decomposed granite, or rubber mulch instead of smooth concrete or slick stones that become treacherous when wet. For electrical components like pumps and filters, use only outdoor-rated GFCI outlets installed by a licensed electrician, and keep all cords buried in conduit or well away from foot traffic and the water’s edge.
Plant toxicity deserves careful attention in edible gardens. While you’re growing food crops, some common water plants contain irritating sap or mildly toxic parts, skip ornamentals like calla lilies or elephant ear colocasia in favour of truly edible varieties. Teach students the “never taste unless instructed” rule from day one. Maintain good water circulation and stop mosquitoes from breeding, which eliminates both nuisance and disease concerns. Post clear signage identifying edible versus ornamental species, and establish a handwashing station nearby for after students handle pond materials or harvest.
Step-by-Step: Building Your Edible Ecosystem
Step 1: Prepare the Site and Install the Water Feature
Start by marking the water feature’s footprint using stakes and string or spray paint, make the outline about 10-15% larger than your planned final size to account for edging and overflow zones. If you’re building an in-ground pond, excavate in stages: dig shelves at 15-30cm depths for marginal plants, then slope down to a deeper zone (60-90cm) where aquatics like lotus and taro will sit. Keep the soil you remove for building up surrounding edible beds later.
For container water gardens, position food-grade stock tanks or large glazed pots where they’ll receive at least six hours of sun daily and stay level, check with a spirit level before filling. Line excavated ponds with underlayment fabric first, then drape flexible EPDM or PVC liner across, letting it settle into contours without stretching. Anchor edges temporarily with smooth rocks while you work.
Install a small submersible pump (around 1000-2000 litres per hour suits most teaching gardens) in the deepest zone, running the cord through conduit to a GFCI-protected outlet. Add a simple foam filter or biological filter box to keep water clear, this becomes a teaching point about natural filtration. Fill the pond slowly with a hose, smoothing liner wrinkles as water weight settles everything into place.
Once full, treat for chlorine and chloramine by adding a dechlorinator or simply let water sit for 48-72 hours with the pump running. This waiting period is crucial: it protects future plants and fish while demonstrating smart water management practices before you introduce any living components.
Step 2: Plant Edible Aquatic Species
Start with plants that thrive in water’s edge zones where roots stay wet but crowns remain above the surface. Watercress establishes quickly in shallow water or constantly moist gravel, making it perfect for beginners. Push bare-root bunches gently into substrate about two inches deep in water no deeper than four inches. Within days you’ll see new growth, and harvesting teaches students how fast aquatic edibles respond.
Taro needs deeper planting, set corms in pots filled with heavy clay soil, then submerge containers so water covers the soil by three to six inches. The large leaves create dramatic teaching moments about transpiration and water movement through plants.
Lotus requires patience but delivers spectacular results. Plant tubers horizontally in wide, shallow containers filled with clay-based soil, covering them with just an inch of soil. Submerge pots under four to six inches of water. Never bury the growing tip. These take weeks to emerge, which teaches valuable lessons about seed dormancy and patience.
Water chestnuts grow from corms planted in rich mud, submerged six inches deep. They spread through runners, demonstrating vegetative reproduction clearly.
For floating plants, simply release water lettuce or duckweed onto the surface, their dangling roots filter nutrients while providing hands-on examples of how plants can survive without soil. Position taller marginals toward the back, floaters in open water, and low growers near viewing edges for maximum educational visibility.
Step 3: Create Surrounding Edible Beds
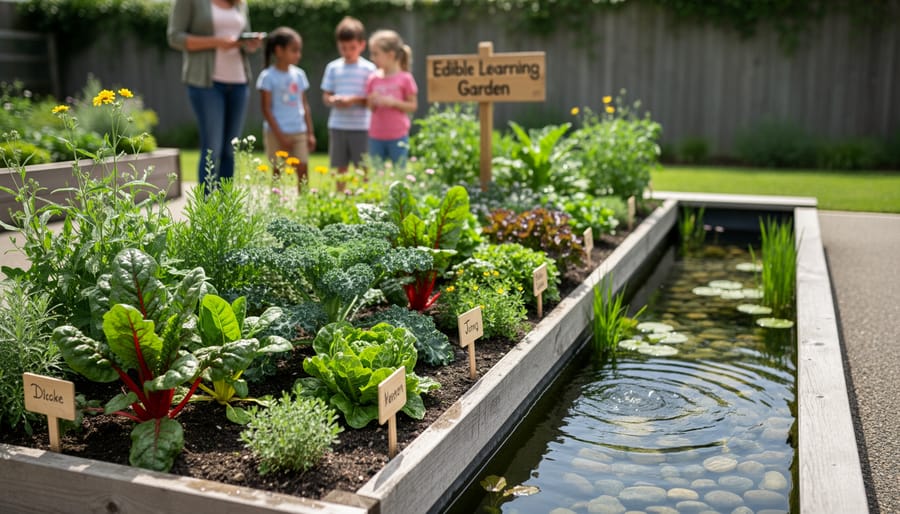
Position your edible beds within 2-3 feet of the water feature’s edge. This zone benefits from increased humidity and easier irrigation access while maintaining good drainage. For raised beds, use untreated cedar or composite lumber at least 12 inches high, which provides excellent root depth while keeping soil slightly elevated above the water table. Fill with a mix of 60% topsoil, 30% compost, and 10% perlite for moisture retention without waterlogging.
Plant moisture-loving edibles that thrive in the humid microclimate your water feature creates. Celery, watercress, and leafy greens like lettuce, spinach, and bok choy perform exceptionally well here because they need consistent moisture. Space mint varieties in their own containers within the bed, they’re aggressive spreaders but love the dampness. Parsley, chives, and cilantro also flourish in these conditions.
Leave a 6-inch gap between the bed and pond edge for maintenance access. This walking space lets students observe water-to-land connections without compacting planting soil. Install soaker hoses or drip lines in each bed, connected to your pond’s pump system if possible. This creates a visible teaching point: water cycling from pond through plants and back to soil.
Add a 2-inch mulch layer around plants to retain moisture and suppress weeds. Wood chips work well and break down to feed the soil. Position taller plants like celery toward the back of beds so they don’t shade shorter greens, ensuring all students can see the varied growth patterns.
Step 4: Establish the Ecosystem Connections
Now you’ll introduce the living elements that transform your garden from a collection of plants into a functioning ecosystem. Start by adding fish to your water feature, goldfish are hardy and budget-friendly, while koi grow larger and produce more nutrient-rich waste. Calculate one fish per 10 gallons of water initially, giving them room to grow. The fish waste becomes fertilizer for your aquatic plants, closing the nutrient loop naturally.
Next, attract beneficial insects by planting flowering herbs like dill, fennel, and cilantro near the water’s edge. These draw dragonflies, damselflies, and pollinators that control pests while cross-pollinating your edible crops. Leave some leaf litter and small sticks around the margins to create habitat for ground beetles and spiders.
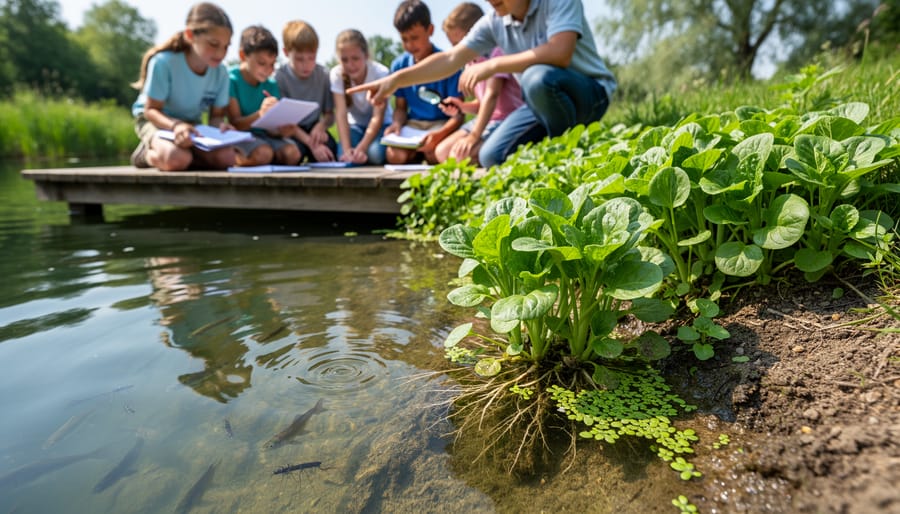
Create clear observation points where students can watch these interactions. Place a flat stone or small bench 2-3 feet from the water where viewers can sit quietly and spot fish feeding, insects hunting, or birds visiting. A kneeling pad at water level lets observers see underwater plant roots and fish behavior up close.
Install simple monitoring tools to track ecosystem health: a basic thermometer clipped to the pond edge, a rain gauge nearby, and a notebook in a weatherproof box for recording observations. Mark a stick with measurements and anchor it vertically to track water level changes through seasons. These tools turn casual observation into scientific inquiry.
Testing and Verifying Your System Works
After you’ve finished planting and stocking, give your system at least two weeks to settle before introducing students or harvesting. During this establishment period, the water will cycle through natural adjustments, cloudiness followed by clearing, microbial populations building, and plants beginning active growth. Walk the garden daily and look for signs that everything’s working together as it should.
Test your water quality first. Use a basic pond test kit to check ammonia, nitrites, and pH every few days. Ammonia and nitrites should drop to near zero within two weeks as beneficial bacteria colonize your filter and substrate. pH for most edible water gardens should sit between 6.5 and 7.5. If readings stay out of range or ammonia climbs, do a partial water change and wait longer before adding more fish or starting teaching activities.
Watch your plants closely for new growth. Healthy aquatic edibles will send up fresh leaves or shoots within a week or two of planting. Watercress spreads quickly, lotus pads unfurl, and water chestnuts push new stems toward the light. Yellowing leaves or stunted growth usually mean nutrient imbalance or poor placement, check that each plant is at the right depth and getting adequate sun.
Your ecosystem is ready for teaching when you see these verification indicators:
- Water stays clear for several days without turning green or murky
- Plants show active new growth with vibrant, healthy-colored foliage
- Fish swim actively near the surface and eagerly take food
- No thick algae blooms or foul odors develop
- All pathways and observation points remain dry, stable, and accessible
- At least one fast-growing edible like watercress is ready for a first small harvest
Fish behavior tells you a lot about system health. They should swim throughout the pond, not gasp at the surface or hide constantly. If they’re sluggish or refusing food, recheck water quality and oxygenation.
Finally, do a safety walk-through as if you’re a student encountering the space for the first time. Are edges clearly marked? Can you reach observation points without leaning dangerously over water? Does the pump cord have proper outdoor protection? Once you can harvest a handful of watercress, taste a water chestnut, and watch fish circle confidently through clear water, your edible ecosystem is fully functional and ready to teach.
Teaching Activities and Learning Opportunities
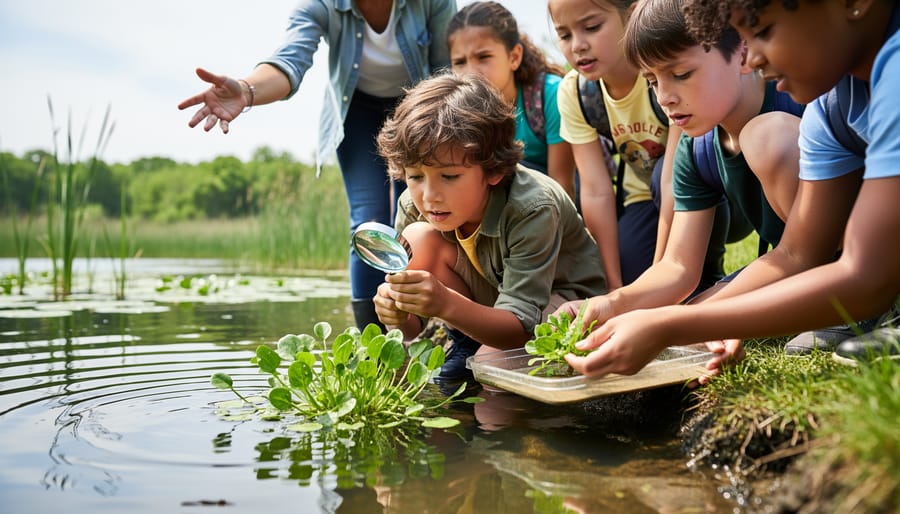
Your edible ecosystem teaching garden transforms abstract ecological concepts into tangible, hands-on experiences. Start with observation journals where students or children sketch and describe what they see each visit, the unfurling lotus leaf, tadpoles clustering near watercress roots, dragonflies laying eggs on water lily pads. These regular observations build scientific documentation skills while revealing the garden’s constant changes.
Water quality testing offers concrete chemistry lessons. Use simple test kits to measure pH, ammonia, and nitrate levels before and after feeding fish, then connect those numbers to how fish waste becomes plant fertilizer. Students see the nitrogen cycle in action rather than just reading about it in textbooks. Track how water clarity changes seasonally and discuss what factors, algae blooms, decaying leaves, heavy rain, affect the ecosystem’s balance.
Food web mapping exercises help visualize the interconnections. Challenge learners to identify who eats what: mosquito larvae consume algae, fish eat mosquito larvae, plants absorb fish waste, beneficial insects pollinate flowering aquatics. Draw these relationships as a web diagram, adding new connections as you discover them. This activity works for multiple learning levels:
- Elementary: Identify and count different organism types (plants, insects, fish)
- Middle school: Map energy flow from sun to plants to consumers
- High school: Calculate biomass changes and nutrient budgets across seasons
- All ages: Harvest tastings that connect ecology to nutrition and culture
- Science fair projects: Compare growth rates in different water conditions
Harvesting sessions become lessons in sustainable yield. Before picking watercress or digging taro, discuss how much you can take without harming the plant’s ability to regrow. This introduces stewardship concepts, we’re part of this ecosystem, not separate from it. Prepare and taste the harvest together, discussing how different cultures use these aquatic vegetables and why growing your own food matters environmentally. Seasonal changes offer annual cycles to track: which plants die back in winter, when fish become less active, how spring triggers explosive growth, why algae blooms in summer heat. Document these patterns over years to understand long-term ecosystem dynamics.
Maintenance and Seasonal Care
Your edible ecosystem teaching garden needs different attention as seasons shift, and these routine tasks offer perfect moments to observe how natural systems respond to change. In spring, clear winter debris from the pond, divide overcrowded aquatic plants, and add fresh compost to surrounding beds. This is when you’ll see the ecosystem wake up, fish become active, new shoots emerge, and beneficial insects return.
Summer demands vigilance. Top up water lost to evaporation, harvest edibles regularly to encourage production, and watch for algae blooms that signal nutrient imbalances. Thin out excess duckweed or water lettuce, using the removed plants as compost, show students how “weeds” become resources. Check pump filters weekly and feed fish only what they’ll consume in a few minutes.
As autumn arrives, reduce feeding as water cools. Harvest frost-sensitive aquatics like taro before the first freeze, and cut back marginal plants to prevent decomposing foliage from affecting water quality. Move tender plants indoors or to deeper water for winter protection. This seasonal preparation demonstrates how ecosystems adapt to survive.
Winter year-round care varies by climate. In mild areas, continue light harvesting from cold-hardy greens and watercress. Where ice forms, install a pond heater or aerator to maintain a small opening for gas exchange. Use this slower season for observation, track which species truly thrive, plan expansions, and let the garden rest while students document what dormancy means in a living system.
Common Questions About Edible Water Teaching Gardens
Starting an edible water teaching garden raises practical questions, and getting clear answers helps you plan with confidence. Here are the questions I hear most often from readers building their first educational water gardens.
How much does it cost to build an edible ecosystem teaching garden?
Initial costs range from $100 for a simple container water garden with a few plants to $2,000+ for larger in-ground ponds with filtration systems. Starting with a 50-gallon stock tank or whiskey barrel (around $50-80) plus plants, pump, and soil keeps your first garden under $200.
How much time does maintenance require?
Expect 30-45 minutes weekly during growing season for basic tasks like checking water levels, feeding fish, and harvesting. Seasonal transitions in spring and fall need a few hours each for cleanup, dividing plants, and winterizing.
Do I need fish, or can the garden work without them?
Fish aren’t required, but they significantly enhance the ecosystem by providing natural fertilizer through their waste, controlling mosquito larvae, and creating a more complete educational model of nutrient cycling. Goldfish work perfectly well if koi feel too ambitious.
What edible water plants are easiest for beginners?
Watercress, water celery, and arrowhead establish quickly and tolerate beginner mistakes. They’re forgiving about water depth, grow vigorously, and produce harvestable food within weeks of planting.
Is it safe with young children around?
Yes, with proper precautions: keep water depth under 18 inches, install sturdy edging they can’t climb over, and establish clear rules about supervised access only. Shallow bog gardens offer the safest option for spaces with unsupervised young learners.
How do I expand the garden once it’s established?
Add a second connected water feature to create a stream or waterfall between them, expand surrounding terrestrial beds outward in phases, or increase planting density in existing water zones. Most gardeners start with one container and add another each season as their confidence grows.
The biggest concern newcomers share is whether they’ll accidentally harm the ecosystem while learning. Here’s the truth: these gardens are remarkably forgiving. Plants grow back after overzealous harvesting, water chemistry stabilizes after minor mistakes, and fish adapt to gradual changes. Your garden becomes more resilient with each season because you’re learning its rhythms and it’s adapting to your care style.
Budget constraints shouldn’t stop you. I’ve seen incredible teaching gardens built entirely from repurposed livestock tanks, salvaged stone, and plant divisions shared between neighbors. The educational value comes from observing the connections, not from expensive materials. A $75 setup teaches the same ecological principles as a $2,000 installation.
Starting your edible ecosystem teaching garden doesn’t require transforming your entire yard overnight. Begin with a single container water garden and a few adjacent pots of herbs. Watch how they interact, learn what thrives in your space, and expand when you’re ready. This approach builds both your confidence and your understanding.
The beauty of this project lies in its dual harvest. You’ll gather fresh watercress, lotus root, and moisture-loving greens for your table while simultaneously cultivating something more profound: hands-on knowledge about how ecosystems function. Every time you observe tadpoles grazing algae or notice how fish waste nourishes your plants, you’re witnessing lessons no textbook can fully capture.
Expect mistakes along the way, they’re part of the learning process and often lead to your best discoveries. Your garden will evolve as you do, becoming more sophisticated and productive as your skills develop. The most important step is simply starting. Dig that first hole, fill that first container, plant those first edibles. You’re not just building a garden; you’re creating a living classroom that will teach, feed, and inspire for years to come.