
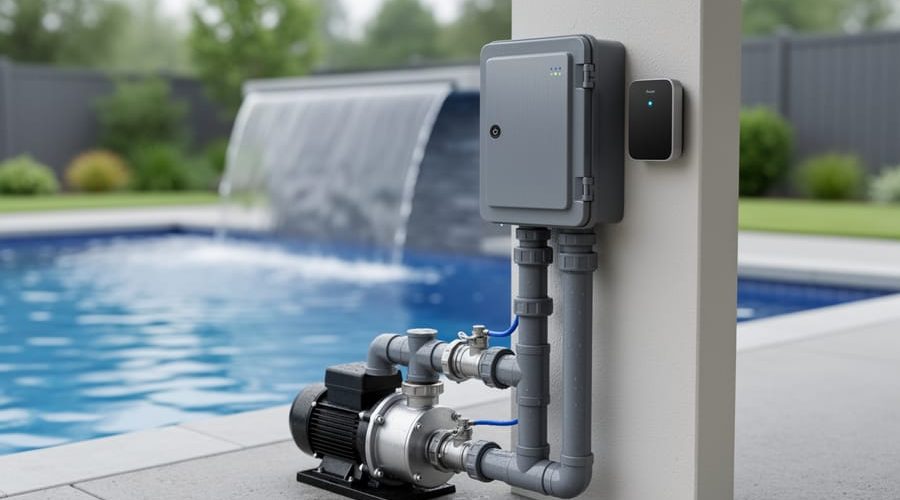
How to Automate Your Pool and Water Features with DIY Smart Controls
You can automate your pool or water feature using a combination of smart relays, timers, and sensors that you install yourself, typically completing the project over a weekend with basic electrical skills and a well-planned approach. Instead of paying professionals thousands for proprietary systems, a DIY automation setup lets you control pumps, lights, heaters, and water features from your phone or voice assistant while learning exactly how your system works.
The best part? You’re not sacrificing quality or safety. Modern smart switches and waterproof enclosures have made pool automation accessible to anyone comfortable working with home electrical systems. I started automating my own pond filtration three years ago with a single timer, and it changed everything. No more forgetting to turn the pump on after maintenance, no more rushing home to adjust settings before guests arrived.
Whether you’re managing a backyard swimming pool, a koi pond, or a decorative fountain, the core components remain the same: a controller (ranging from simple mechanical timers to full smart home hubs), relay switches to handle the heavy electrical loads, weatherproof enclosures rated for outdoor use, and sensors that monitor water level, temperature, or chemical balance depending on your needs. The initial investment varies widely based on features, but you’ll build a system tailored exactly to your setup rather than forcing your unique pool into a one-size-fits-all package.
This guide walks you through every step, from choosing compatible components and mapping your electrical circuits to mounting equipment safely and programming schedules that keep your water pristine year-round. We’ll cover the safety protocols you absolutely must follow when working near water, how to test each component before putting it into service, and troubleshooting tips for the most common hiccups.
What You’ll Need: Tools, Materials, and Components
Getting started with DIY pool automation doesn’t require an exotic toolkit or a degree in electrical engineering. Most of what you need is available at hardware stores or online retailers, and you probably already own some of the basic tools. Let’s break down exactly what you’ll need to get your first automation project up and running.
For a basic automation setup, you’ll want to gather these essentials before you begin:
- Programmable timer or smart switch rated for outdoor use and the amperage your pump or device requires
- Screwdriver set (both flathead and Phillips) for mounting and wiring connections
- Wire strippers and electrical tape for safe, clean connections
- Weatherproof electrical enclosure to protect your controls from moisture
- GFCI outlet or breaker if your installation location doesn’t already have one
- Waterproof wire connectors and appropriate gauge electrical wire for your specific application
- Voltage tester to verify power is off before you start working
The programmable timer or smart switch is the brain of your system. Basic mechanical timers work reliably for simple on-off scheduling of pumps and filters, while Wi-Fi smart switches let you control everything from your phone and create more sophisticated schedules. Choose one rated for the electrical load of whatever you’re automating, most pool pumps draw between 5 and 15 amps.
Weatherproof enclosures are non-negotiable when you’re working outdoors. Even components marketed as weather-resistant benefit from the extra protection of a proper enclosure. Look for boxes with an IP65 rating or higher, which means they can handle direct water spray without letting moisture inside.
If you want to get fancy (and honestly, it’s worth considering), optional components can take your system from basic to brilliant. Waterproof temperature sensors let you automate heating based on actual water temperature. Water level sensors can trigger automatic top-off systems when evaporation lowers your pool or pond. Smart relays allow you to control multiple devices from a single hub, and liquid-tight conduit provides professional-grade protection for exposed wiring runs.
Don’t feel pressured to buy everything at once. Start with the basics for your first automation project, then expand your toolkit as you tackle more ambitious installations. I started with a simple timer and a screwdriver, and built up from there as I got more comfortable with the process.
Safety First: Important Precautions When Working with Water and Electricity
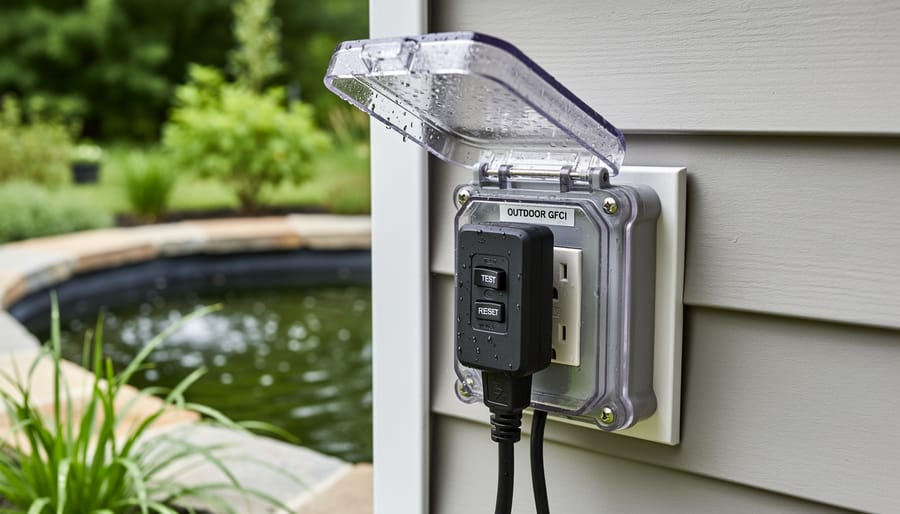
Working with electricity around water isn’t something to take lightly, it’s genuinely dangerous if you don’t follow proper precautions. Before you touch a single wire or plug in any device, make sure you understand these essential safety rules.
Every outlet and circuit you use for pool or water feature automation must have GFCI (Ground Fault Circuit Interrupter) protection. These devices detect electrical imbalances and shut off power in milliseconds if current is leaking, potentially through you. Most modern outdoor outlets have GFCI built in, but if yours don’t, install GFCI breakers or plug-in adapters before proceeding.
Proper grounding is equally critical. All metal components, enclosures, and equipment frames must connect to your home’s grounding system. If you’re unsure whether your setup is properly grounded, hire a licensed electrician to inspect it. This isn’t an area to guess about.
Pay attention to IP ratings, which tell you how well a device resists water and dust. The first number (0-6) covers solid particles, the second (0-9) covers liquids. For pool automation, look for at least IP65 (dust-tight, protected against water jets) for outdoor enclosures. Anything directly exposed to sprays or submersion needs IP67 or higher.
Always shut off power at the breaker before installing or modifying electrical components. Test with a voltage tester to confirm power is truly off, don’t just flip a switch and trust it.
Know your limits. If your project requires running new circuits, working inside your electrical panel, or anything beyond basic plug-and-play connections, call a licensed electrician. Also check your local electrical codes, some jurisdictions require permits and professional installation for outdoor electrical work. Saving money isn’t worth risking your safety or your home’s insurance coverage.
Planning Your Automation System: What to Automate First
When you’re staring at all the automation possibilities, it’s easy to feel overwhelmed. The secret is starting with the feature you interact with most often and building from there.
Your pool’s filtration pump is usually the best first automation target. You’re already running it daily, probably walking out to flip a switch morning and evening. Automating that single task saves you two trips every day and ensures your pump never gets forgotten during a busy week. A simple timer or smart switch handles this perfectly, and if you’ve already worked through your pump setup you’re already familiar with the electrical connection.
For water feature enthusiasts, waterfall pumps and fountain jets make excellent starter projects. These typically run on lower voltage than pool equipment, giving you a gentler learning curve. I automated my DIY waterfall pump first, before touching my pool system. The smaller scale meant fewer nerves about getting it right, and the satisfying sound of water cascading on schedule each evening convinced me to tackle bigger projects.
Lighting comes next for many DIYers because it delivers immediate visual impact with relatively simple wiring. Automated lights transform your pool area at sunset without you lifting a finger.
Water level top-off systems and heaters represent intermediate projects. These require sensors and slightly more complex logic, so save them for after you’ve mastered basic timers and switches. There’s no shame in taking months between projects. Automation should reduce stress, not create it. Each successful addition teaches you something new and makes the next upgrade easier.
Starting simple doesn’t mean thinking small. Your single timer today becomes the foundation of an integrated system tomorrow, with each component adding capabilities you’ll actually use rather than features gathering dust.
Step-by-Step: Installing Your First DIY Pool Automation Control
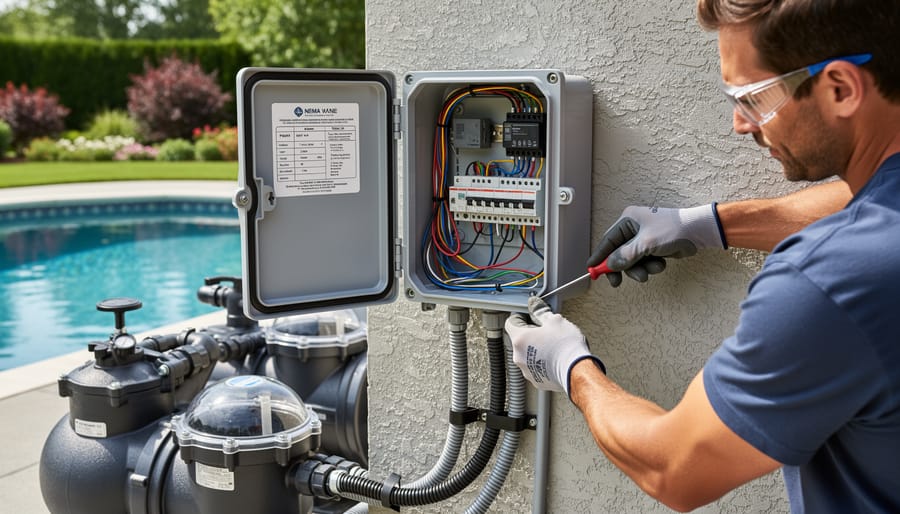
Installing your first DIY pool automation control might feel intimidating, but I promise it’s more straightforward than you think. I still remember the mix of excitement and nervousness when I tackled my first timer installation for a pond fountain. By the end, I was amazed at how simple the process actually was. Let me walk you through each step so you’ll feel confident doing the same.
The key to success is working methodically and double-checking everything before moving to the next step. We’ll start with basic safety and work through to that satisfying moment when your system springs to life on schedule.
- Turn off all power at the breaker panel. Locate the circuit breaker that controls your pool pump or water feature and flip it to the off position. Use a voltage tester to confirm power is truly off at the pump’s electrical box. This is absolutely non-negotiable for your safety.
- Choose and prepare your mounting location. Select a spot near your pump that’s protected from direct weather exposure, ideally under an eave or inside a weatherproof enclosure. The control unit should be easily accessible but safely away from splashing water. Clean the mounting surface and ensure it’s stable.
- Mount your timer or relay control. Most units come with mounting brackets or screw holes. Use corrosion-resistant screws appropriate for your surface (concrete, wood, or vinyl siding). The unit should sit level and feel secure when you gently tug on it.
- Remove the cover from your control unit and pump junction box. You’ll typically see three wires in your pump setup: hot (black), neutral (white), and ground (green or bare copper). Take a photo of the existing connections before touching anything, this gives you a reference if needed.
- Wire the control unit between your power source and pump. Connect the incoming power wires (from your electrical panel) to the “line” or “input” terminals on your timer. Then connect wires from the “load” or “output” terminals to your pump. Match colors: black to black, white to white, green to green. Tighten each wire nut firmly and tug gently to verify connections are secure.
- Verify all connections are tight and properly insulated. Check that no bare copper wire is exposed outside wire nuts or terminals. Ensure ground wires are properly connected, this is critical for safety around water.
- Replace all covers and ensure weatherproof seals are in place. Most outdoor-rated controls have rubber gaskets, make sure these are properly seated before closing covers. This protects your connections from moisture.
- Program your timer or connect to your app. For mechanical timers, push down the tabs for times you want the pump running. For smart controls, follow the app pairing instructions (usually holding a button until an LED blinks). Set your initial schedule, maybe just a test run of 15 minutes.
- Restore power at the breaker panel. You should hear a satisfying click or see an LED light up on your control unit. If your first scheduled run time has already passed, manually trigger a test cycle to verify everything works.
- Observe the first automated cycle completely. Stay nearby for the first full on/off sequence. Listen for normal pump operation, watch for any unusual vibrations or sounds, and verify the pump stops when scheduled. Check your control unit and connections after 10 minutes of operation, they should remain cool to the touch.
When that pump fires up right on schedule for the first time, you’ll feel an incredible sense of accomplishment. That’s the moment you realize you’ve just saved yourself countless trips outside to manually flip switches. During your first week, check the system daily to build confidence that everything’s running smoothly. You’ll quickly develop an ear for what normal operation sounds like.
If your pump doesn’t start when expected, don’t panic. Go back to your junction box with power off and verify each connection is secure. Double-check that you wired load and line correctly, this is the most common beginner mistake and easily fixed. Sometimes the issue is as simple as the timer needing fresh batteries or your schedule being set for AM instead of PM.
Connecting Smart Controls and Wi-Fi Automation
Adding smart systems to your pool automation takes things to the next level. You’ll gain remote control from anywhere, create custom schedules that adjust automatically, and even use voice commands if that’s your thing.
Start by choosing a Wi-Fi-enabled switch or relay that fits your needs. Most plug directly into your existing setup between the power source and your pump or feature. Look for devices with waterproof ratings suitable for outdoor use. Follow the manufacturer’s pairing instructions, which typically involve downloading their app, creating an account, and putting the device into pairing mode by holding a button for a few seconds.
Once connected, open the app and name your device something memorable like “fountain pump” or “pool filter.” You’ll create schedules through simple tap-and-drag interfaces. Set your filtration to run during off-peak electricity hours, or program your waterfall to start each morning and shut off at sunset. Many apps let you duplicate schedules across days, saving you repetitive setup.
Voice assistant integration works through your app’s settings. Link your account to Google Assistant or Alexa, then control everything by saying “turn on the fountain” or “start the pool pump.” It’s genuinely convenient when your hands are full of gardening tools.
Common hiccups? If your device won’t connect, move your router closer or add a Wi-Fi extender, outdoor smart plugs need strong signals. Check that you’re on a 2.4GHz network, not 5GHz, many budget automation devices only support the former. If schedules aren’t triggering, verify your time zone settings in the app. Restart both the device and your router if things act glitchy, that simple step fixes most connection issues surprisingly often.
Testing and Verifying Your System Works Correctly
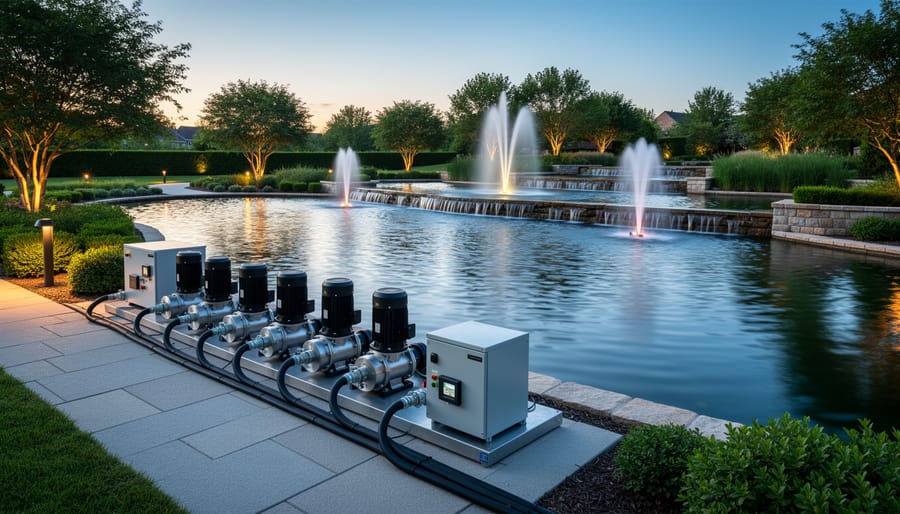
Once your automation is installed and powered on, it’s time to make sure everything works as planned. Start by manually triggering your system, if you’ve installed a timer, advance it to an “on” period and watch the pump or water feature start up. If you’re using a smart switch, tap the button in your app and listen for the relay click and motor hum. This immediate feedback tells you the wiring and power connections are solid.
Over the next few days, monitor several automated cycles without intervening. Check that your pump turns on and off at the scheduled times, and note whether the timing drifts or stays consistent. Walk out to your pool or pond at different times of day to observe the system in action, you’ll catch issues like a pump that starts but doesn’t circulate properly, or lights that flicker instead of holding steady.
Inspect all connections for signs of trouble. Touch junction boxes and relay housings gently to feel for unusual warmth, which can signal loose wires or overloaded circuits. Look for moisture inside enclosures, condensation on terminals, or water pooling near outlets. If you find dampness, power down immediately and reseal or relocate the affected components.
Listen for changes in sound. A healthy pump has a consistent whir; grinding, rattling, or intermittent noise means something needs attention. Fine-tune your schedules based on what you observe, if the waterfall runs too long and wastes water, shorten the cycle; if algae creeps back, add an extra filtration window. Testing builds confidence and ensures seasonal reliability so your system keeps performing month after month.
Troubleshooting Common Issues
Even when you’ve followed all the installation steps carefully, you might hit a few snags. Here’s how to tackle the most common DIY pool automation hiccups.
Device won’t respond at all. Check the obvious first: is power getting to the unit? Verify the circuit breaker is on and test the outlet with another device. Inspect all wire connections, a loose terminal can stop everything cold. If you’re using GFCI protection (which you absolutely should be), try resetting it. Sometimes moisture trips the GFCI even when everything’s properly sealed.
Intermittent connectivity with smart controls. Wi-Fi signal strength is usually the culprit when your pool equipment is outdoors. Stand where your control unit is mounted and check your phone’s signal, if it’s weak there, your automation device struggles too. Consider adding a Wi-Fi extender rated for outdoor use, or relocate your router closer to a window facing the pool area. Also verify your home network hasn’t changed its password or settings after an update.
Schedules aren’t triggering on time. First, confirm your timer or controller has the correct date and time set. Many units reset after a power outage and need manual correction. Double-check that you’ve set AM/PM correctly, an easy mistake that throws everything off by twelve hours. If you’re using app-based scheduling, ensure the app has proper permissions and hasn’t been force-closed by your phone’s battery optimization.
Pump makes noise but won’t start. This often points to the pump itself rather than your automation. Listen closely: a humming sound without movement usually means a stuck impeller or a failed capacitor in the pump motor. Your automation is doing its job by sending power, but the pump needs mechanical attention. Try manually spinning the pump shaft (power off first) to free a stuck impeller.
When troubleshooting, change one thing at a time and test after each adjustment. That way you’ll know exactly what fixed the problem and can prevent it in the future.
Frequently Asked Questions
Can I automate an existing pool or water feature?
Absolutely. Most pools and water features can be retrofitted with automation systems without major modifications. You simply add controls between your existing power source and pumps or equipment, making it an ideal project for homes with established setups.
Do I need special electrical knowledge to install automation?
Basic electrical understanding helps, but you don’t need to be an electrician for simple timer installations. If you’re comfortable replacing a light switch, you can handle basic automation. For more complex wiring or anything involving your main electrical panel, hire a licensed electrician.
Will automation actually save me money?
Yes, automation typically reduces energy costs by running pumps and equipment only when needed rather than continuously. You’ll also save on chemical costs through consistent filtration and reduce repair expenses by preventing issues like running pumps dry or overworking equipment.
How reliable are DIY automation systems compared to professional setups?
Quality DIY components can be just as reliable as expensive professional systems. The key is choosing weatherproof, outdoor-rated equipment and following proper installation procedures. Many DIYers find their systems run for years without issues.
Beyond these common questions, many folks wonder about the difference between basic timers and smart controls. Simple mechanical or digital timers operate on fixed schedules you program manually, turning equipment on and off at set times each day. Smart controls offer Wi-Fi connectivity, smartphone apps, remote access, and the ability to create complex routines or respond to conditions like temperature changes. Both work well, just at different convenience and cost levels.
Can you expand your system later? That’s one of the best aspects of starting with DIY automation. Begin with one function like your main pump, get comfortable with the process, then gradually add controls for lighting, water features, or heating as your confidence grows. Most systems are modular, letting you build capability over time without replacing what you’ve already installed. This approach spreads out costs and keeps the learning curve manageable while you integrate automation into your year-round maintenance routine.
You’ve made it through the planning, the wiring, the testing, and now you have a pool or water feature that runs itself. That’s genuinely impressive work, and you should feel proud of what you’ve accomplished. What started as a manual chore checking timers or flipping switches has become an automated system that handles itself while you enjoy your outdoor space.
The beauty of DIY automation is that you’re never truly finished. Once your first component is working smoothly, you can add another. Automate your lighting next, or add a water level sensor, or expand to multiple zones. Each addition builds on what you’ve already learned, and your confidence grows with every successful installation.
Don’t hesitate to share your experience with other water gardening enthusiasts. Online forums, local pond clubs, and social media groups are filled with people who’ve tackled similar projects and love swapping tips and troubleshooting advice. You’ll find new ideas, learn clever workarounds, and discover features you hadn’t considered. The water gardening community is remarkably supportive, and your success can inspire someone else to take that first step.
Starting small and building gradually is the smart approach. You’ve proven you can do this work safely and effectively. Now it’s time to enjoy the freedom automation brings, more time relaxing by your pond or pool, less time maintaining it. That’s the whole point, after all.