

Beautiful DIY Plant Waterers That Transform Your Water Feature
Transform your plant care routine with a self-watering system that keeps your green friends thriving while you’re away. Building your own DIY water features and irrigation solutions saves money and offers complete control over your plants’ hydration needs. From simple wine bottle drippers to sophisticated gravity-fed systems, creating a custom plant waterer requires just a few household items and basic crafting skills. Whether you’re planning a weekend getaway or simply want to streamline your daily plant maintenance, these automated watering solutions ensure consistent moisture levels without the worry of over or under-watering. Perfect for both indoor houseplants and outdoor gardens, these clever DIY systems combine practicality with sustainable gardening practices, making plant care effortless and efficient.
Smart Design Principles for Water Feature Plant Integration
Water Flow and Distribution
Getting the right water flow for your DIY plant waterer is crucial for keeping your plants happy and healthy. Start by calculating your plants’ water needs – most houseplants need about 1-2 cups of water per week, while outdoor plants may need more depending on climate and size.
For a basic drip system, aim for a flow rate of 1-2 drops per second per plant. You can adjust this by testing different hole sizes in your delivery tubes – start with a 1/16-inch hole and adjust up or down as needed. For multiple plants, use a main water reservoir elevated at least 12 inches above your highest plant to ensure proper water pressure throughout the system.
To distribute water evenly, position your main line slightly higher than the plant containers and use smaller feeding tubes for each plant. Monitor soil moisture levels regularly during the first week to fine-tune your flow rate. For soil-moisture activated systems, place sensors about 2-3 inches deep in the soil where roots are most active.
Remember that seasonal adjustments may be necessary – plants typically need more water during growing seasons and hot weather, so design your system with adjustable flow controls.
Material Selection
When selecting materials for your DIY plant waterer, durability and safety should be your top priorities. Food-grade plastic containers, such as clean milk jugs or water bottles, make excellent reservoirs as they’re both safe for plants and weather-resistant. Glass wine bottles can add a decorative touch while serving as reliable water vessels, though they require careful handling.
For the delivery system, consider using unglazed terracotta stakes or porous ceramic cones, which naturally regulate water flow through their permeable material. Cotton or nylon rope works well as wicking material, while plastic tubing offers precise water control for more sophisticated setups.
Choose materials that complement your garden’s aesthetic. Natural elements like bamboo poles can create beautiful gravity-fed systems, while copper pipes add a modern industrial touch. If you’re planning a long-term solution, invest in UV-resistant materials to prevent degradation from sun exposure.
For connecting pieces, food-grade silicone tubing and rubber grommets ensure watertight seals without introducing harmful chemicals to your plants. Remember to avoid any materials that might rust or leach unwanted substances into your water supply.
Three Beautiful DIY Plant Watering Designs
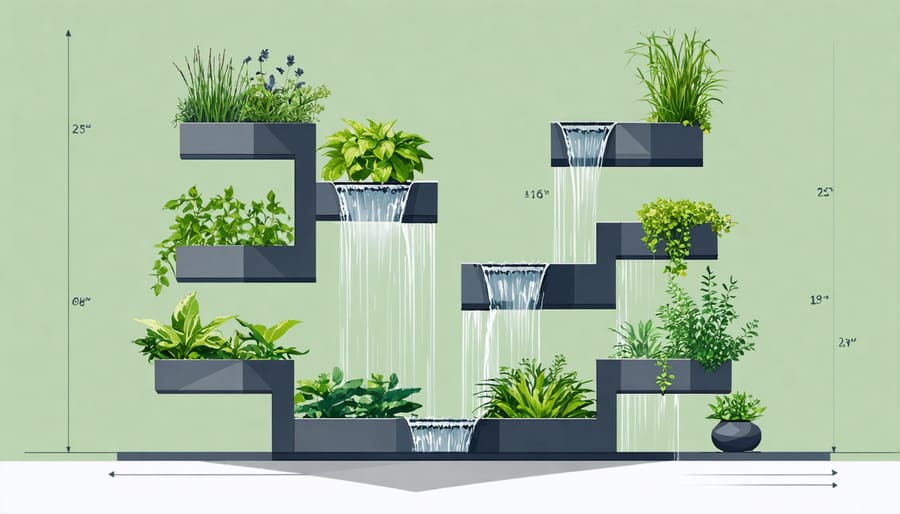
Cascading Terrace System
Creating a multi-level watering system for your plants can transform your garden into a stunning display while ensuring efficient irrigation. By combining the principles of cascading water features with practical plant care, you’ll create a functional and beautiful garden centerpiece.
Start by gathering your materials: terracotta pots in descending sizes, a submersible pump, plastic tubing, waterproof sealant, and decorative stones. You’ll also need a drill with a masonry bit and basic tools.
Begin by sealing your pots with waterproof sealant, focusing on the drainage holes except for the bottom pot. Once dry, drill holes in the side of each pot near the base for the water to flow through. These holes should align when the pots are arranged in their final position.
Create your structure by placing the largest pot at the bottom, which will serve as your reservoir. Insert the submersible pump here, ensuring it’s fully submerged. Thread the pump tubing up through the pots, securing it discretely along the way.
Stack your pots in descending order, using bricks or sturdy supports between each level to create height variation. Position each pot slightly off-center from the one below, allowing water to cascade naturally. The top pot should receive water directly from the pump tube.
Add your plants, choosing varieties that match your local climate and water needs. Consider trailing plants for the edges and upright specimens for the center of each pot. Place decorative stones around the pots to hide the tubing and create a more natural look.
When you turn on the system, water will flow from the top, nurturing each level of plants before collecting in the reservoir to be recirculated. This efficient system minimizes water waste while creating a stunning visual display.
Remember to monitor water levels and clean the pump regularly to maintain optimal performance. Adjust the flow rate as needed to ensure all plants receive adequate moisture without overwatering.
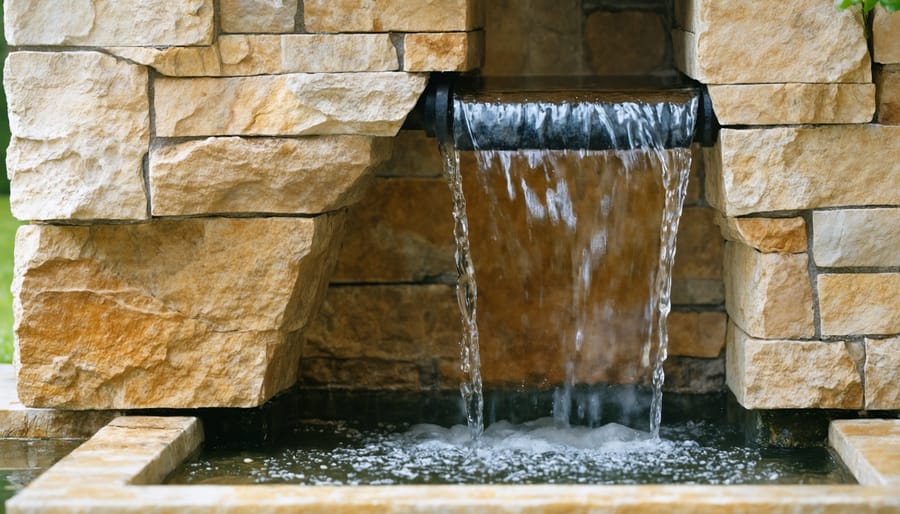
Hidden Drip System
A hidden drip system offers a brilliant way to maintain your plants while preserving the natural beauty of your water feature. By incorporating concealed irrigation into your existing setup, you’ll create a self-sustaining environment that looks effortless and elegant, much like what you might see in professional illuminated water features.
Start by gathering your materials: flexible plastic tubing (1/4 inch diameter), drip emitters, a water pump, and connecting pieces. Choose dark-colored tubing that blends with your landscaping. The key is to route the tubing behind rocks, under mulch, or along the edges of your water feature where it won’t be visible.
Begin installation by connecting the tubing to your water pump. Place the pump in the deepest part of your water feature, ensuring it’s fully submerged. Run the main line around the perimeter of your feature, securing it with landscape pins or tucking it beneath decorative elements.
At each plant location, install a T-connector and attach shorter lengths of tubing with drip emitters. Position these emitters near plant roots, about 2-3 inches deep in the soil. For hanging plants or elevated arrangements, snake the tubing up through hollow decorative elements or behind support structures.
Pro tip: Use adjustable drip emitters to fine-tune water flow for different plant needs. Small succulents might need just a trickle, while thirstier plants require more substantial flow.
To maintain your hidden system, check connections monthly and clean the pump filter every few weeks. In winter, you may need to adjust flow rates or disconnect the system entirely, depending on your climate.
This subtle approach to plant irrigation not only keeps your garden thriving but also maintains the natural aesthetic of your water feature. Your guests will wonder how your plants stay so perfectly hydrated without visible watering systems.
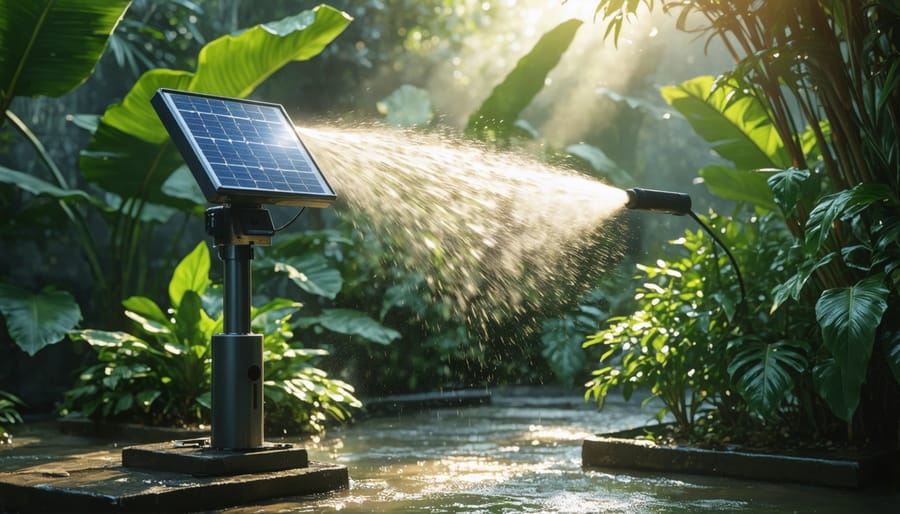
Solar-Powered Mist Feature
Transform your garden into an eco-friendly oasis with this solar-powered misting system that’s perfect for delicate plants requiring high humidity. This project combines sustainable energy with efficient plant care, creating a gentle mist that keeps your plants happy while adding a touch of magic to your garden.
To get started, you’ll need a small solar panel (5-10 watts), a 12V mini water pump, misting nozzles, flexible tubing, cable ties, and basic tools. The heart of this system lies in its solar-powered operation, eliminating the need for electrical outlets while keeping your garden green.
Begin by positioning your solar panel in a spot that receives maximum sunlight. Mount it on a pole or secure it to a sturdy surface at a 45-degree angle facing south. Connect the panel to the water pump using weatherproof connectors, ensuring all connections are properly sealed against moisture.
Next, create your misting network. Cut the flexible tubing to size, considering the layout of your plant arrangement. Install misting nozzles every 12-18 inches along the tubing, depending on your coverage needs. Pro tip: use T-connectors to create branches in your misting system for better coverage.
Place the pump in a water reservoir – this could be a small bucket or container hidden among your plants. Connect the main tubing to the pump’s output port, and secure all connections with hose clamps to prevent leaks. Use cable ties to neatly attach the tubing to support structures or along plant stakes.
The system will automatically operate when the sun hits the solar panel, creating a fine mist that’s perfect for orchids, ferns, and other humidity-loving plants. For more control, you can add a simple timer switch between the solar panel and pump.
Remember to clean the nozzles monthly to prevent mineral buildup, and adjust the system seasonally as the sun’s position changes. This eco-friendly solution not only conserves water through efficient misting but also adds a delightful sensory element to your garden space.
Maintenance and Troubleshooting
Seasonal Adjustments
As seasons change, so do your plants’ watering needs. During hot summer months, increase water flow by adjusting your DIY waterer’s drip rate or adding extra drip points to compensate for increased evaporation. You might need to refill your reservoir more frequently or consider installing a larger container.
In spring and fall, maintain a moderate flow that matches your plants’ growth patterns. These transitional seasons often require careful monitoring as weather can be unpredictable. Keep an eye on soil moisture levels and adjust accordingly.
Winter calls for reduced watering, especially for outdoor plants entering dormancy. If you’re using a gravity-fed system, consider installing a valve that allows for easy flow adjustment. For indoor plants, maintain consistent but reduced watering schedules, as heating systems can dry out the air.
Remember to check your water delivery tubes or pipes seasonally for any blockages caused by mineral buildup or debris. A quick flush with vinegar solution can help clear minor clogs and ensure smooth operation year-round. For areas with freezing winters, consider installing quick-disconnect fittings so you can easily remove and store your system indoors.
Common Issues and Solutions
Even the best DIY plant waterers can encounter issues, but most are easily fixable. One common problem is uneven water distribution, which often occurs when using plastic bottles. To fix this, try making the water holes slightly larger or adding more holes for better flow. If you notice water draining too quickly, consider using a smaller hole size or adding a piece of cloth as a filter.
Clogged systems are another frequent challenge, especially when using natural materials like terracotta pots or bamboo. Regular cleaning and occasional unclogging with a thin wire can keep the system flowing smoothly. For self-watering systems using wicks, the material may become less effective over time. Simply replace the wick material every few months to maintain optimal performance.
Algae growth can occur in clear containers exposed to sunlight. Paint or cover your containers with dark material to prevent this issue. If you’re experiencing overflow problems, check that your reservoir isn’t too full and ensure proper drainage holes are in place. For systems that seem to dry out too quickly, consider adding a moisture-retaining medium like coconut coir to your soil mix.
Creating your own DIY plant waterer is not just a practical solution for keeping your plants healthy – it’s an enjoyable project that can save you time and money while reducing water waste. Whether you’ve chosen the simple bottle method, crafted a decorative drip system, or built an automated irrigation setup, you now have the knowledge to keep your plants properly hydrated. Remember to monitor your system regularly, adjust water flow as needed, and maintain the components to ensure long-lasting performance. Don’t be afraid to experiment and customize these ideas to suit your specific needs. Your plants will thank you with vibrant growth, and you’ll enjoy the satisfaction of having created a sustainable watering solution. Ready to get started? Gather your materials and begin your DIY plant waterer project today!