
Easy DIY Pond Aeration: Bring Your Water Garden to Life
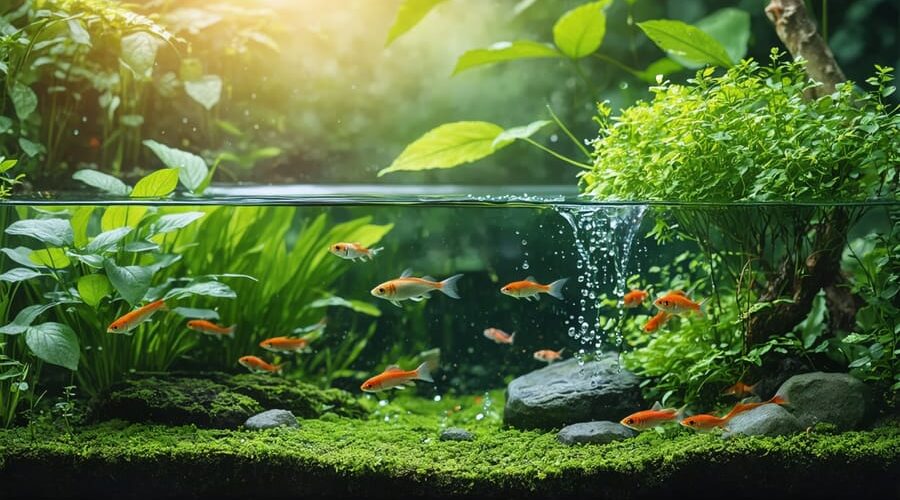
Transform your backyard pond into a thriving aquatic ecosystem with a DIY aeration system that costs a fraction of commercial solutions. Understanding the benefits of pond aeration is crucial – from preventing algae growth to supporting healthy fish populations. Building your own aerator combines simple hardware store materials with basic DIY skills to create professional-grade results.
Picture crystal-clear water teeming with life, achieved through a system you built with your own hands. Whether you’re working with a small decorative pond or a larger recreational water feature, this guide will walk you through creating an efficient aeration setup using readily available components like air pumps, diffuser stones, and weighted tubing. We’ll explore cost-effective solutions that deliver optimal oxygen levels while maintaining the natural beauty of your water garden.
The best part? These DIY methods are customizable to your specific pond size and needs, allowing you to scale up or down as required. Get ready to roll up your sleeves and give your pond the gift of oxygen – your fish and plants will thank you for it.
Understanding Pond Aeration Basics
How Pond Aeration Works
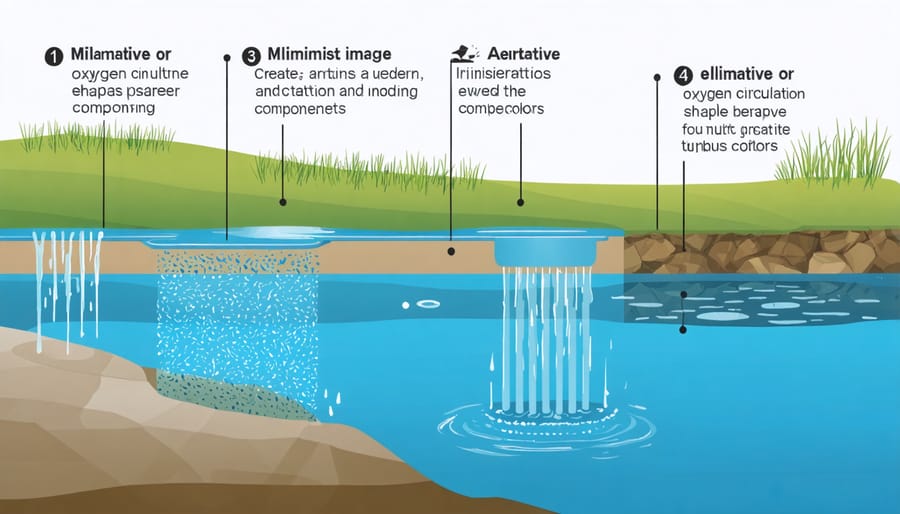
Pond aeration works by introducing oxygen into your pond water through a simple but effective process. At its core, an aeration system creates thousands of tiny bubbles that rise from the bottom of your pond to the surface. As these bubbles travel upward, they do two important jobs: they bring oxygen-poor water from the bottom to the surface, where it can absorb oxygen from the air, and they directly transfer oxygen into the water through their surface area.
This constant circulation helps to keep your water crystal clear and creates a healthier environment for fish and beneficial bacteria. Think of it like a giant water elevator – the rising bubbles lift the bottom water to the top, while pushing surface water down, creating a continuous cycle that prevents stagnation.
The process also breaks down thermal stratification (layers of different temperature water), helps beneficial bacteria thrive, and reduces harmful gases that can build up in deeper areas. This natural mixing action is what makes aeration such a powerful tool for maintaining a healthy pond ecosystem.
Signs Your Pond Needs Aeration
Your pond will often send clear distress signals when it needs better aeration. One of the most obvious signs is fish gasping at the surface, especially during early morning hours. This behavior indicates low oxygen levels, which can seriously impact the effectiveness of pond aerators and the overall health of your aquatic ecosystem.
Watch out for excess algae growth, which appears as green, cloudy water or thick surface mats. This usually happens when there’s poor water circulation and too many nutrients building up. You might also notice an unpleasant rotten egg smell coming from your pond – this is hydrogen sulfide gas, a sure sign of poor oxygenation.
Dead zones at the bottom of your pond, where leaves and debris accumulate without breaking down, indicate stagnant water. If your fish seem lethargic or you’re experiencing unexplained fish losses, especially during hot summer months, your pond is crying out for better aeration. Keep an eye on surface movement too – a healthy pond should have some rippling or movement across the water’s surface.
Simple DIY Aeration Methods
Solar-Powered Air Pump System
Creating a solar-powered air pump system is an eco-friendly way to achieve aeration for healthier fish and a cleaner pond. Here’s how to build one:
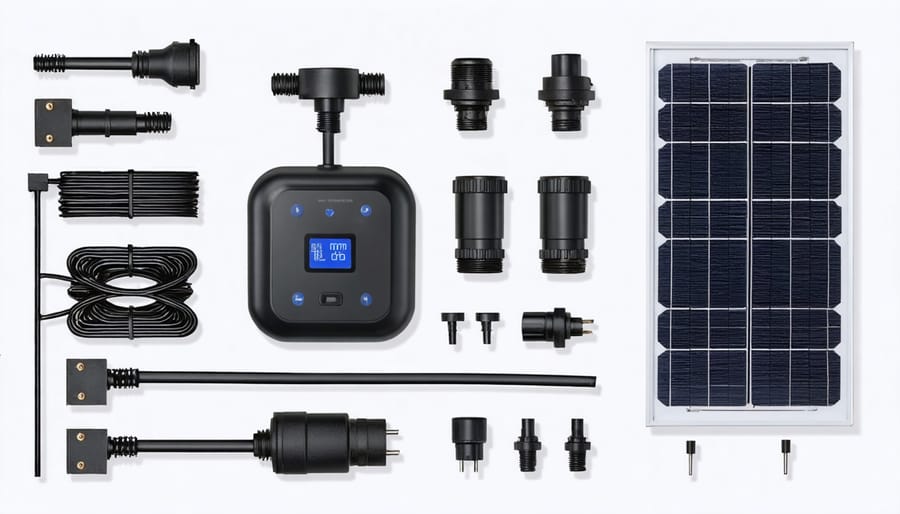
Start by gathering your materials: a 12V solar panel (20-30 watts), a solar charge controller, a deep cycle 12V battery, a DC air pump, airline tubing, and air stones. You’ll also need basic tools like wire strippers, a screwdriver, and weatherproof housing for electrical components.
Mount the solar panel in a sunny location, ideally facing south. Connect the panel to the charge controller, which prevents overcharging. Next, wire the controller to your battery, ensuring proper polarity. Connect the air pump to the battery through the controller’s load terminals.
Run the airline tubing from the pump to your pond, making sure it’s protected from UV damage. Place air stones at the end of the tubing in different pond areas for even oxygen distribution. Secure the tubing with stakes to prevent floating.
For best results, position the air stones 12-18 inches below the surface. The system will run during daylight hours and, with the battery backup, continue operating at night. Regular maintenance includes cleaning air stones monthly and checking electrical connections seasonally.
Remember to weatherproof all electrical components and keep connections elevated above ground level to prevent water damage during rain.
Waterfall and Stream Features
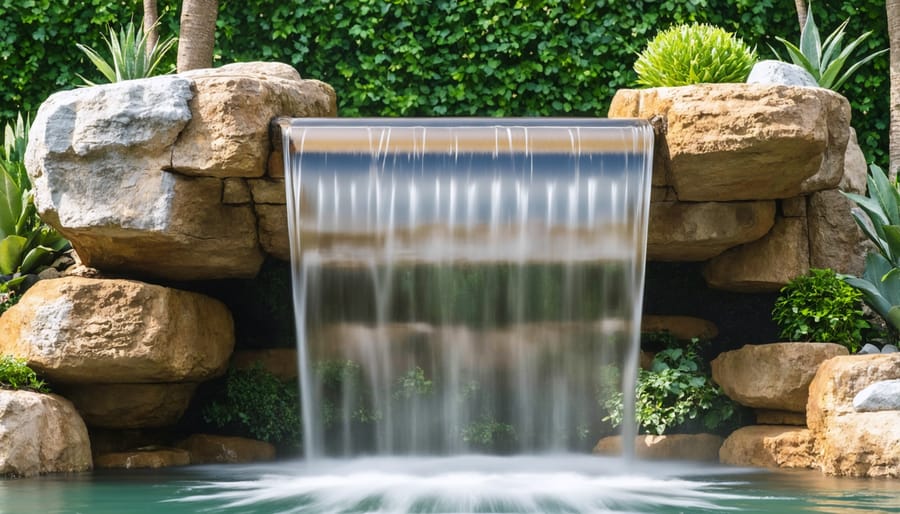
Waterfalls and streams aren’t just beautiful additions to your pond – they’re also natural aerators that can significantly boost oxygen levels in your water. When water cascades down rocks or flows through a stream, it creates surface agitation and captures oxygen from the air, naturally incorporating it into your pond water.
Creating a simple waterfall is easier than you might think. Start by installing a submersible pump at the lowest point of your desired water feature. Run flexible tubing from the pump to your planned waterfall location, making sure to hide it beneath rocks or landscaping. Build up a mound using large rocks, creating natural-looking levels for the water to flow over. The key is to ensure multiple points of contact between the water and rocks, as this increases oxygen absorption.
For streams, dig a gentle slope that winds its way to your pond. Line the channel with pond liner, and arrange rocks of varying sizes to create small rapids and mini-waterfalls along the way. The more turbulent the water flow, the better the aeration effect. A good rule of thumb is to include at least three small drops or rapids in your stream design.
Remember to size your pump appropriately – aim for a flow rate that turns over your pond’s entire volume at least once every two hours for optimal aeration. The sound of flowing water will not only add oxygen but also create a peaceful atmosphere in your garden.
Windmill Aeration Setup
A windmill aeration system offers an eco-friendly way to aerate your pond without electricity. Start by choosing a location that receives consistent wind exposure, ideally on elevated ground near your pond. You’ll need a windmill kit (typically 8-20 feet tall), mounting pole, airline tubing, and diffusers.
Begin installation by securing a concrete base for stability. Assemble the windmill tower according to the manufacturer’s instructions, typically starting with the bottom section and working your way up. Mount the head unit, which contains the diaphragm pump, at the top of the tower.
Connect the airline tubing to the pump head and run it down through the tower to your pond. Bury the tubing underground at a depth of 12-18 inches to protect it from damage and UV exposure. At the pond end, attach weighted diffusers to the airline and position them at the deepest parts of your pond.
For optimal performance, install multiple diffusers spaced evenly throughout deeper areas. The windmill’s spinning action powers the diaphragm pump, which pushes air through the system and creates bubbles in your pond. Regular maintenance includes checking the airline connections, lubricating moving parts twice yearly, and ensuring the windmill head turns freely.
This system works best in areas with average wind speeds of at least 7 mph and can aerate ponds up to 2 acres in size.
Essential Materials and Tools
Before diving into your DIY pond aeration project, gathering all the necessary materials and tools will ensure a smooth installation process. Here’s everything you’ll need to get started:
Core Materials:
– Air pump (sized according to your pond volume)
– Air stones or diffusers (at least 1 per 1000 gallons)
– Weighted airline tubing (length depends on pond size)
– Check valve
– Tubing connectors and splitters
– Weatherproof electrical box or cover
– Concrete blocks or sturdy platform for pump placement
Essential Tools:
– Scissors or utility knife
– Screwdriver set
– Pliers
– Measuring tape
– Marker pen
– Wire strippers (if customizing electrical connections)
– Level
Safety Equipment:
– Waterproof work gloves
– Safety glasses
– Rubber boots or waders
– Ground fault circuit interrupter (GFCI) outlet
Optional Materials:
– Rubber grommets for clean tubing entry points
– Cable ties for securing airlines
– Pipe insulation for winter protection
– Solar panel kit (if choosing solar-powered option)
– Additional airline tubing for backup
– Hose clamps for secure connections
– Anti-kink springs for tubing protection
Storage and Maintenance Items:
– Small tool box for keeping spare parts
– Cleaning supplies for air stones
– Silicone lubricant for maintenance
– Air pump replacement diaphragm kit
– Extra air stones and tubing sections
Remember to choose quality materials that can withstand underwater conditions and varying weather. While it might be tempting to cut costs on certain items, investing in durable components will save you money and effort in the long run. Store your supplies in a dry, accessible place for easy maintenance and repairs when needed.
Installation and Maintenance Tips
Proper Placement Guidelines
Proper placement of your DIY pond aeration system is crucial for maximum effectiveness. Start by positioning your air compressor or pump on dry, level ground, ideally elevated above the pond’s water level to prevent water backflow. Place it in a sheltered area, protected from rain and direct sunlight, and ensure it has adequate ventilation to prevent overheating.
For the diffuser placement, divide your pond into sections and mark the deepest points. These are ideal locations for your air diffusers, as rising air bubbles will create better circulation from bottom to top. If you have a single diffuser, position it in the deepest central area. For multiple diffusers, space them evenly across the bottom, ensuring coverage of all deep zones.
When running airline tubing, create a gentle slope from the compressor to the pond, avoiding any sharp bends or kinks that could restrict airflow. Include a check valve in the line about 12 inches from the compressor to prevent water from flowing back if the system stops. Secure the tubing along its route using stakes or weights to prevent floating.
Consider seasonal changes when planning your layout. In winter, you might want to move diffusers to shallower areas to prevent complete freezing, while in summer, deeper placement helps circulate cooler bottom water. Always ensure easy access to components for maintenance and adjustments.
Seasonal Maintenance Schedule
Keeping your DIY pond aeration system running smoothly requires regular water feature maintenance throughout the year. Here’s your seasonal guide to keeping everything in top shape:
Spring (March-May):
– Clean or replace air filters
– Check all air lines for winter damage
– Clear debris from diffuser stones
– Test water quality as temperatures rise
– Inspect electrical connections
Summer (June-August):
– Clean diffuser stones monthly
– Check air flow weekly
– Monitor pump temperature
– Remove any algae buildup
– Ensure ventilation around the air pump
Fall (September-November):
– Remove fallen leaves regularly
– Deep clean diffuser stones
– Check all connections before winter
– Consider adding a backup system
– Clear vegetation around the setup
Winter (December-February):
– Keep the system running to prevent ice
– Protect exposed pipes with insulation
– Check air flow weekly
– Clear snow from pump housing
– Monitor power supply during storms
For optimal performance, inspect your air pump monthly and clean or replace parts as needed. Keep a maintenance log to track patterns and anticipate potential issues before they become problems. Remember that consistent care will extend your system’s lifespan and keep your pond healthy year-round.
Troubleshooting Common Issues
Even the best DIY pond aeration systems can encounter issues, but most problems have simple solutions. If you notice reduced bubbles or weak air flow, first check for kinked air lines – straightening them often resolves the problem. Air leaks are another common culprit; inspect all connections and apply silicone sealant where needed.
When your air pump seems noisy, check if it’s properly leveled and mounted on a stable surface. Adding rubber feet or a foam pad underneath can reduce vibrations. If the pump is housed outdoors, ensure it’s protected from rain and debris while maintaining proper ventilation to prevent overheating.
For diffusers that aren’t producing bubbles, they may be clogged with sediment. Remove and clean them with a gentle brush and vinegar solution. If bubbles are coming up in unwanted areas, your air line might have developed small holes – replace the affected section of tubing.
Winter brings its own challenges. Keep your pump in a sheltered location and use a check valve to prevent water from backing up into the system when turned off. If ice forms around diffusers, carefully adjust their depth to prevent damage.
Remember that regular maintenance prevents most issues. Clean or replace air filters monthly, check connections quarterly, and inspect diffusers twice yearly for optimal performance.
Creating your own DIY pond aeration system is both rewarding and cost-effective. By following the methods we’ve discussed, you can significantly improve your pond’s health while saving money. Remember that proper aeration leads to clearer water, healthier fish, and fewer algae problems. Whether you choose a simple solar-powered setup or a more complex windmill system, the key is to start with a well-planned design and quality materials. Don’t be afraid to start small and upgrade as needed – even a basic DIY aerator can make a noticeable difference in your pond’s ecosystem. With regular maintenance and monitoring, your homemade aeration system will keep your pond thriving for years to come. So gather your materials, follow our safety guidelines, and get started on your DIY pond aeration project today!