
Fish Breeding Tubs: The Secret to Successful Backyard Fish Production
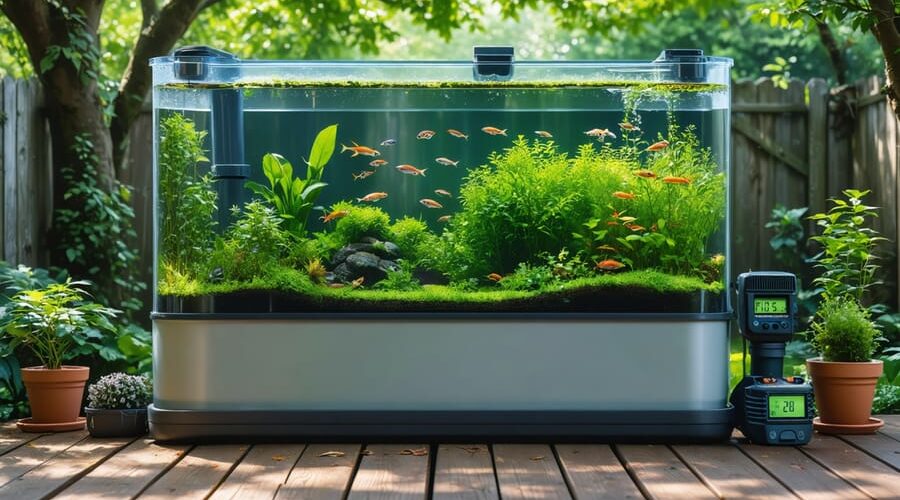
Transform an ordinary tub into a thriving fish breeding sanctuary with precise temperature control, dedicated spawning zones, and proper filtration. Select a food-grade plastic container at least 50 gallons in capacity, ensuring durability and safety for your breeding pairs. Install adjustable heaters to maintain optimal spawning temperatures between 68-75°F (20-24°C), crucial for successful backyard fish breeding. Create distinct breeding areas using aquatic plants, spawning mops, or breeding grass, giving fish multiple safe spaces to deposit eggs. Position the tub in a partially shaded area to prevent algae overgrowth while maintaining natural light cycles that trigger breeding behavior. Add a gentle air-powered sponge filter to maintain water quality without endangering newly hatched fry, and establish beneficial bacteria colonies two weeks before introducing breeding pairs.
Setting Up Your Fish Breeding Tub
Choosing the Right Tub
When selecting a breeding tub, you’ll need to consider three key factors: size, material, and durability. For most fish species, a tub between 50 to 100 gallons provides adequate space for successful breeding. Larger tubs offer more stable water conditions and accommodate more fish, while smaller ones are easier to maintain and monitor.
Popular material choices include food-grade plastic, fiberglass, and polyethylene. These materials are non-toxic, durable, and maintain consistent water temperatures. Dark-colored tubs are preferable as they reduce stress in breeding fish and provide a more natural environment. Avoid metal containers, which can leach harmful substances into the water.
Look for tubs with smooth interior surfaces to prevent fish injuries and make cleaning easier. The tub should have sufficient depth (at least 18 inches) to create different water zones and accommodate breeding behaviors. If possible, choose tubs with built-in drain plugs for easier water changes.
For outdoor setups, UV-resistant materials are essential to prevent degradation from sun exposure. Indoor breeders might prefer lightweight options that are easier to move and maintain.
Creating the Perfect Environment
Creating the perfect environment in your fish breeding tub starts with maintaining optimal water conditions. The water temperature should stay consistent between 68-78°F (20-26°C), depending on your fish species. Install a reliable aquarium heater with a thermostat to prevent sudden temperature fluctuations that could stress your breeding pairs.
Water quality is crucial for successful breeding. Use a good filtration system to keep the water clean and well-oxygenated. A combination of mechanical and biological filtration works best, helping to remove waste while maintaining beneficial bacteria. An air pump with air stones will ensure proper oxygen levels and water circulation.
Test your water parameters regularly using a quality testing kit. The ideal pH should typically be between 6.5 and 7.5, though this may vary depending on your fish species. Ammonia and nitrite levels should always be at zero, while nitrates should remain below 20 ppm.
Essential equipment for your breeding tub includes:
– Water thermometer
– LED lighting (for plant growth and day/night cycles)
– Breeding nets or separate containers for fry
– Live or artificial plants for shelter
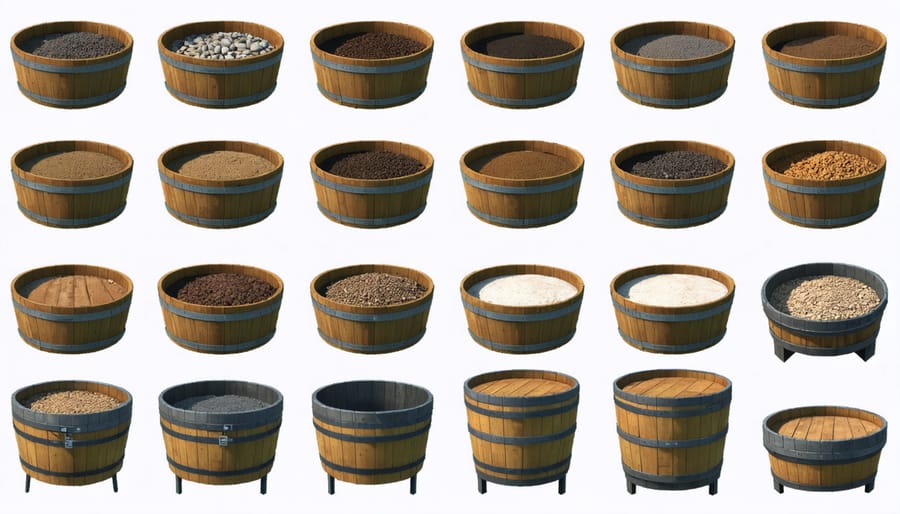
– Substrate suitable for egg-laying
– Water conditioner to remove chlorine
Remember to cycle your tub properly before introducing breeding pairs. This process typically takes 2-3 weeks and ensures a stable environment. Add floating plants or breeding mops to provide hiding spots for eggs and fry. These additions not only serve a practical purpose but also help create a more natural-feeling environment for your fish.
Preparing Your Breeding Tub
Water Quality Management
Maintaining pristine water quality is crucial for successful fish breeding in your tub setup. Start by installing an optimal water filtration system that matches your tub’s size and fish population. Regular monitoring of key water parameters is essential – keep ammonia and nitrite levels at zero, and nitrates below 20ppm.
Test your water weekly using a reliable testing kit, paying special attention to pH levels (aim for 6.8-7.5 for most fish species). Temperature stability is vital for breeding success, so consider installing a quality heater if breeding tropical species. During breeding seasons, perform smaller but more frequent water changes (about 10-15% twice weekly) to maintain water quality without disturbing the breeding environment.
Don’t forget to remove debris and uneaten food daily to prevent water contamination. Adding live plants can help maintain water quality naturally by absorbing excess nutrients and providing hiding spots for fry. If you notice any sudden changes in water clarity or fish behavior, check your parameters immediately and perform necessary adjustments.
Consider using air stones to maintain proper oxygen levels, especially important when you have a higher fish density during breeding periods. Remember, healthy water means healthy fish, which leads to successful breeding outcomes.
Adding Plants and Spawning Media
Creating the right environment in your breeding tub starts with adding essential aquatic plants and suitable spawning media. For most fish species, floating plants like water sprite or hornwort provide excellent cover for eggs and fry, while helping maintain water quality. These plants also offer natural hiding spots for breeding pairs.
Different fish species require specific spawning materials. For egg-scattering fish like tetras and danios, use fine-leaved plants or synthetic spawning mops. Egg-depositing species like angelfish prefer broad leaves or vertical surfaces – artificial slate or breeding cones work perfectly. Mouth-brooders like bettas appreciate dense plant cover but don’t need specific spawning surfaces.
Add java moss, which serves multiple purposes: it provides cover, helps filter the water, and creates microorganisms that become first foods for newly hatched fry. For bottom-spawning fish like corydoras, include fine gravel or rounded pebbles. Remember to arrange plants and spawning media to create distinct territories, reducing stress and encouraging natural breeding behaviors.

Conditioning Your Breeding Pairs
Before introducing your breeding pairs to their new tub, proper conditioning is essential for successful spawning. Start by selecting healthy, mature fish that show clear gender differences. Males typically display brighter colors and slimmer bodies, while females appear plumper, especially when carrying eggs.
Feed your breeding pairs a varied, high-quality diet for 2-3 weeks before moving them to the breeding tub. Include protein-rich foods like bloodworms, brine shrimp, and quality pellets to help females develop eggs and ensure both fish are in prime breeding condition.
Keep male and female fish separated during this conditioning period, allowing them to see each other through a clear divider. This separation builds breeding anticipation and often results in more successful spawning when they’re finally introduced.
Monitor water parameters carefully during conditioning, maintaining stable temperatures and clean water conditions. A slight temperature increase of 2-3 degrees can help trigger breeding behavior once the pairs are ready to be introduced to their breeding tub.
Remember that stressed or unhealthy fish rarely breed successfully, so take your time with the conditioning process. Your patience will be rewarded with healthier fry and higher spawning success rates.
Managing the Breeding Process
Monitoring Breeding Behavior
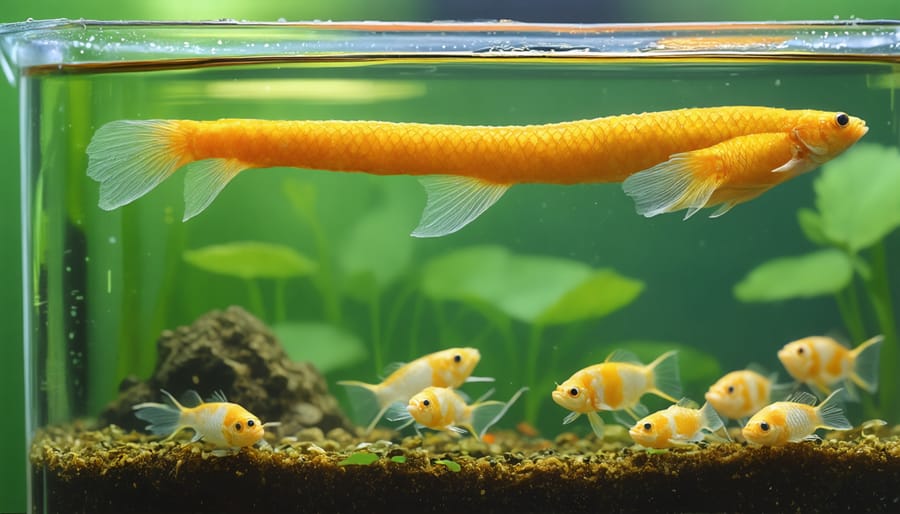
Keeping a close eye on your breeding fish will help you identify when spawning is about to occur. Look for telltale signs like male fish chasing females, increased activity levels, and females appearing notably rounder with eggs. During spawning season, males often develop brighter colors and may become territorial around the breeding tub.
When spawning begins, you’ll typically notice the female releasing eggs while the male follows closely behind, fertilizing them. This process can last anywhere from a few minutes to several hours, depending on the fish species. After spawning, carefully remove the parent fish to prevent them from eating the eggs.
Monitor the eggs daily, looking for any signs of fungus or decay. Remove any white or cloudy eggs as these are likely unfertilized or infected. Healthy eggs should be clear or slightly tinted. Depending on water temperature and species, eggs typically hatch within 3-7 days.
Once the fry emerge, you’ll notice them hanging vertically or swimming near the surface. At this stage, maintain stable water conditions and begin feeding them appropriate-sized food like infusoria or commercial fry food. Keep the water clean but avoid aggressive cleaning that might harm the delicate babies.
Watch for any unusual behavior or signs of stress in the fry. Successfully raised fry will begin to show their adult coloration within a few weeks and can be gradually introduced to larger food particles as they grow.
Caring for Eggs and Fry
Once your fish have spawned, caring for the eggs and fry becomes your top priority. Start by carefully monitoring the water temperature, keeping it stable between 75-80°F (24-27°C) to ensure proper development. Remove any unfertilized or fungus-covered eggs to prevent them from affecting healthy ones.
Most fish eggs hatch within 2-7 days, depending on the species and water temperature. Once hatched, the tiny fry will need frequent, small feedings of specially formulated fry food or infusoria. Feed them 4-6 times daily, but be careful not to overfeed as this can quickly pollute the water.
Install a gentle sponge filter to maintain water quality without creating strong currents that could harm the delicate fry. Change about 10-15% of the water every other day, being extra careful to match the temperature of the new water to avoid shocking the young fish.
Keep predators away by covering the breeding tub with fine mesh or netting. Even adult fish of the same species might eat their own fry, so it’s best to separate them. As the fry grow, gradually introduce larger food particles and increase the time between feedings.
After about 4-6 weeks, when the fry are large enough to easily see and actively swimming, you can begin treating them more like juvenile fish and adjust their care accordingly.
Common Challenges and Solutions
Even with careful setup, fish breeding tubs can present several common challenges. Water quality issues often top the list, with sudden pH fluctuations or ammonia spikes potentially stressing your breeding fish. Regular water testing and partial changes can help maintain optimal conditions. Temperature control can be tricky, especially outdoors; consider using aquarium heaters or shade cloth depending on your climate.
Breeding pairs sometimes show aggression or reluctance to spawn. Creating natural barriers with plants or decorative elements can provide necessary hiding spots and reduce stress. If fish aren’t breeding, ensure you’re providing the right environmental triggers like temperature changes or specific lighting conditions that match their natural breeding season.
Following proper fish health management strategies is crucial for success. Watch for signs of fungal infections or parasites, which can quickly spread in breeding environments. Quarantine new fish before introduction and maintain strict cleaning routines to prevent disease outbreaks.
Fry survival rates can be disappointing for beginners. Protect young fish by adding fine-leaved plants or breeding nets, and ensure appropriate food size for tiny mouths. Overfeeding is another common mistake – start with small amounts and observe feeding behavior. Remember, patience and consistent monitoring are key to overcoming these challenges and achieving successful breeding results.
Transitioning Fry to Main Pond
Moving your young fish from the breeding tub to the main pond is a crucial step that requires careful timing and preparation. The best time to transition fry is when they’ve reached about 1-1.5 inches in length, typically around 6-8 weeks after hatching. This size ensures they’re strong enough to handle the new environment and avoid becoming prey to larger pond inhabitants.
Before the move, gradually adjust the water parameters in your breeding tub to match those of the main pond. Over several days, slowly mix small amounts of pond water into the breeding tub. This helps the fry acclimate to their future home’s water chemistry without shock.
When you’re ready for the transfer, choose a calm, overcast day to minimize stress. Use a fine mesh net to gently catch the fry, and place them in a floating container within the main pond for about 30 minutes. This allows them to adjust to the temperature difference naturally.
Release the fry near dense plants or protective structures where they can hide from predators. The early morning or evening hours are ideal for this process, as fish are generally calmer during these times. Consider adding some floating plants near the release area to provide extra cover for the first few days.
Monitor the newly released fry for the first week, ensuring they’re adapting well and finding food sources. If possible, supplement their diet with small amounts of finely crushed flake food until they’re confidently foraging on their own.
Setting up a fish breeding tub is an exciting and rewarding project that can bring joy to any outdoor space. We’ve covered everything from selecting the right tub and location to maintaining optimal water conditions and caring for your fish fry. With proper planning and attention to detail, you can create a thriving breeding environment for your aquatic friends. Remember to start small, monitor water parameters regularly, and provide appropriate nutrition for both adult fish and fry. The satisfaction of watching your first batch of fish grow from eggs to healthy juveniles makes all the effort worthwhile. Whether you’re a hobbyist or planning to breed fish more seriously, a breeding tub system offers a perfect starting point. Don’t be afraid to experiment and learn from experience – every fish keeper started somewhere. Get your supplies ready and take that first step toward your fish breeding adventure!