Build Your Own Pond Filtration System: The DIY Blueprint for Crystal-Clear Water
Create your own pond filtration system by gathering essential materials like a plastic container, sponges, and a submersible pump. Cut sections of the sponges to fit snugly inside the container, layering them to maximize surface area for beneficial bacteria growth and water filtration. Drill holes into the container for water inlets and outlets, ensuring optimal flow through the sponges. Attach the submersible pump to your DIY filter and submerge the system in your pond, adjusting the setup to maintain a balanced ecosystem.
Understanding Pond Filtration Systems
Types of Pond Filters
When it comes to creating a thriving aquatic environment, understanding the roles of different types of pond filters is essential. Among the most common are biological, mechanical, and chemical filters, each playing a unique part in maintaining water quality. Biological filters are the unsung heroes, promoting beneficial bacteria that break down harmful substances and keep your pond’s ecosystem in balance. These are especially great for DIY enthusiasts interested in fostering natural water gardens. Then there are mechanical filters, which physically trap debris and sediment, ensuring clearer water. Imagine them as the pond’s broom, sweeping away floating particles before they become problems. For those looking for the best pond filters, combining different types can be incredibly effective. Lastly, chemical filters work by altering water chemistry to remove specific impurities. These can be handy, but remember to use them sparingly to avoid over-reliance. By understanding these filter types, you’re well on your way to creating and maintaining an enchanting pond haven.

Essential Components
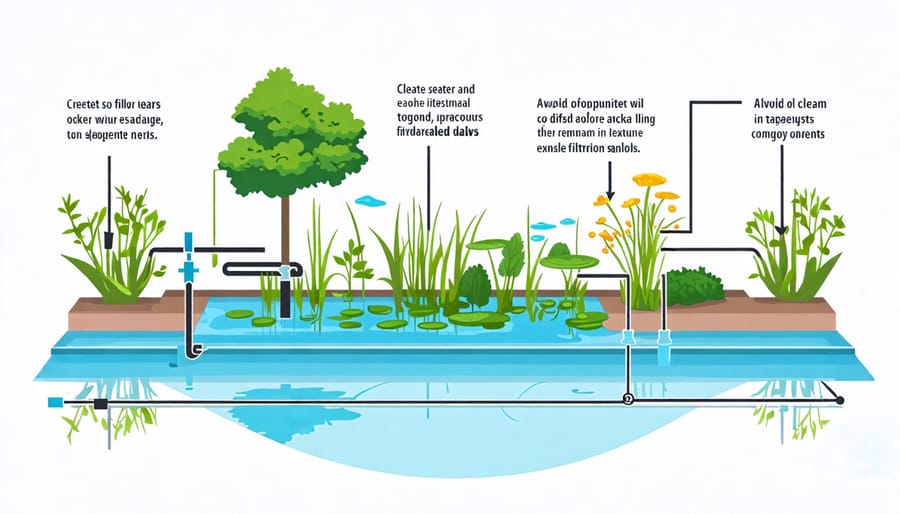
When building a DIY pond filtration system, understanding the essential components is key to maintaining a vibrant water garden. At the heart of your system is the pump, which keeps the water moving, helping to prevent stagnation and promote equally distributed oxygen levels. Without a good pump, your pond can quickly become a breeding ground for algae and mosquitoes. For pond pump perfection, ensure you select a pump that matches your pond’s size and flow needs.
Next, filter media plays a critical role in trapping debris and housing beneficial bacteria that break down harmful substances. Typical filter media include sponges, bio balls, and lava rock, each with unique properties. Sponges provide mechanical filtration, while bio balls and lava rock are fantastic for biological filtration, offering ample surface area for bacteria growth. Finally, a UV clarifier can be an optional addition to eliminate algae blooms, keeping your pond looking crystal clear.
Creating a balanced ecosystem takes time, but with these components, you’re well on your way to having a thriving, clear pond.

Planning Your DIY Pond Filtration System
Assessing Pond Size and Needs
When determining the size and filtration needs of your pond, start by assessing its dimensions—length, width, and depth. You’ll want to calculate the water volume, as this helps you understand how much water your filtration system will handle. A simple way to calculate volume is to multiply the pond’s length by width and average depth, then adjusting for shape if needed. For instance, if you have a rectangular pond that’s 10 feet long, 5 feet wide, and 2 feet deep, your pond holds about 750 gallons of water.
Once you know your pond’s size, think about the types and number of fish and plants. More inhabitants mean higher biological activity, requiring efficient filtration. Remember, the goal is to maintain clear, healthy water, which fosters a flourishing aquatic environment. Aim for a filtration system that can process at least half of your pond’s volume per hour to keep everything balanced and vibrant.
Choosing the Right Materials
Selecting the right materials for your DIY pond filtration system is both an exciting and crucial step. First, consider the size and type of your pond as these dictate the capacity and materials you’ll need. For smaller ponds, simple components like sponges and mesh bags filled with bio-media work well, while larger ponds might require stronger pumps and heavy-duty liners. It’s important to choose materials that fit your budget but don’t compromise on quality. Opt for durable, non-toxic materials like PVC piping for plumbing and high-grade filtration media to ensure longevity and water clarity. Remember to source materials that are easy to clean, saving you time in maintenance. By thoughtfully selecting your materials, you’ll create a filtration system that perfectly complements your pond, promoting a healthy aquatic environment.
Step-by-Step Guide to Building Your DIY Pond Filtration System
Assembling the Filter
Assembling your DIY pond filtration system can be an exciting and rewarding project. Let’s dive into the steps to create an efficient system using basic materials you can find at most home improvement stores. First, gather your materials: a large plastic container or barrel to serve as the filter body, PVC pipes for the inlet and outlet, a submersible water pump, gravel or small stones, coarse and fine filter media like sponges or filter mats, and bio-balls or ceramic rings for biological filtration.
Start by preparing your container, which will house all the filter layers. Drill holes for the inlet and outlet pipes, ensuring they fit snugly to prevent any leaks. Typically, the inlet is positioned higher on the container to allow water to flow downward through the filter layers, while the outlet is placed lower to ensure filtered water returns to the pond. Next, attach the PVC pipes securely using waterproof sealant, giving them time to cure properly.
Once your container is prepped and pipes are set, it’s time to layer your filter media inside the container. Begin with a layer of rocks or gravel at the bottom, which will help anchor the filter and facilitate solid debris settlement. Above this, add a layer of coarse filter media to capture larger debris. Follow with a layer of finer filter material, which will trap smaller particles and ensure clearer water. Top it off with your biological filter media, like bio-balls or ceramic rings, to promote beneficial bacteria growth.
Install your water pump by connecting it to the inlet pipe, ensuring it’s powerful enough to circulate all the water through your filter system effectively. Then, submerge the pump in your pond and monitor the system to ensure water flows smoothly through your DIY filter. Adjust the setup if necessary to improve efficiency and water clarity. With these steps, you’re on your way to enjoying a clean, healthy pond teeming with life.
Installing and Testing
Starting your DIY pond filtration installation is an exciting phase that brings you closer to a clean and healthy pond. To begin, ensure that all components are easily accessible and in a safe spot around your pond. Most importantly, check that your pond pump is correctly positioned at the deepest part of the pond to efficiently draw water into the filtration system.
Begin by connecting your pump to the intake hose of your filter system. Make sure the hose fits securely and there are no leaks. It’s a good idea to test the connections by turning on the pump briefly. Once you’ve ensured there are no leaks, switch the pump off and continue with the next steps.
Position the filter units outside the pond in an easily accessible location. This allows for simpler maintenance while avoiding any risk of overflow. Use sturdy materials, like flat rocks or bricks, to elevate the filter slightly if your setup requires water to flow back into the pond via gravity. This will help promote efficient water circulation.
With everything in place, it’s time for a full test run. Turn on the pump and observe the water flow. The water should move smoothly through the filter system, eventually cascading back into the pond. It’s normal to make adjustments. For instance, you may need to reposition hoses to maximize flow or adjust the filter’s location to optimize gravity-fed systems.
Once you’ve confirmed a good water flow, monitor the pond over the next few days to ensure the system is maintaining clear, healthy water. Keep an eye on your filter media, cleaning or replacing it as needed to preserve water quality. Congratulations, you’re now a proud owner of a custom DIY pond filtration system, adding both beauty and harmony to your aquatic haven!

Maintaining Your Pond Filtration System
Regular Cleaning and Checks
Maintaining a pond filtration system is key to keeping your water feature looking its best. Start by scheduling regular cleanings; this helps ensure crystal clear water and prolongs the lifespan of the filtration components. Once a week, check for debris, such as leaves or twigs, clogging the filters and remove them. This prevents blockage and reduces strain on the pump. Every month, inspect and gently clean filter media using pond water, not tap water, to maintain beneficial bacteria. Don’t forget to monitor water flow and listen for unusual noises from the pump, which could indicate an issue. In colder climates, take preventive measures during winter to prevent freezing. With these simple habits, your DIY pond system will run efficiently and keep your aquatic oasis thriving.
Troubleshooting Common Issues
Having trouble with your DIY pond filtration system? You’re not alone! A common issue is reduced water flow, often caused by clogged filter media. To fix this, simply rinse the filter pads with pond water to avoid killing beneficial bacteria. Struggling with cloudy water? This might be due to an overloaded filter system. Add extra filter media or upgrade to a larger pump to handle the volume. If you notice unpleasant odors, it’s likely from accumulated organic material in your filter. Regularly cleaning the filter and removing debris can help. Lastly, if algae blooms are your nemesis, introducing UV clarifiers or adding aquatic plants can balance the ecosystem and keep algae at bay. Remember, consistency in maintenance keeps your filtration system running smoothly, helping your pond thrive!
Conclusion
Creating a DIY pond filtration system offers numerous benefits that extend beyond just keeping your pond water clear. It’s a rewarding project that combines creativity with practicality, enhancing your outdoor space’s aesthetics while ensuring a thriving aquatic environment. By building your own system, you tailor it to fit your pond’s unique needs, embracing both functionality and cost-effectiveness. As your aquatic ecosystem evolves, remember that ongoing maintenance is key to sustained health and clarity. Regularly check on the components, make necessary adjustments, and explore complementary practices like natural pond aeration to boost your pond’s vitality. Engaging in these practices not only keeps your water garden beautiful but also supports the wellbeing of any fish and plants. Whether you’re a beginner or an experienced pond enthusiast, this project provides a fulfilling way to contribute to a sustainable environment right in your backyard. Happy pond keeping!
